Animate a logo reveal in Cinema 4D
3D animation meets graphic design as Tim Clapham shows you how to animate and composite a pro-quality logo sequence.
Daily design news, reviews, how-tos and more, as picked by the editors.
You are now subscribed
Your newsletter sign-up was successful
Want to add more newsletters?

Five times a week
CreativeBloq
Your daily dose of creative inspiration: unmissable art, design and tech news, reviews, expert commentary and buying advice.

Once a week
By Design
The design newsletter from Creative Bloq, bringing you the latest news and inspiration from the worlds of graphic design, branding, typography and more.

Once a week
State of the Art
Our digital art newsletter is your go-to source for the latest news, trends, and inspiration from the worlds of art, illustration, 3D modelling, game design, animation, and beyond.

Seasonal (around events)
Brand Impact Awards
Make an impression. Sign up to learn more about this prestigious award scheme, which celebrates the best of branding.
16. Test the dynamic simulation
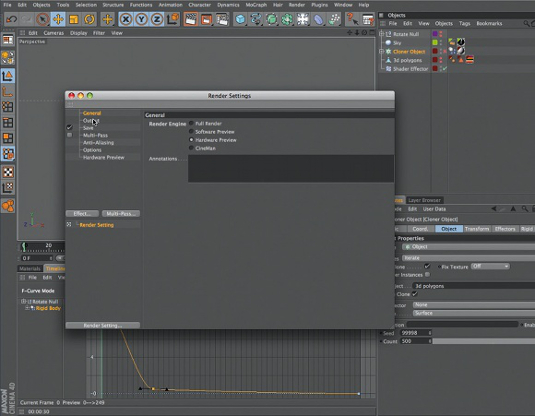
Hide Rotate Null. In Perspective view, position the camera so you can see all of the 3D Polygons object. Hide 3D Polygons. Select Render > Render Settings. Set Render Engine to Hardware Preview. In Output, set the output to 1,024x576 at 25fps. Set Frame Range to All Frames. In Save, choose a path and file format. Select Render > Render to Picture Viewer to output the result.
17. Check the render
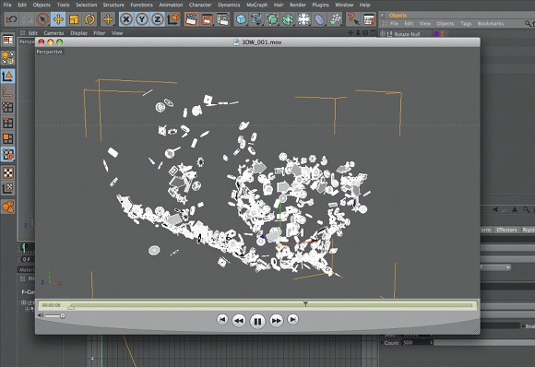
Once the render is complete, check the motion of the simulation to ensure everything is as it should be. You may wish to make adjustments to your settings. You could also add in another camera and child this to Rotate Null to get an alternative view of the simulation. For the final animation (available to download from the 3D World website), I used several camera angles and edited between them.
Stage 3: lighting the scene
Here you will get the opportunity to try out the Light Dome preset I provide on the 3D World website. This will be used to create a fake GI-type lighting setup. This will add a global light to all the objects, giving it a uniform tone. Although rather flat on its own, the use of a lighting dome can be helpful to eliminate any unwanted dark or shadowed areas. To further enhance the lighting of the scene, you’ll then introduce key and fill lights. These will add some warmth to the highlights and make the shadows a little colder, adding more dynamism to the overall lighting setup.
18. Set up the light dome
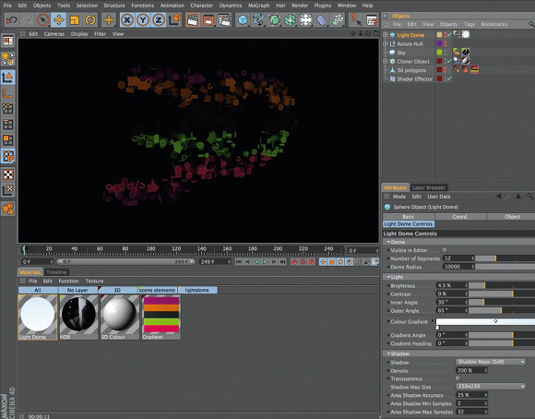
Open LightDome.c4d from the files on the web. Copy the light dome into the main scene. In the Light Dome Controls tab, set Number of Segments to 12, Dome Radius to 10000, Brightness to 4.5%, Inner Angle to 30° and Outer Angle to 65°. In the Colour Gradient settings, place a white knot on the left and a blue knot on the right. Set Gradient Angle to 0°, Shadow to Shadow Maps and Density to 200%.
19. Add a key light
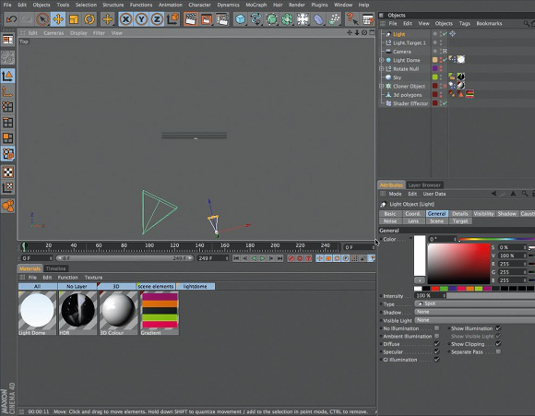
Adjust the Perspective view to show all of the 3D Polygons object. Add a Camera and click its small square in the Object Manager to make it active. Disable Cloner Object and unhide 3D Polygons. Add a Target Light, then move Light.Target.1 null to the centre of the 3D text. In Top view, move the light to the right of the camera. Switch to Right view and position the light to point down at the logo.
20. Set the light parameters
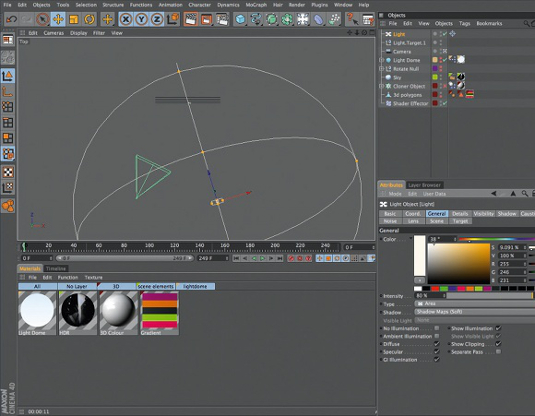
In Attributes, set Type to Area. Change Color to white with a hint of orange. Set Intensity to 80% and Shadow to Shadow Maps (Soft). In the Details tab, set Outer Radius to 300, Contrast to -15% and Falloff to Inv. Square Clamped. Set Radius/ Decay so the falloff fully covers the logo. In the Shadow tab, set Color to a dark, desaturated blue. Set Density to 125% and Shadow Map to 750x750.
21. Add a fill light
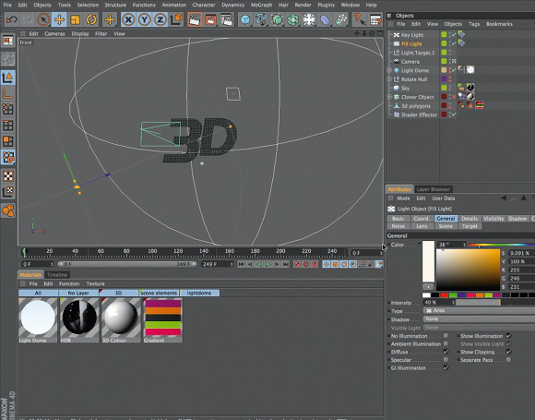
Rename Light to Key Light, then make a copy of it. Rename the duplicate as Fill Light and give it a blue-white colour. Set Intensity to 40% and Shadow to None, then untick Specular. In Top view, move the fill light so that it hits the side of the logo. In Front view, move the light to just below the logo. Hide 3D Polygons and enable Cloner Object.
Daily design news, reviews, how-tos and more, as picked by the editors.
Stage 4: Setting up multi-pass renders
Once the lighting is complete, you will set up the render options, adding in the appropriate multi-pass render channels. This enables you to output a separate render layer for each of the material channels, as well as an ambient occlusion pass. Using Cinema 4D’s external composting feature, you’ll also export an AEC file. With the appropriate plug-in installed, you’ll be all set to open After Effects with the renders automatically imported and the first composition set up.
22. Set up multi-pass rendering
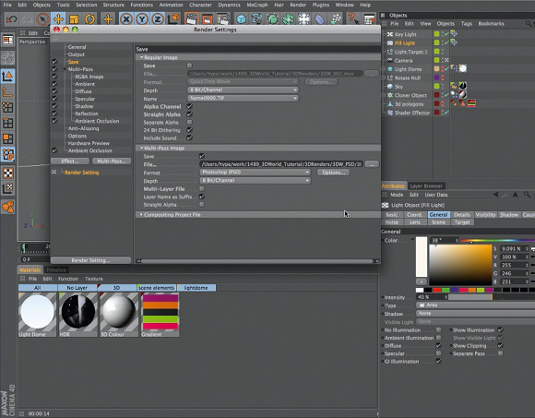
In Render Settings, set Render Engine to Full Render. Set your resolution and frame rate, then set Frame Range to All Frames. Enable Multi-Pass. Via the Multi-Pass pop-up, add RGBA, Ambient, Diffuse, Specular, Shadow, Reflection and Ambient Occlusion. Via the Effect pop-up, add Ambient Occlusion. Set Accuracy to 10%, Min Samples to 8 and Max Samples to 32. Set Anti-Aliasing to Geometry.
23. Render preparations
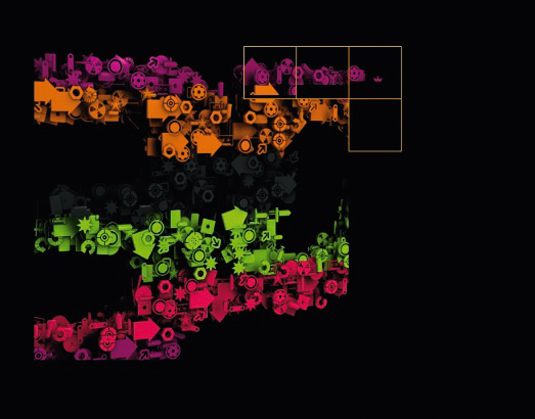
In Save’s Regular Image area, untick Save, but enable Alpha Channel and Straight Alpha. Under Multi-Pass Image, tick Save, set Format to Photoshop and untick Multi-Layer File. Under Compositing Project File, tick Save and set Target Application to After Effects: this saves an AEC file with your render. Select Render > Render to Picture Viewer to render your passes.
24. Take the render into After Effects
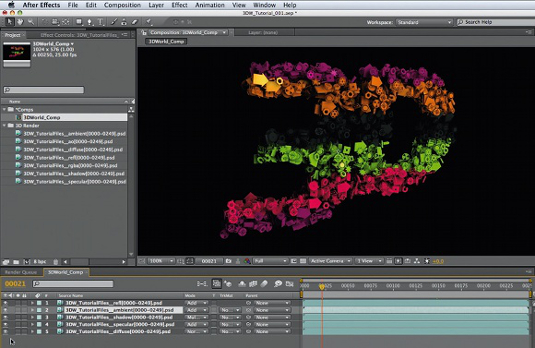
Make sure you have the Cinema 4D Exchange plug-in installed in the After Effects Plug-Ins folder. (You can find it in your Cinema 4D application folder > Exchange Plugins > After Effects.) In a new document in After Effects, select File > Import > File and choose 3DWorld_Tutorial_35. aec from the project files’ 3D_Renders folder. In the Project window, rename the imported Composition as 3DWorld_Comp. Double-click it to open the composition. Before you continue, take a moment to check that all the passes have been imported correctly. You may need to import one or more passes manually: to do this, select File > Import Multiple Files, browse for the correct pass images in your render output location and select them. Tick Photoshop Sequence in the dialog before importing. See the video at 1:10:59 for further assistance. Finally, add the AO pass to the top of the comp, and set its Mode to Multiply.

The Creative Bloq team is made up of a group of art and design enthusiasts, and has changed and evolved since Creative Bloq began back in 2012. The current website team consists of eight full-time members of staff: Editor Georgia Coggan, Deputy Editor Rosie Hilder, Ecommerce Editor Beren Neale, Senior News Editor Daniel Piper, Editor, Digital Art and 3D Ian Dean, Tech Reviews Editor Erlingur Einarsson, Ecommerce Writer Beth Nicholls and Staff Writer Natalie Fear, as well as a roster of freelancers from around the world. The ImagineFX magazine team also pitch in, ensuring that content from leading digital art publication ImagineFX is represented on Creative Bloq.
