9 easy steps to a Behance ProSite portfolio
Create a portfolio website without needing to know code using Behance ProSite, which comes free with the Creative Cloud. Here's how.
ProSite is a personal portfolio site builder that automatically syncs with your Behance Network projects. In a nutshell, ProSite enables you to create a fully customised personal website extremely quickly, publishing to your own URL and without any reference to Behance or ProSite directly.
ProSite is sometimes confused as being the same as a standard Behance Network profile, but the two are actually very different. Behance profiles sit within the overall Behance Network, adopting the same look and feel universally across different profiles.
In contrast, ProSite stands independently from Behance, with its own unique appearance, pages and content. One of the real benefits to be had is that once you've set up your ProSite, which is included as part of your Creative Cloud subscription, you can easily publish new design work to it directly from your desktop apps, via your Behance profile. So here's how to create a personalised ProSite in 9 easy steps.
01. Select a layout
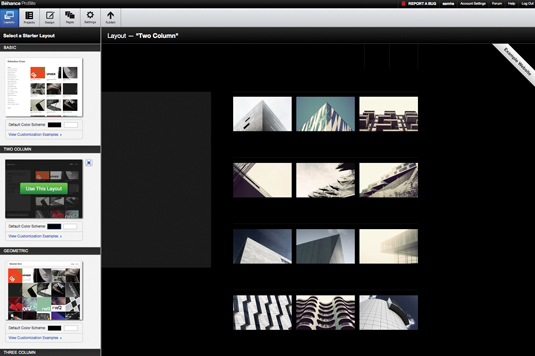
First, make sure you have a Behance profile set up, then visit the ProSite builder at www.prosite.com. Log in to your account, and follow the instructions to start building your ProSite. Remember, ProSite is included within your Creative Cloud membership, so there's no additional cost.
02. Choose your projects
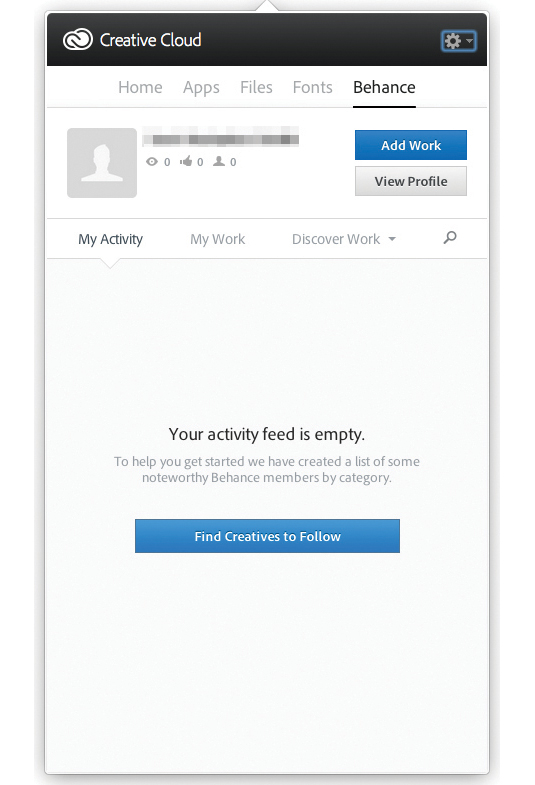
Underpinning the entire ProSite system is the idea of projects. These are like folders within your portfolio, which let you organise the work you want to show into distinct areas. How you arrange your projects is entirely up to you, but you'll need at least one to be able to start building your ProSite.
03. Drag and drop
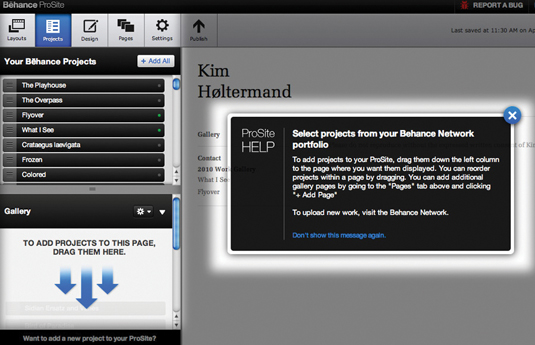
Once you've got your projects uploaded to your Behance profile, you can drag and drop them from the Projects panel into the Gallery tab. This makes the projects available as part of your ProSite. The system will also pick up any changes you make to your projects, for super-easy updating later.
04. Customise
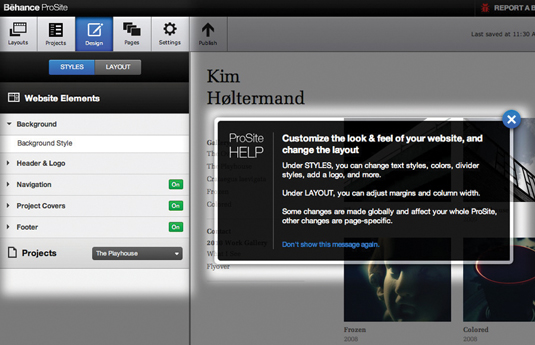
The Design tab provides access to the customisation tools that you can use to make your ProSite uniquely yours. There are lots of different elements you can adjust to change both the colour scheme and layout. Start with the Layout tab to set your overall parameters of size and position.
Daily design news, reviews, how-tos and more, as picked by the editors.
05. Work on the details
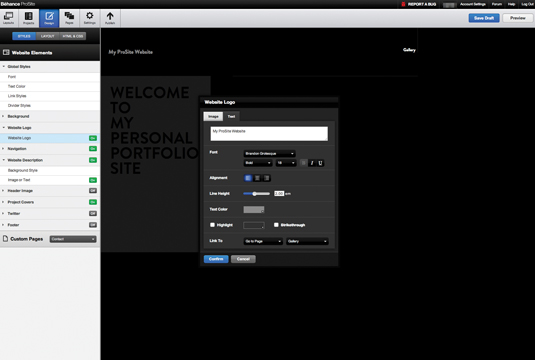
Once you've got your basic layout created, add finesse by returning to the Styles tab and adjusting the background, header and logo (if you want to use one), navigation menus and footer. You can enable and disable individual elements to suit your preferences, so experiment for the best effect.
06. Add more pages
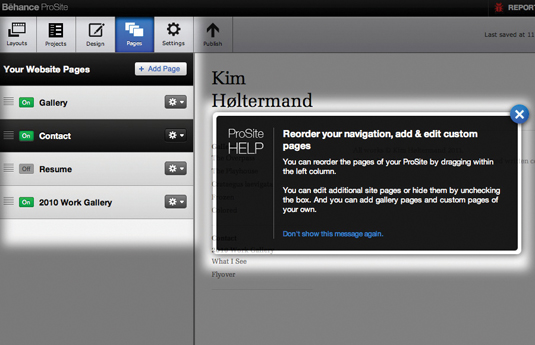
By default, ProSite will create the basic page structure, using the projects you've shared. You can add more pages via the Pages tab, where you can also temporarily disable pages too. Additionally you can set page permissions, requesting a user name and password before pages can be viewed.
07. Publish your ProSite
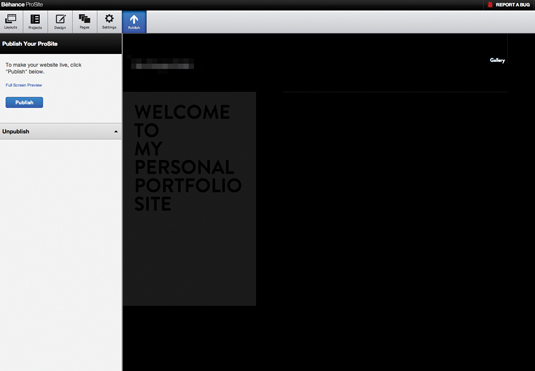
Once you're satisfied with your first build, you can publish your ProSite directly from the same interface. Keep in mind that publishing is only really the first step: you'll want to continue to tweak your design and layout once you can clearly see your design work in situ.
08. Share work to Behance
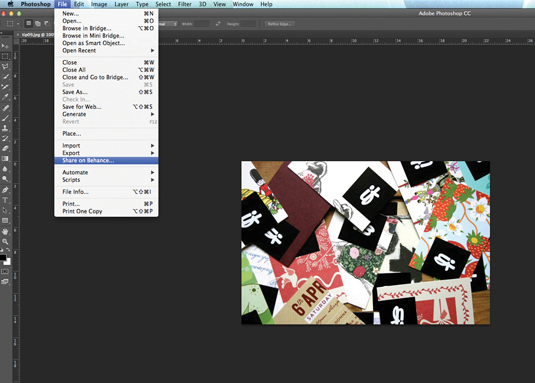
Now share some additional work to your Behance profile from any CC app. In Photoshop CC, for example, you'll find the option under File>Share on Behance. You can also access the upload facility from the CC desktop app. Ensure you upload your work into one of the projects you shared with your ProSite.
09. Test and review
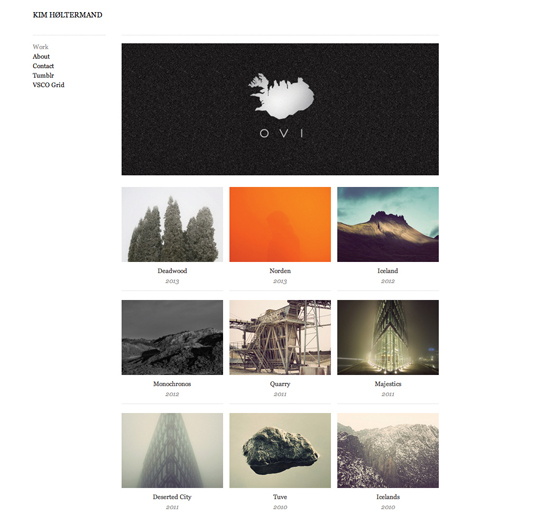
You should now be able to visit your ProSite in your web browser and view the work you shared in the last step. This workflow makes it incredibly easy to keep your ProSite up-to-date without having to worry about settings for FTP, or manually maintaining the website.
This article was originally published in The Ultimate Guide To Adobe Creative Cloud.
Now read these:
- Designers speak out about Adobe's Creative Cloud
- New tools in Adobe Creative Cloud: 12 revealing videos
- Free Photoshop actions to create stunning effects

The Creative Bloq team is made up of a group of art and design enthusiasts, and has changed and evolved since Creative Bloq began back in 2012. The current website team consists of eight full-time members of staff: Editor Georgia Coggan, Deputy Editor Rosie Hilder, Ecommerce Editor Beren Neale, Senior News Editor Daniel Piper, Editor, Digital Art and 3D Ian Dean, Tech Reviews Editor Erlingur Einarsson, Ecommerce Writer Beth Nicholls and Staff Writer Natalie Fear, as well as a roster of freelancers from around the world. The ImagineFX magazine team also pitch in, ensuring that content from leading digital art publication ImagineFX is represented on Creative Bloq.
