How to build a digital maquette
John Petersen reveals how he uses a digital maquette to quickly render an abandoned futuristic city.
Sign up to Creative Bloq's daily newsletter, which brings you the latest news and inspiration from the worlds of art, design and technology.
You are now subscribed
Your newsletter sign-up was successful
Want to add more newsletters?
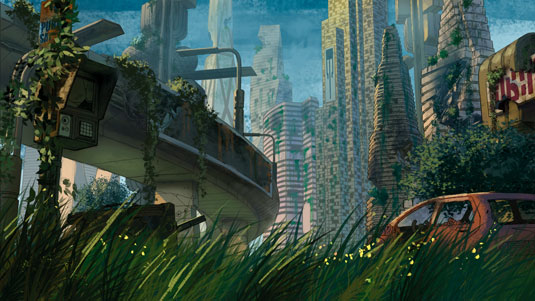
Creating 3D art is a time-consuming process, but, thankfully, there are lots of resources – including After Effects tutorials – and techniques you can adopt that will help speed things up. For this piece, I'm using a digital maquette to quickly render this abandoned city.
This involves creating a combination of futuristic, advanced technology with modernist architecture and corrosion, decay, vegetation overgrowth, blight, and crumbling or collapsed structures. You have to ask yourself, why was the city abandoned? Was it from war? Disease? Alien invasion?
Depending on the circumstances, you'll have to think about leaving evidence behind of the sudden abandonment. Consider adding bullet holes, overturned vehicles, emergency evacuation signs and other indicators.
Article continues below 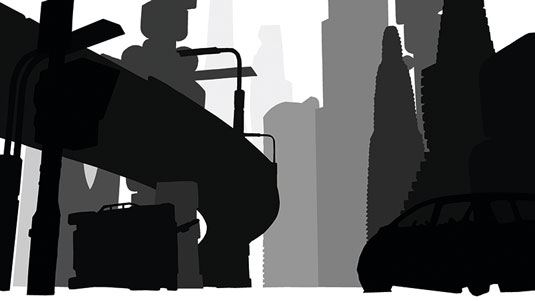
My process involves creating a 3D model of the major structures to use as a reference. Modern and futurist architecture contains wavy lines and curves intermingled with straight-line grids, and this workflow saves me a lot of time trying to achieve an accurate perspective by drawing countless vanishing points on my own. I can also move the camera to try different perspectives to quickly find the composition I like.
Then I render an image from that angle, draw over the image, and then paint in the details. I also take the time to make lasso selections to separate background elements from the foreground so I can adjust colour and tone for each area separately.
01. Begin in 3D
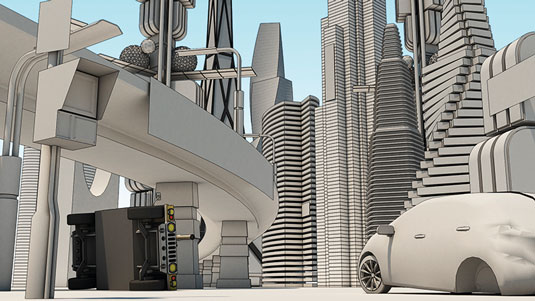
I start by constructing a 3D model of my city. I create basic shapes, and either copy or extrude them into stacked arrays. This gives me skyscraper-like structures with separations for each floor. Then I can twist, bend, stretch and scale each one to give me that futurist look.
02. Add detail with line art
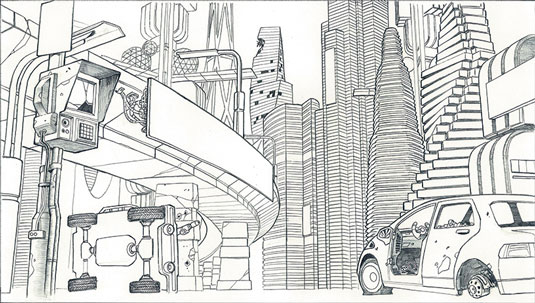
I project the 3D rendered image and trace it on to drawing paper. You can also just start painting digitally over the 3D model, but I like having a bit of a line art style to my work. I add destruction and broken windows to the buildings, but much of this will be painted over.
Sign up to Creative Bloq's daily newsletter, which brings you the latest news and inspiration from the worlds of art, design and technology.
03. Finish with colour and value
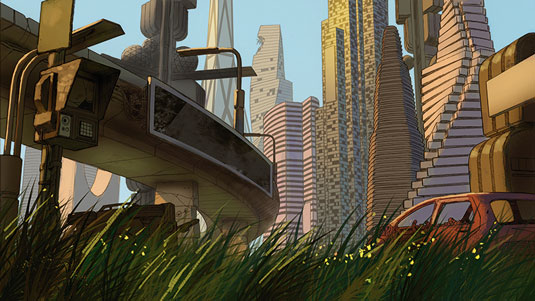
I begin adding colour and value to the piece, using Color Balance adjustment layers to unify the mood if the colours start to get all over the place. I want a sunlit scene, with the light coming in from the back left. Atmospheric perspective is also useful for showing distance and scale.
Words: John Petersen
John is a production artist and animator for Engineering Systems, Inc. He's also an illustrator whose clients include Monte Cook Games and Catalyst Game Labs. This article originally appeared in ImagineFX magazine issue 131.
Like this? Read these!
- How to get started with ink drawing
- Get the best free vector art for your projects
- Stunning examples of geometric patterns
- Top examples of experimental design
- Want print perfection? Get these InDesign tutorials

The Creative Bloq team is made up of a group of art and design enthusiasts, and has changed and evolved since Creative Bloq began back in 2012. The current website team consists of eight full-time members of staff: Editor Georgia Coggan, Deputy Editor Rosie Hilder, Ecommerce Editor Beren Neale, Senior News Editor Daniel Piper, Editor, Digital Art and 3D Ian Dean, Tech Reviews Editor Erlingur Einarsson, Ecommerce Writer Beth Nicholls and Staff Writer Natalie Fear, as well as a roster of freelancers from around the world. The ImagineFX magazine team also pitch in, ensuring that content from leading digital art publication ImagineFX is represented on Creative Bloq.
