How to paint like a Pre-Raphaelite
Learn how to reinterpret an iconic painting, focusing on strong composition and colour.
Sign up to Creative Bloq's daily newsletter, which brings you the latest news and inspiration from the worlds of art, design and technology.
You are now subscribed
Your newsletter sign-up was successful
Want to add more newsletters?

Five times a week
CreativeBloq
Sign up to Creative Bloq's daily newsletter, which brings you the latest news and inspiration from the worlds of art, design and technology.

Once a week
By Design
Sign up to Creative Bloq's daily newsletter, which brings you the latest news and inspiration from the worlds of art, design and technology.

Once a week
State of the Art
Sign up to Creative Bloq's daily newsletter, which brings you the latest news and inspiration from the worlds of art, design and technology.

Seasonal (around events)
Brand Impact Awards
Sign up to Creative Bloq's daily newsletter, which brings you the latest news and inspiration from the worlds of art, design and technology.
08. Add colour to the scene
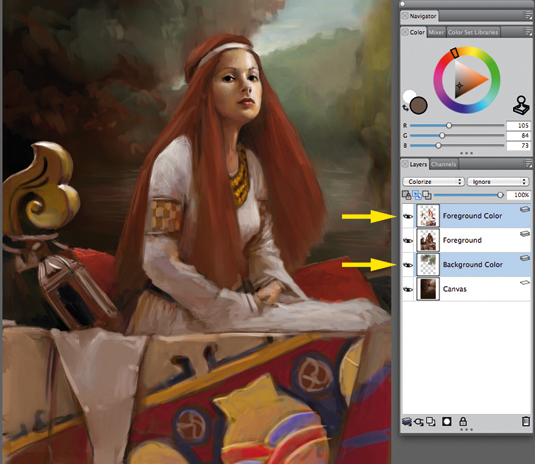
I create two layers: a background colour layer that's placed over the canvas layer, and a foreground colour that sits on top of my foreground layer.
I set both layers to Colorize and, using the Cover Pencil tool, I start to add colour. The pencil picks up less of the paper's grain than the charcoal tool. I then merge each layer with its colour layer, so that I still have my two layers.
09. Introducing more elements
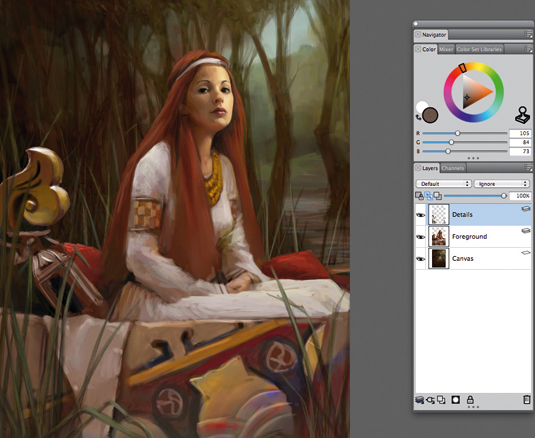
I notice that the background is too simple, and the foreground also needs some additional elements. So I create new layers on the background and foreground, and loosely paint in some trees and river weeds using the Charcoal and Oil brushes. My detailing is saved for the focal points of the image.
10. Flip and define the shapes
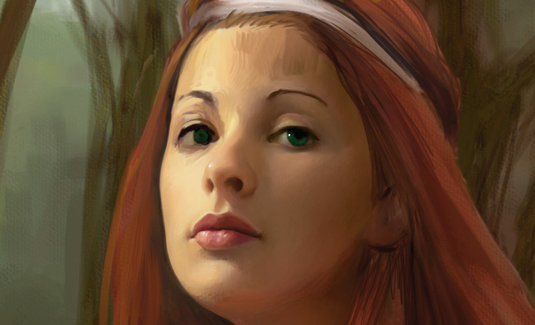
I use a combination of Smudge, Soft Blender Stump and oil brushes to smooth the strokes created in the previous step.
By reducing the pressure of my hand on the tablet during the painting process, I can create very soft effects using the Real Round Bristle brush. I then flip the image, just to check that I haven't made any mistakes.
11. The face is too big!
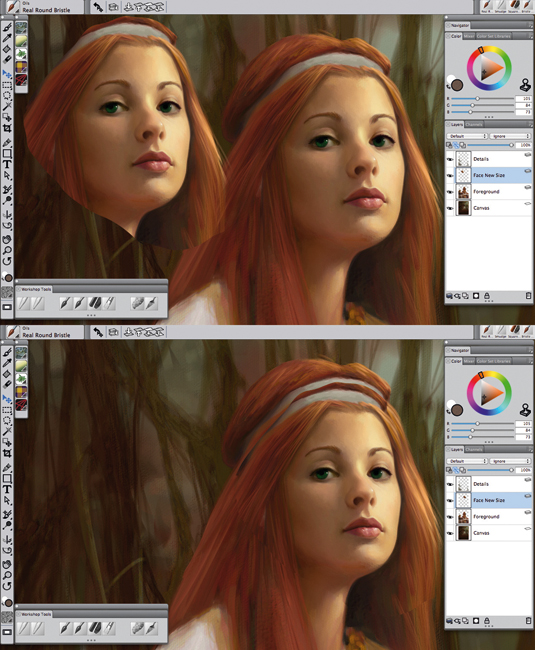
I notice that the lady's face is too big in relation to her body. So using the Lasso Selection tool I select the face area, and copy and paste it on a new layer, then adjust the face with the Free Transform tool.
I use the Eraser tool to remove the borderline areas of the new face, merge the new layer with the foreground layer and paint until the new face matches the existing art.
Sign up to Creative Bloq's daily newsletter, which brings you the latest news and inspiration from the worlds of art, design and technology.
12. Acting on feedback
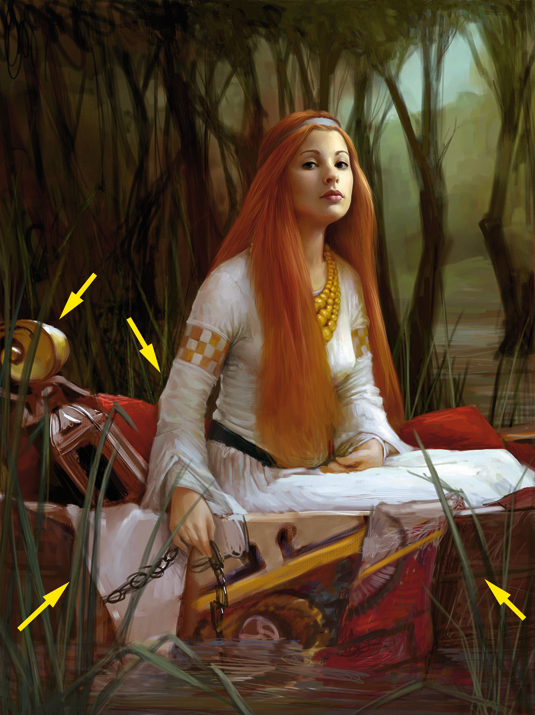
After sending the WIP to the ImagineFX team, we decide to modify the lady's pose to generate a more dynamic effect, and to better integrate the image with the cover shape and elements.
I have to change the position of the right arm, add a chain, reduce the drapery on the boat and alter the shape of the boat's hull.
13. Foreground and background details
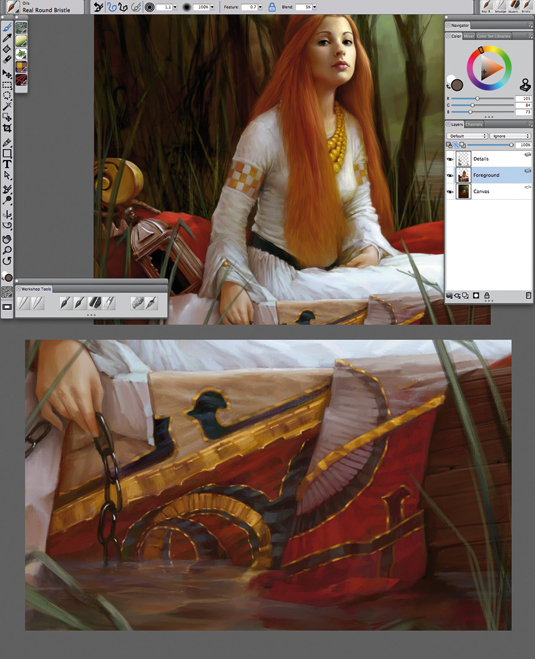
I refine the dress, drapery and boat's wooden hull by refining and smoothing the painting. In contrast, the background mustn't be too defined because it risks diverting the viewer's attention away from the focal point.
I'm happy leaving the background as a series of rough tree shapes. This also gives more depth to the painting, ensuring it doesn't look too flat.
14. Finishing up
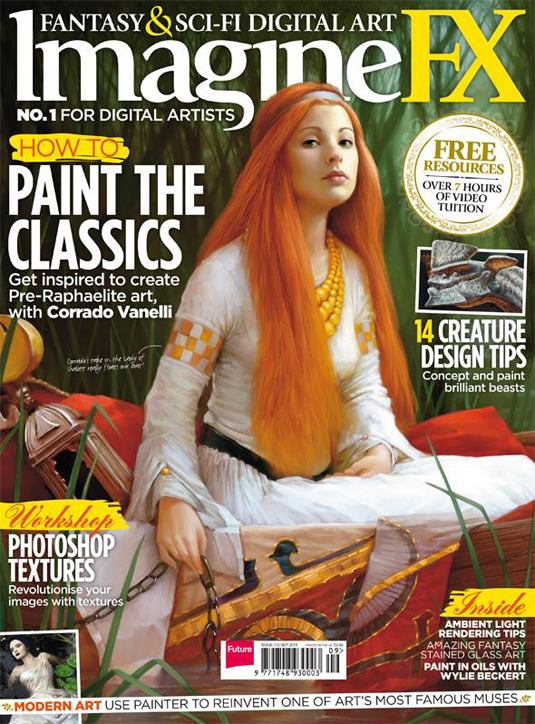
Here's the final version of the painting after a few more minor corrections. I hope you've found my workshop and painting process interesting.
This project is a reminder that a successful image can't be rushed. Basic shapes have to evolve into the final version, step by step, through a process of steady refinement.
This article originally appeared in ImagineFX magazine issue 112.
Related articles:
- How to draw faces without reference
- Wizards of the Coast artist paints a warrior the Applibot way
- Powerful painting app offers artists unique creative options
