4 important tips for painting a still life scene
Learn how to create the illusion of realistic still life illustration with these handy step-by-step tips.
Sign up to Creative Bloq's daily newsletter, which brings you the latest news and inspiration from the worlds of art, design and technology.
You are now subscribed
Your newsletter sign-up was successful
Want to add more newsletters?

Five times a week
CreativeBloq
Sign up to Creative Bloq's daily newsletter, which brings you the latest news and inspiration from the worlds of art, design and technology.

Once a week
By Design
Sign up to Creative Bloq's daily newsletter, which brings you the latest news and inspiration from the worlds of art, design and technology.

Once a week
State of the Art
Sign up to Creative Bloq's daily newsletter, which brings you the latest news and inspiration from the worlds of art, design and technology.

Seasonal (around events)
Brand Impact Awards
Sign up to Creative Bloq's daily newsletter, which brings you the latest news and inspiration from the worlds of art, design and technology.
I’d always recommend setting some time aside for a still life painting session. You’ll learn realistic rendering techniques, meaning you can paint credible details and create a more intricate illustration. It’s also useful to keep your eye trained to capture colours, shades, proportions and to learn how to paint inanimate object like fruit, cloth, and glass and metal objects.
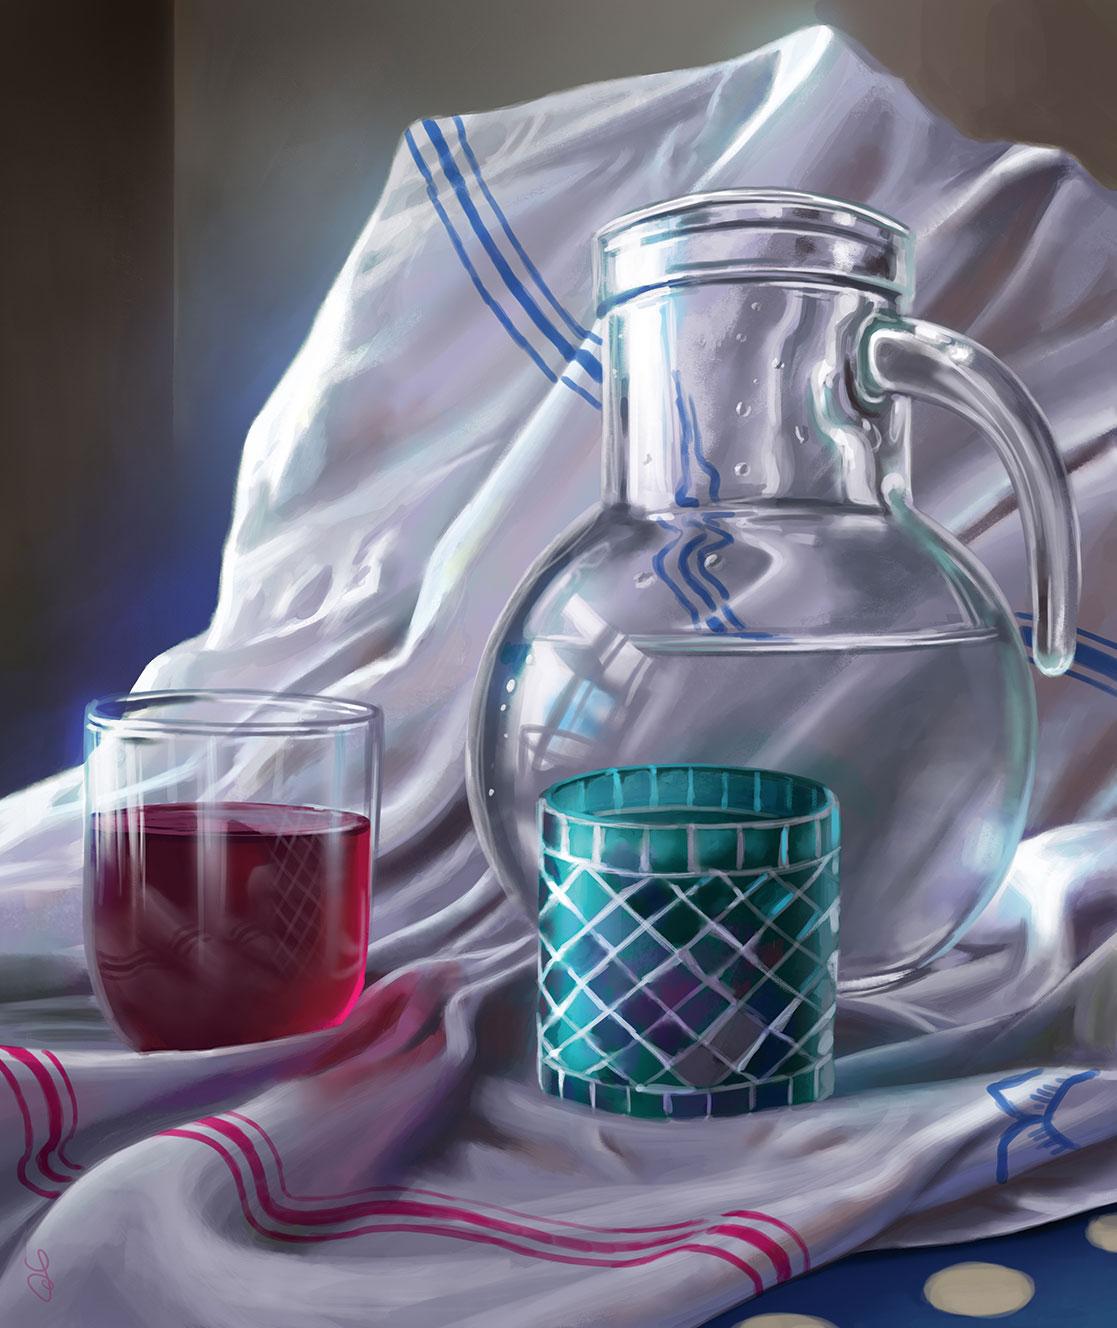
For this article I put together a composition using the glassware, a jug, a wine glass and an ornamental glass. I place them on a white table cloth, close to a source of natural light (in this case a window), so that the way the light interacts with the glass is obvious. Before starting the painting I take a photo: sunlight changes its position and colour during different times of the day, so it’s better to keep a reference image because the work can take a long time.
Since my purpose is to portray a still life composition, I don’t worry about the background. I simply sketch some lines to outline perspective and table top, bearing in mind that its colour will affect the lights and shadows of the scene.
01. Preliminary sketch
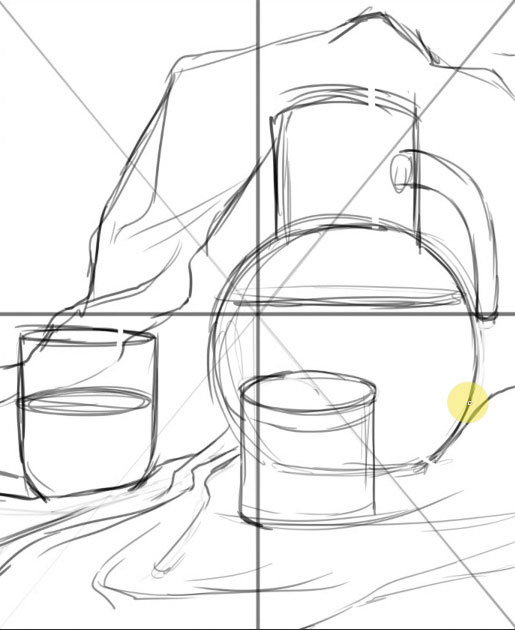
I proceed as I would do when painting traditionally. I start with a quick sketch of the jug and the two glasses with a small, hard-edged brush, bearing in mind proportions and perspective. Drawing diagonals on the canvas helps me keep the composition’s key elements in focus. Once I’m happy with my sketch I lay down basic colours using the Lasso and Fill tools.
02. Selecting colours
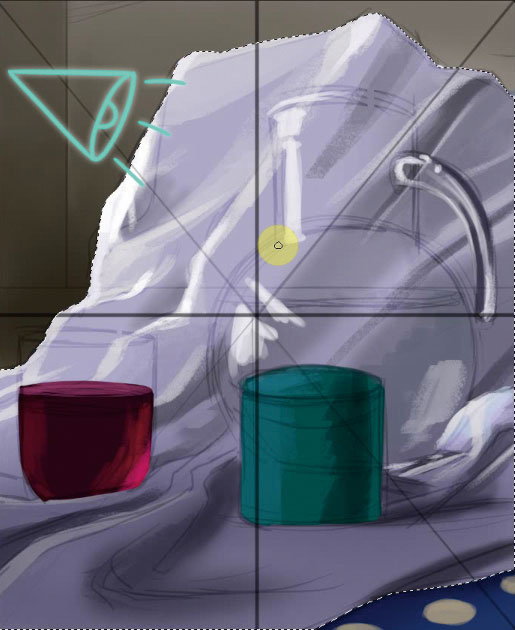
This is a delicate phase because choosing colours similar to those that our eye perceives can really make a difference in the success of my painting. Of course, working digitally means I can easily correct my colours, unlike with traditional techniques. With a large hard-edged brush I sketch lights and shadows, noting that with a cold light I have warm shadows tones.
03. Fabric and shadows
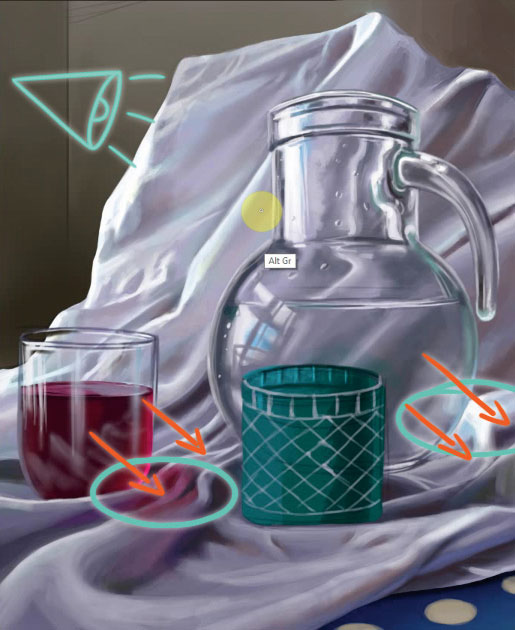
I add details. First I define the cloth with a smaller, softer-edged brush. I paint darker shadows where the fabric overlaps. Before moving on to glass objects, I paint the light reflected on the fabric folds, picking up the colour with the Eyedropper tool from the well-lit areas of the wine glass (which in this case is a bright and saturated red) and the water jug.
04. Light and reflections
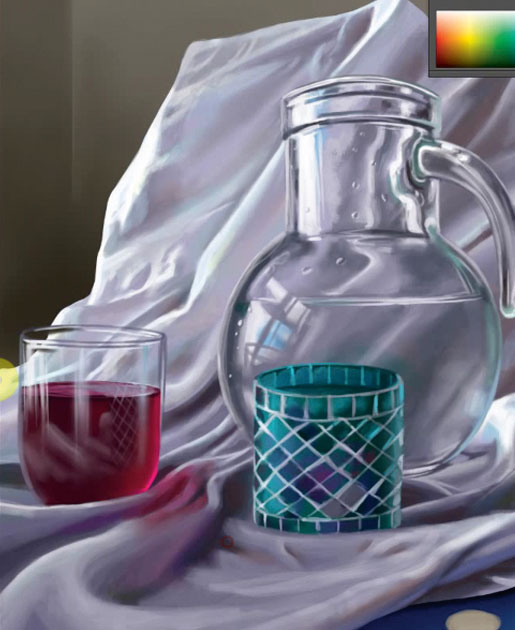
I paint the glass and the jug on a new layer, using the Eraser tool to create the transparent effect. As well as being transparent, glass is also reflective so I create another layer and I paint the reflections of the drapery on the wine glass. I use a brush with a soft edge to avoid overcooking them. Finally, I detail the objects and paint the blue lines that run across the cloth.
Sign up to Creative Bloq's daily newsletter, which brings you the latest news and inspiration from the worlds of art, design and technology.
This article was originally published in ImagineFX magazine issue 140.
Related articles:

Sara Forlenza creates art for book covers, cards and RPGs. After many years using traditional media, she was introduced to the world of digital art.
