How to fake camera shake in After Effects
Learn how to fake a camera shake in this quick After Effects tutorial.
Sign up to Creative Bloq's daily newsletter, which brings you the latest news and inspiration from the worlds of art, design and technology.
You are now subscribed
Your newsletter sign-up was successful
Want to add more newsletters?
This camera shake technique is simple to implement but versatile in use. The key to getting the technique right is to match up the two layers it relies on.
A quick way to create new in and out points for a layer is to press [Alt]+[ for a new in point and [Alt]+] for a new out point. Be sure to use the [Alt] key, or you’ll find your layer has a new start point instead.
01. Set up the comp

Import your footage into a new project, either by double-clicking within the project window or by selecting File > Import > File.
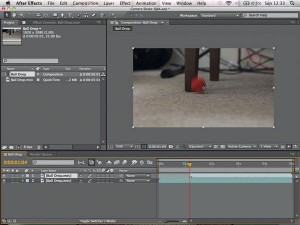
Article continues belowDrag the footage over the New Composition icon at the bottom of the project window to create a project that matches the clip’s settings. Scrub through the footage to find the appropriate in and out points for your artificial camera shake.
02. Add a wiggle
Once you have decided the range, duplicate the source layer via Edit > Duplicate. Pull in the handles of the new layer to match your selected area. Make sure the clip you want to apply the shake to is selected, then choose Effect > Stylize > Motion Tile.
Next, you’ll add a wiggle, one of After Effects’ most common expressions. With the Effect Controls window open, [Alt]-click the stopwatch for Tile Center; in the text field that appears, type wiggle (5, 30).
03. Align the clips
Because the wiggle occurs throughout the affected clip, it won’t have the same in and out position as the original layer, causing an unnatural jump in position. Open the Transform properties of the duplicated layer and reduce Opacity until you can clearly see both clips at once.
Sign up to Creative Bloq's daily newsletter, which brings you the latest news and inspiration from the worlds of art, design and technology.
At the in point of the new layer, keyframe its Position properties so it lines up exactly with the clip beneath, then repeat at the out point. Bring Opacity to 100% and play back your composition.

The Creative Bloq team is made up of a group of art and design enthusiasts, and has changed and evolved since Creative Bloq began back in 2012. The current website team consists of eight full-time members of staff: Editor Georgia Coggan, Deputy Editor Rosie Hilder, Ecommerce Editor Beren Neale, Senior News Editor Daniel Piper, Editor, Digital Art and 3D Ian Dean, Tech Reviews Editor Erlingur Einarsson, Ecommerce Writer Beth Nicholls and Staff Writer Natalie Fear, as well as a roster of freelancers from around the world. The ImagineFX magazine team also pitch in, ensuring that content from leading digital art publication ImagineFX is represented on Creative Bloq.
