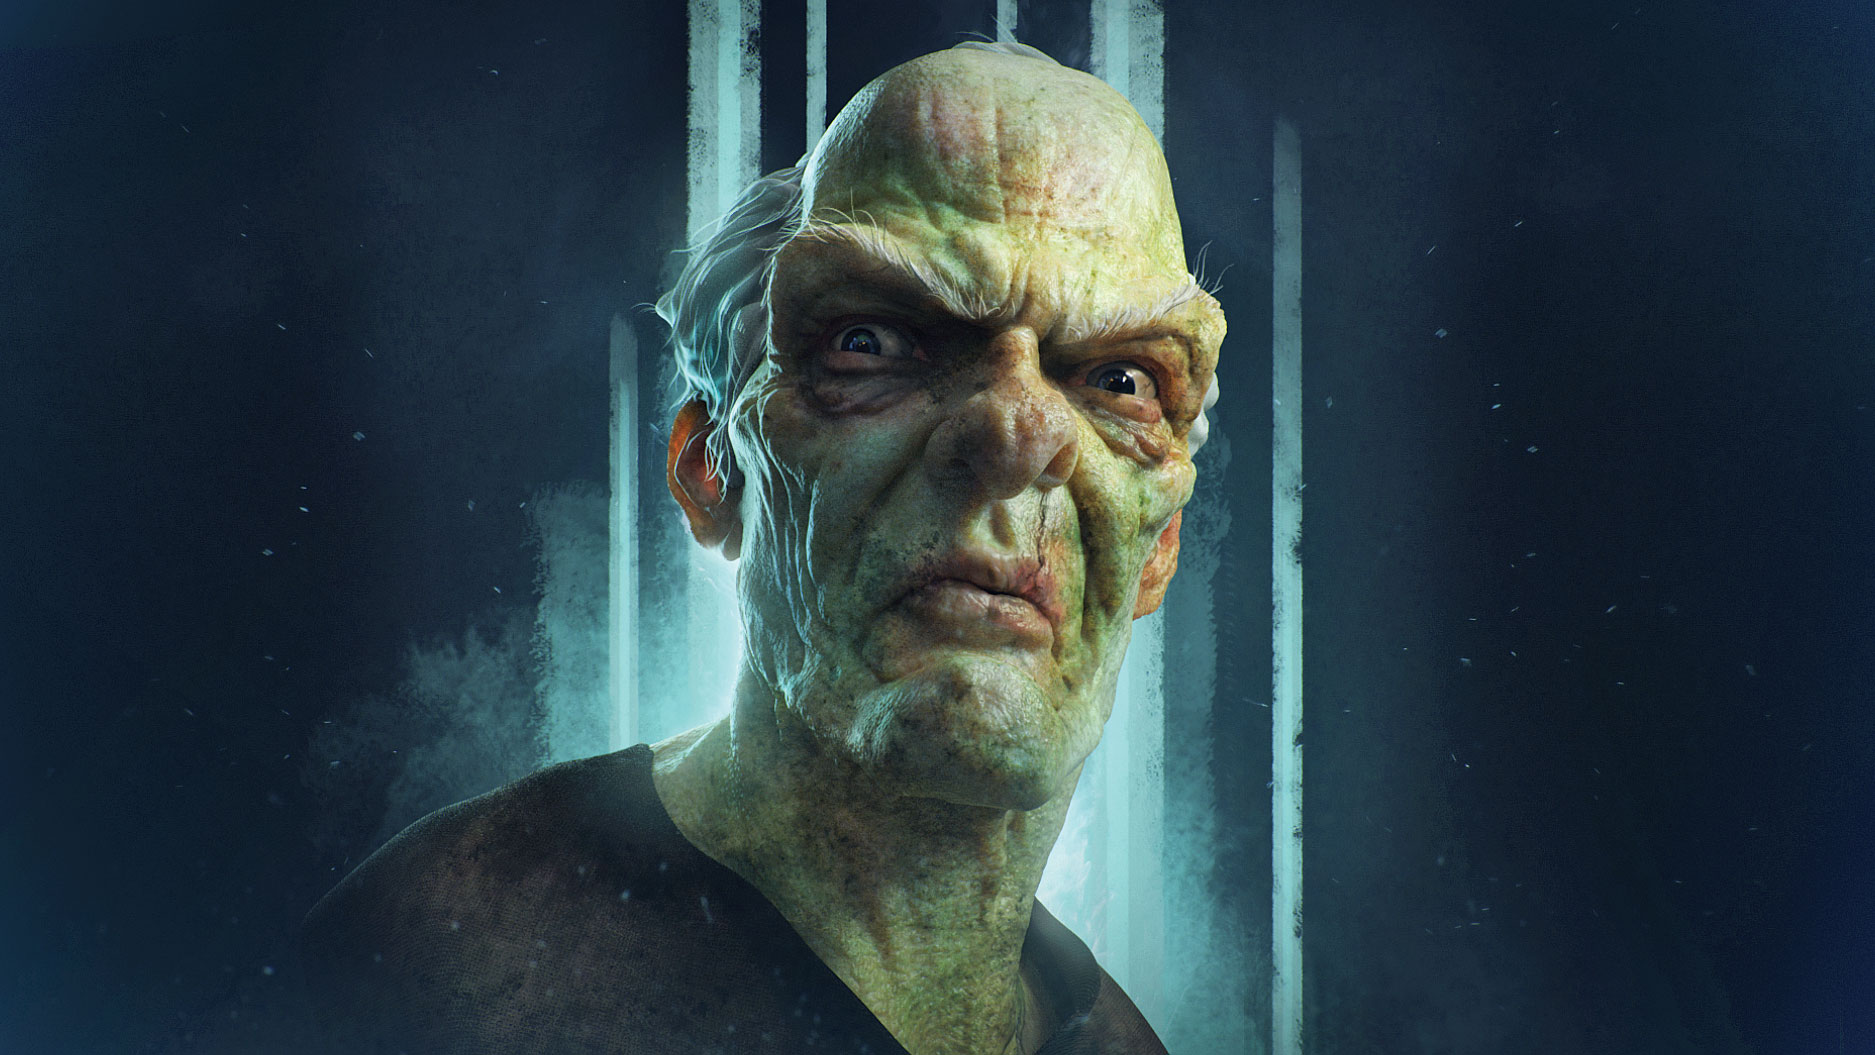
Create a character with stylised realism
Discover how to set up and use displacement maps to improve your 3D workflow.
Sign up to Creative Bloq's daily newsletter, which brings you the latest news and inspiration from the worlds of art, design and technology.
You are now subscribed
Your newsletter sign-up was successful
Want to add more newsletters?
FlippedNormals is a site run by Henning Sanden and Morten Jaeger alongside their day jobs in VFX in London. They focus on making high-quality tutorials and assets based on the knowledge they have accumulated over their years working with high-level 3D art.
At FlippedNormals we made an elaborate 11-hour tutorial series on how to use Modo and ZBrush together: The Complete Modo to ZBrush Workflow. This includes sculpting, retopo, UVs, in-depth knowledge of displacement maps, lighting and much more. This tutorial is an excerpt from the complete series. While we're using Modo and ZBrush together, you can replace Modo with any other application; the steps in ZBrush are identical, as the outputted maps can be used in any 3D software.
Setting up proper displacement maps can be really tricky for any 3D artist, and yet they are essential in a lot of cases. Professionally I use them every day. When dealing with ZBrush and other applications, knowing how to use displacement maps inside out is vital, and so we spend some time on it here.
Article continues belowGet all the assets you need here.
01. Understanding the importance of design
Before you start with any kind of retopo or UVs, you need to have a well established design. The clearer your design is, the easier it will be down the line. If you have to do design alterations after you've retopoed, UVed and textured the character, it will become complicated very quickly. Try not to rush the design phase. A common issue is to skip the primary and secondary shapes and go right to the details. The better your design is, the stronger the final image will be. Take your time.
02. Time to get to work with your retopo tool
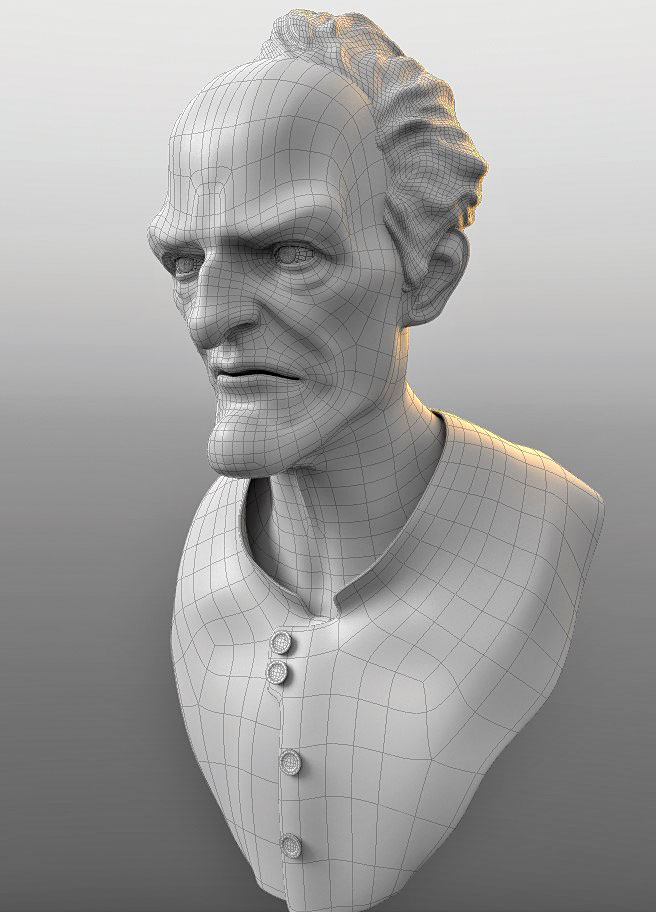
I prefer to retopo in Modo, but you can work in any application you prefer. I've also retopologised a lot in Maya, which is more than adequate for the job. When you're retopologising, make sure to start off with big polygons, getting more detailed as you get further along. If you start off too dense, you'll have a really hard time getting a clean model later on.
03. Use UDIM UV mapping
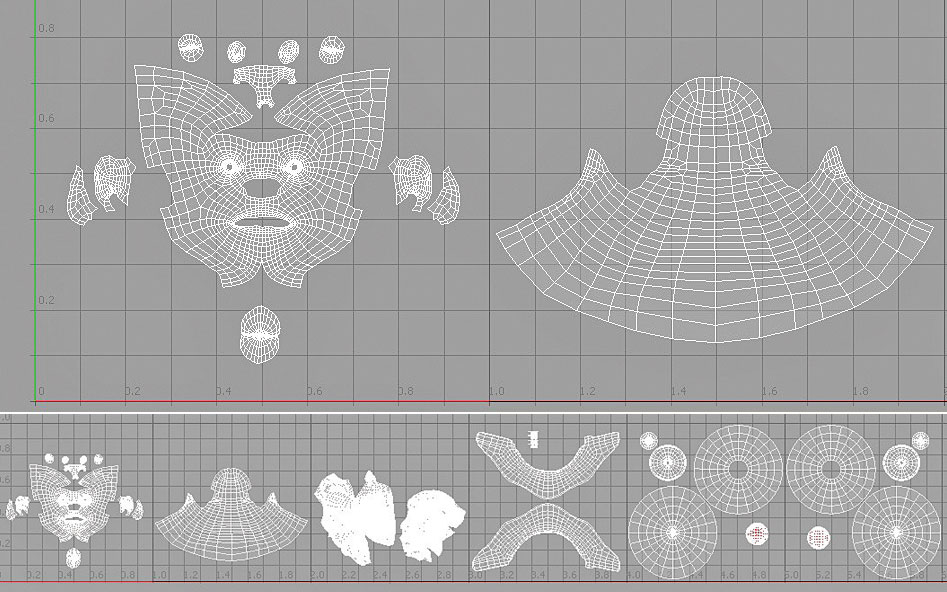
When UV mapping, stick to the UDIM system. This means that you're never working in the negative UV space; you're always starting at UDIM 1001 and working your way up. The UDIM number starts at 1001 with the U=0, Y=0 being 1001. This keeps your characters really clean and makes them easy to work with. You can also effortlessly export out all your displacement maps from ZBrush using the UDIM convention. In the example above the head is split over two UDIMs. How many tiles you split it over is entirely dependant on how close you want to get to the camera. In production, a full character might be over 50-100 UDIMs, depending on the asset.
Sign up to Creative Bloq's daily newsletter, which brings you the latest news and inspiration from the worlds of art, design and technology.
04. Reproject your sculpt onto the clean model
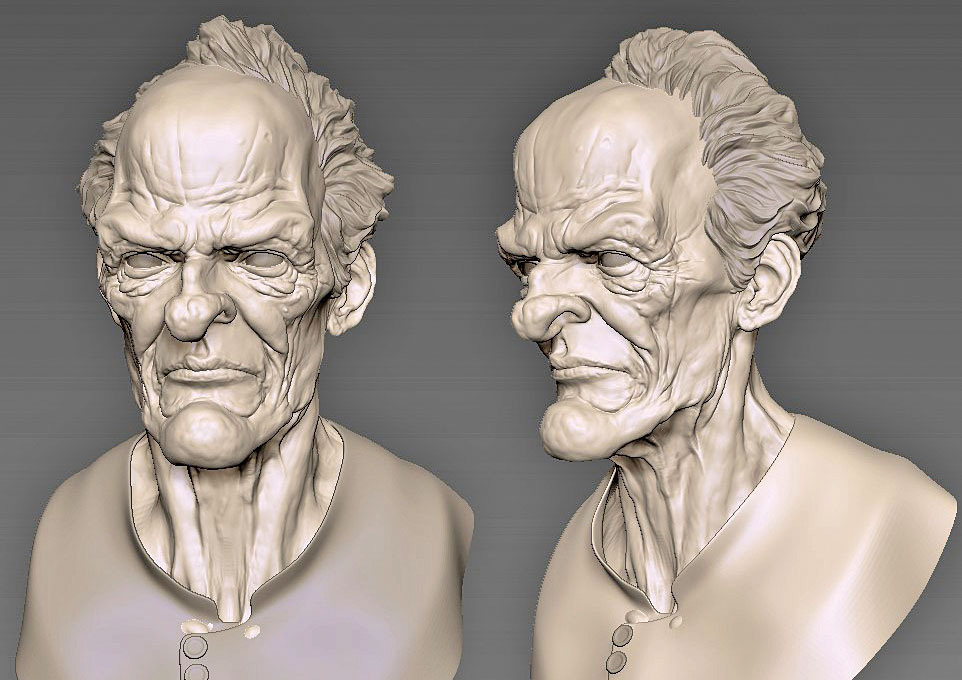
Now it's time to reproject our sculpt onto the clean model. To do this, you have to subdivide the model to the highest level. Ideally between two and six million polygons. Next, go to Store Morph Target (use the button on the bottom of the interface), and then Create Layer on the highest level. Make sure only the subtool you want to project from and project to are visible. If you wanted to, you could mask out regions that you know aren't going to project properly, like the lips, eyes, nose cavities etc, at this point. Then, go to Tool>SubTool>Project>ProjectAll. Make sure the PA Blur-Amount is set to 0 (default 10). You can find this in the top right of our custom UI too. This will project from all the visible subtools onto the active one. If it all projected correctly, well done! If you have errors, don't worry, you can use the Morph Brush (hotkey BMO or in the bottom of the UI) to paint out regions which are troublesome.
05. Defining the features
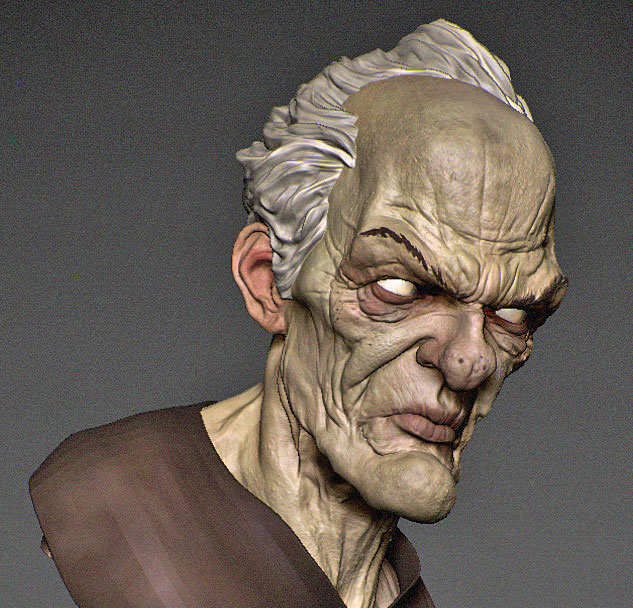
At this point we have a clean model with proper sculpting on top. That said, the model still requires a lot of refinement. Really go in and make sure that all your features are tight and well done. You probably need to take a pass on the eyes, nose, ears and mouth, in particular. I prefer to isolate the mentioned regions and spend some time on each bit until they are as defined as you need them to be.
06. Add the all-important detailing to the model
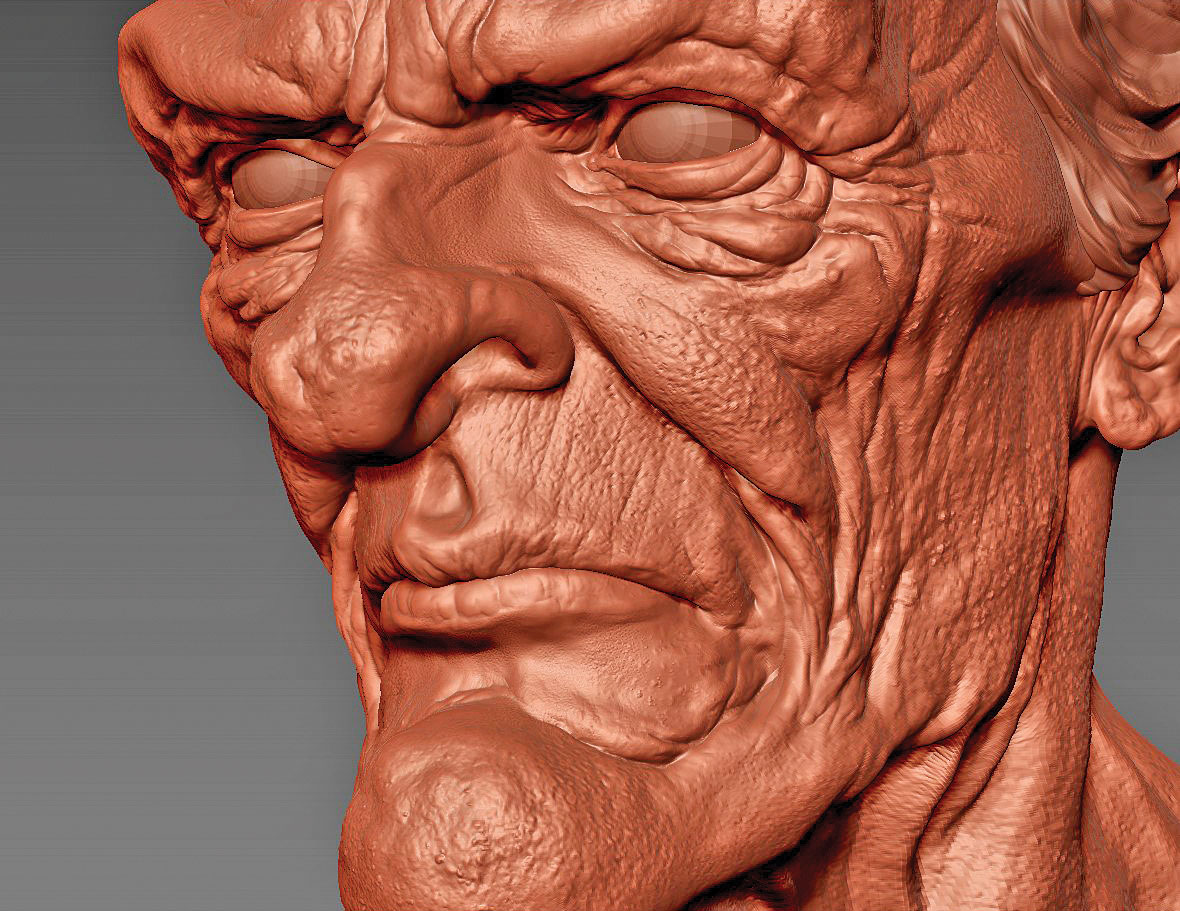
This is the stage everyone rushes to initially. While I'm adamant on the point that details shouldn't be rushed, this mustn't be confused with saying that they aren't important and shouldn't have been thought of before this stage. In order to really achieve the final level of realism, fine details are of paramount importance. They will really help to break up the specularity on the model, giving you a natural and organic look.
07. Use displacements maps
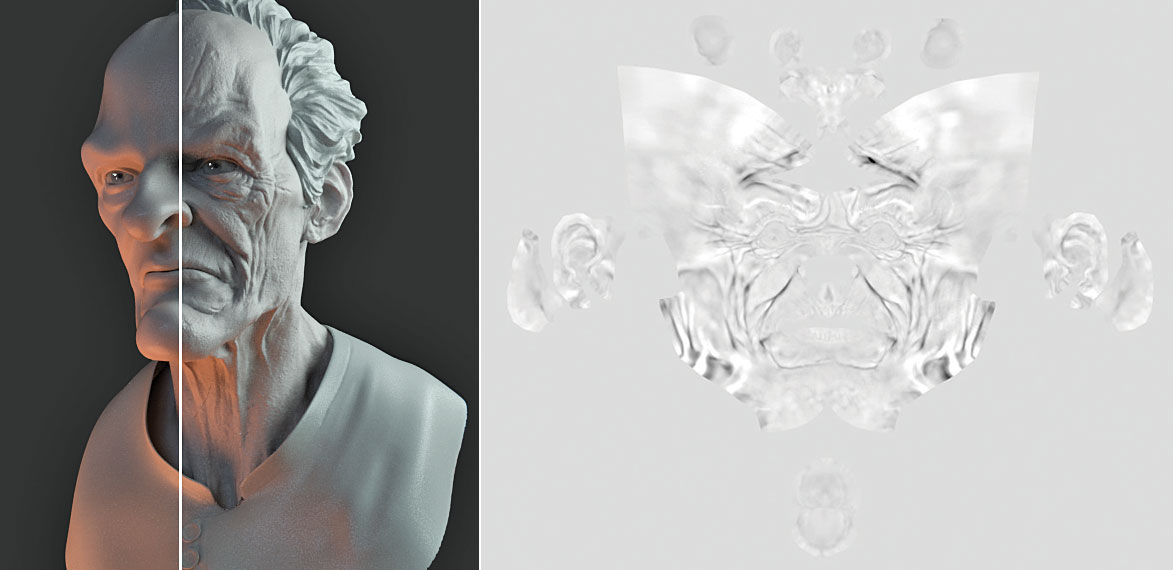
The model now has proper industry-level UVs and topology which supports all the major forms. This means it's displacement map time! When it comes to creating additional detail for your meshes, displacement maps are king. Before we get any further, we have to briefly talk about what a displacement map (from here on referred to as a disp) actually is. In short, a disp is a texture map that contains all the sculpting from ZBrush. This can be applied in any render engine onto a low-poly model, making it render the sculpting at render time only. The advantage of this is that you can animate a low-poly model and still have the high-poly appearance at render time. It would be impossible to animate a 10 million polygon model in any 3D application currently out there.
08. Proper settings for MME
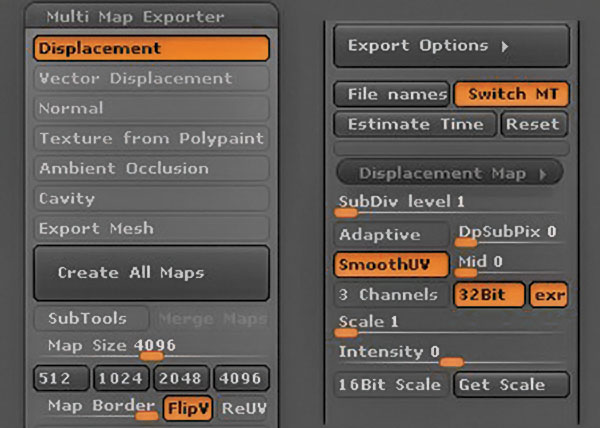
You can generate a disp from ZBrush using its Multi Map Exporter. It offers a lot more settings than the traditional disp extraction process, plus it has UDIM export support. Neat!
The image above shows the correct settings, depending on your needs. Here are the various settings explained:
1. SubDiv Level: From which subdiv level will the map be generated from. Usually 1.
2. Adaptive: Slightly higher quality of the map, but takes a lot longer to generate. Leave off.
3. DpSubPix: A subdivision multiplier. Definitely leave off! A setting of 4 will subdivide your model four times during the generation, taking a LOT longer.
4. Smooth UVs: Does exactly that – smooths the UVs.
5. Mid: Sets the mid value of your map. Usually set it to 0, but this depends on the pipeline.
6. 3 Channels: Leave off. This puts the disp only in the red channel, which optimises the files.
7. 32 Bit: This needs to be on. Otherwise you'll get nasty banding in your render.
8. Exr: Leave on to get exr files. Otherwise you get .tif files. Exr-option does not work with Merge Maps though.
9. Scale & Intensity: Don't touch. If you're working with 32-bit files (which we are) the scale is set automatically.
Hit Create All Maps to generate your disps.
09. Rename your files
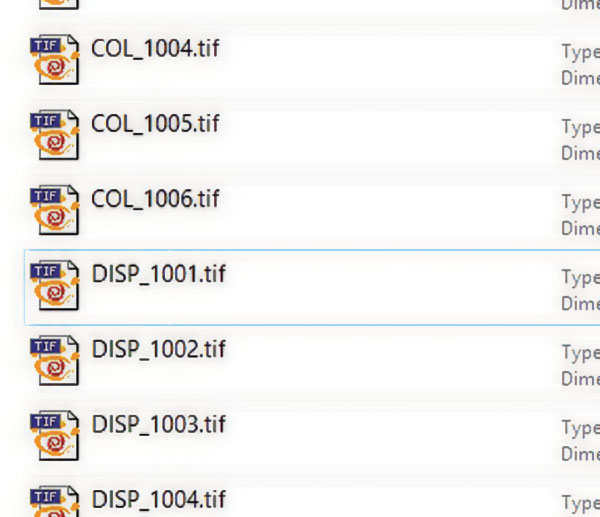
Rename your files. By default you'll get some nasty names out of ZBrush. Keep your files clean and your workflow will be so much clearer down the line. I use the naming convention DISP_####.exr (or tif), where #### is the UDIM number.
10. Export & import
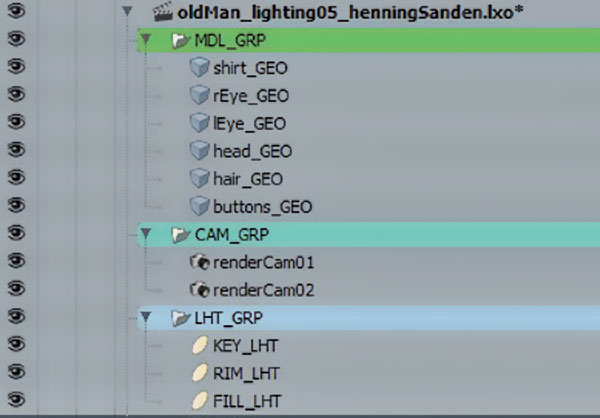
Export all your geometry from the lowest level and import it into Modo. Rename your models to a convention which suits your needs (I use modelName_GEO) and group it. I also prefer to colour-code my groups. It takes only a few minutes to organise your scene and you'll really thank yourself later on, as working in it will be far more enjoyable. Sharing the scene becomes a lot easier too.
11. Assigning the UDIMs
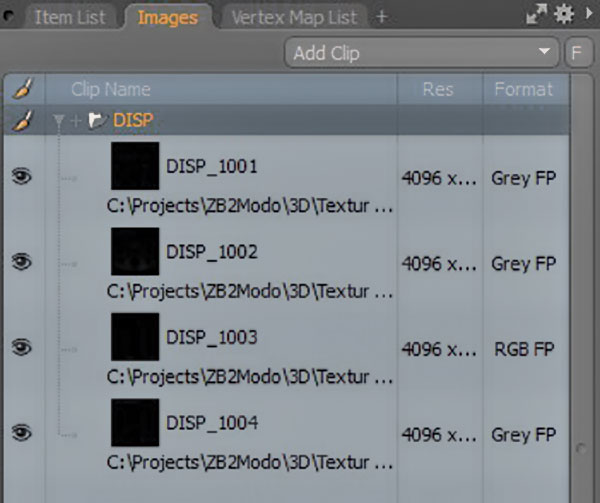
This is very easy to do in Modo:
1. In the Render Tab, go to the Images tab.
2. Add Clip.
3. Load UDIMs. Select all your DISP-images (for me, thats DISP_1001 to DISP_1004). This creates a folder called DISP containing all my maps.
12. Assign the materials
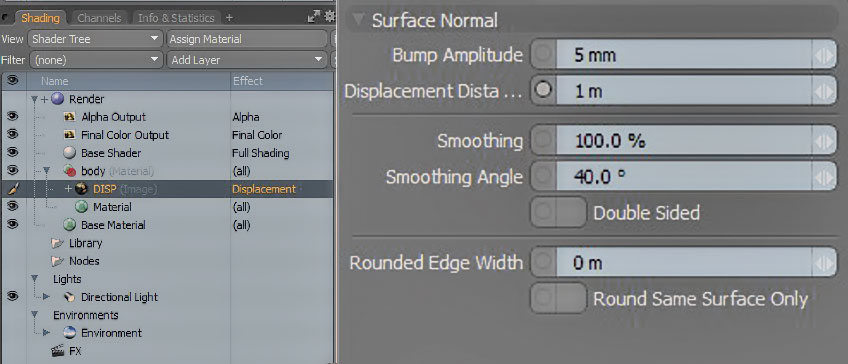
Now it's time to use the disp maps…
Using the displacement maps:
1. Assign a material to your model (hotkey is [M]).
2. Use the Add Layer button, select the Image Map>Use Clip Browser option.
3. Select the map which does not have a number next to it. You might have DISP_1001, DISP_1002, and so on. Select the one just called DISP.
4. Right-click on the disp and set the effect to Displacement.
5. Under Material Ref, set the Displacement Distance to 1m. This will make sure the model displaces the correct amount.
13. Adjust the settings
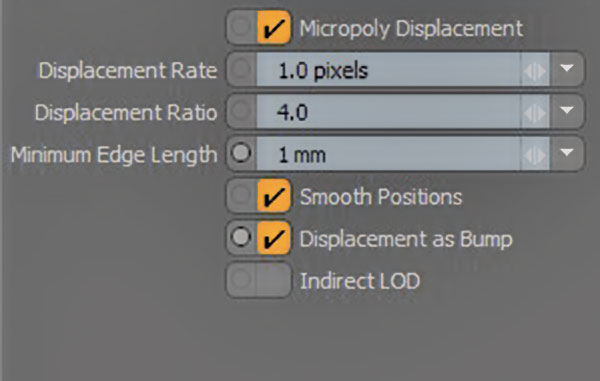
Start adjusting the displacement settings under Settings in the Render tab. I start off by enabling Displacement as Bump. This is a really useful setting which simply puts parts of the disp into the bump slot, making it render faster.
You also want to start adjusting the Minimum Edge Length. The default of 100um is really small, meaning it will take ages to render. I usually start with 1mm, brining it up x10 per render to see how high I can go without compromising the render quality.
14. Master the art of realistic lighting
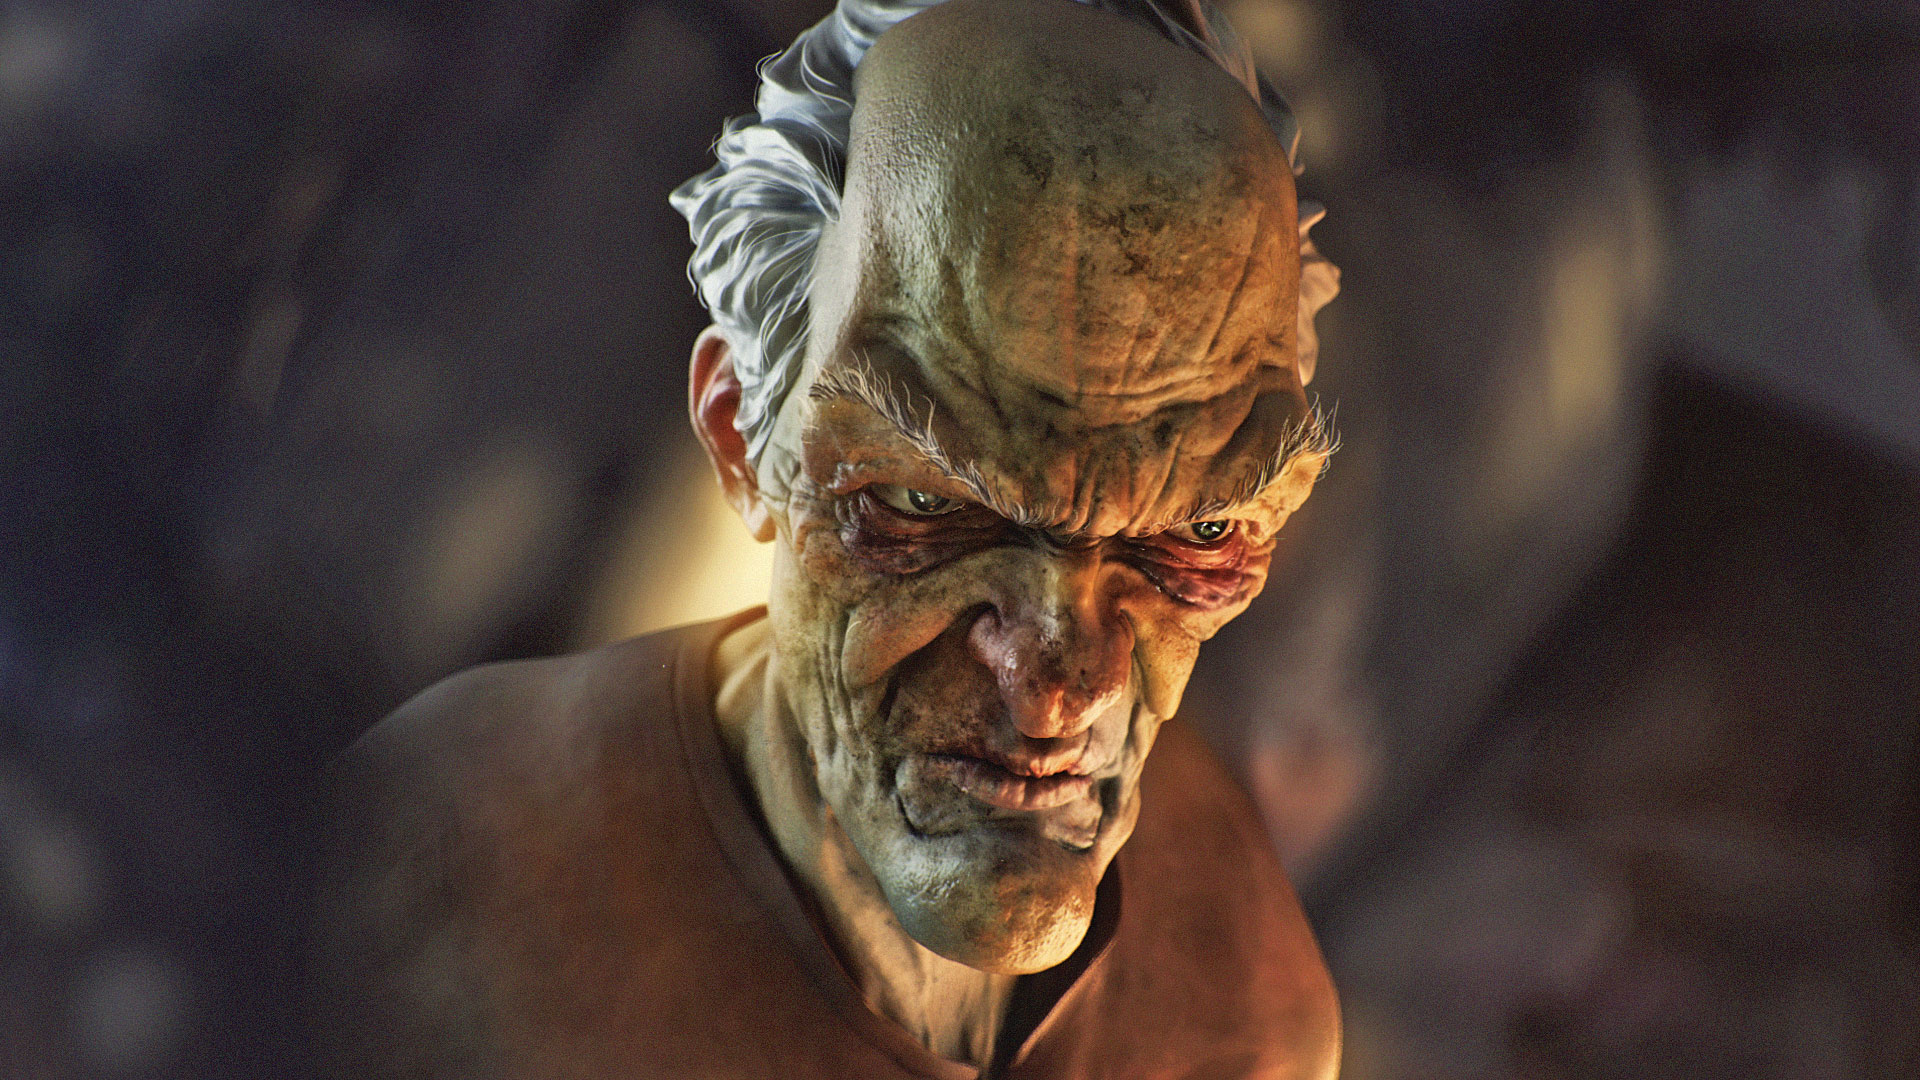
If you're having trouble with getting nice lighting, I'd highly recommend the FlippedNormals Lighting Scene for Modo, which can be found on flippednormals.com. This allows you to simply drag your model into the scene and it will instantly look appealing. It was rendered in a modified version of our lighting scene.
Getting a proper disp map requires that all the steps are done properly and methodically. If any one of these steps are rushed, the end result will suffer. Your topology should ideally be nice and evenly spaced without any topological errors, and your UV map must be nicely laid out with minimal amount of stretching. If your topology, UVs and Multi Map Exporter settings are solid, your disp should be perfectly fine. It's a process which takes a bit of time to learn how to use, but once you've understood how it's done, you'll have a much better time dealing with disp maps. You'll also be able to debug what's happening if something goes awry and you can use disp maps to create interesting effects in other areas of 3D, not necessarily related to sculpting.
For the full The Complete Modo to ZBrush Workflow, please visit our website and check the front page of flippednormals.com.
This article originally appeared in 3D World issue 211; buy it here.
