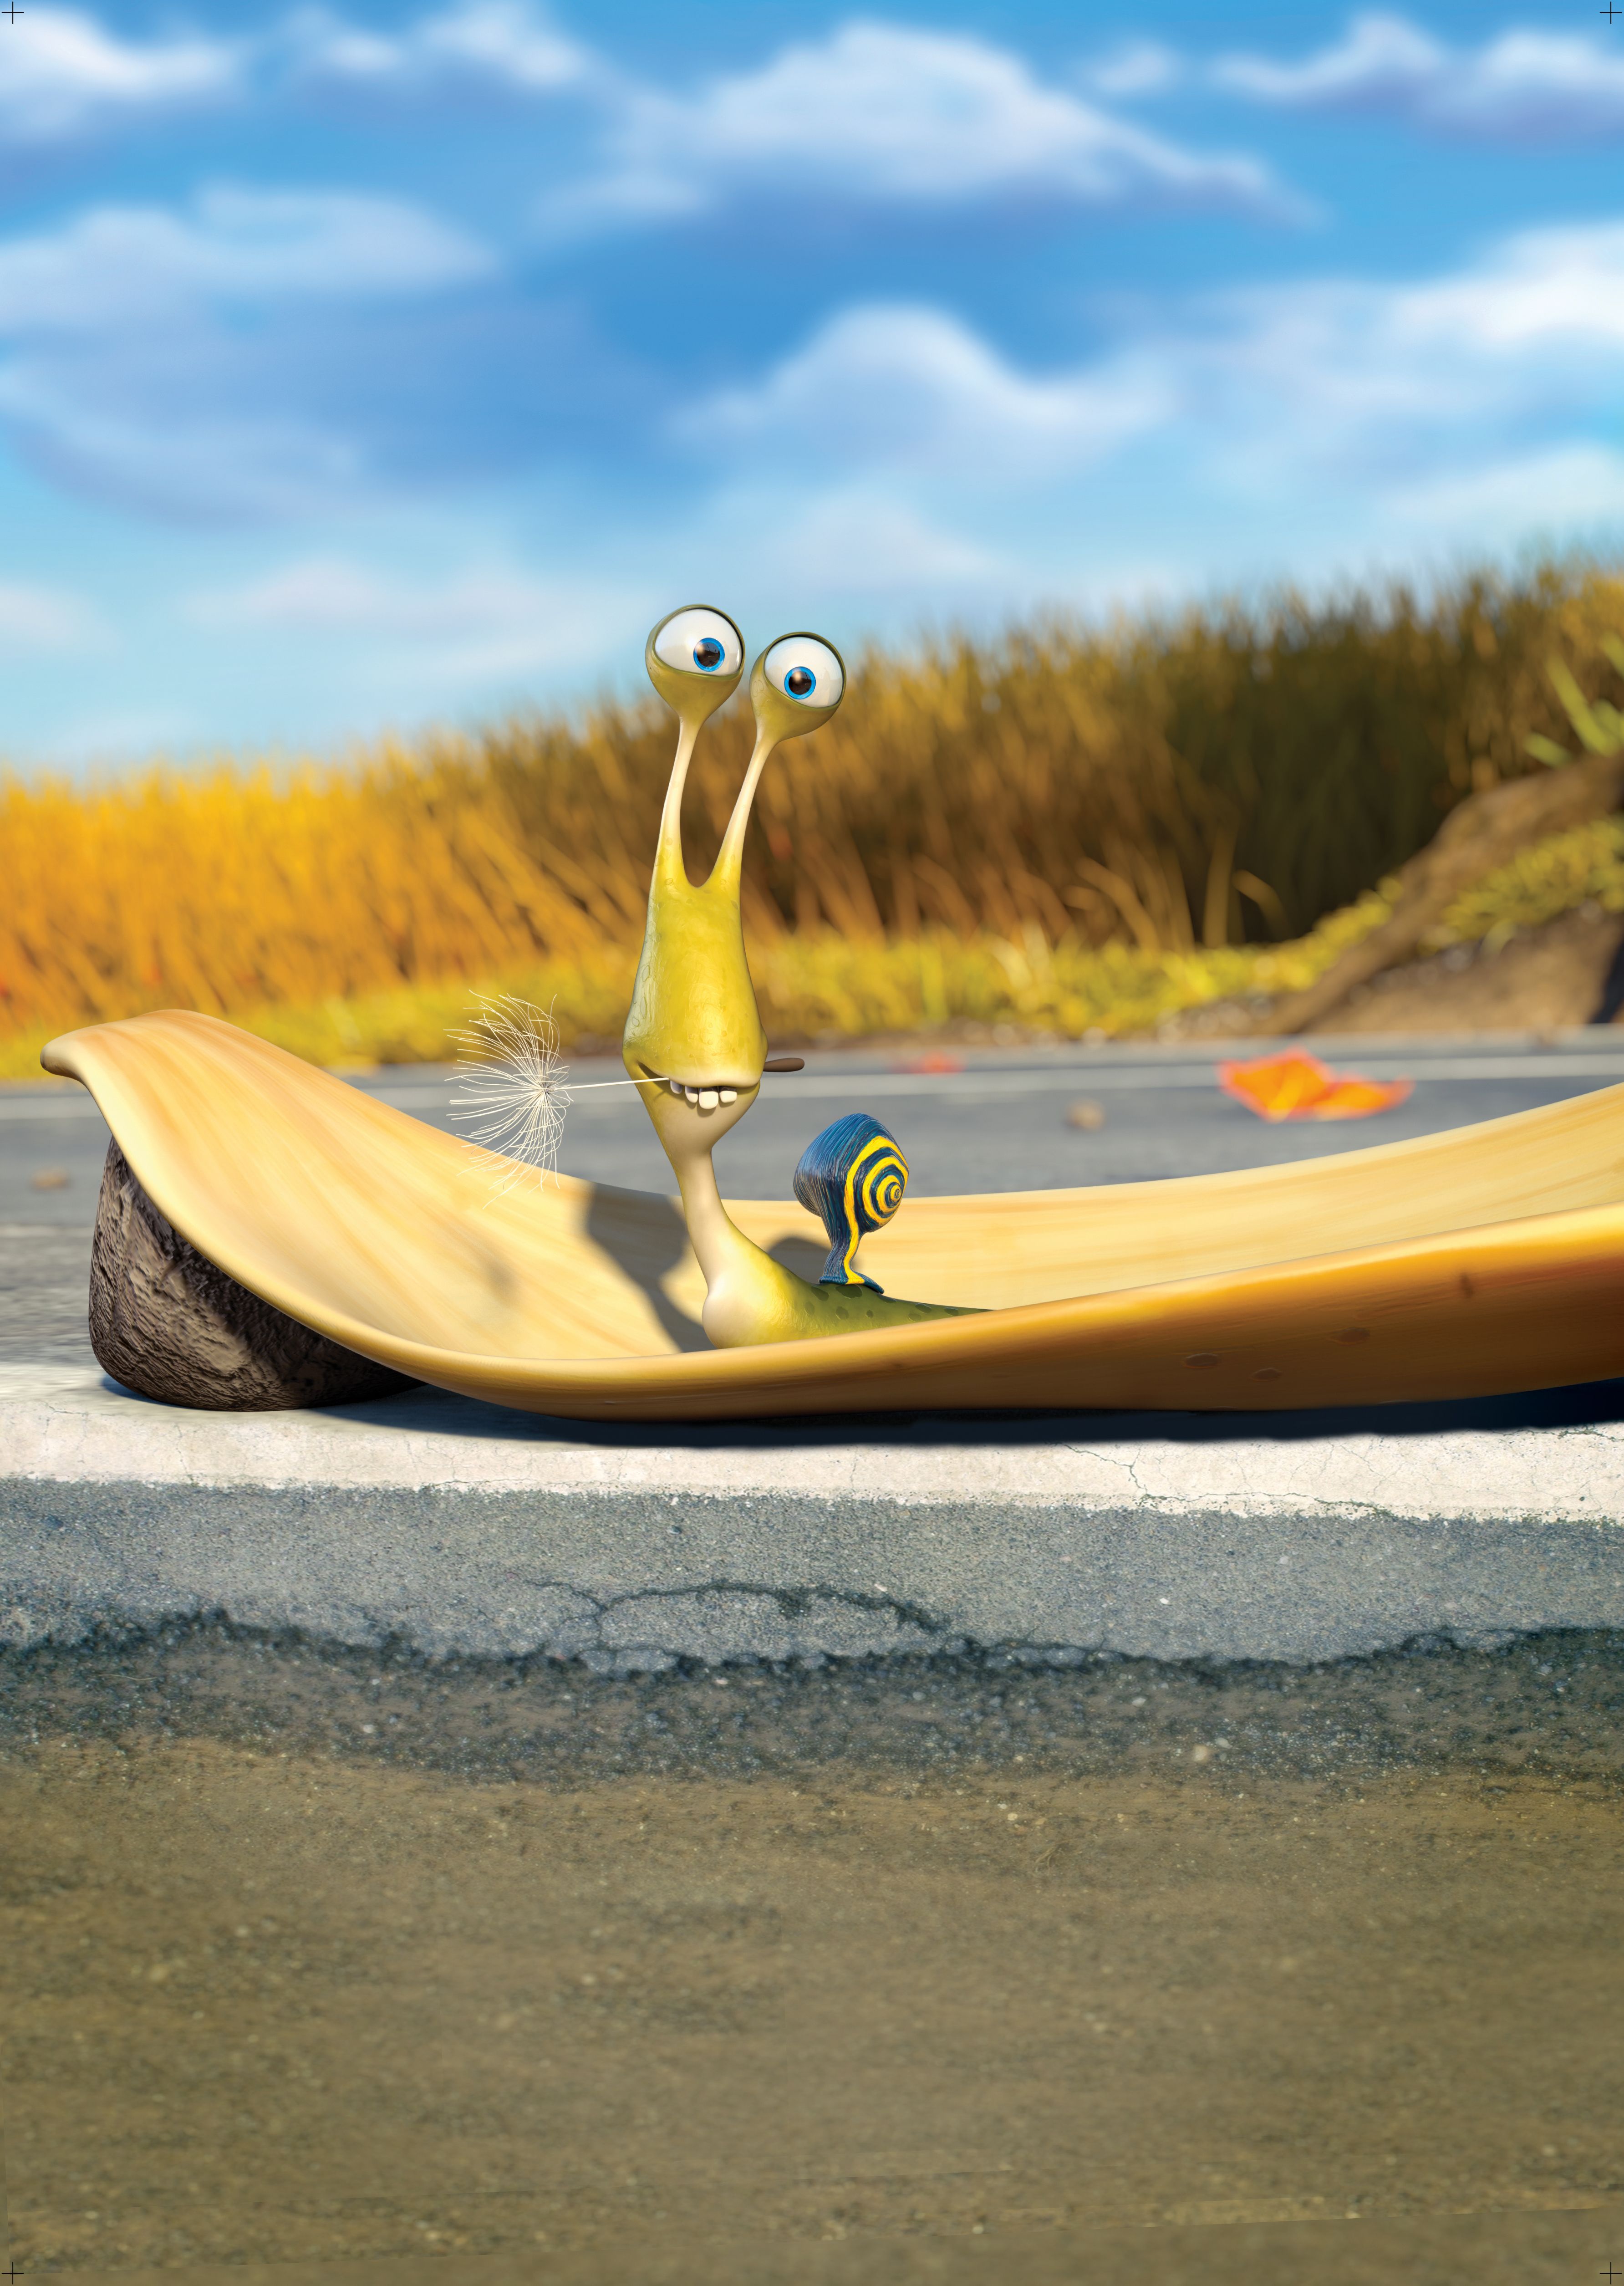
How to make a flexible ribbon rig
Discover how to use ribbon rig techniques to create the right amount of squash and stretch in your animations.
Daily design news, reviews, how-tos and more, as picked by the editors.
You are now subscribed
Your newsletter sign-up was successful
Want to add more newsletters?

Five times a week
CreativeBloq
Your daily dose of creative inspiration: unmissable art, design and tech news, reviews, expert commentary and buying advice.

Once a week
By Design
The design newsletter from Creative Bloq, bringing you the latest news and inspiration from the worlds of graphic design, branding, typography and more.

Once a week
State of the Art
Our digital art newsletter is your go-to source for the latest news, trends, and inspiration from the worlds of art, illustration, 3D modelling, game design, animation, and beyond.

Seasonal (around events)
Brand Impact Awards
Make an impression. Sign up to learn more about this prestigious award scheme, which celebrates the best of branding.
Ribbon rigs are fairly common in 3d art production rigs these days. They have a similar behaviour to using a spline IK setup, but can be easier to set up and have additional layering benefits. In the following tutorial, I will demonstrate how to set up a simple ribbon rig to simulate jiggle and bend, and then we’ll take it a little further with some advanced techniques.
We’ll be looking at setting up a basic node setup and how to use layers of controls to get the desired results – being able to maintain close control over your rig is important. Then we’ll develop the ribbon rig technique and look at advanced options and bonus options to take the jiggle simulation a step further. Everything that you’ll learn here will be the groundwork for your own projects, and from here you can keep experimenting with the techniques.
In the online Vault you will find step-by-step images that you can download to take a closer look at my settings and setup. I’ve also included my Python script code in the download so that you can try out the advanced options. I hope you enjoy the tutorial!
01. Build ribbons & follicles
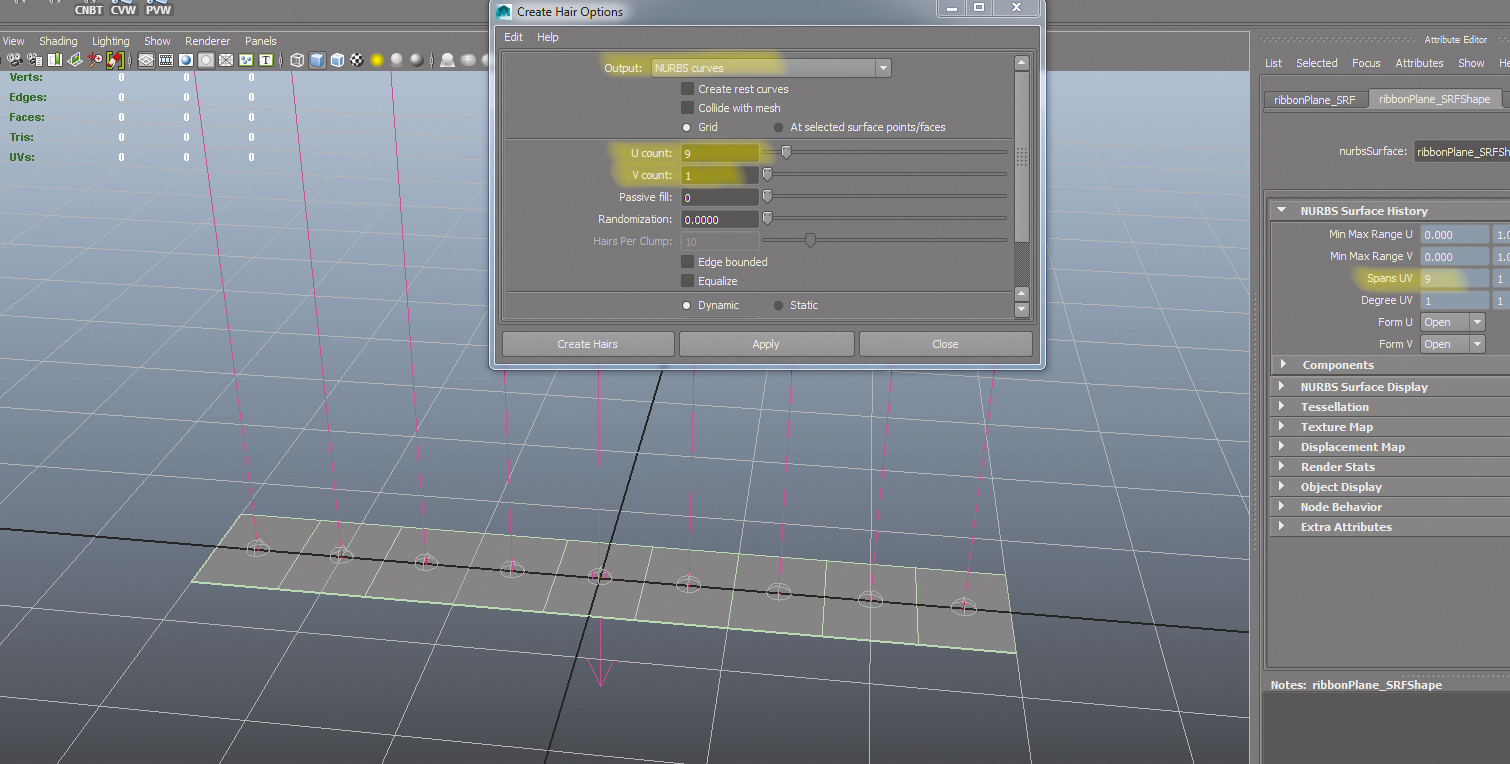
Create a nurbs plane and scale in X with some spans. Make it so the joints/follicles are between spans. If you have them right on the spans, then you might have trouble getting them to aim between each other properly. Now go to the nHair menu and create a Hair option box. Change the options from the default. Set the V count to 1; you want to control how many follicles you get along the U. Match the U count to the U spans to get the right value.
02. Follicle nodes
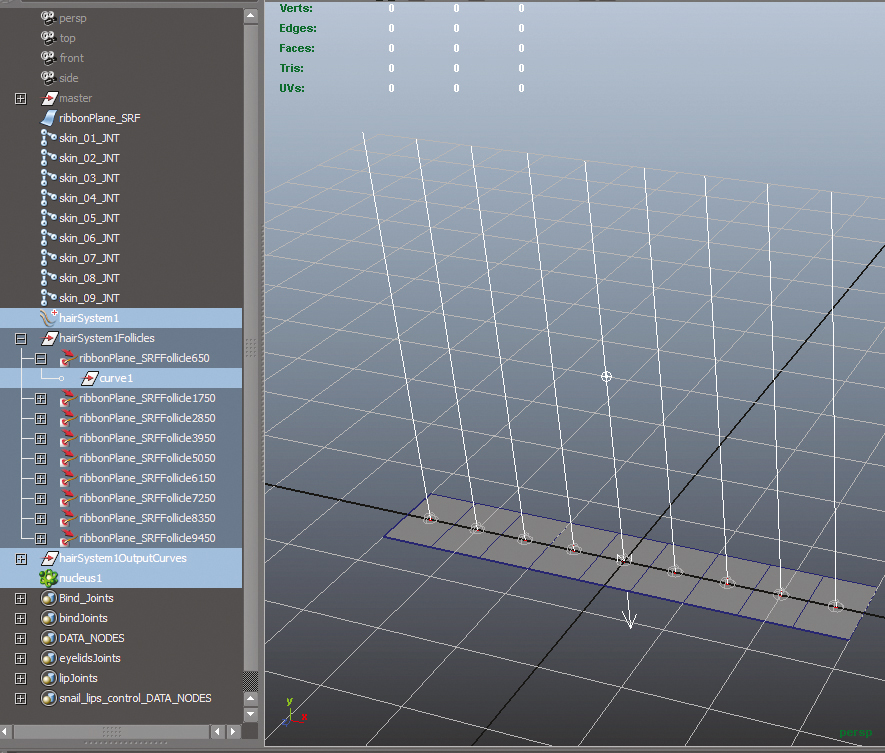
Now you can delete the highlighted nodes that you see in the screengrab above. The curve nodes under the follicles can be deleted since we’re not using actual hair, just the nodes that the tool created. Using the Create hair menu is just a quick and easy way to make follicles on the surface. Alternatively, you could create the nodes by hand (createNode follicle) and then you would have to hook up the surface shape and transforms yourself.
03. Orient your joints
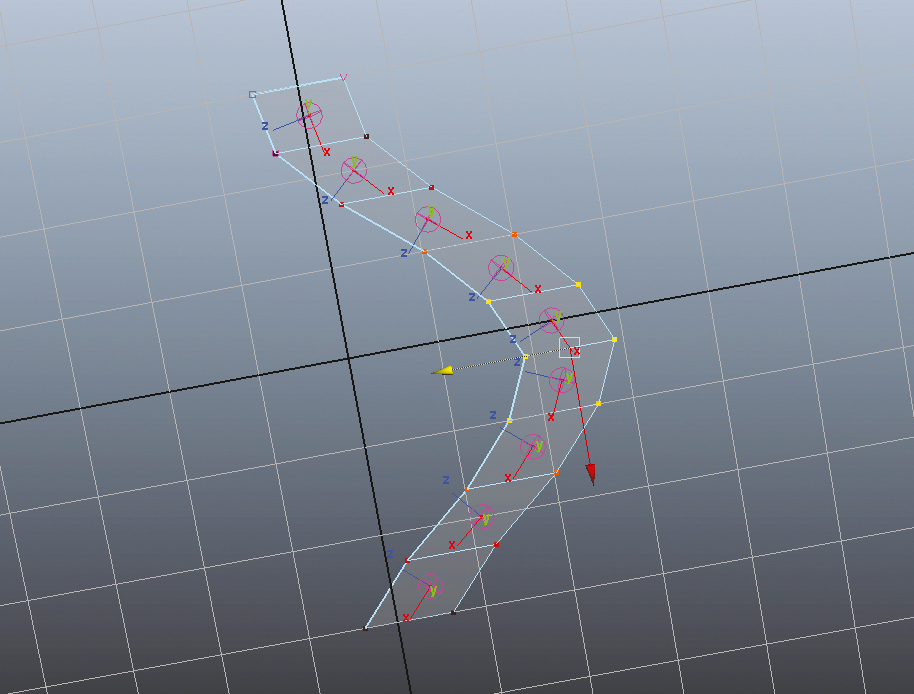
For each of these follicles, you’ll want to put joints under them and use these joints to skin your mesh to; at this point, moving the nurbs surface around will make the joints follow. Test it out: manipulate the CVs to see how the joints react. Turn on the local rotation axis (Display> Transform Display>Local Rotation Axis) to see how they keep their orientations along the surface. Make sure you undo any movement on those CVs though – we want to continue with the surface in its default position.
04. Now add the controls
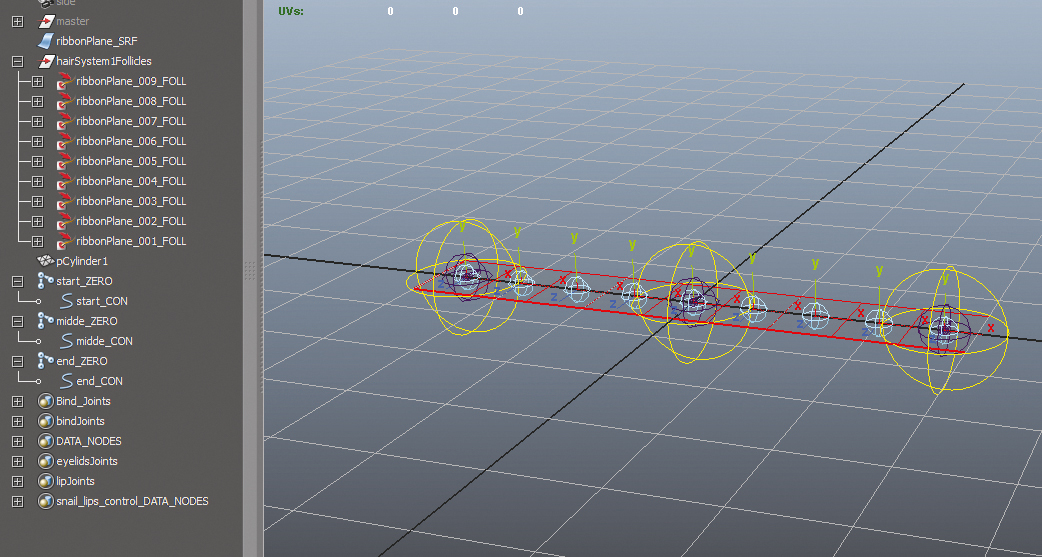
My snail rig’s eye stalks use multiple sets of controls. The first layer is a simple ‘start middle end’ setup, so let’s start with that: Save your file and go ahead and duplicate the start, middle, and end joints that you have on the follicles, and unparent them. Duplicate again, name one set _ZERO and the other set with _ CON. Parent the _CONs under the _ZEROs, and add some curve shapes to them for selection purposes. Check your hierarchy against the image.
Daily design news, reviews, how-tos and more, as picked by the editors.
05. Skin the ribbon
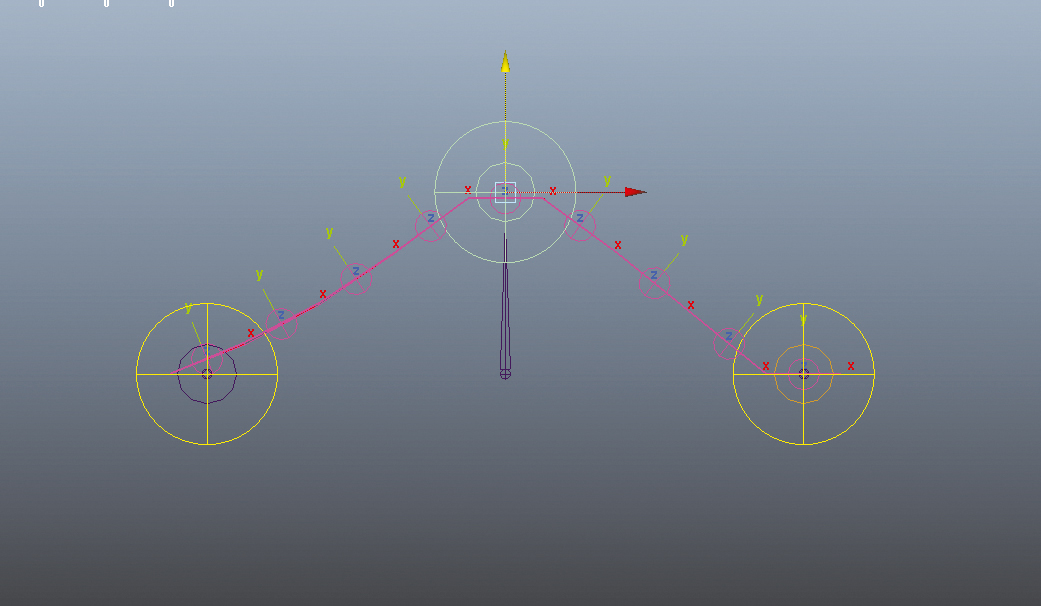
Since the controls we made are joints, we can skin the ribbon surface to those. Always skin with the option of selected joints, and select only the _CON joints we made. Smooth out the weights after skinning so the ribbon deforms evenly and lock the start/end spans so they don’t move when the middle moves – or choose to have them aim. This is a behaviour decision for your animator. If you have the ends ‘aim’, tweak the weighting on the CVs to get a little influence from the middle joint.
06. Layer it up
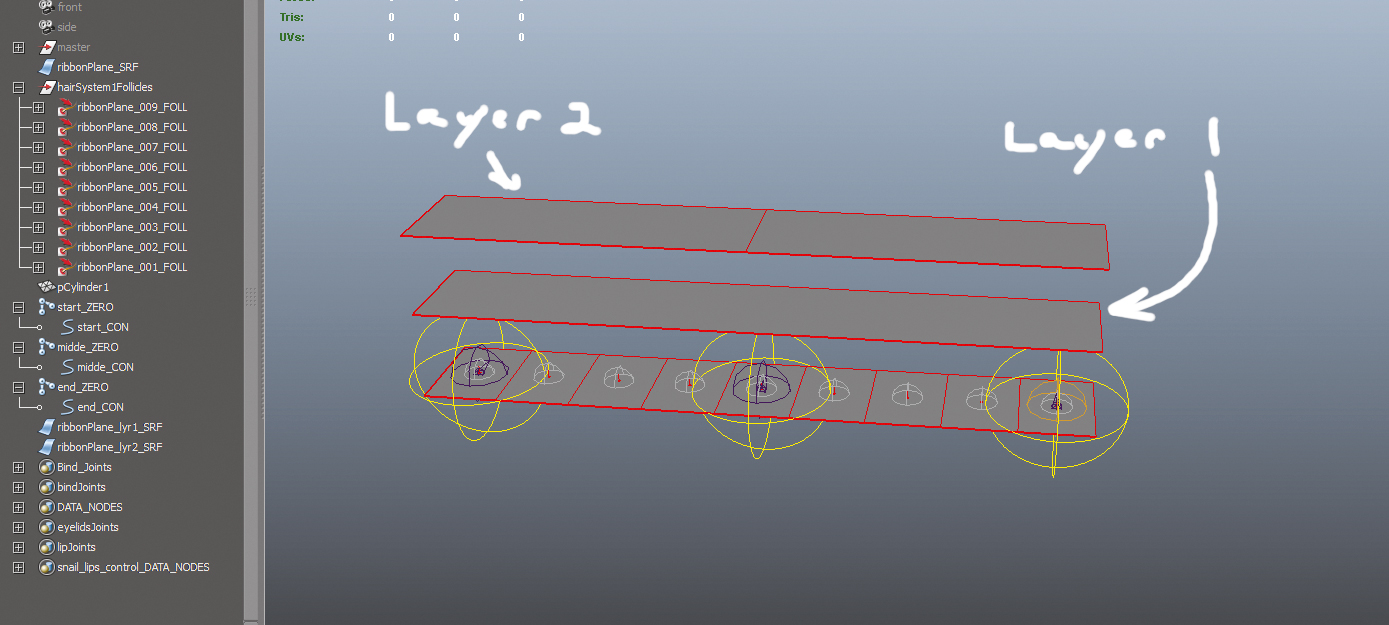
Put your ZERO nodes under your rig. (If you want a bendy arm section, put these joints under your forearm joint, and the arm will be skinned to the joints under the follicles.) Let’s take this further and add some layered control. Go back to your saved file (where the ribbon is unskinned) and make a new ribbon surface that has one span in each direction; duplicate the original ribbon surface then remove all the inner CVs from that duplicate.
07. More follicles
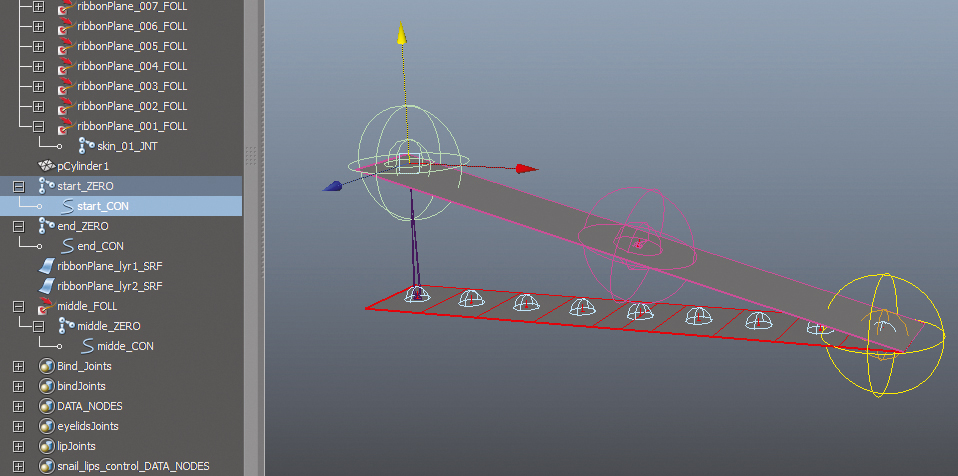
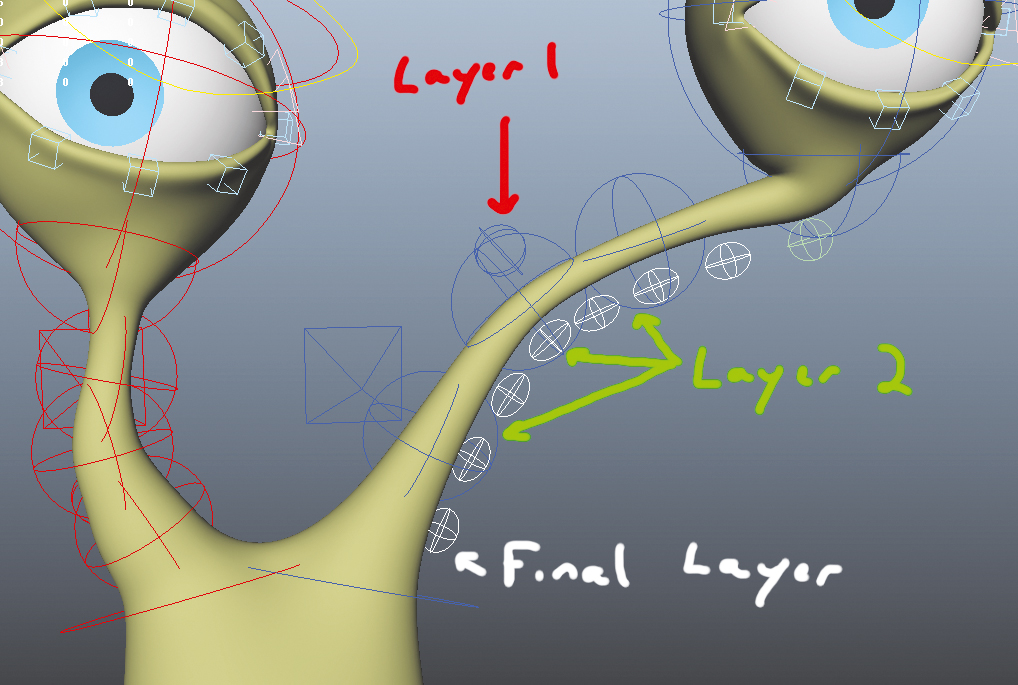
Let’s take the layer 1 surface (1x1 spans) and skin that to the start and end controls. This surface should drive the rest of the layers that you make, which means the mid control should be attached to the surface. Starting with the current middle control that you already have, let’s make a follicle on the layer 1 surface at the location of the middle_CON.
08. Adding more layers
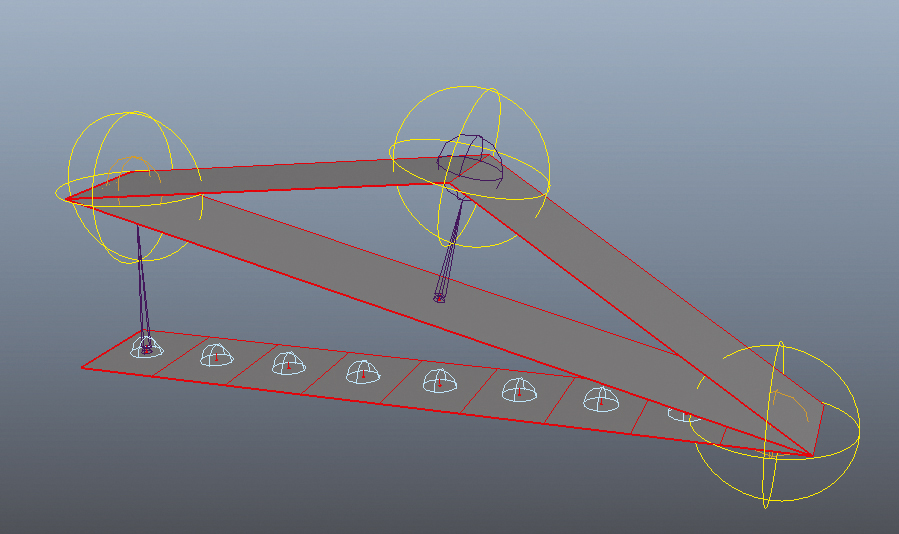
Now take the layer two surface, and skin that to all three controls (start, middle and end). We continue to have multiple options on how this rig ends up. We could end it right here and simply wrap the original surface to layer two. However, to get a smoother result, we could use the Rebuild Surface option to give us a cubic surface to wrap to, rather than a linear one. Use the Edit Nurbs>Rebuild Surface menu with the layer two surface selected. Make sure that Keep Original is checked.
Now you should have a little play around with the controls so that you can see how the surfaces are affected. You can see the rebuilt surface with history from the layer two surface. By making the rebuilt surface cubic in the U direction, the result is a smoother surface. Here’s what it would look like if we wrapped the original surface to the newly rebuilt, cubic layer two surface.
09. More options
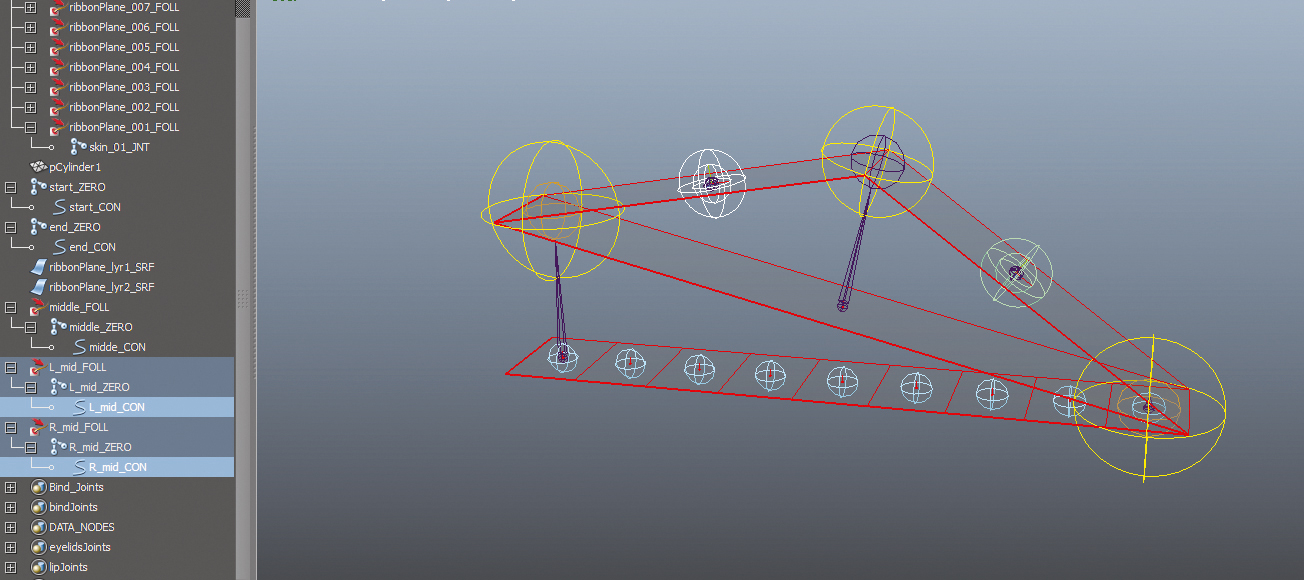
Let’s back up and add an extra layer of control. Duplicate the inbetween joints on each side of the middle control (joints 3 and 7 in my example). These will become new controls to use. Follow the previous steps to put them under follicles that are attached to layer two’s (the linear) surface. Create a new surface with more spans (at the location of the new mid controls), and this surface will be skinned to all the controls we’ve created so far.
10. Wrapping it up
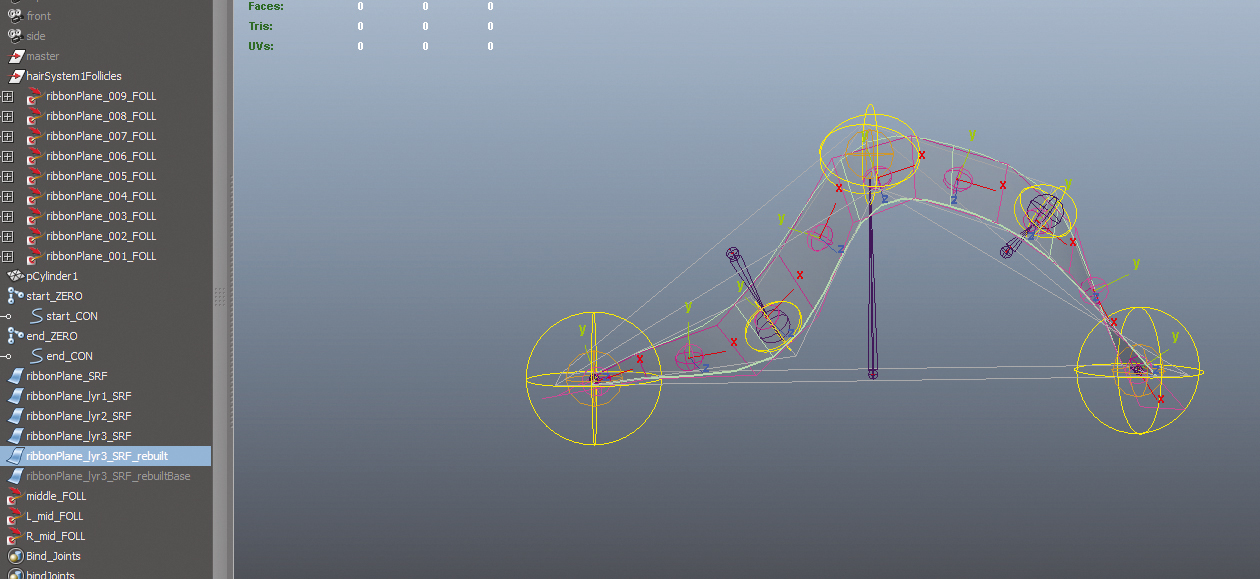
To bring it all together, use the rebuild surface trick on this final third layer ribbon. Play with the Rebuild Surface options to get the right amount of bendiness that you want. Once you’re done, you can wrap the original surface to this new third layer’s rebuilt surface. Alternatively, you could just recreate all the follicles on the layer 3 rebuilt surface, and put the skin joints under those. This would get rid of some extra calculations from the wrap node.
11. Bonus features
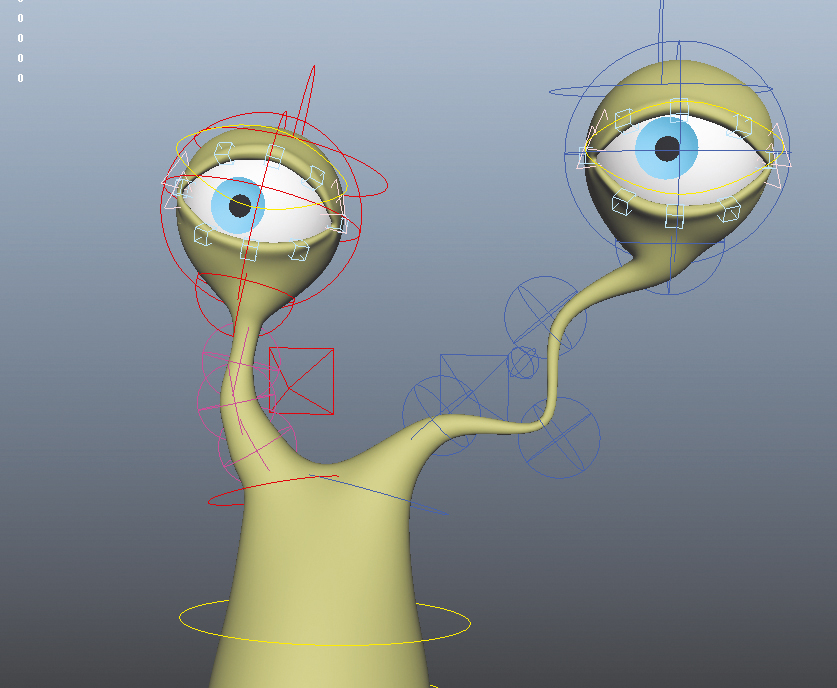
You can take the rig further by adding scaling features. Once you get a mesh skinned to the skinning joints, and have it stretched out, you may notice that the mesh doesn’t maintain uniform stretching. This is because our joints aren’t actually scaling; they’re just translating away from each other. This may be OK in a lot of cases, but if you do need to set up scaling, you would go about this like you would with an IK spline rig.
12. Spline techniques
Grab the original ribbon surface and go into Isoparm mode. Select an isoparm at the 0.5 mark in V (for example, select r ribbonPlane_SRF.v[0.5]). Use the Edit Curves>Duplicate Surface Curves menu item to duplicate that isoparm. This will give you a curve that follows the ribbon, by keeping its history. You can then use that curve to plug into a curveInfo node and set up your typical squash and stretch node networks.
There is no limit to how many layers you create, so make sure that you experiment with these techniques and try to explore more on your own! Plug the curve shape into the curveInfo node to obtain the arcLength. Use this to drive how much stretching happens on the joints attached to the surface. Here’s a final look at the ribbon used on the snail’s eye stalks – three layers, with the final layer being the actual individual control over the skinned joints. This was necessary to achieve some of the waving effects.
This article was originally published in 3D World magazine issue 208. Buy it here.
