Learn to model a 3D person in ZBrush and Maya
Pro techniques for capturing personality, expressions and emotions.
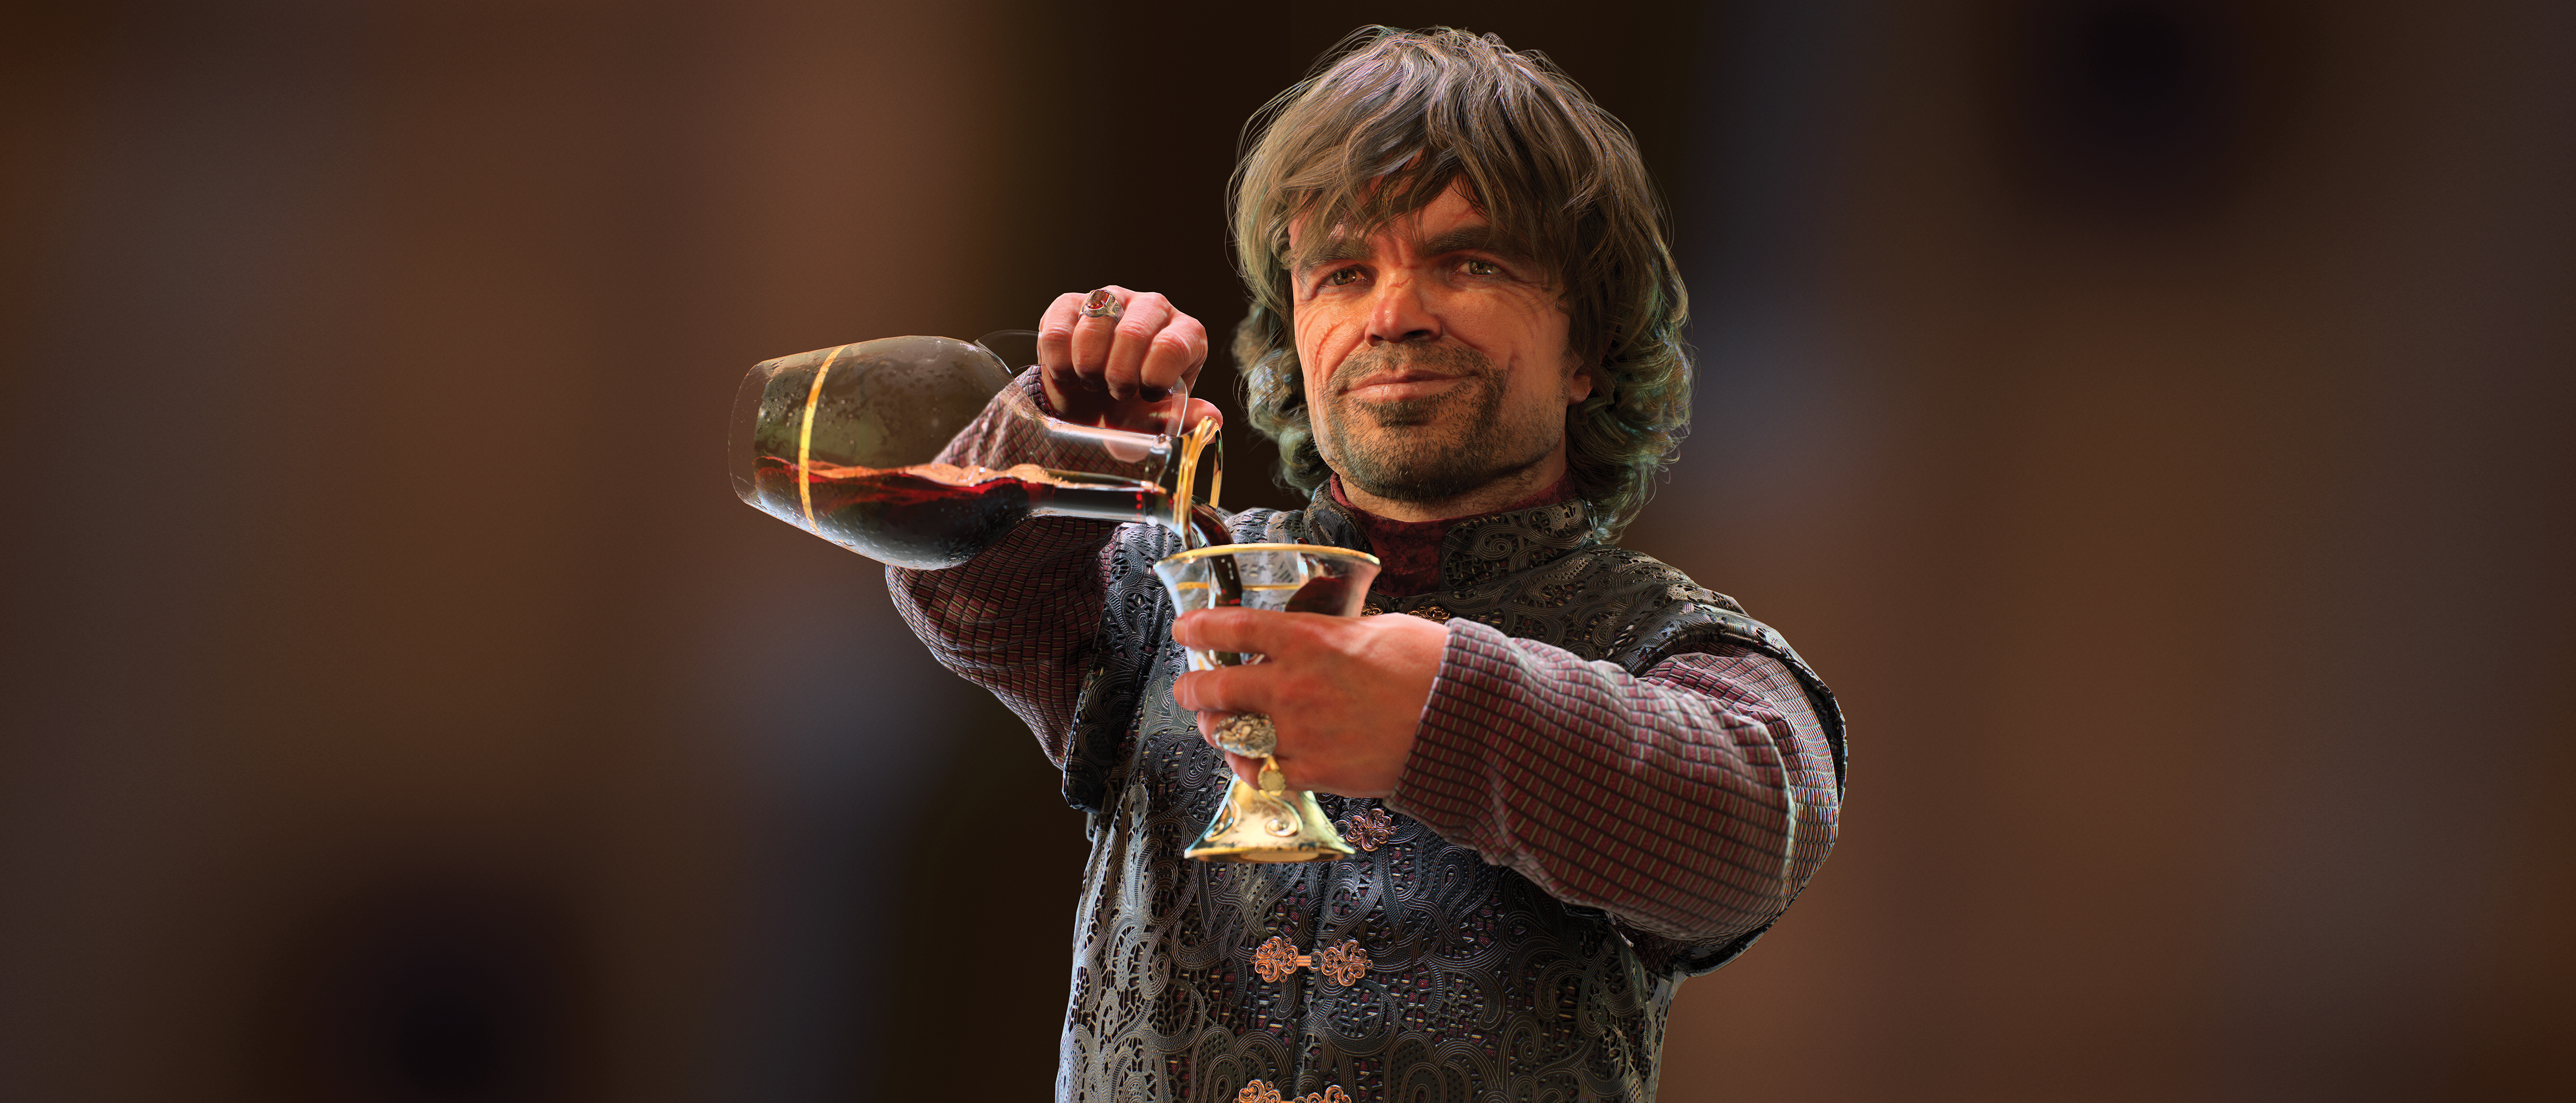
Bringing 3D art to life using ZBrush and Maya is a process involving a dozen different disciplines, from sculpting all the way to rendering. Being able to achieve the best result on every single detail certainly takes a lot of time. But, from my experience, it has always been an appreciated quality and ultimately helps you become a better artist.
With this 3D portrait of Peter Dinklage playing Tyrion Lannister (from Game of Thrones), I tried to capture not only the look of the actor, but his personality, expressions, emotions and, of course, all those details that usually end up being sacrificed just because it takes too much time to create them. This includes elements such as the rings and the jacket pattern.
In this tutorial I’ll provide an overview of the creation of the image and the software I used. I’ll show you how to solve some common issues and I hope you’ll find it interesting, helpful, as well as productive. If you have questions about a specific matter, follow me on my ArtStation page.
Article continues below01. Find references
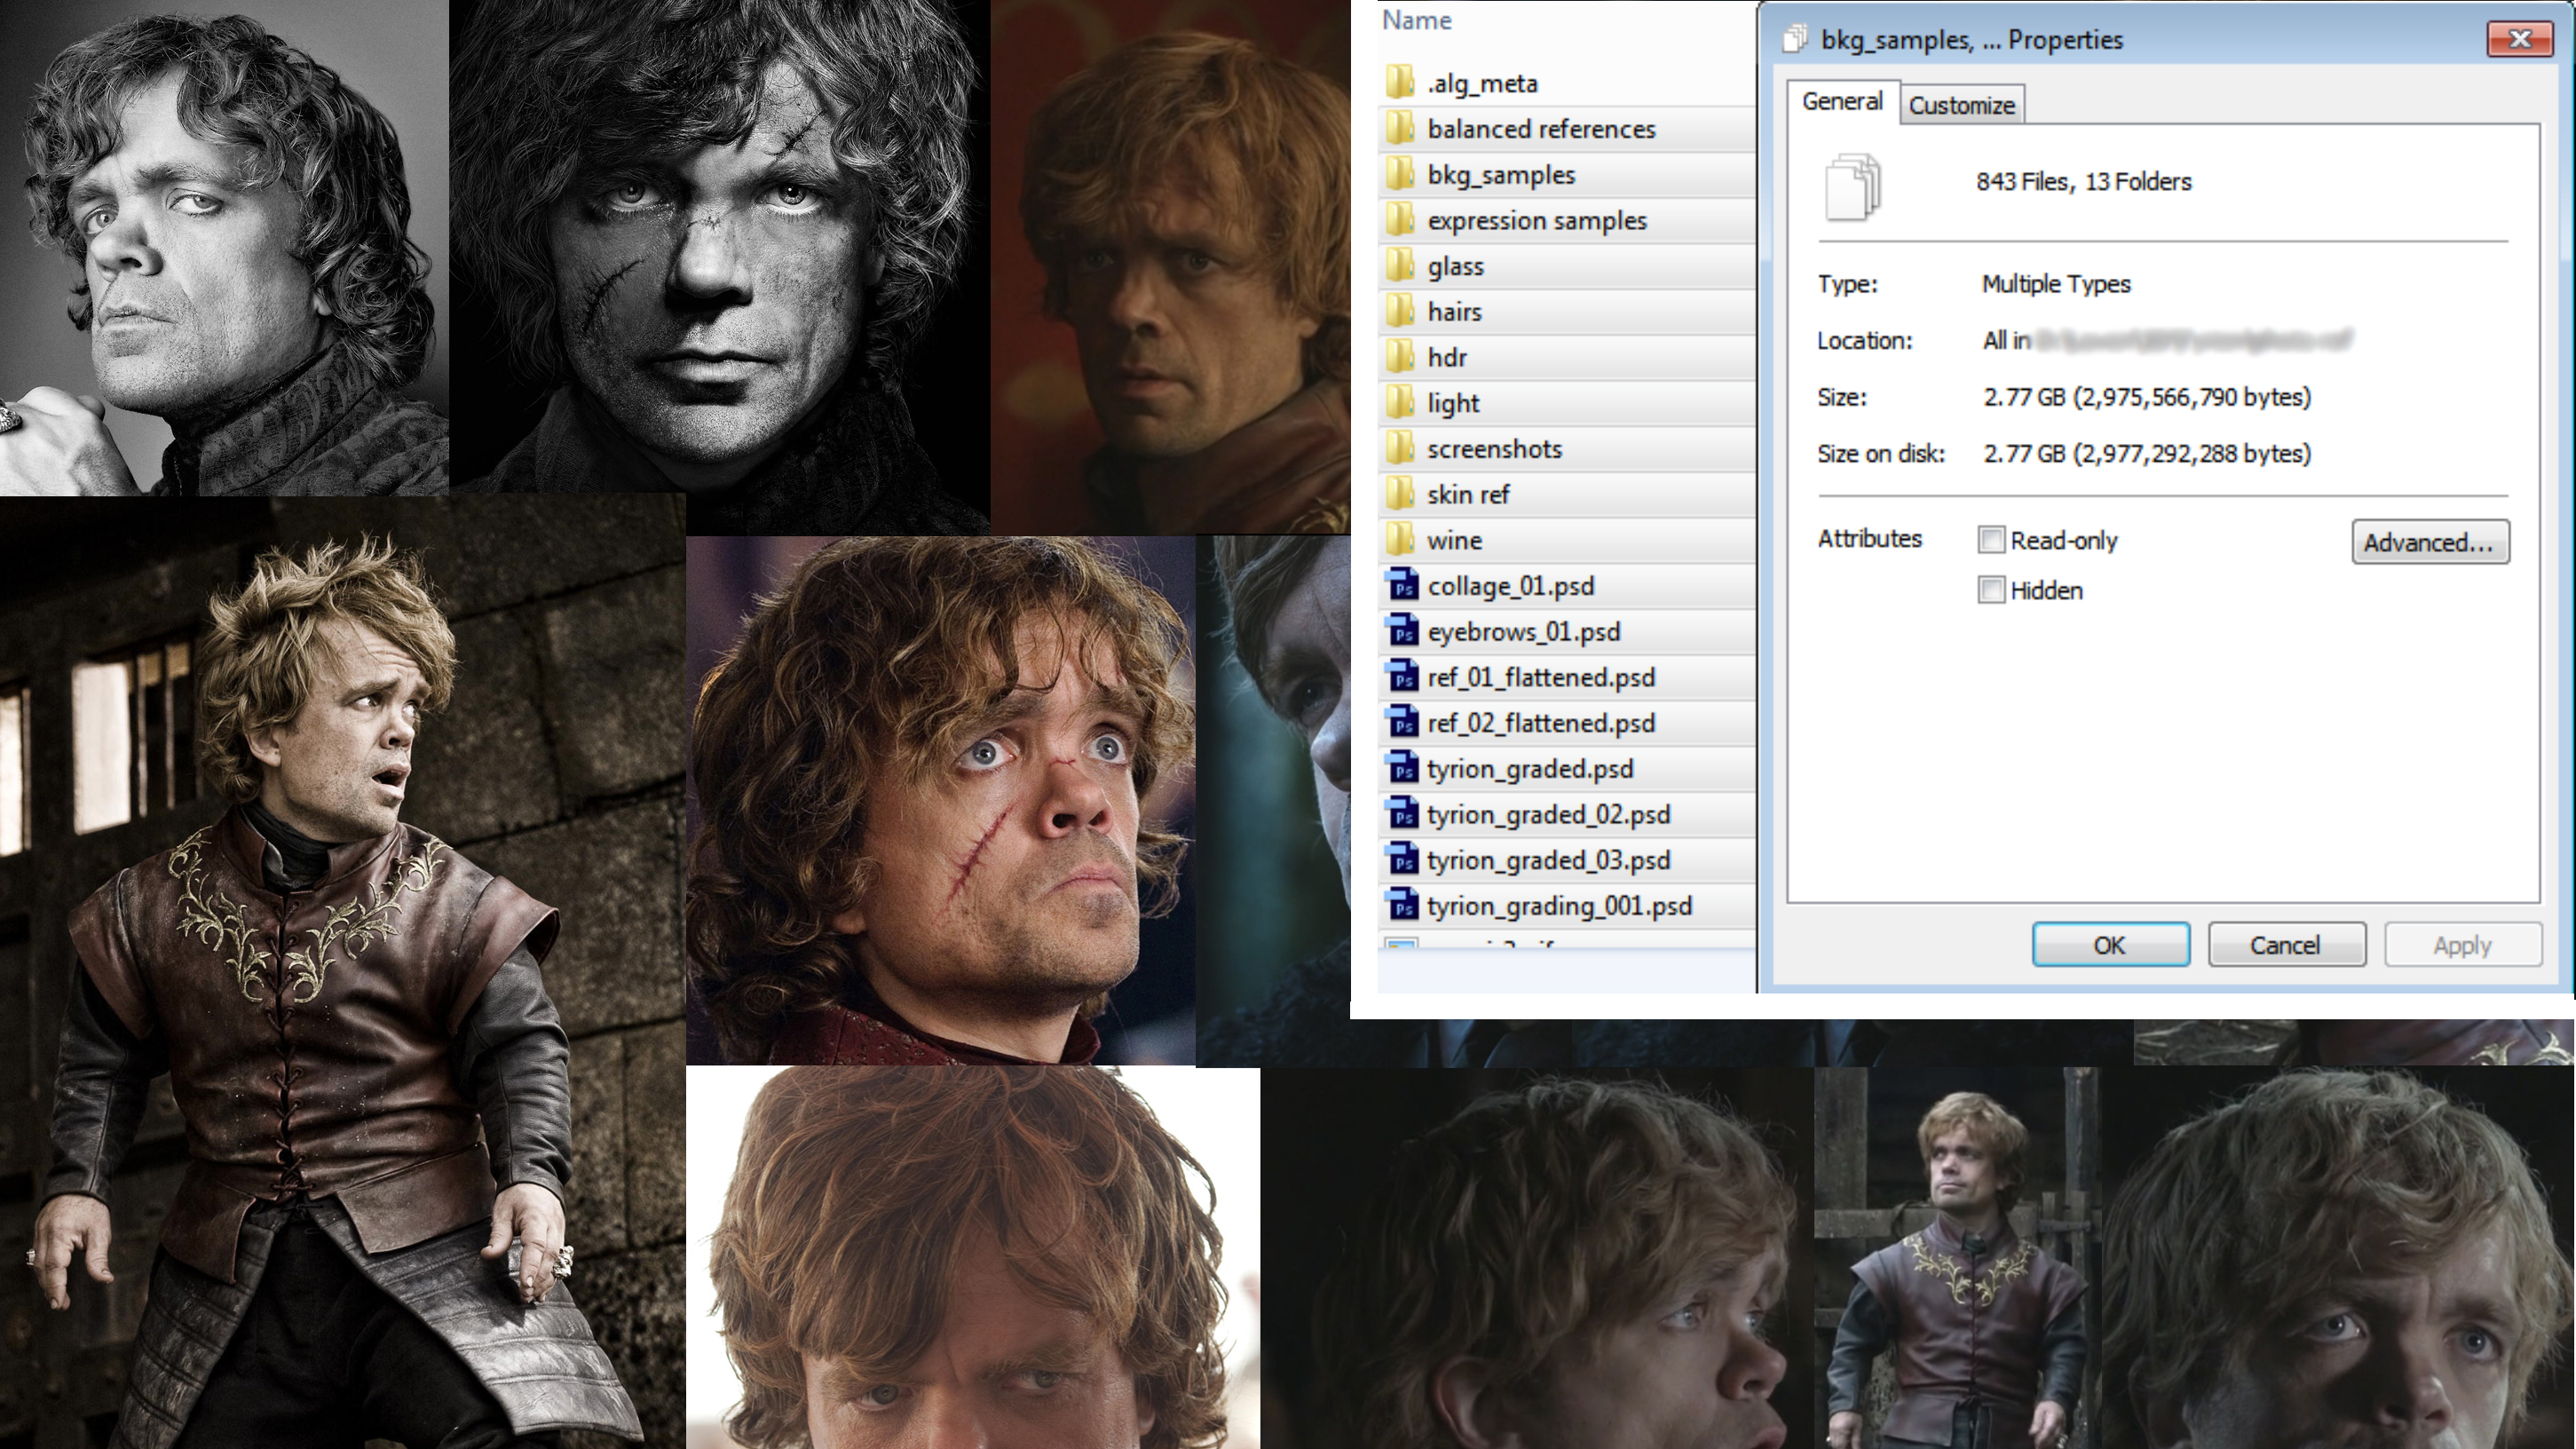
Personally, before jumping into ZBrush, I love spending time finding references to get ideas about the pose I want to give my character. This is important for two reasons: we are probably working with a limited selection of resources, and depending on the quality and number of photos we find online, we could settle on an initial idea for the pose and the camera angle.
02. Sculpt the head
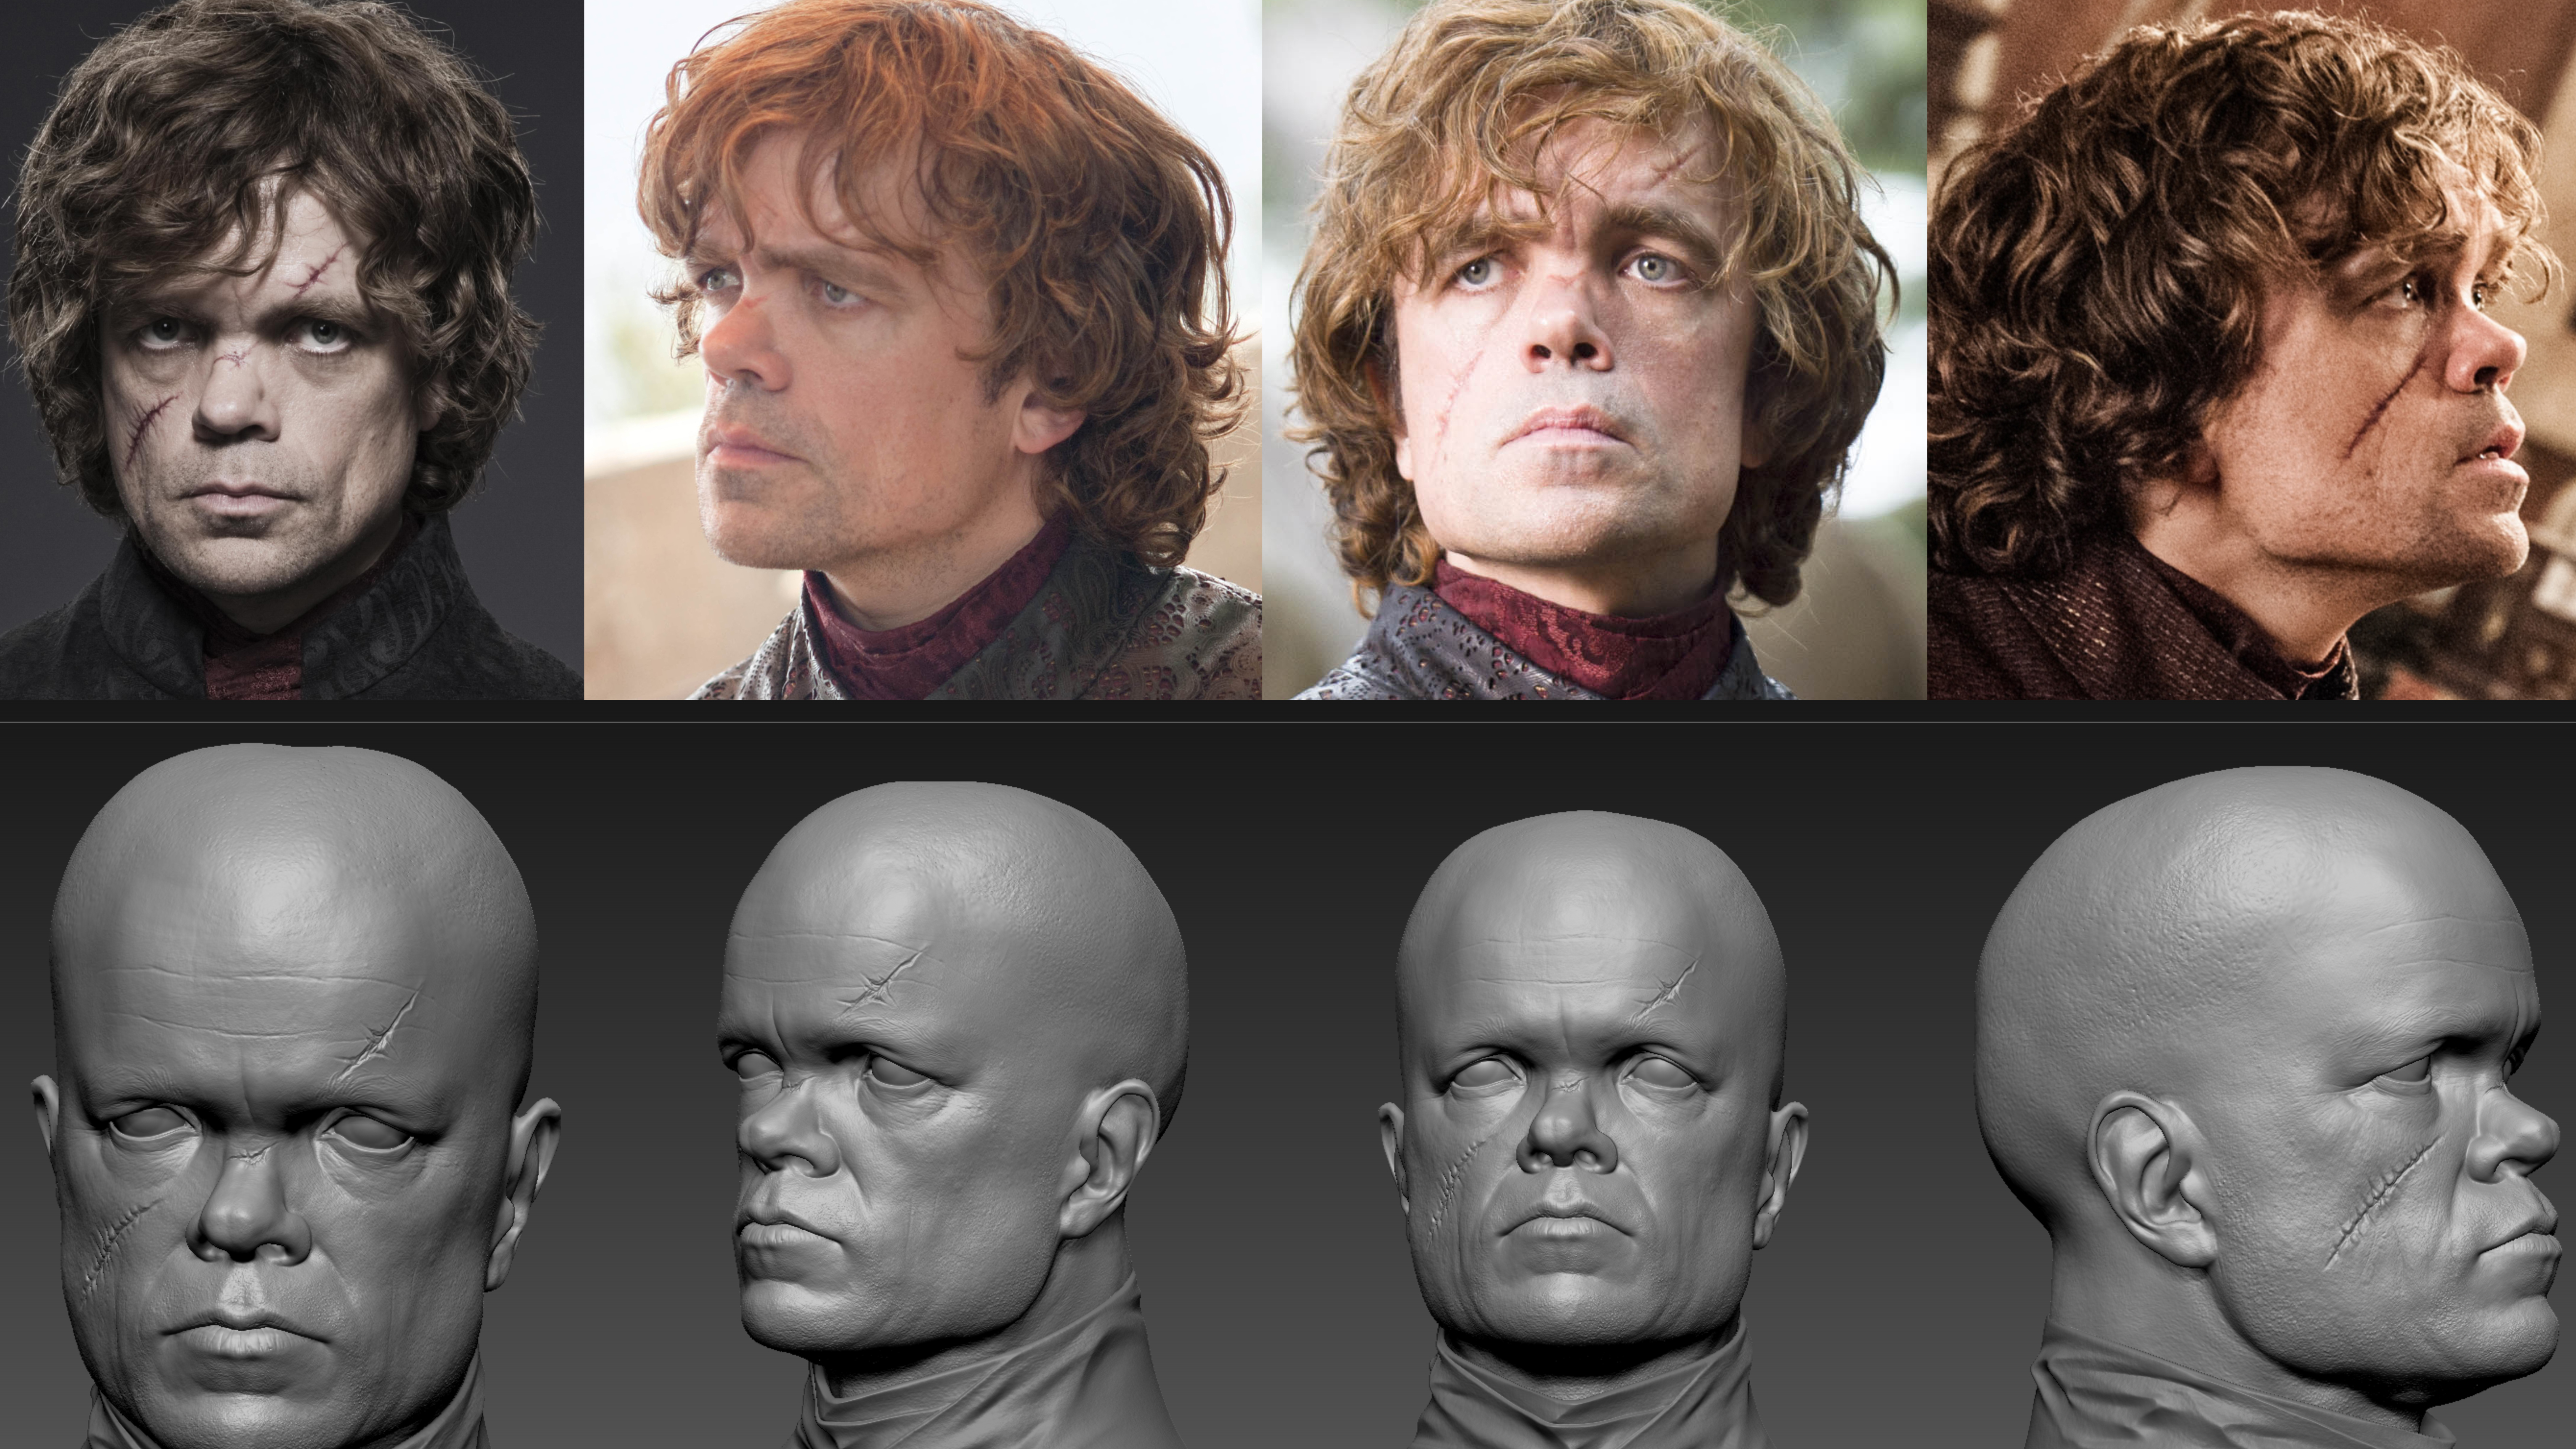
When you sculpt the head, I’d say to start with a sphere and sculpt on it. Every once in a while, use the DynaMesh tool to rearrange your mesh and update your sculpture. When you obtain a decent block-out with no details, it is a good time to make a rough retopo and start subdividing it.
From now on, I would work on different sculpting layers in order to work individually on wrinkles, skin pores and volume definition, or even just to be able to see the difference a specific area makes to the image by switching the layer on and off.
03. Create the body
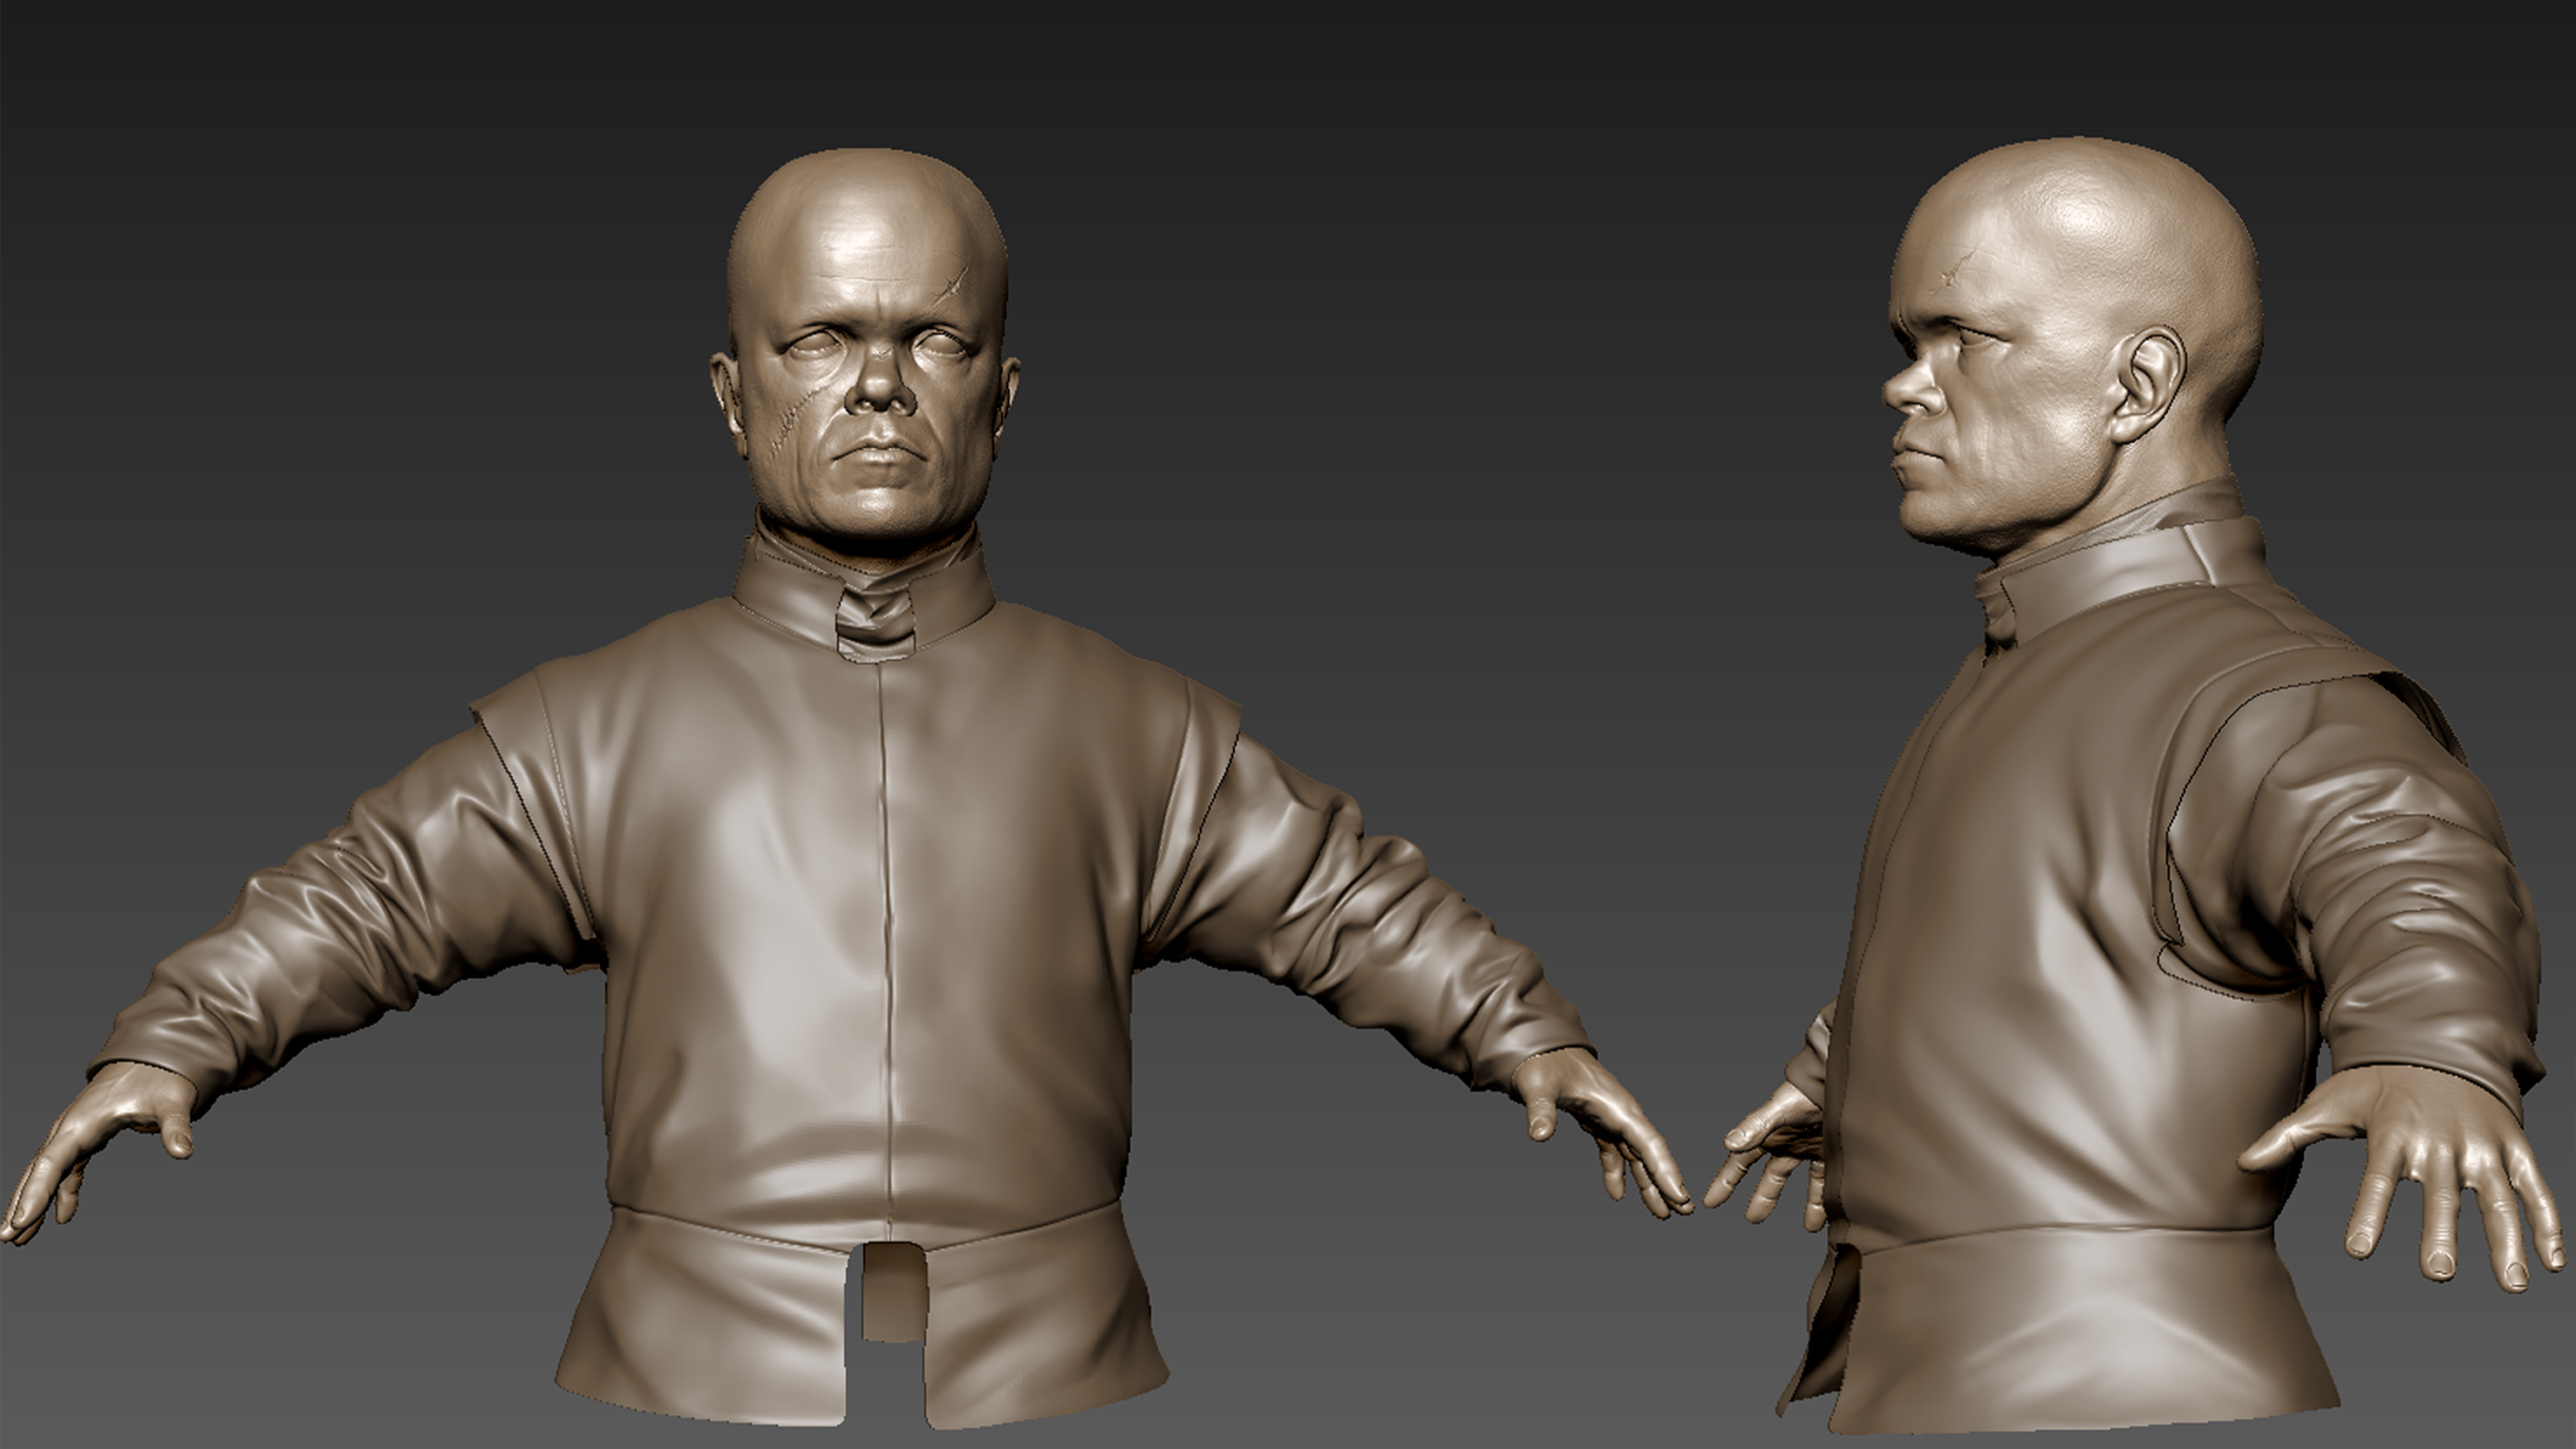
For this particular asset, I sculpted the jacket directly, instead of creating his naked body first. Because of the stiffness of the fabric, I thought it was not worth using Marvelous Designer, this time at least. I sculpted a rough model, focusing only on the main folds.
Sign up to Creative Bloq's daily newsletter, which brings you the latest news and inspiration from the worlds of art, design and technology.
For the initial T-pose model, the jacket was entirely polygonal (over 200 millions polys), but that was too heavy for this render. The final pattern was obtained via texturing. The T-pose render is on my ArtStation page.
04. Sculpt the rings
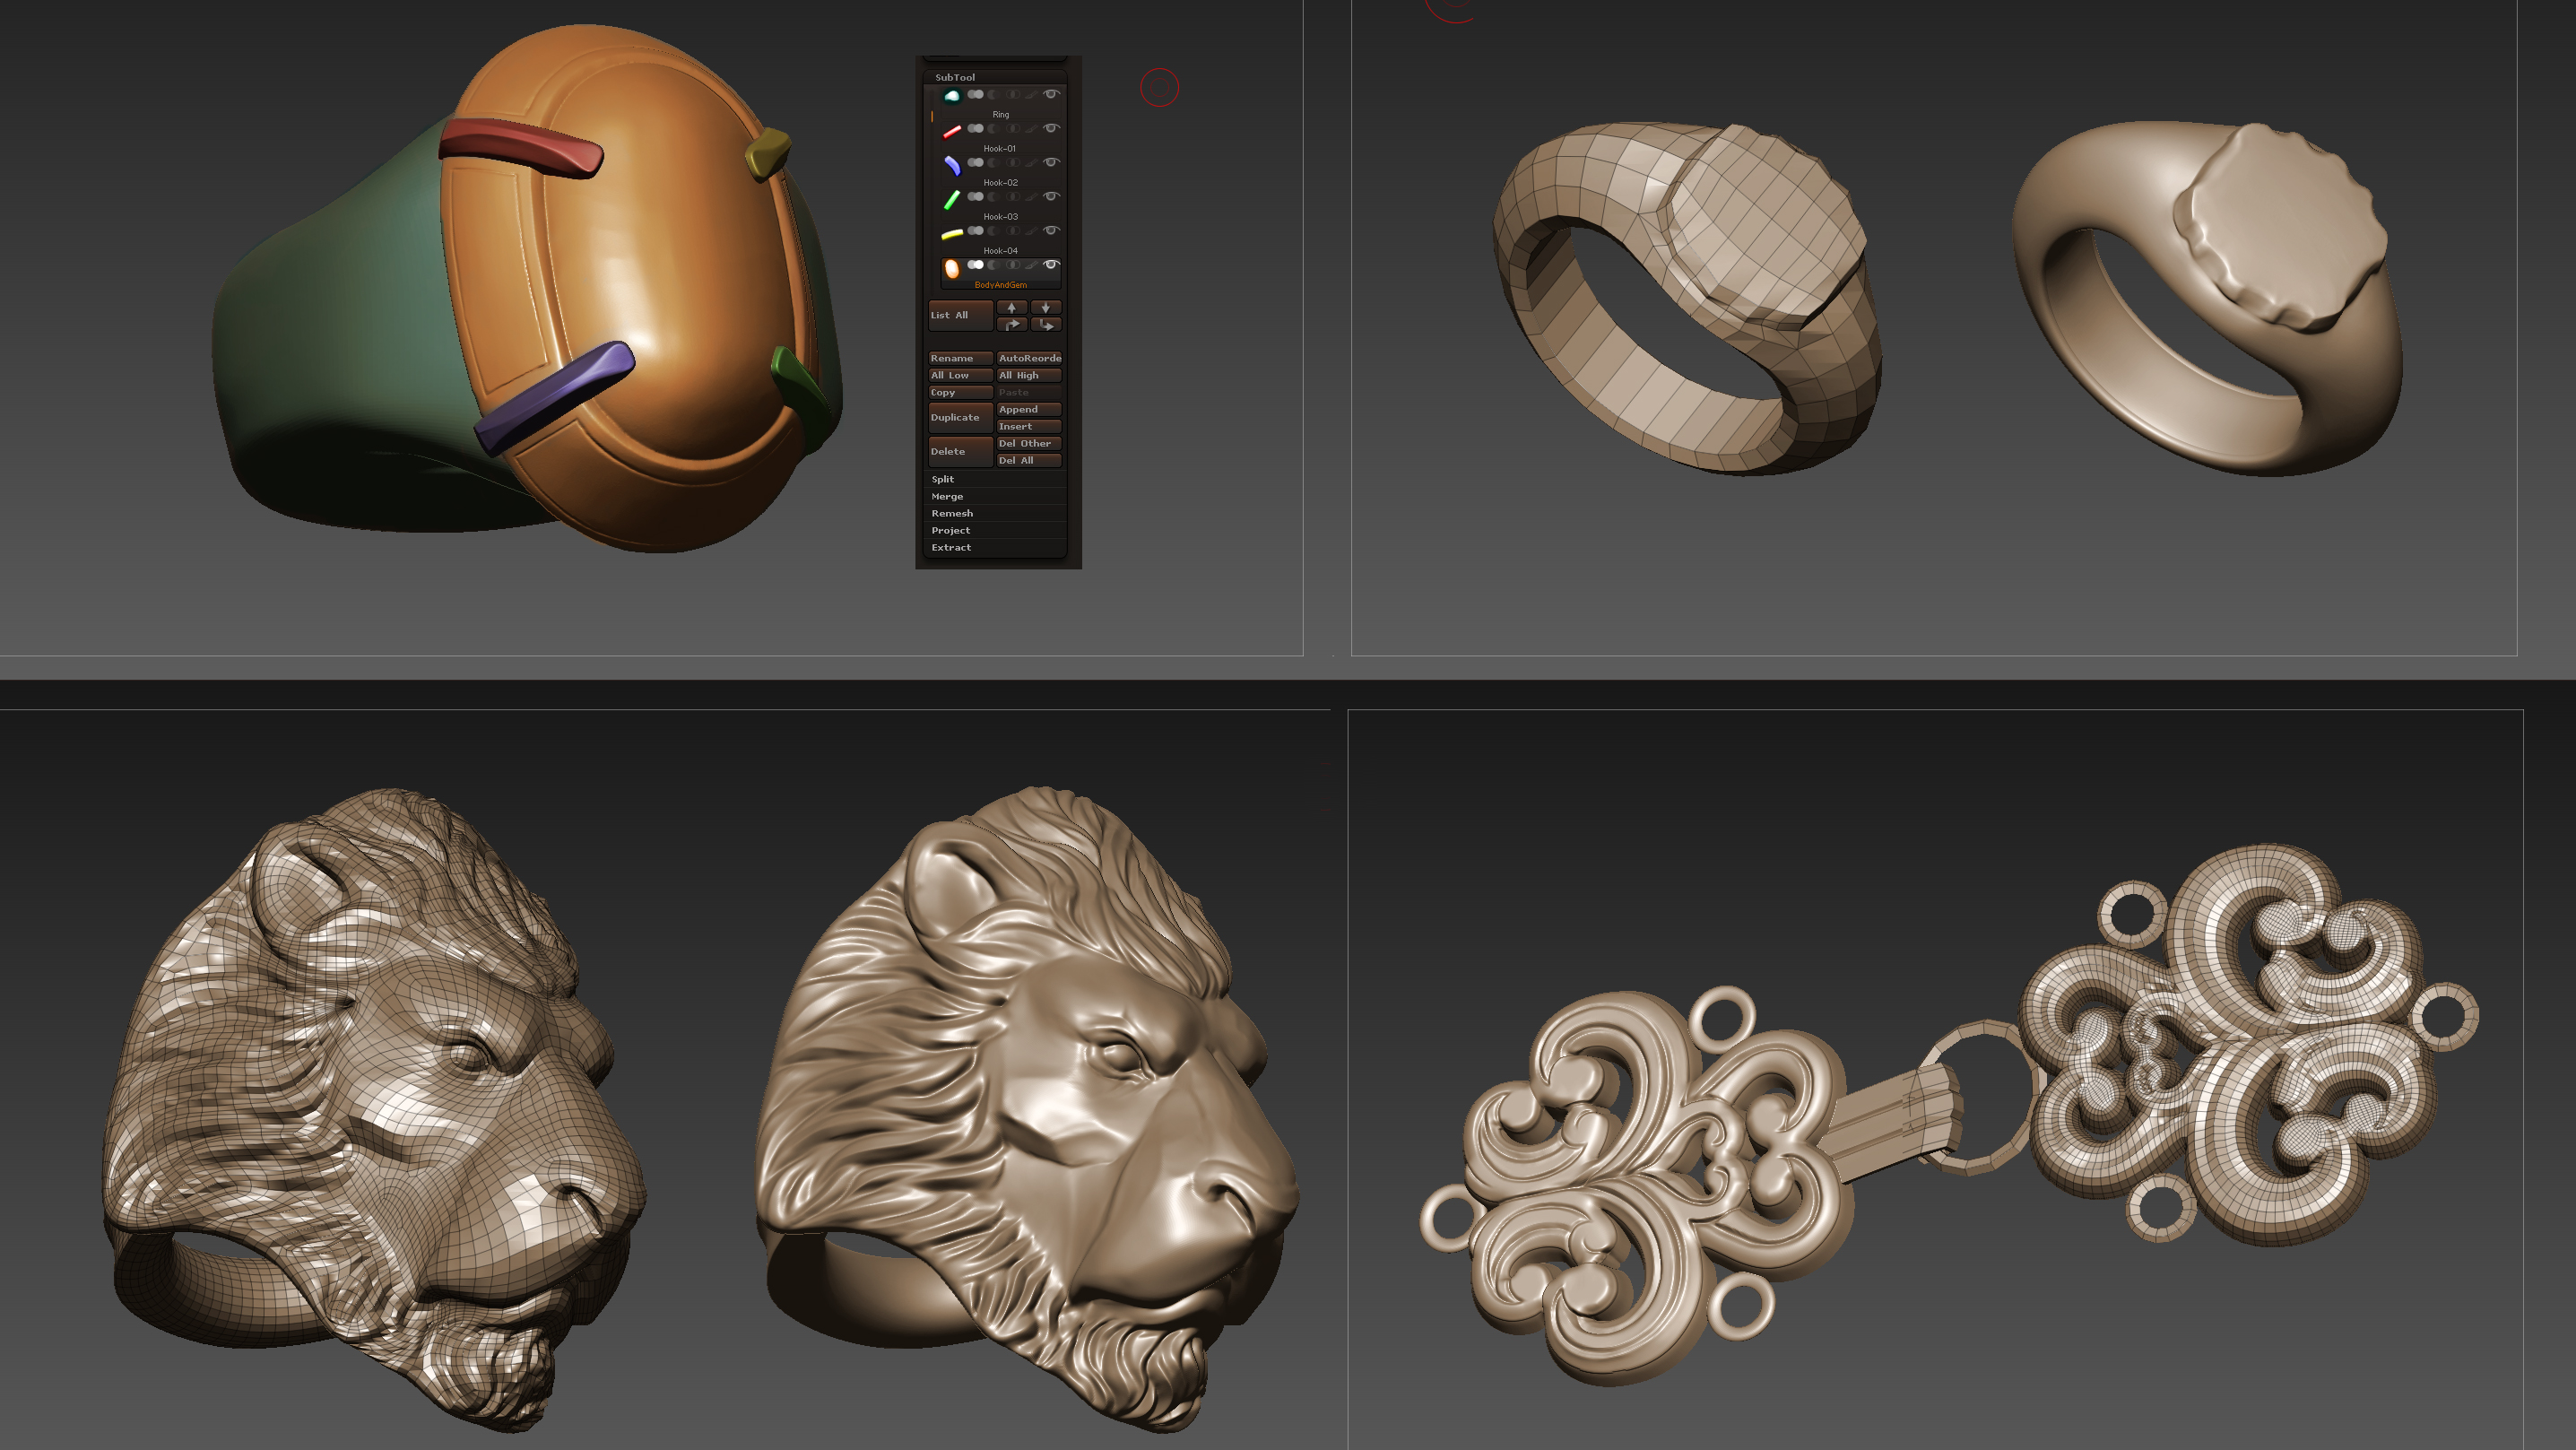
I sculpted the rings in ZBrush, one at a time. For the ruby ring, the metal material should be separate from the gem. This will help you when rendering out the ruby’s refraction. I created one of the hooks covering the ruby, duplicated it three times and placed the copies on each side of the ring. The jacket buttons were modelled in Maya and detailed in ZBrush.
05. Retopology in Maya
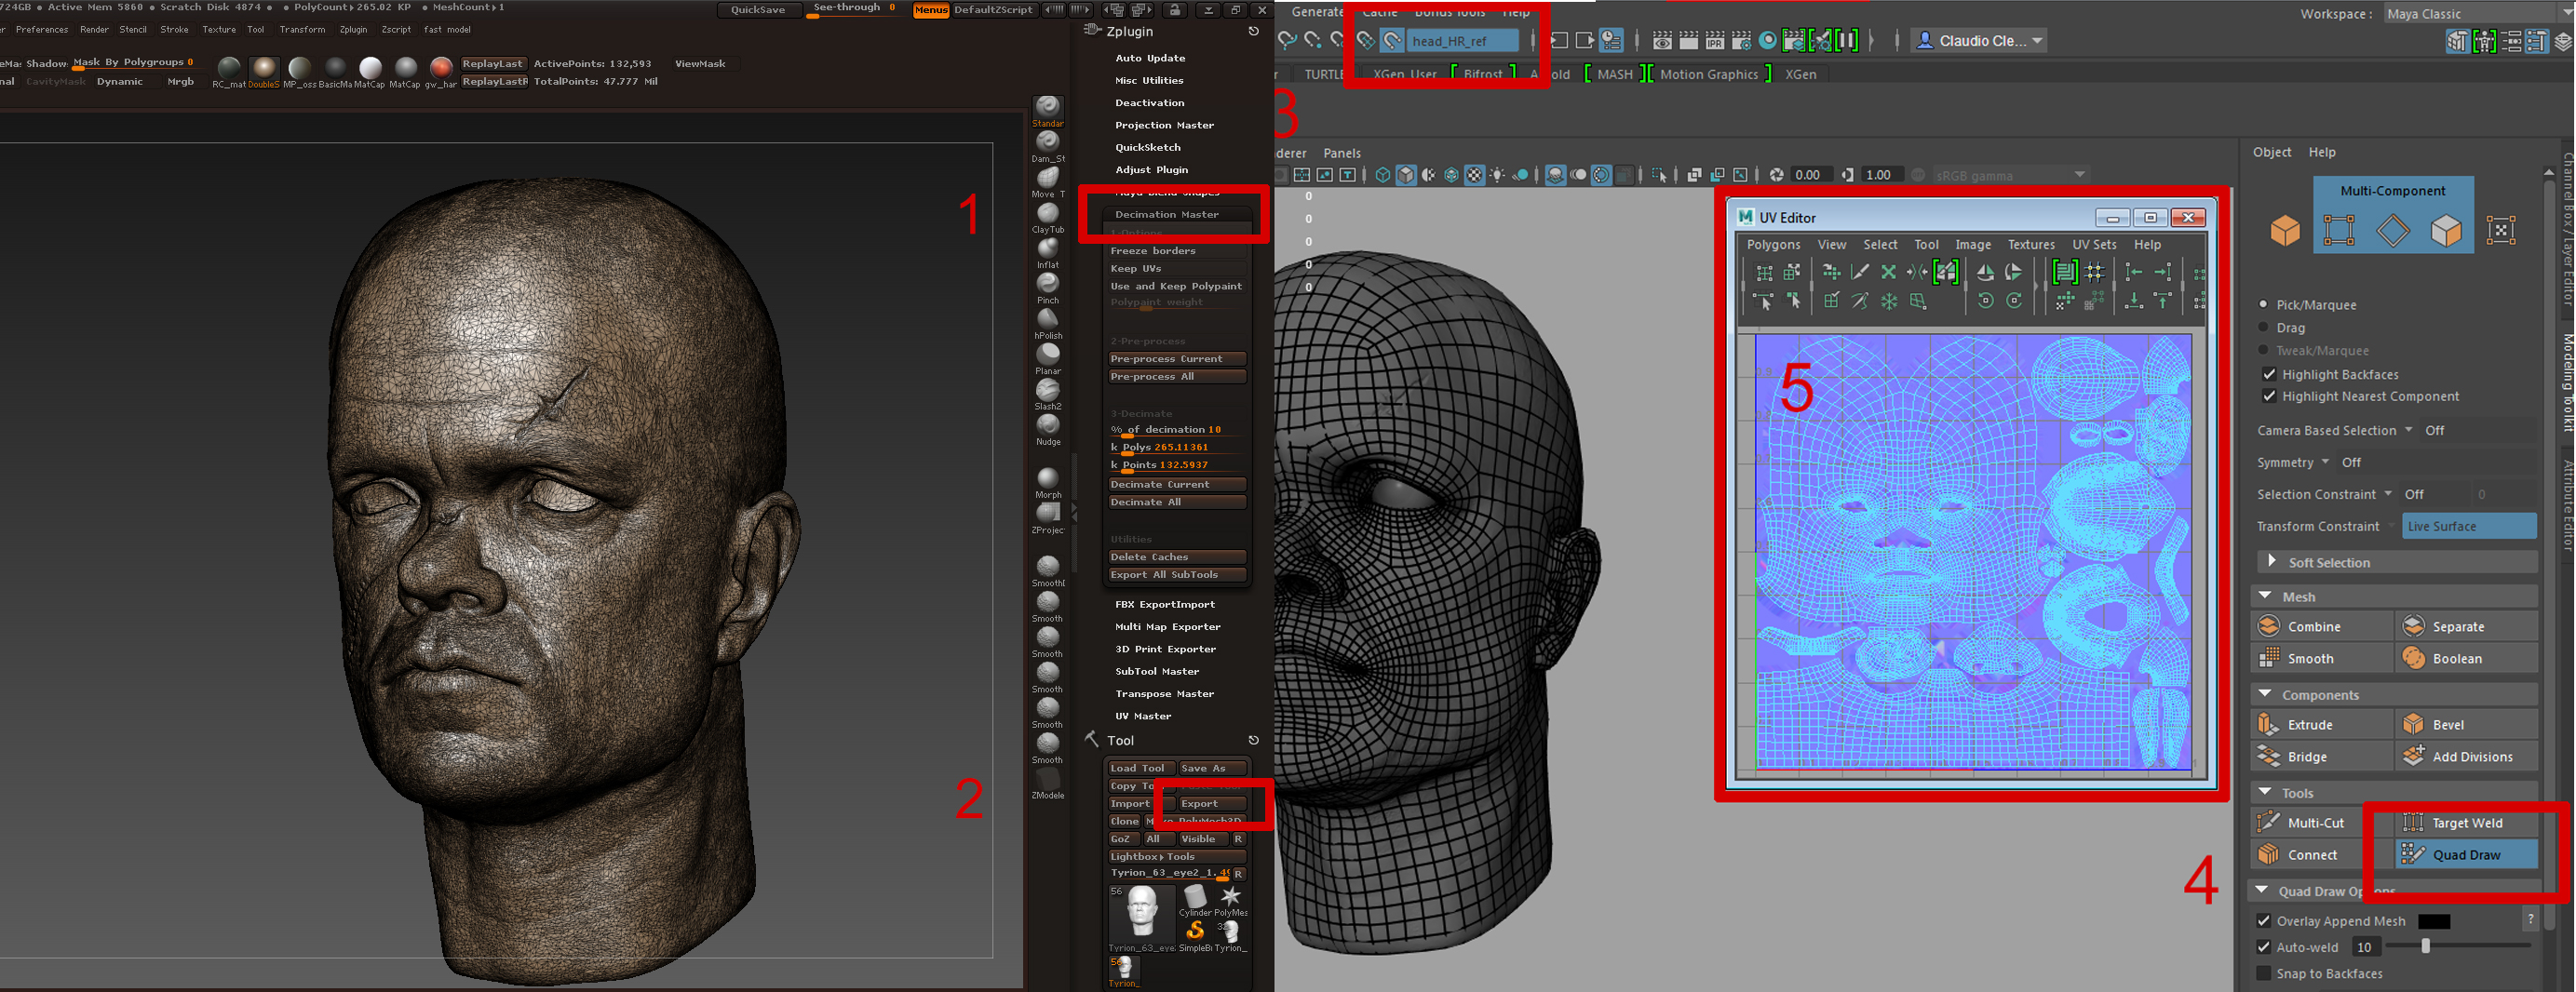
After finishing the high-res sculpture (with no hairs), I optimised it with Decimation Master, from the Zplugin palette, and exported it in Maya to retopologise it. In Maya, make the decimated high-res mesh live and, in Modeling Tool Kit, activate the Quad Draw tool.
From now on, you’ll be able to create new topology directly on top of the high-res mesh. Once I created my final meshes for the head, jacket, buttons, hands, and rings, I spent some time creating the UVs for each part of it.
06. Flask and glass modelling
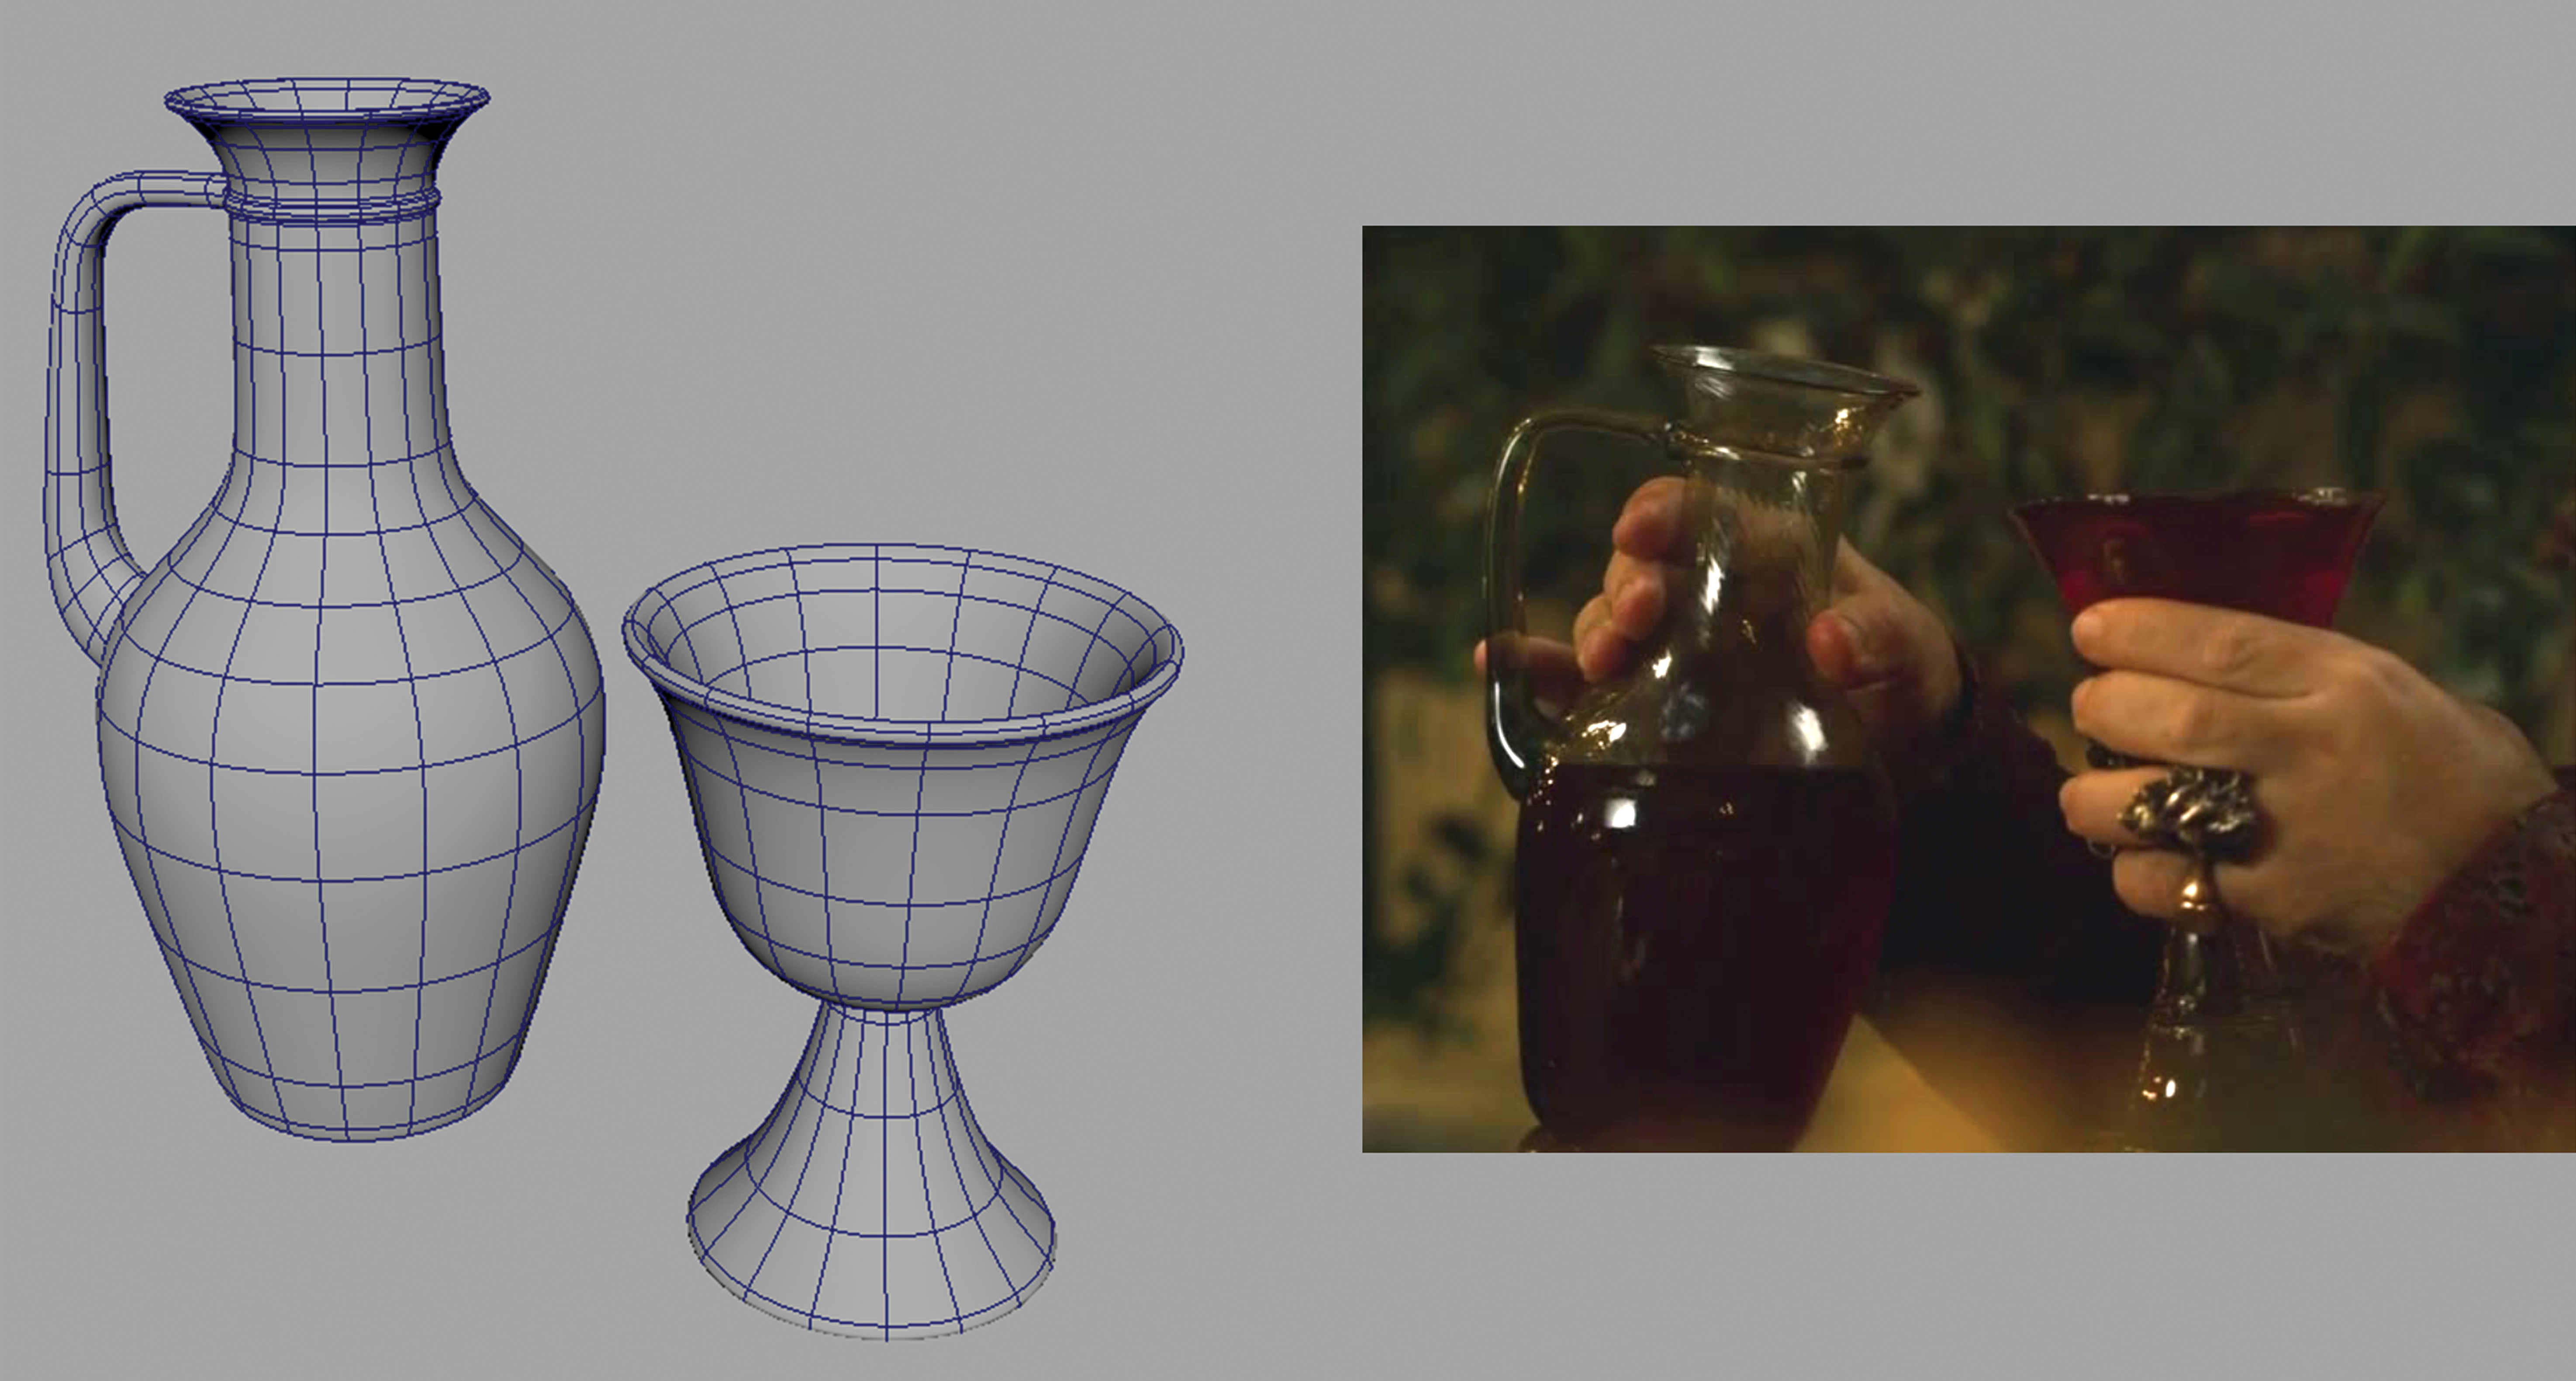
After the asset retopo, now is the point where I decided to start modelling the glass and the flask in Maya, according to my photo references. Then I exported everything to ZBrush for the posing. These props will be used with our final character in order to create a sense of narrative – and to give our character a sense of personality – in the final image.
07. Pose the asset
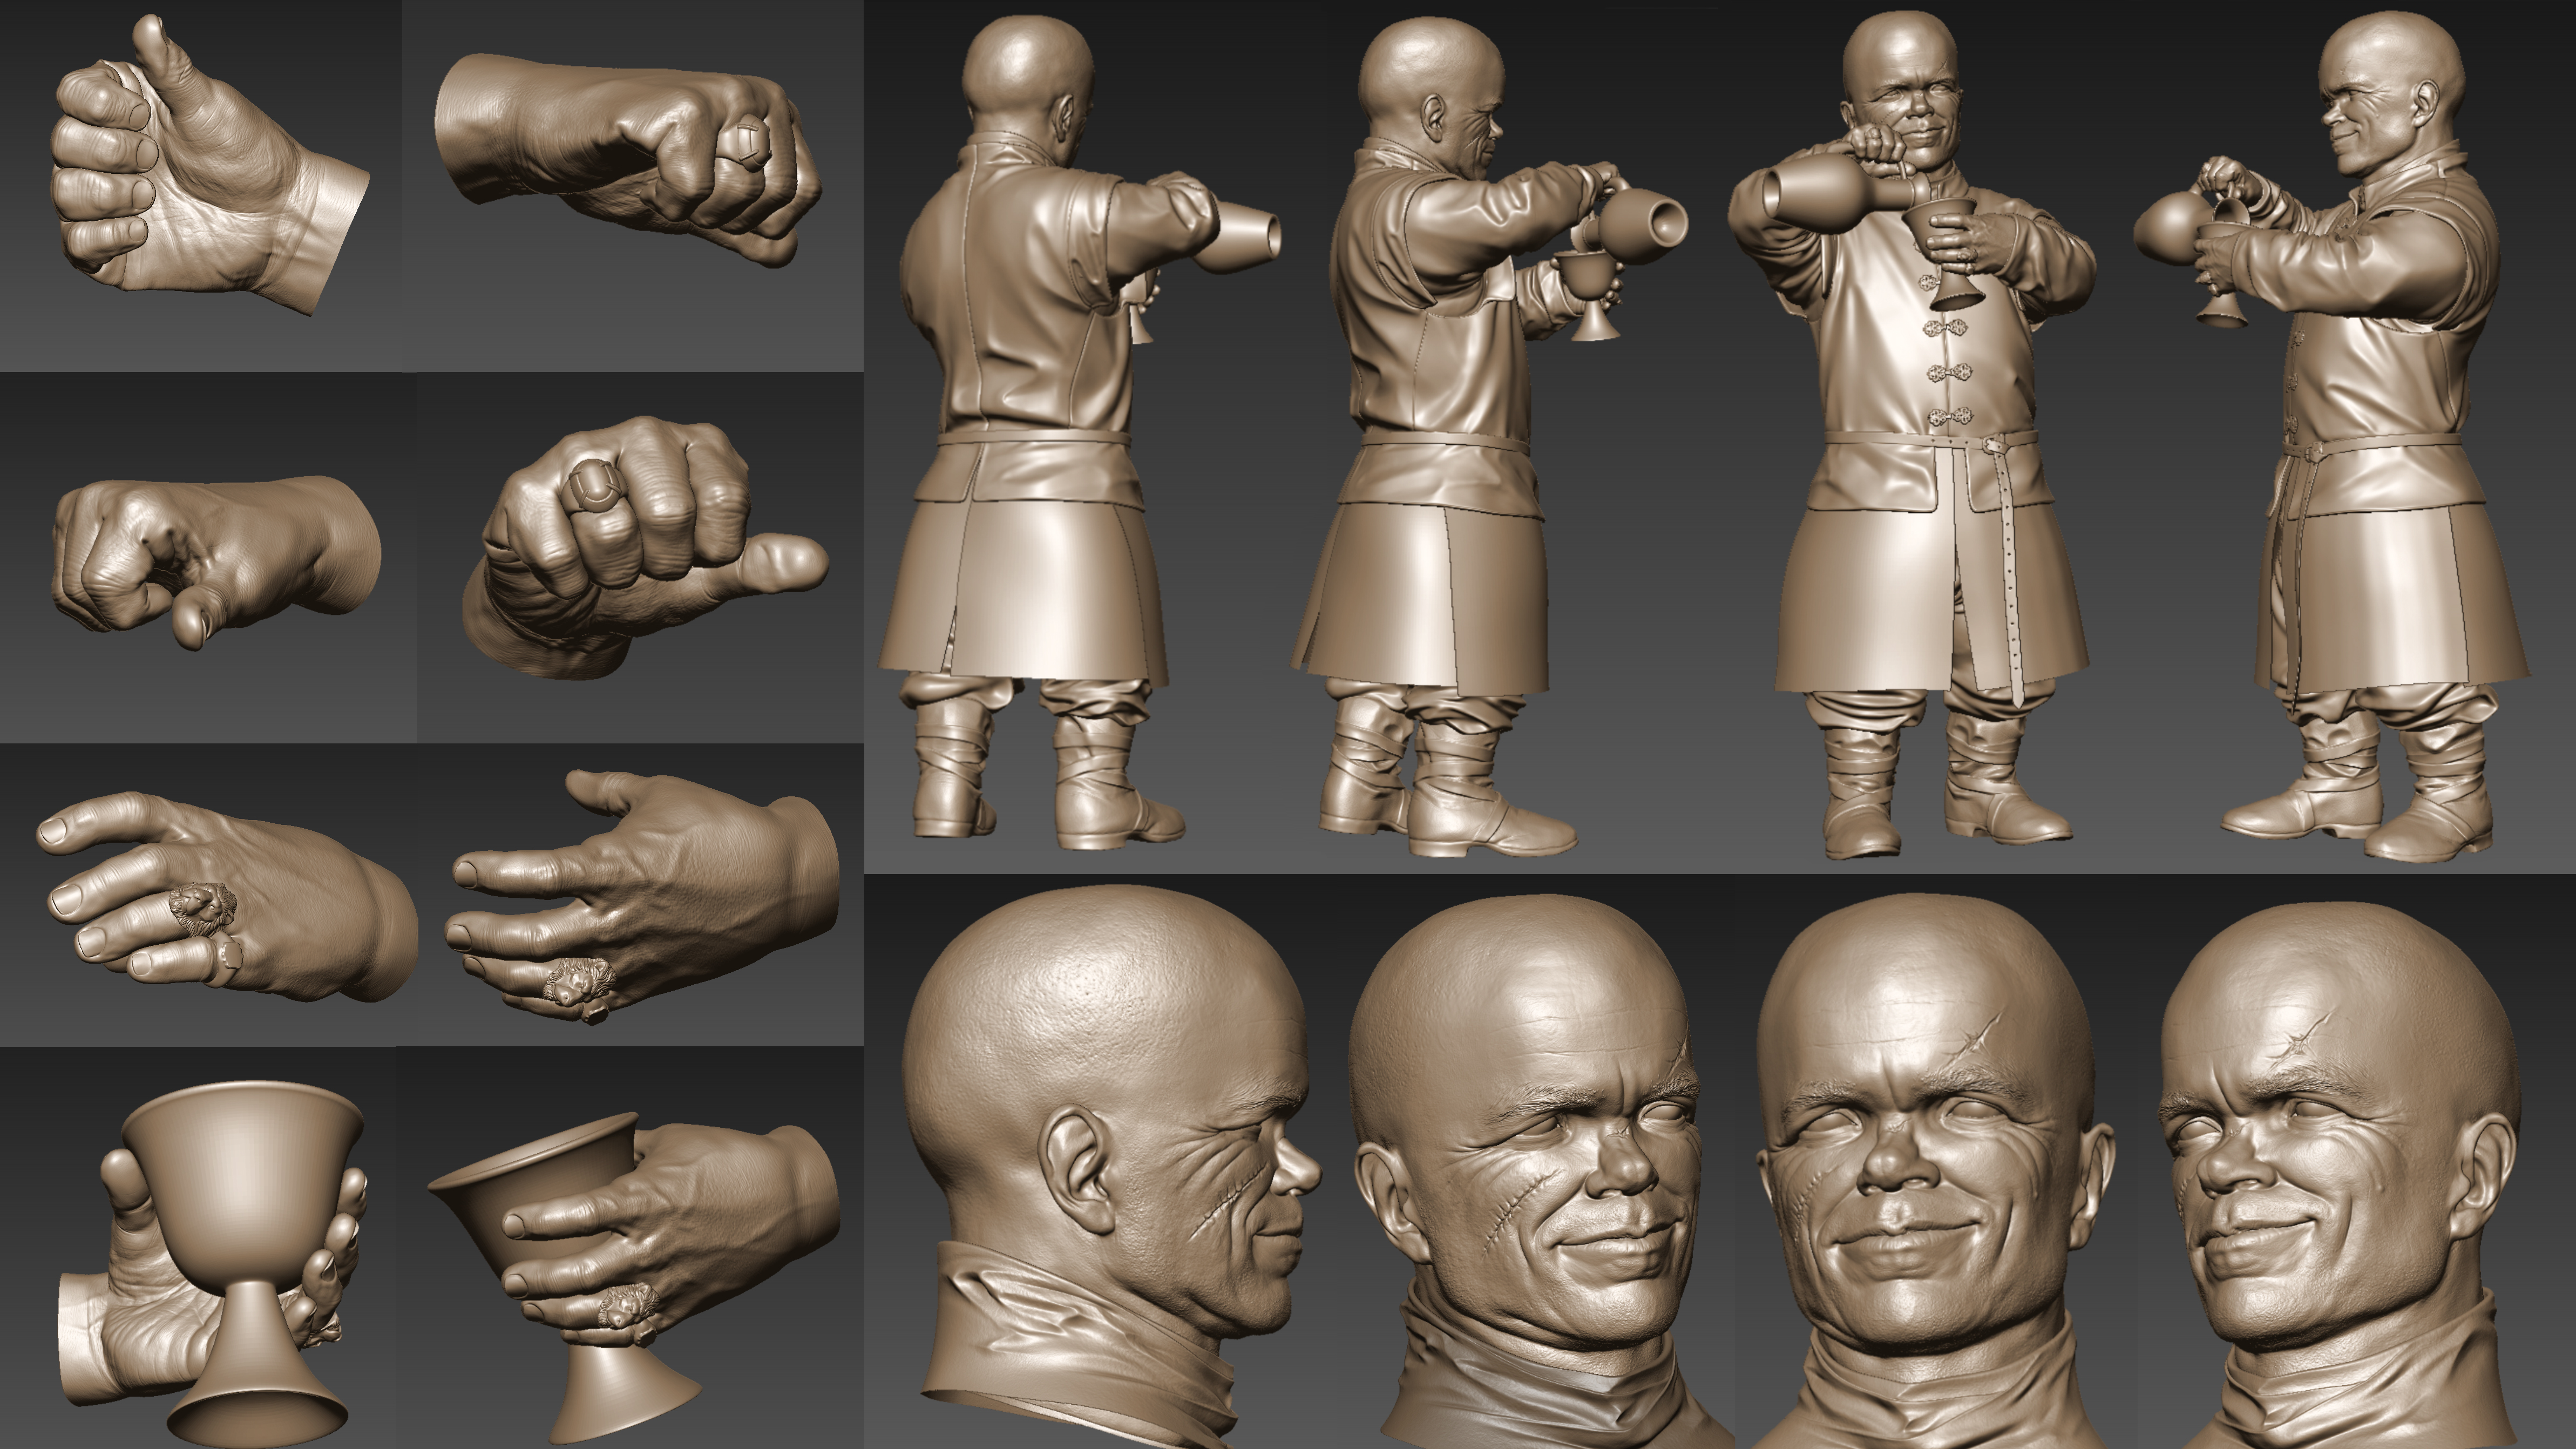
I usually prefer to project my high-res sculpture on a subdivided version of my retopo meshes. This way, whatever adjustment I make on my high-res sculpture, I’ll be updating my low-res mesh at the same time. At this point, using the Transpose Master, I force my asset into pose. After that, I’ll have to re-tweak clothes wrinkles and the skin on the hands and face.
08. Wine sculpting
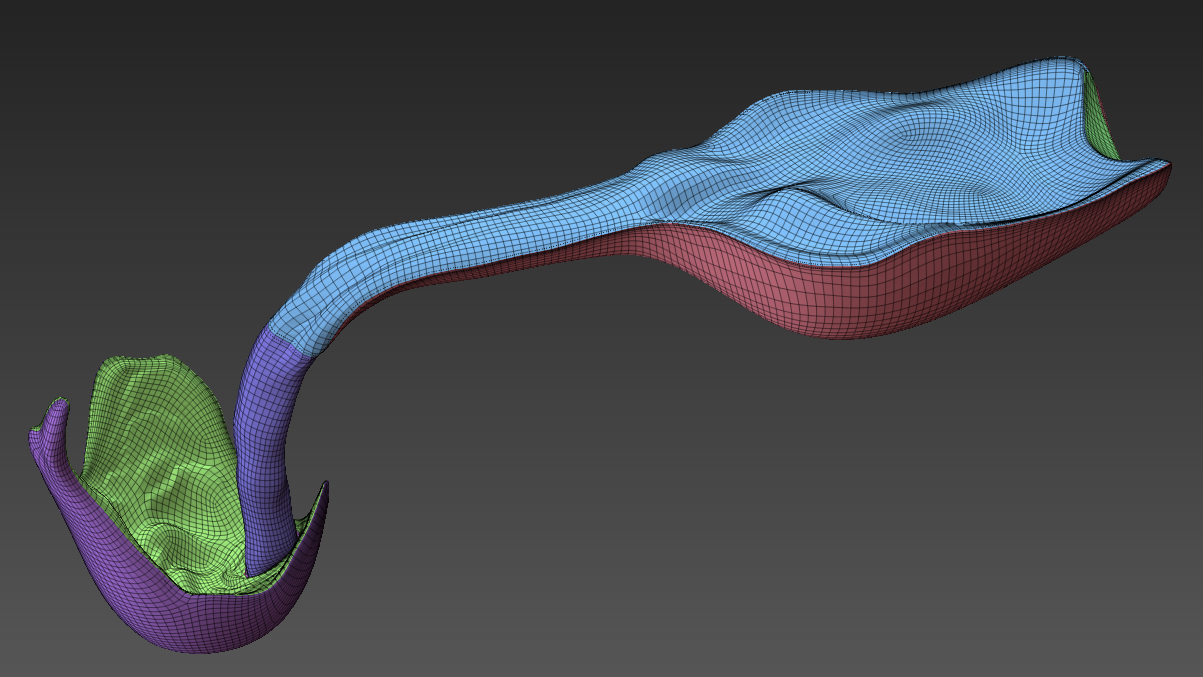
After posing the asset, and having both the flask and the glass in position, I sculpted the wine in ZBrush, starting with a sphere and using DynaMesh often, until I obtained a decent rough shape. I divided it into some polygroups in order to split the side shape, and connected it to the flask, the glass, and the top surface, where I wanted the wine to be wavy. At that point I used ZRemesher to achieve my final mesh, and then subdivided it in order to add some more detail.
09. Eyeballs mesh setting
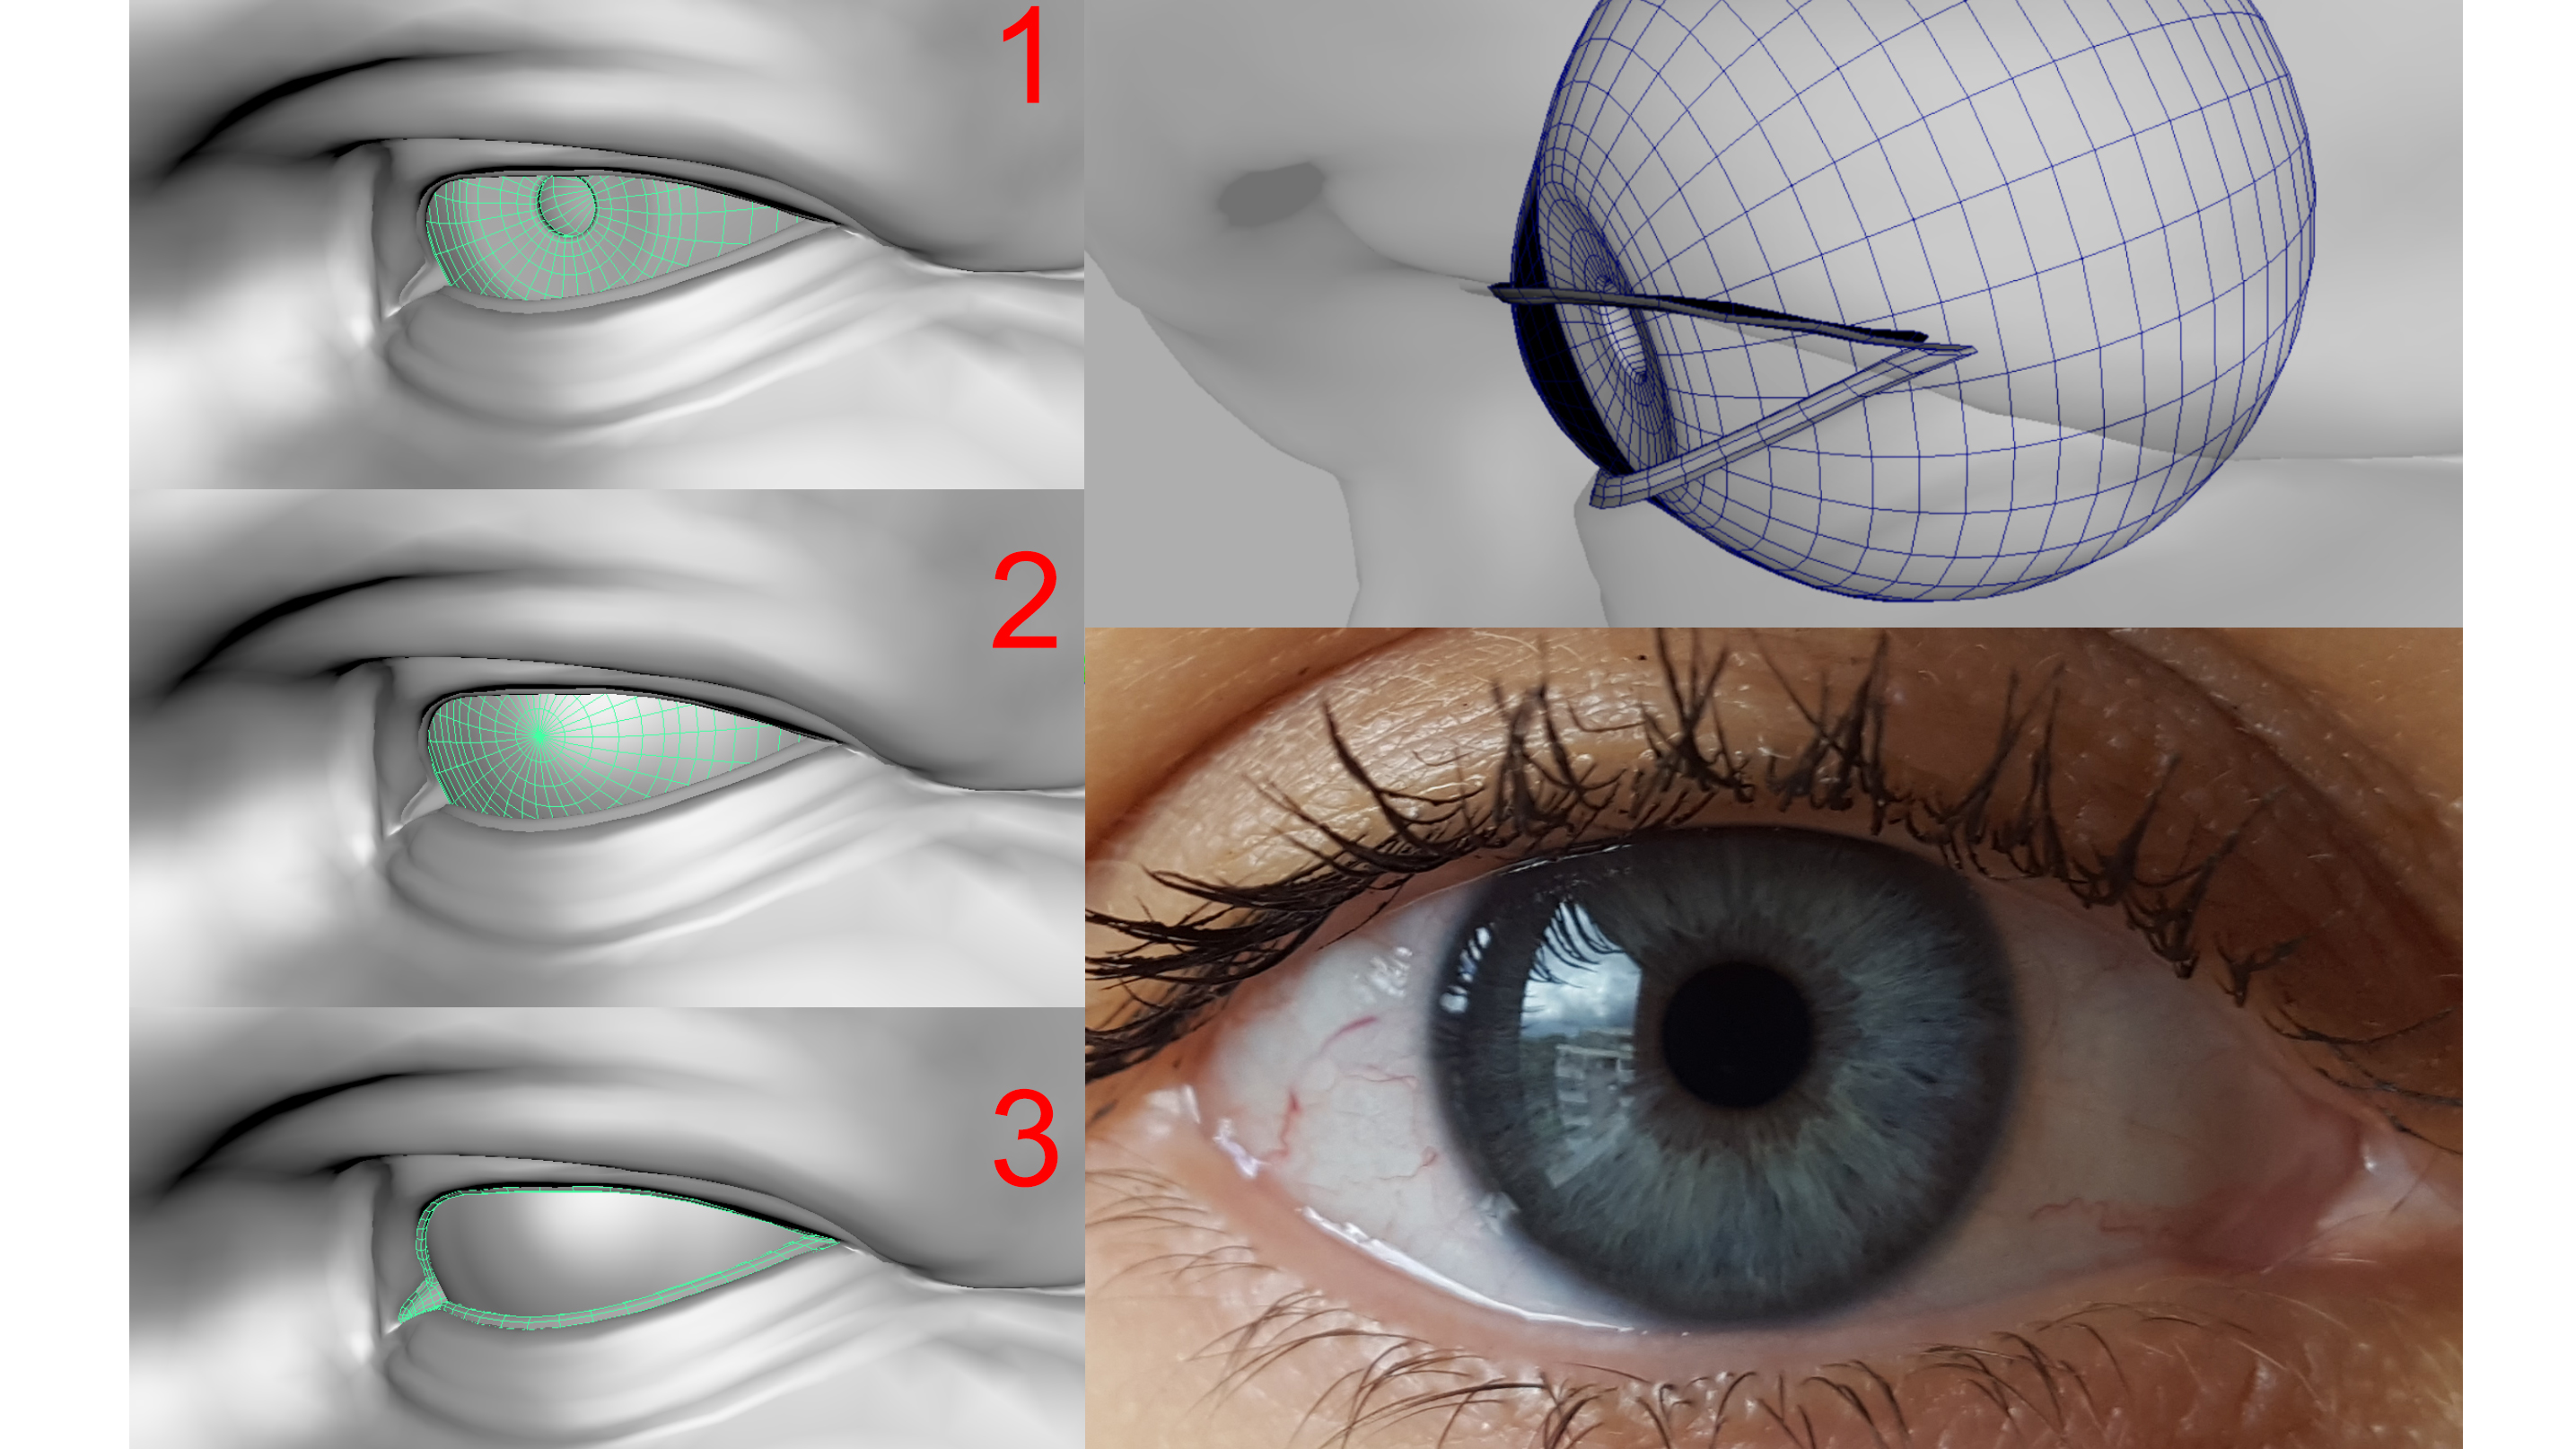
I split the eyeballs in three parts: 1) the iris with the sclera, 2) the cornea with the thin wet layer on top of the eye, 3) the meniscus. Having three meshes helped me obtain the most realistic material in Marmoset. The iris has its own roughness but, without having a second mesh for the cornea, that roughness would be visible in the reflection highlight, which would be wrong.
10. Hair strain grooming
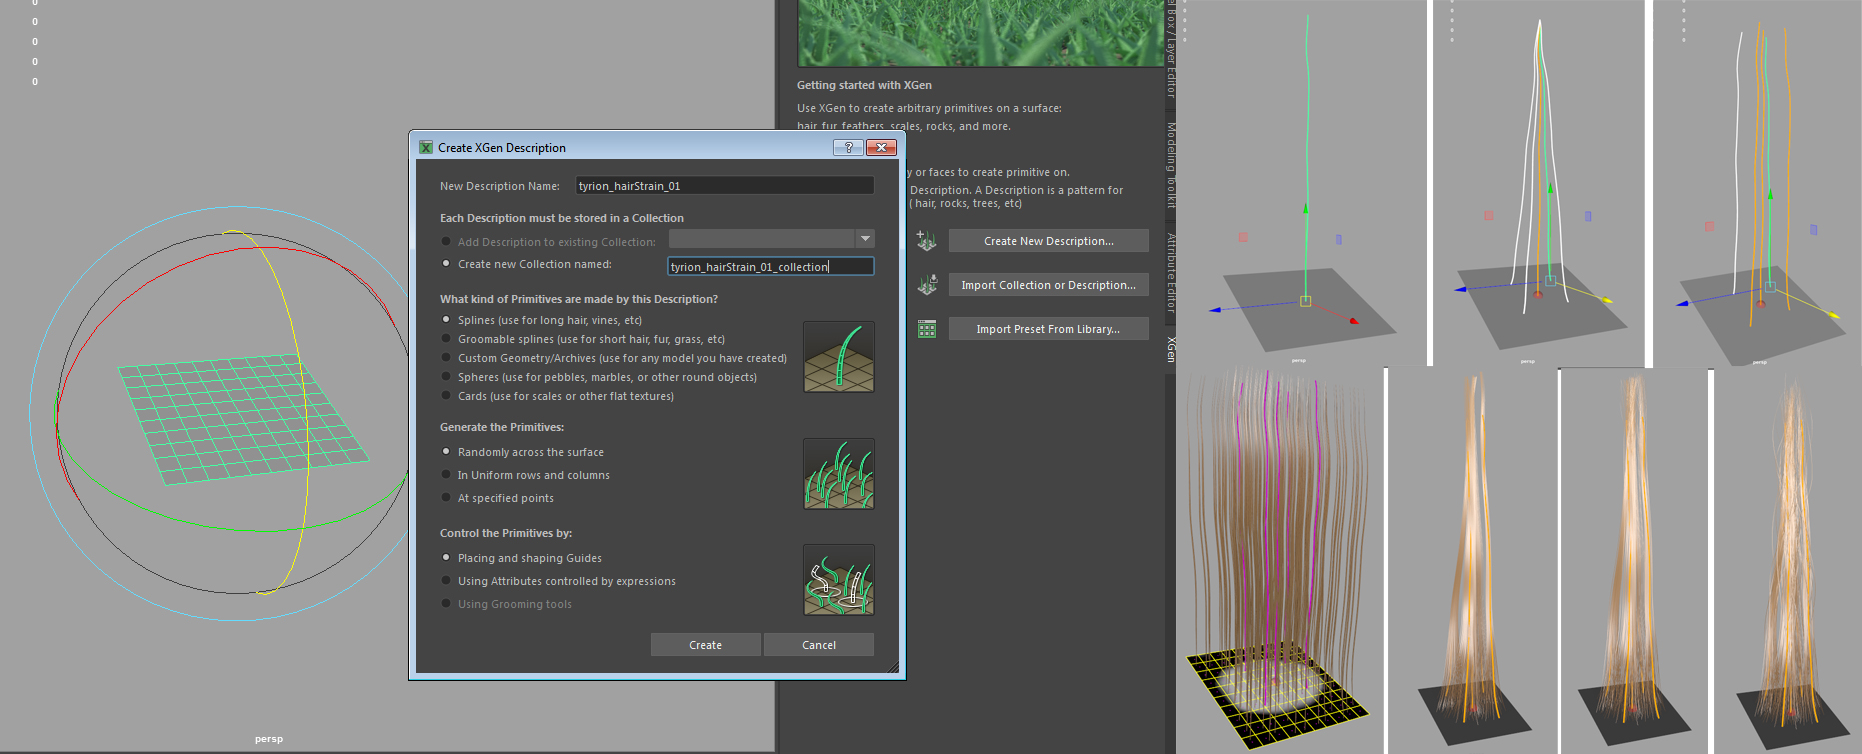
I used XGen to grow long, single strain of hairs, to give me more texture space for longer curls. I had high-density strains for the thicker lower layer of hairs, mid-density strains for the basic layer of curls, and two or three strains for the external curls.
These were pretty dense but with a thinner shape. I used them to create scattering curls from the main thick ones. Finally, the last two strains were proper scattering hairs. These revealed a minimal amount of single hairs, used to create the scattering effect all over the head and the curls.
11. Hair texture baking
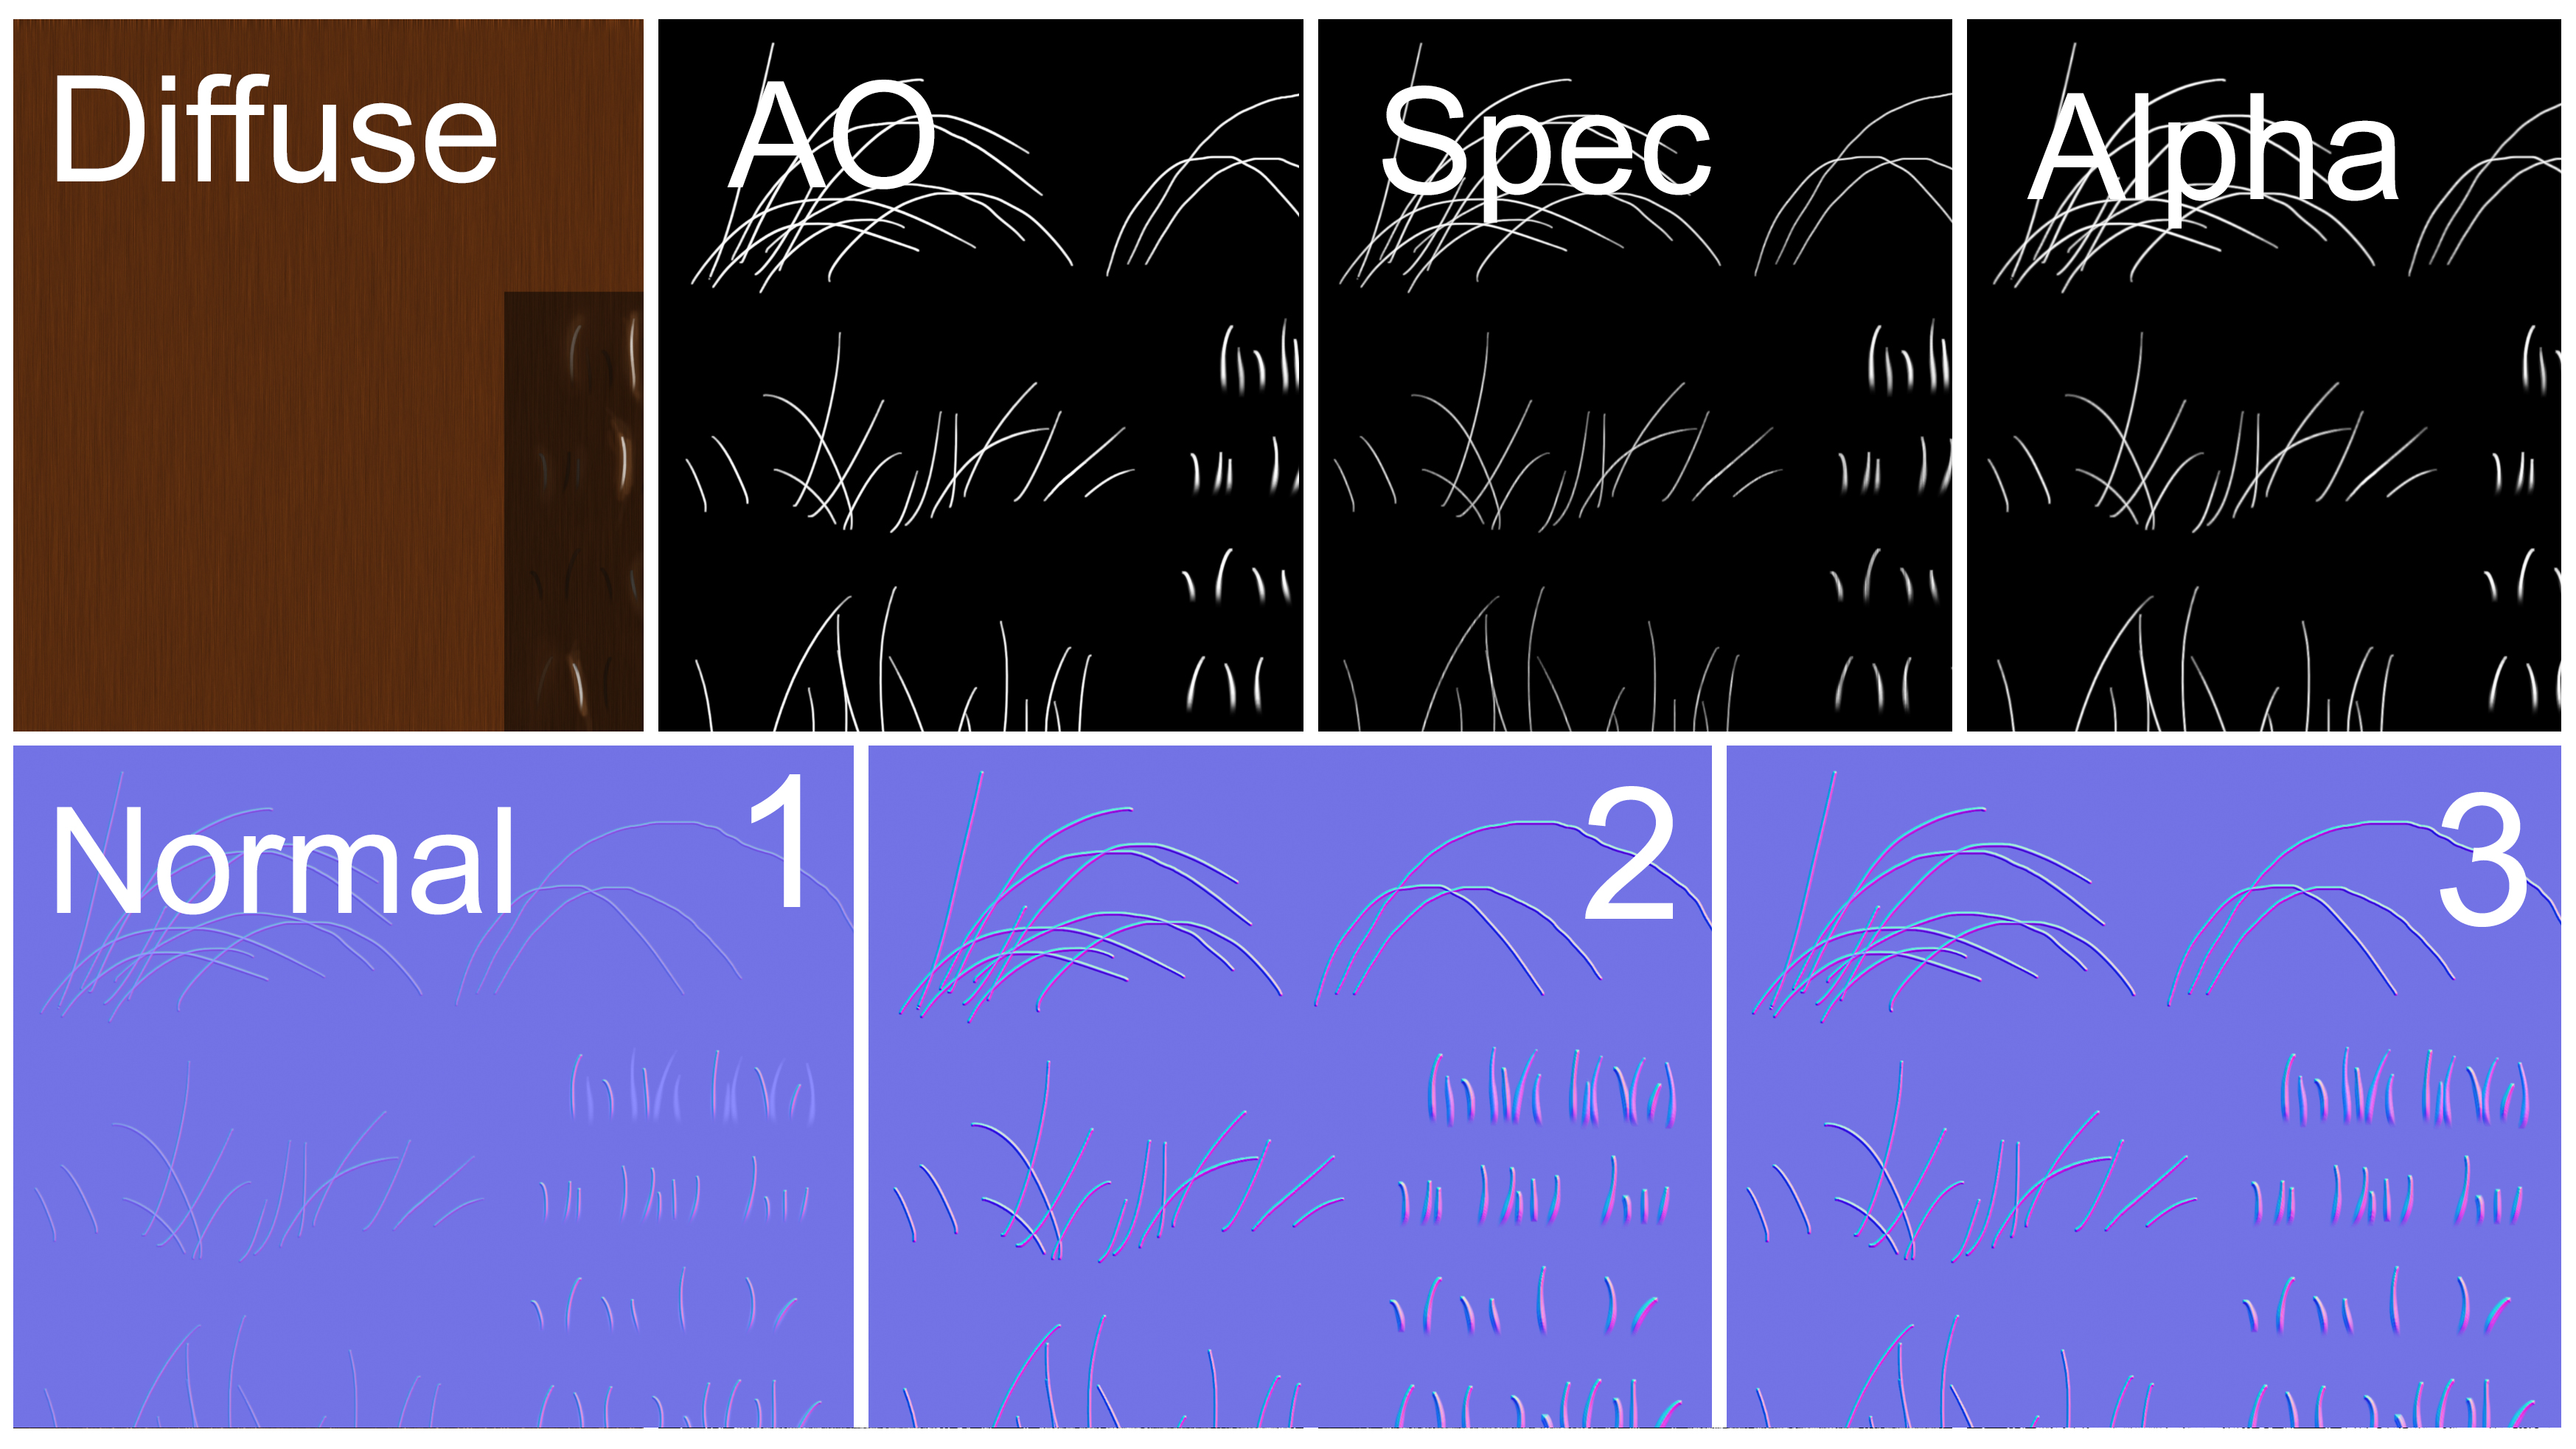
I used Arnold to bake the Diffuse and the Ambient Occlusion channels but, because the hairs were so thin, I had to use a trick to get the normal map, cavity, specular, fuzziness, and transmission textures. For the normal maps, I used Handplane Baker to project the strain onto a plane.
In Photoshop, I used a copy of the Ambient Occlusion channel to obtain another normal map layer, focused on the single hair, so I was able to get more detail on each strain overlaying this second layer. I also added some manual variation.
12. Placement of hair cards
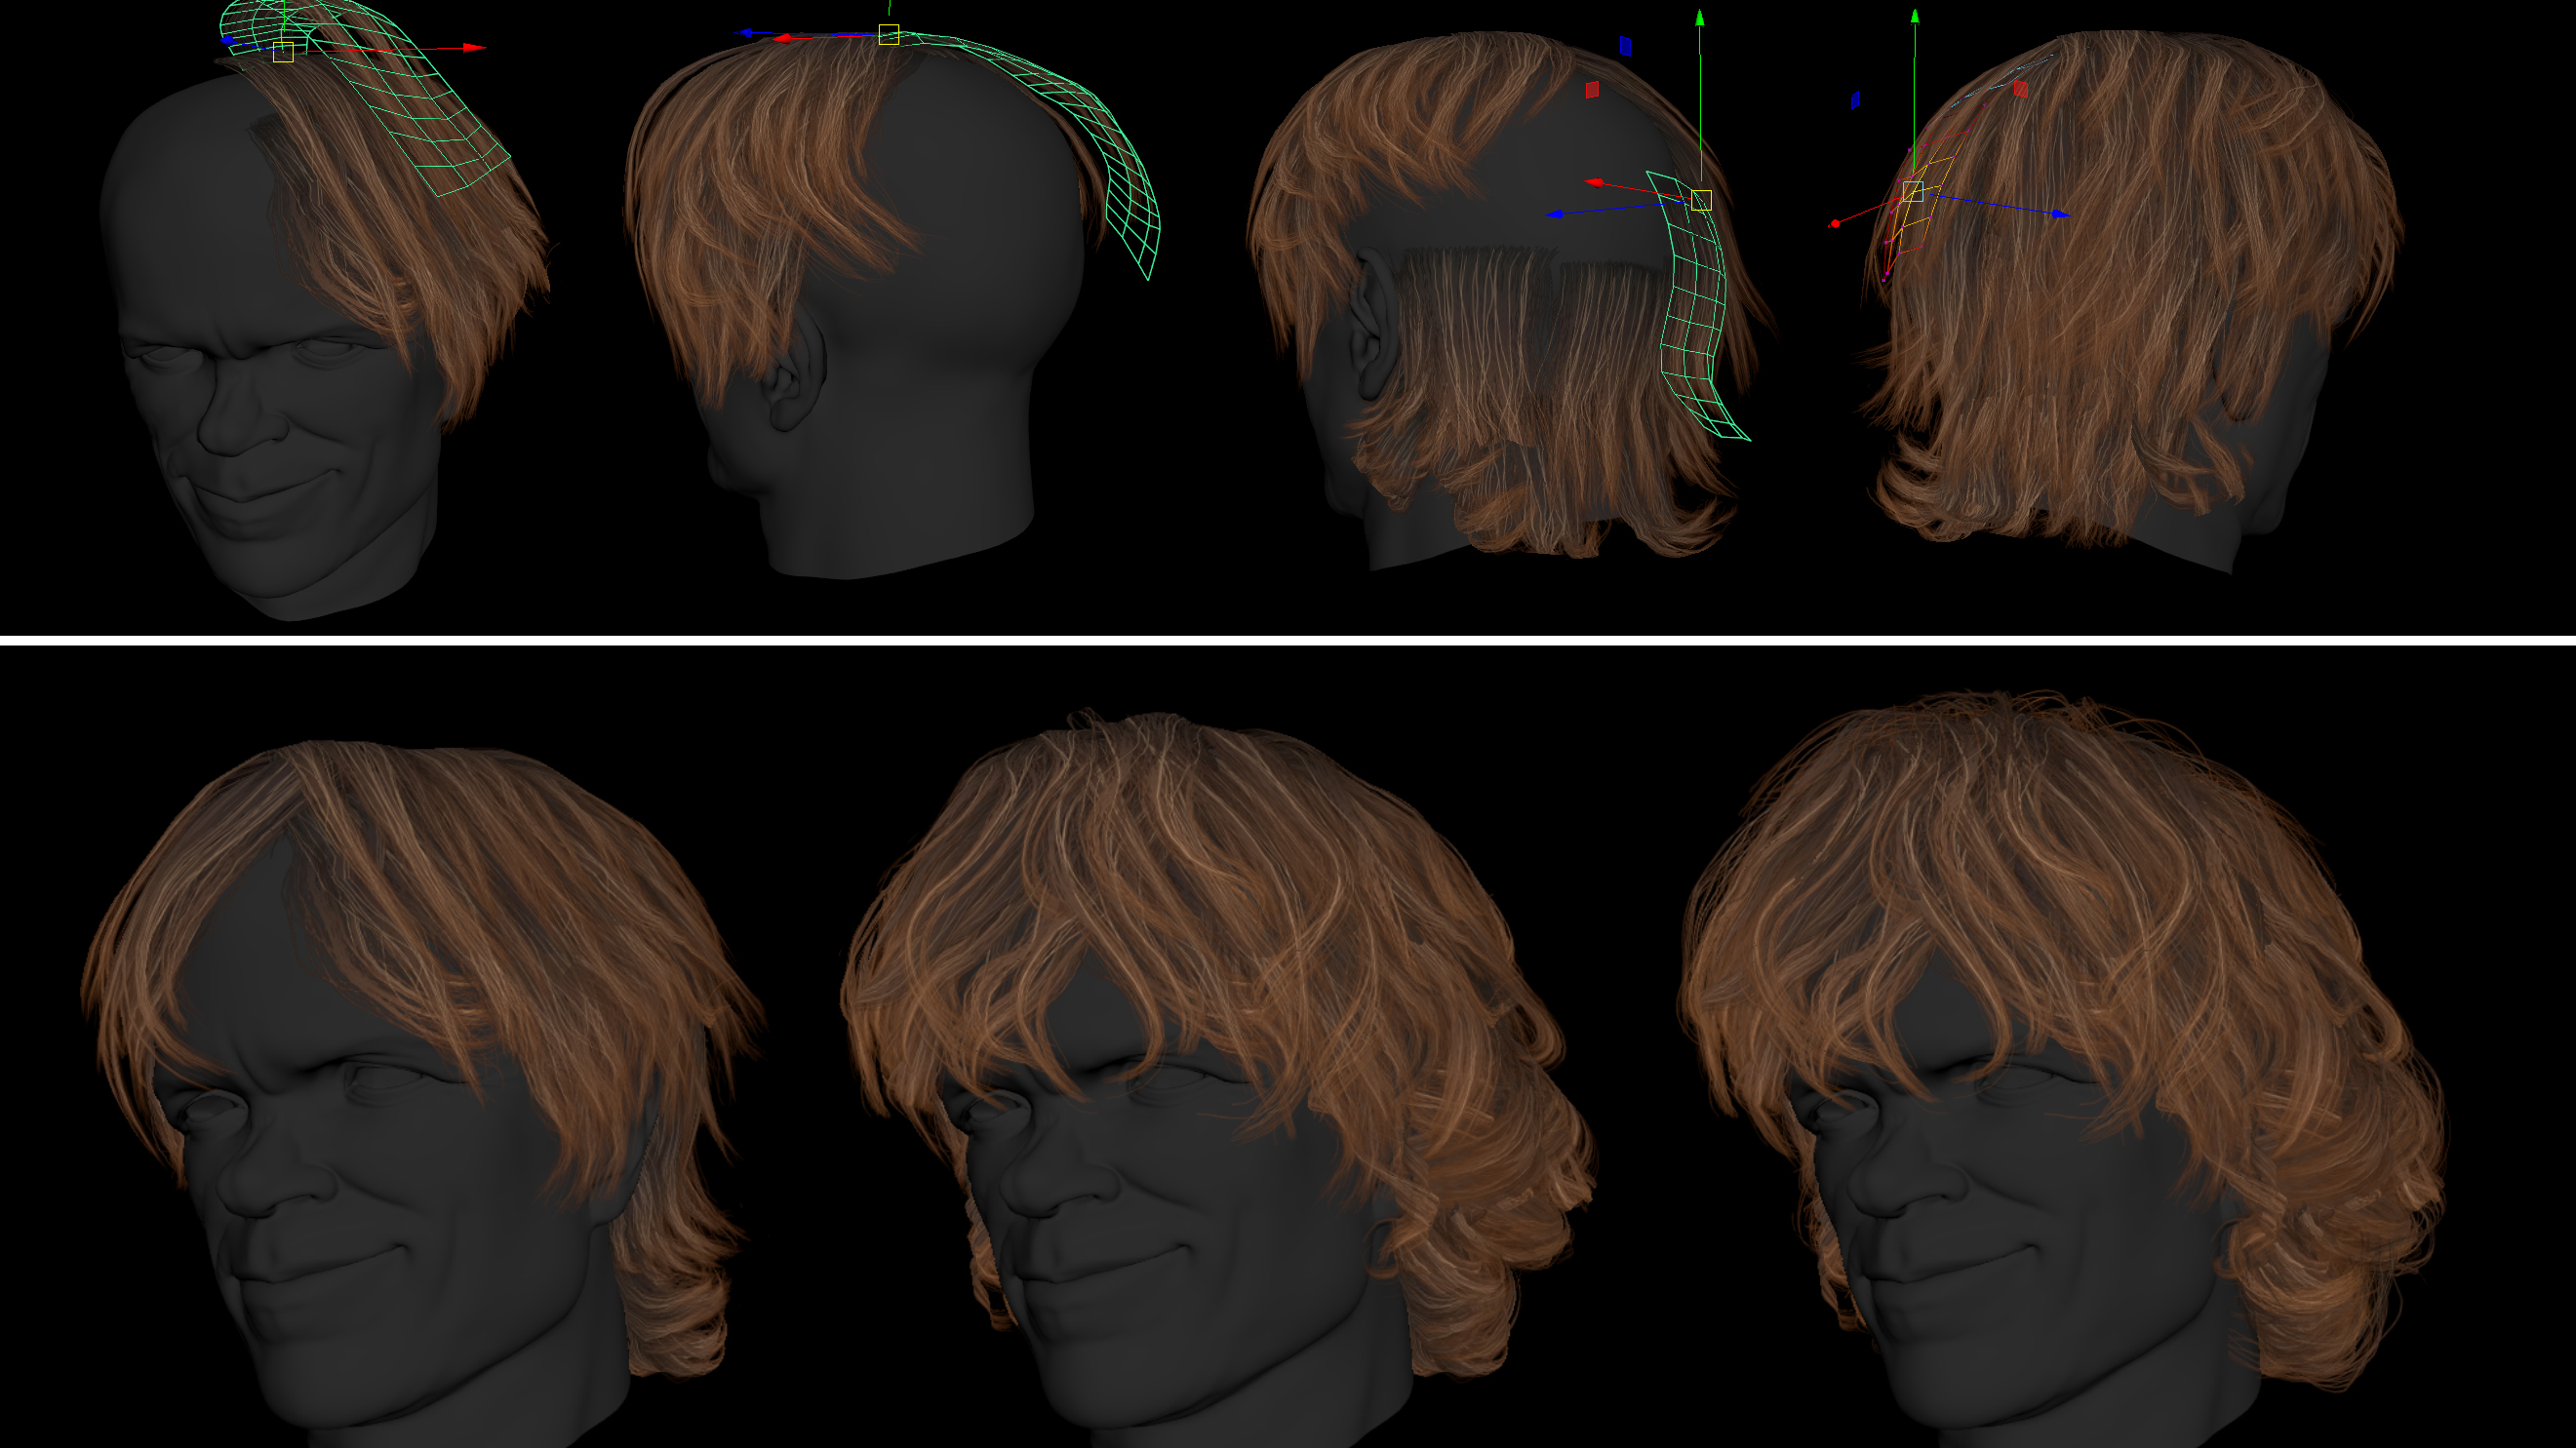
Placing hair cards is a process that you’ll have to do individually. Unfortunately there is no way around it. Of course, you can help speed up the process with some script to adjust the pivot of each strain, and organise different hair layers in groups, so that you can hide them easily, but at the end of the day, you’ll just have to work hard on it.
13. Place beard cards
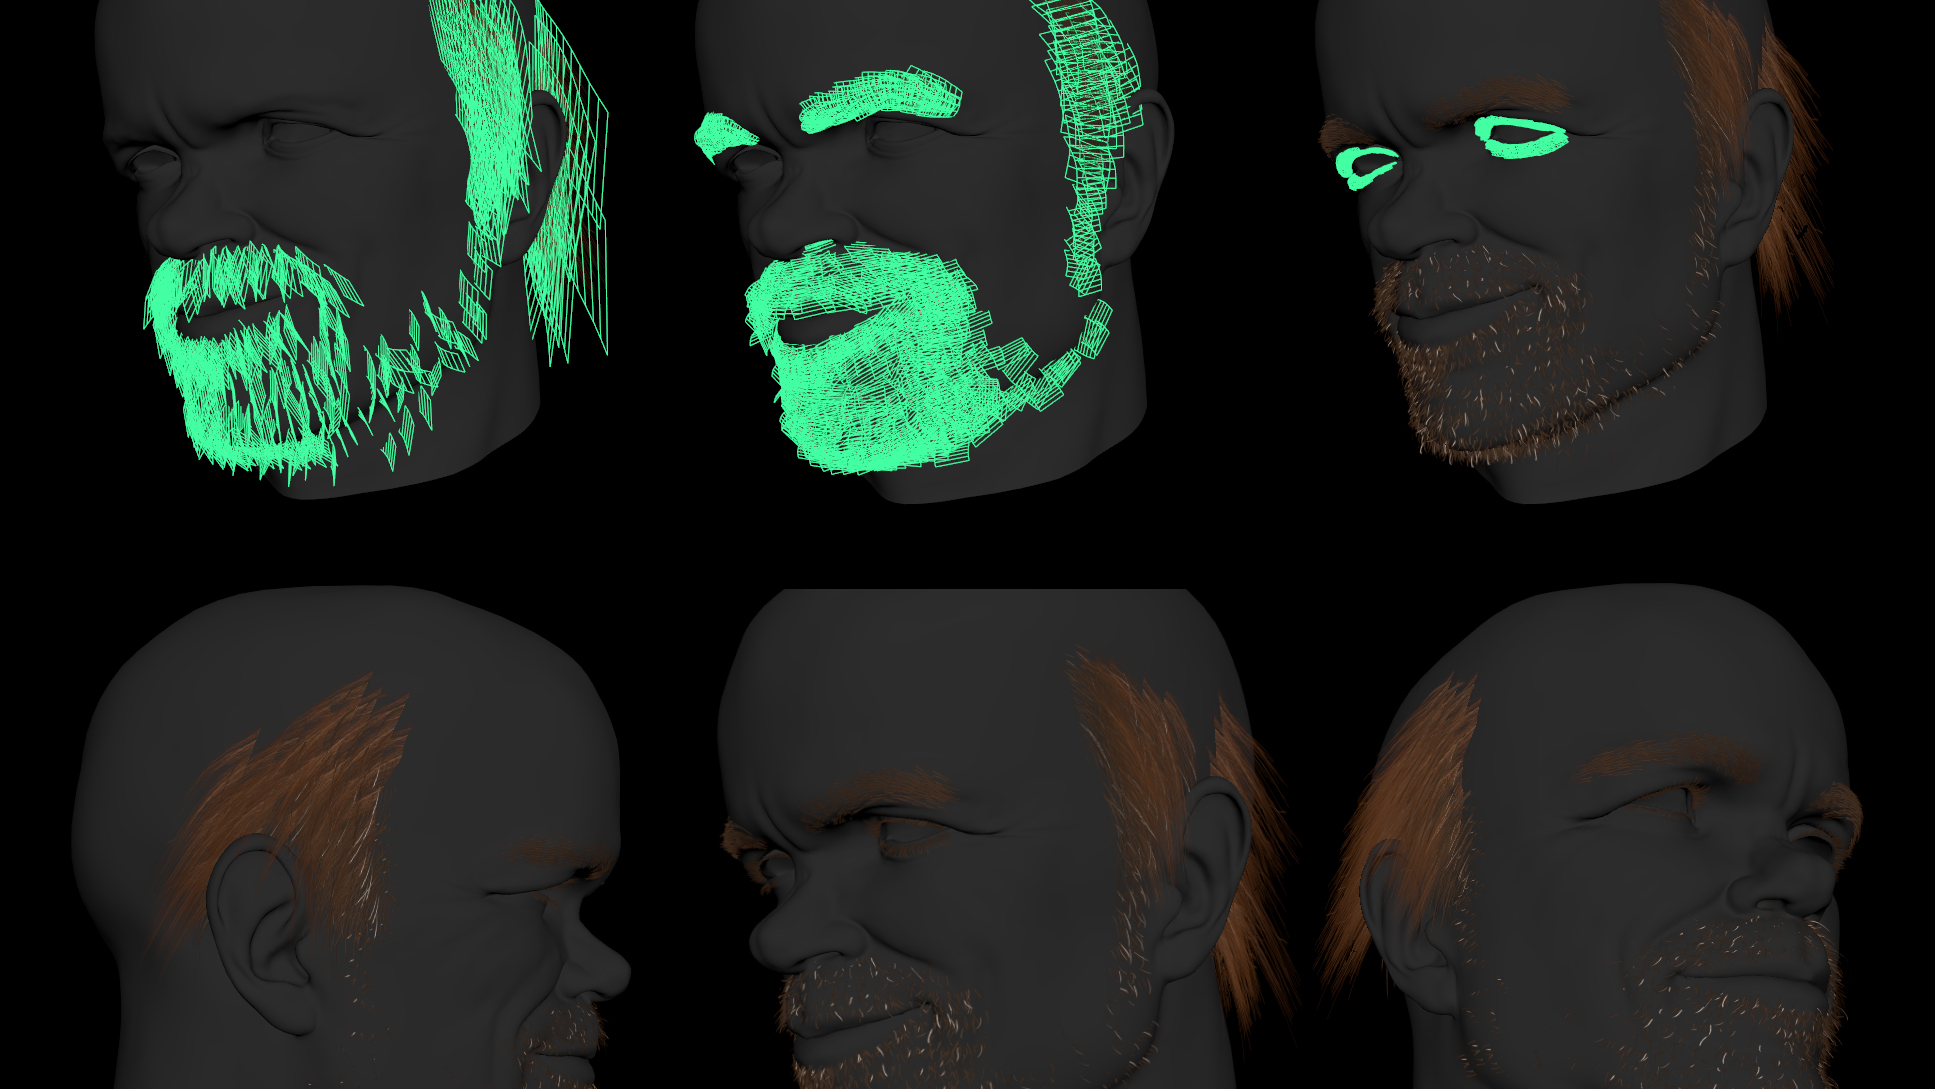
The beard, eyebrows and eyelids are easier. Because the hairs are short, you don’t have to work too hard to place every strain, but be careful with the density of your strains. I painted these textures myself in Photoshop, using the space I left in the hair texture. You’ll end up having many more polygons in the beard than in the hairs, but it’s fine.
14. Texture head and hands
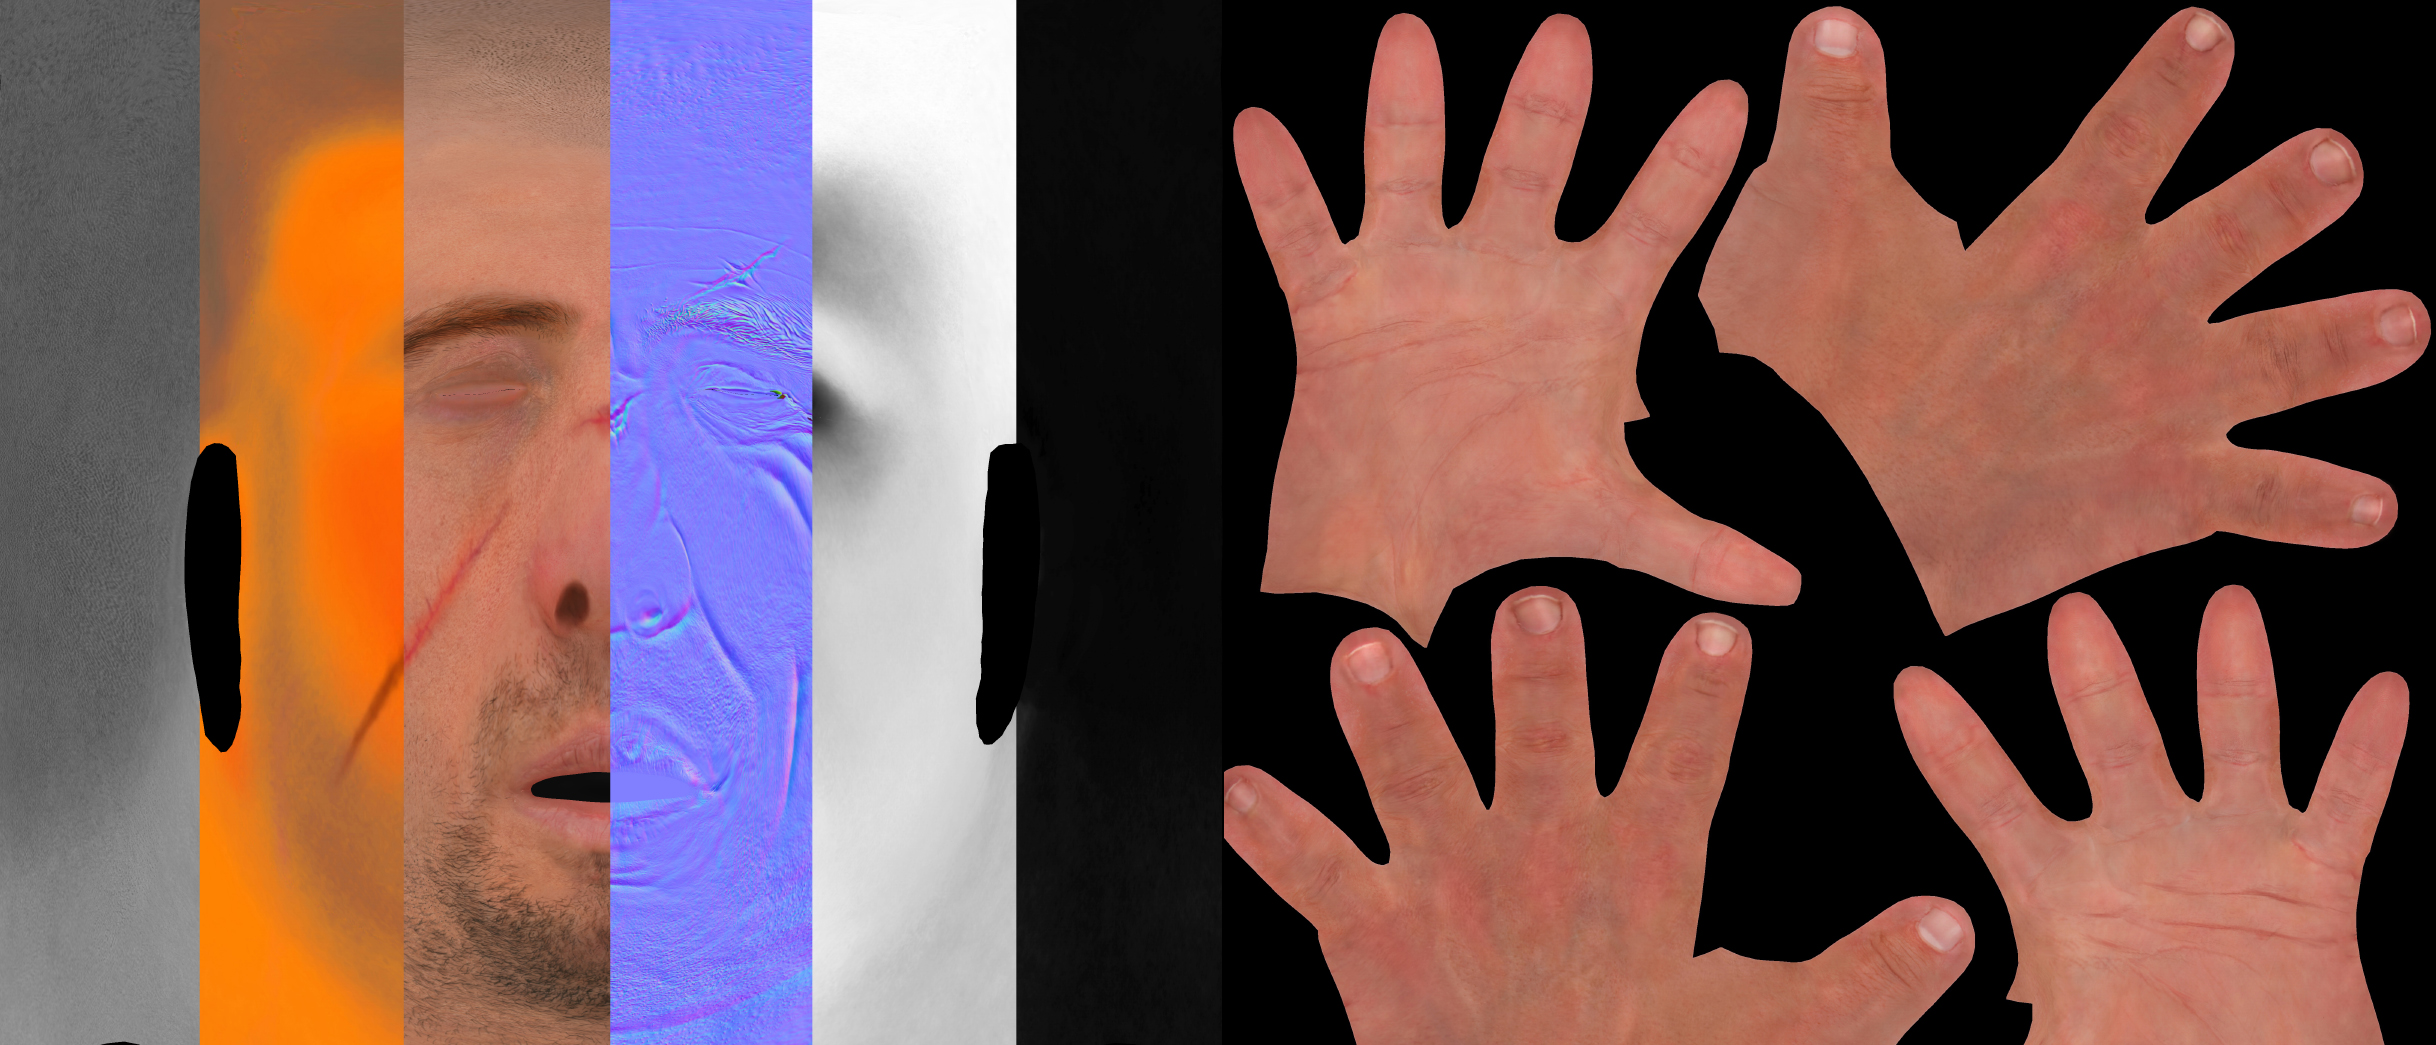
The first pass of the Diffuse channel was done in Mari. Once I had an homogeneous layer, I moved to Painter and Photoshop to refine it, and tweak the other channels.
Ambient Occlusion and the normal map were exported via Handplane Baker but, on top of that layer, I added a pass obtained by converting the diffuse channel, so that Diffuse and Normal were more alike. All other channels – Specular, Glossiness, Subdermal, Translucency and Fuzziness – have been tweaked in Painter.
Next page: How to texture your figure's clothing, add shaders and finish your model
