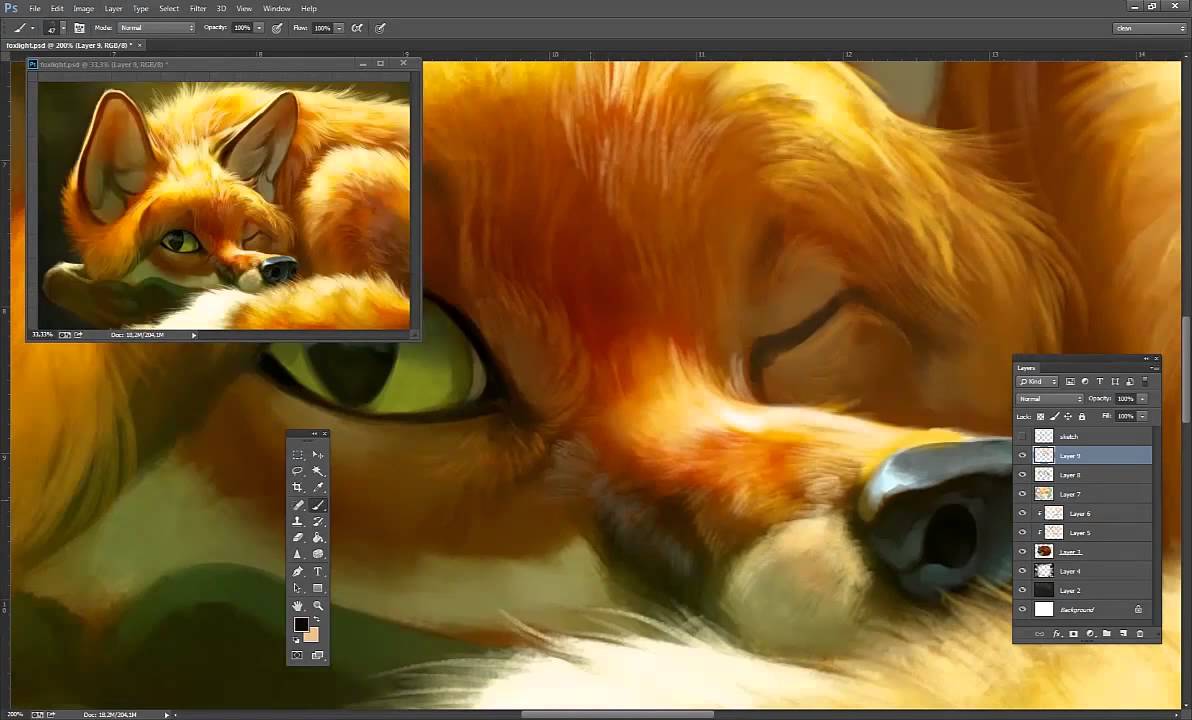
When painting digital light in fur, I try to take advantage of Photoshop's strong light layer styles. By switching between Soft Light, Hard Light and Overlay, and seeing what works best, I can achieve that very particular kind of glowing light that appears when light is scattered through and between strands of hair.
Where direct sunlight hits the creature, I paint in bold strokes of white and light yellow. Be careful though: don't overdo it so it looks garish. Keep it clean. Always be consistent with light direction and try to picture the animal as a three-dimensional object. Light should always be wrapped around the form: it's what makes a painting seem believable.
Article continues below01. Reduce opacity while painting

I start off with a rough sketch of a cuddly looking fox that I can paint underneath. I don't pay a lot of attention to detail at this point, because this sketch will only be a guide and not set in stone.
In Photoshop, reduce the Opacity of the sketch layer when you paint to about
50 per cent. This will enable you to see the line work without it interfering with the painting process.
02. Block your colours

I continue by blocking in the main colours, which at this point are unlit by an external source. I keep it dark, because I plan on building up the shapes by going from dark to light.
I like to maintain a traditional approach to my art, so I'm not afraid to work with messy, textured brushes. These add a lot of unintentional detail and keep the art from looking plastic and overly smooth.
03. Use Photoshop's layers

Now to the fun part! On top of this unlit base, I work with different layer styles such as Soft Light, Hard Light and Overlay. In combination, these can create a golden summery glow, especially when painted on such a colourful animal as a fox. This is really about trying out what works, so experiment with different opacities and intensities of the light.
4. Add further detail and depth

This is the final detail phase, and definitely where I have the most fun. Here, I paint little individual hair strands and weave the whole composition together.
I usually merge everything and work on one single layer to marry all the elements into one cohesive image. I'm also fond of depth, so I choose to frame this with some leaves out of focus in the foreground.
Tip: Add realistic motes of dust
To add extra realism to a brightly lit scene, try adding some dust floating around in the air. All the little airborne particles will be hit by the strong light and become visible to the eye.
This article originally appeared in ImagineFX magazine issue 107.
Related articles:
- The designer's guide to special characters
- Illustrator tutorials: amazing ideas to try today!
- Great examples of doodle art
