Create a fantasy scene with Photoshop
Create a magical fantasy scene featuring a looming giant and tiny fairy, learning some useful tips along the way.
Sign up to Creative Bloq's daily newsletter, which brings you the latest news and inspiration from the worlds of art, design and technology.
You are now subscribed
Your newsletter sign-up was successful
Want to add more newsletters?
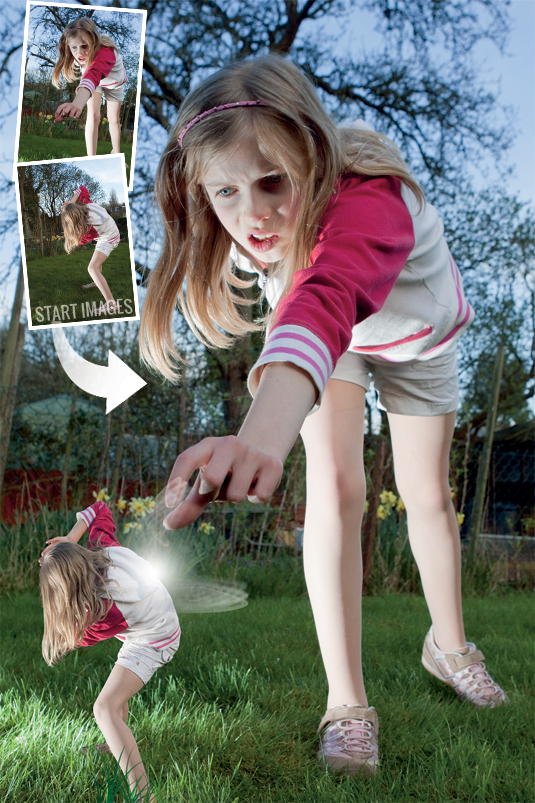
Lewis Carroll’s classic novel Alice in Wonderland features the titular heroine shrinking down to a height of just 10in with help from a magic potion, while a magic cake then causes her to grow to over 9ft tall. Today, children don’t need to step through the magical looking glass to have a fairy tale experience - Photoshop’s selection and transformation tools will quickly do the job for you.
Since photography’s earliest days, darkrooms have been used to composite separate shots together in one image, to create the illusion of giants and little people. But for the technique to work effectively you need to capture suitable source images.
Shoot your subject pretending to be a giant and fairy in the same location. This helps ensure the lighting in both versions illuminates your subject in the same way, so they look like they belong in the same scene when you put the two together.
Article continues belowWe used an off-camera flash to add a dramatic key light to the scene. When shooting the giant, use a wide-angle lens and crouch down low to make her loom over the camera. Shoot the fairy from a higher angle to make her look smaller.
Giant and fairy
We’ll show you how to remove the fairy from the start image and transplant her to the giant’s shot. You’ll learn how to transform the layer, and discover clever brush-based techniques to embed her into the scene. She’ll then look like she’s standing among huge blades of grass.
The guide below shows how to get the look using Photoshop Elements 7 or above, but you can use Photoshop CS up to and including Photoshop CS6 too.
Click here to download start image 1
Click here to download start image 2
01. Make a selection
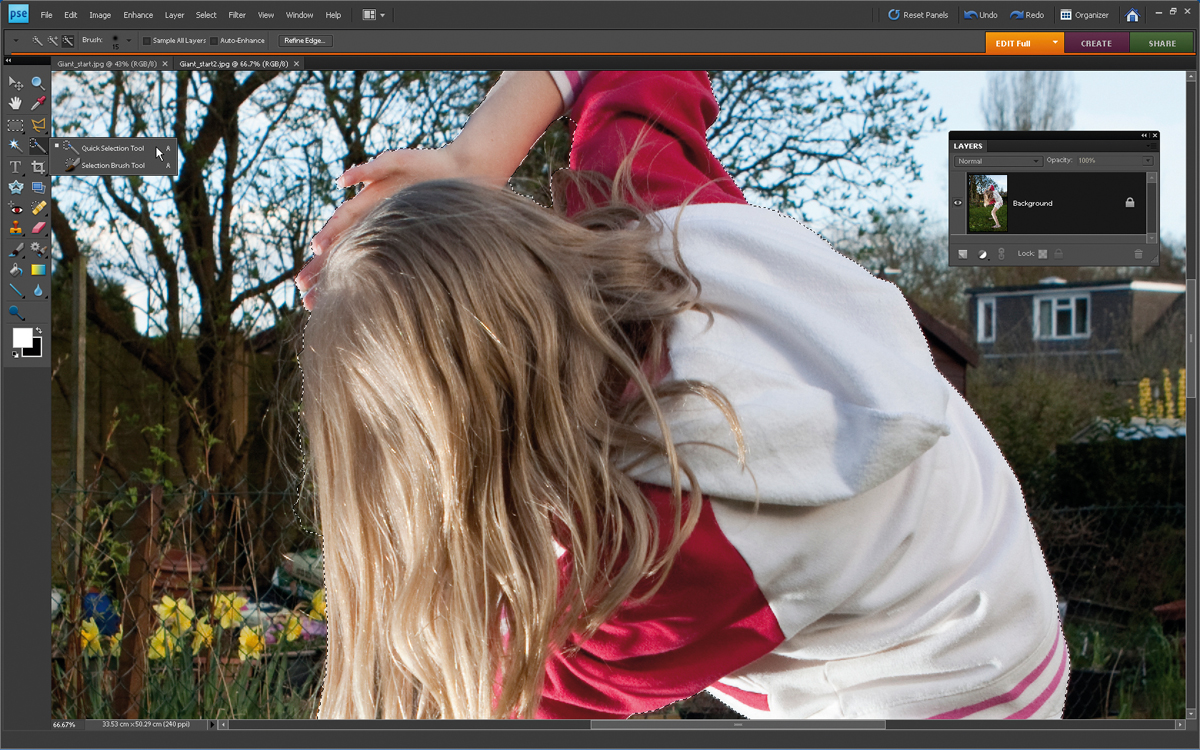
Open giant_start2.jpg. Grab the Quick Selection tool from the Tools palette. Tick the New Selection icon in the Options bar and spray over the child to select her. A ‘marching ants’ selection will appear around her. Use the Add To and Subtract From selection icons in the Options bar to fine-tune the selection. Don’t worry if you have clumps of grass by her feet, as you can hide these areas later.
Sign up to Creative Bloq's daily newsletter, which brings you the latest news and inspiration from the worlds of art, design and technology.
02. Refine the selection
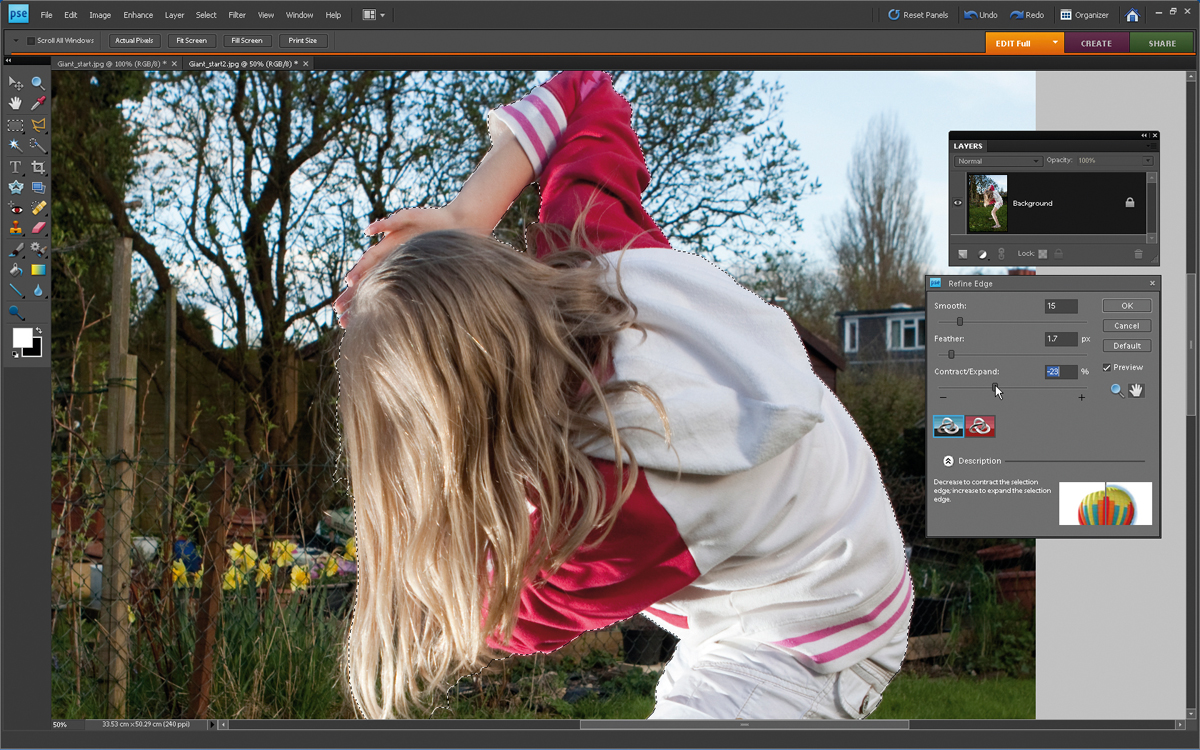
Click the Refine Edge button in the Options bar. Set Smooth to 15 to iron out any jagged edges around her outline. Pop feather up to 1.7. This gives the selection marquee a softer edge, to help blend the girl’s pixels with their new background. Drag Contract/Expand to -23%. This tightens the selection, helping remove fringes of her original background. Click OK to apply the changes to the selection marquee.
03. Paste and transform
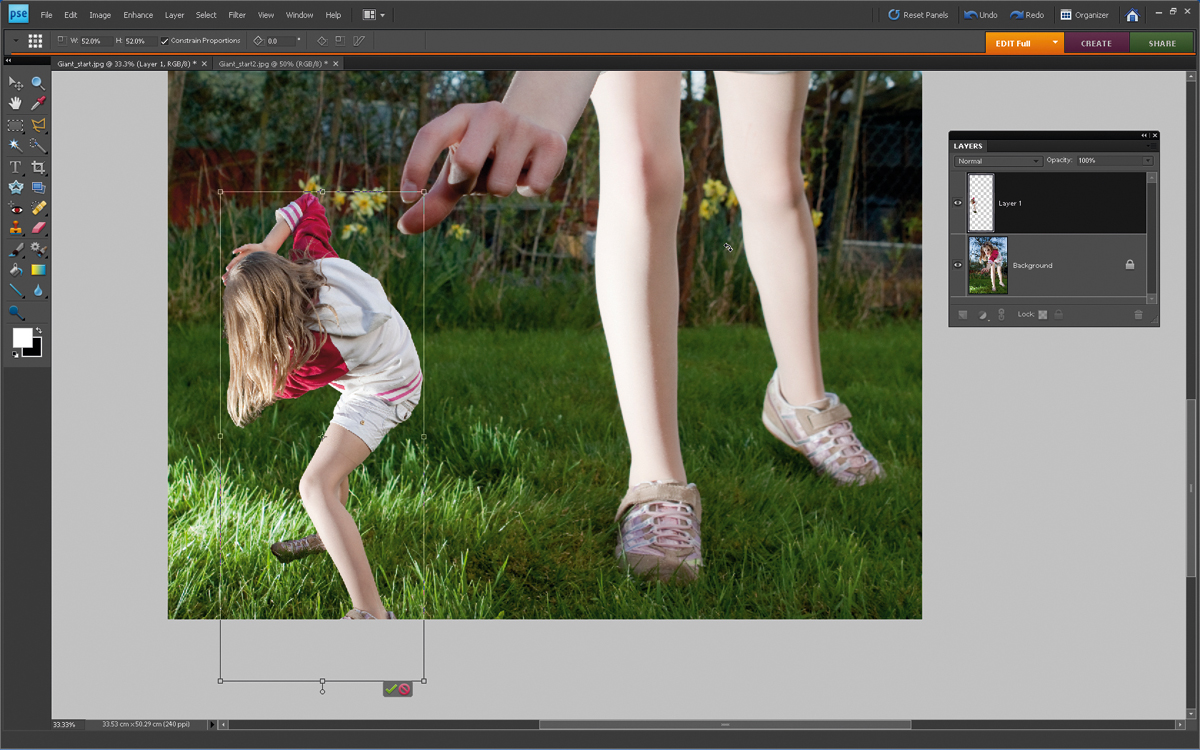
Choose Edit>Copy. Open giant_start.jpg, and click Edit>Paste to add the girl to the background image on a separate layer. Press Ctrl+T for the Free Transform tool and a box will appear around the copied girl. Tick the Constrain Proportions box and drag one of the corner handles to shrink the child. Use the Width and Height boxes in the Options bar to take her down to 52%. Drag within the box to position her in the bottom-left of the frame. Hit Return.
04. Tidy the selection
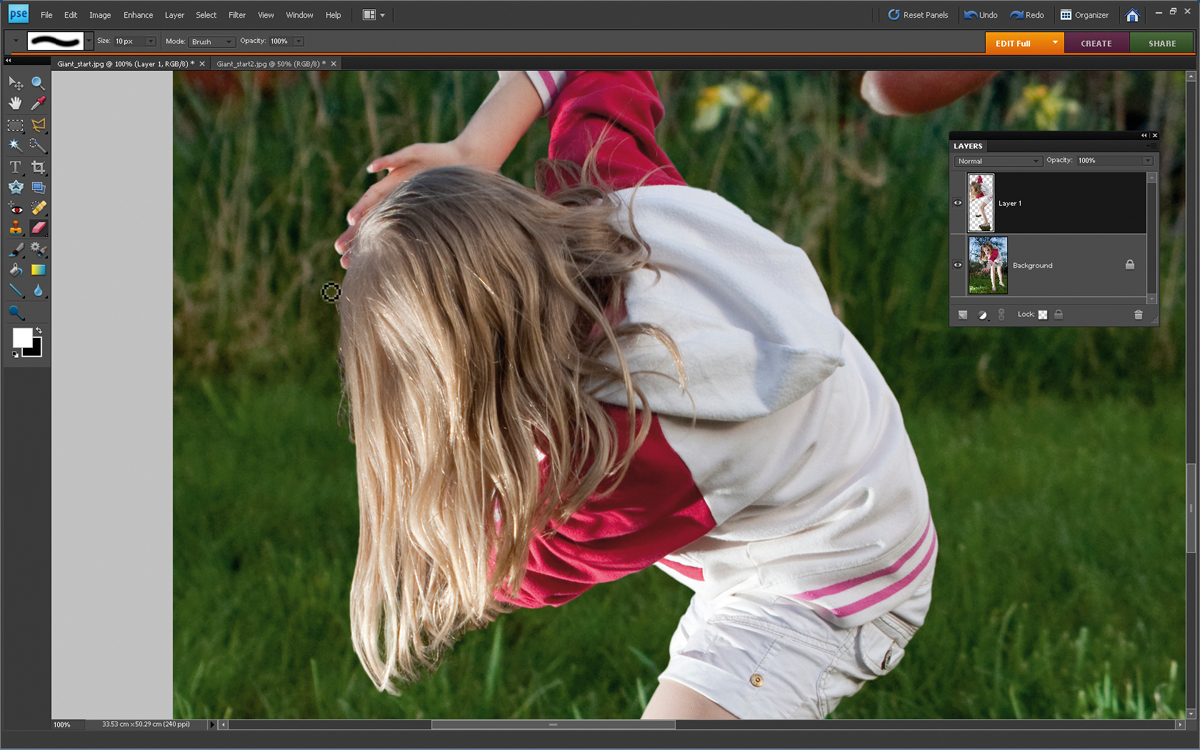
Use the Zoom tool to view the shot at 100%. You may find traces of the copied shot’s background clinging to the edge of the girl, especially in fiddly areas such as fingers and hair. Grab the Eraser tool, set Size to 10 pixels, and rub over unwanted background pixels to remove them. Reduce Opacity to 20% to reduce the visibility of background objects.
05. Erase her foot
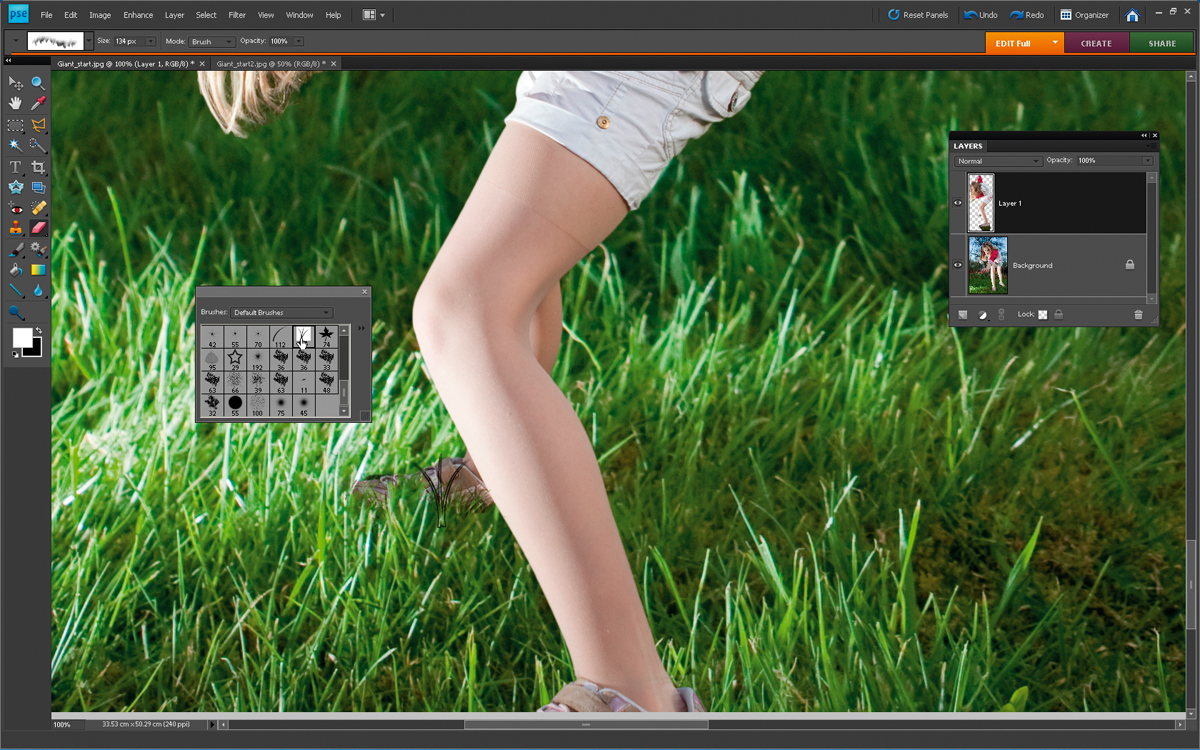
To make the transformed girl’s right foot look like it’s standing in the longer grass, grab the Eraser tool. Click the Brush picker in the Options bar, change to Default Brushes then select the Grass brush tip. Click and spray over the foot - parts will be erased by the grass-shaped tip, revealing real grass from the layer below. This helps embed the transformed girl among the larger blades of grass in the main image.
06. Instant grass
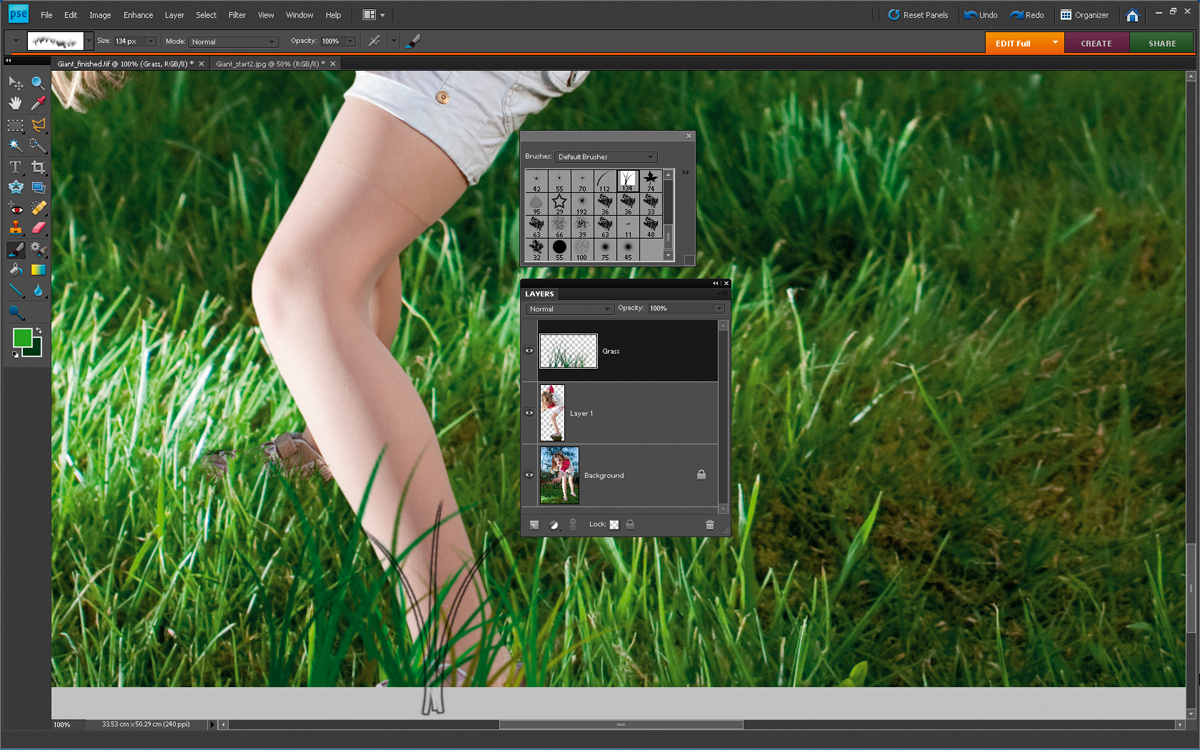
Create a new layer and label it ‘Grass’. Press I to select the Eyedropper tool and click to sample dark green grass. Press X to swap the foreground and background colours around, then Alt-click to sample lighter green grass. Grab the Brush tool from the Tools palette and choose the same grass-shaped brush tip. Set Size to 400 pixels. Now click to place a few blades of grass over her nearest foot.
07. Adding wings
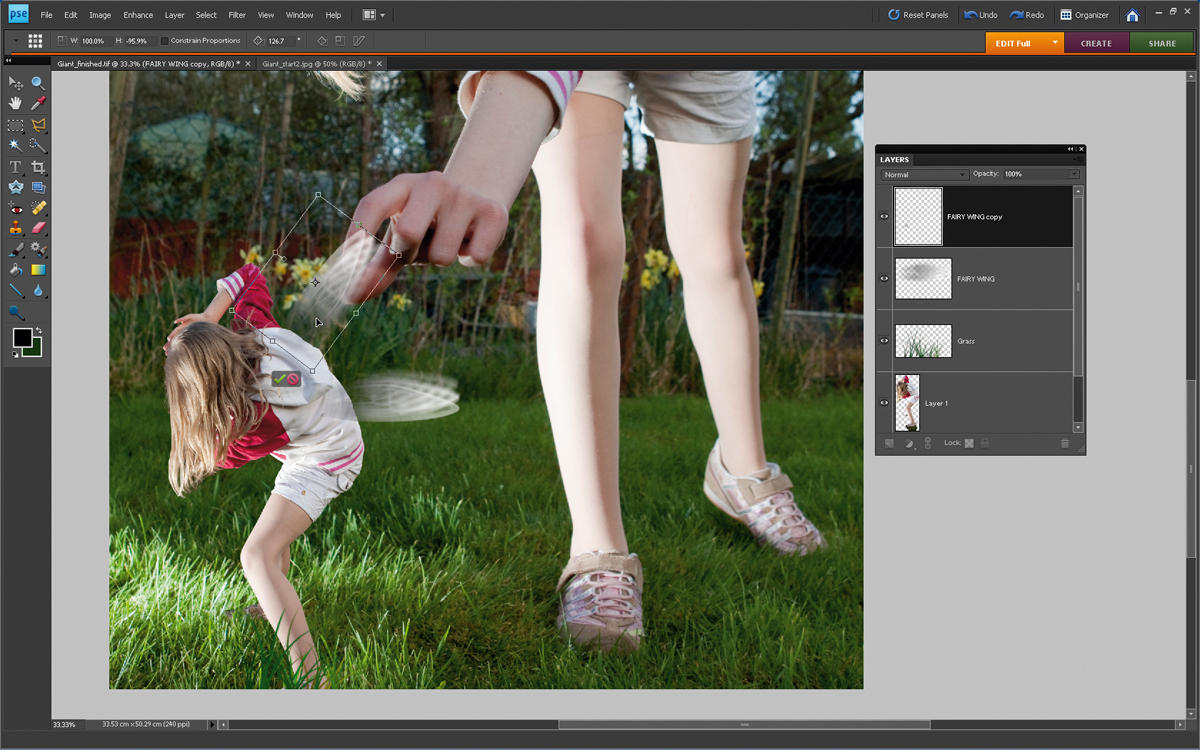
Now turn the child into a fairy. Find or create a fairy wing shape you can use in a new document and cut it out. Select the wing, press Ctrl+C to copy then Ctrl+V to paste onto our composite image. Press Ctrl+T (Free Transform). Rotate and position the wing on her left shoulder. Duplicate the layer, press Ctrl+T and scale its Height by -95%. Place the copy on our fairy’s right shoulder.
08. Glow girl!
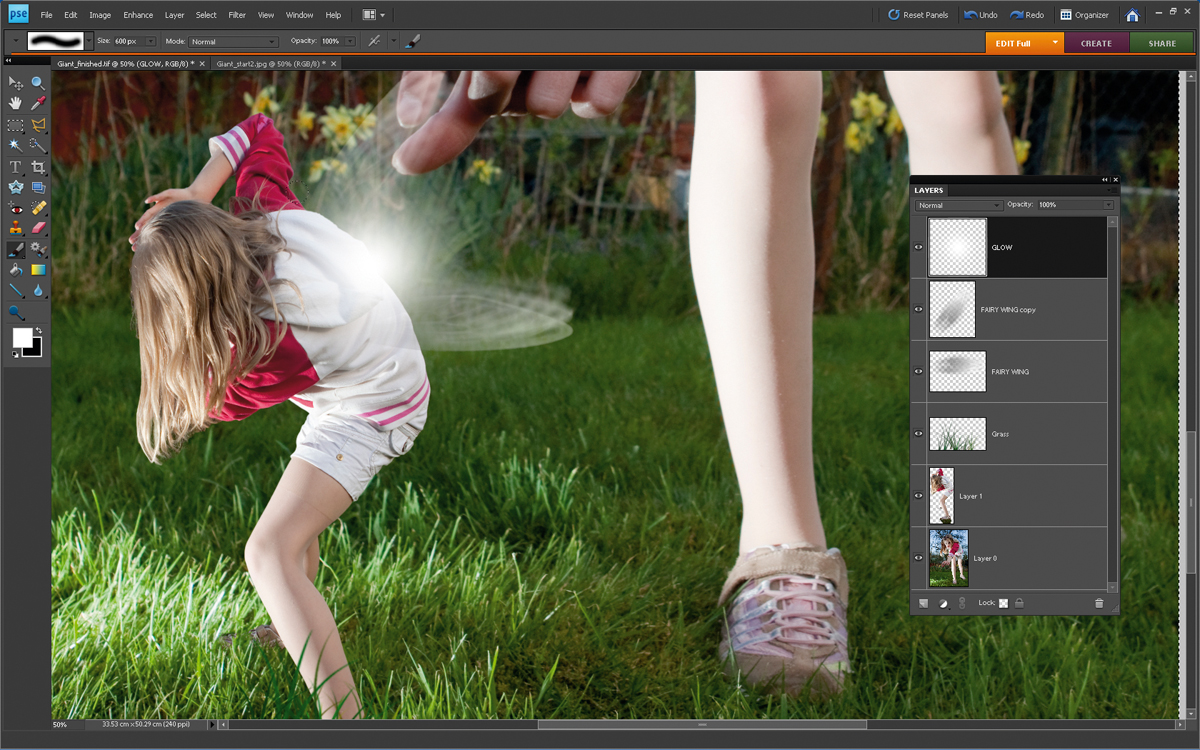
Set the Wing layers’ Blending Modes to Screen and reduce their Opacity to 62% for an ethereal effect. Grab the Brush tool. Choose a soft-edged brush with a Size of 600 pixels. Set the Foreground colour in the Tools palette to white and click the Create New Layer icon at the bottom of the Layers palette. Click to paint a glow between the wings, and this magical light appears to be illuminating the full-sized girl.
This tutorial first appeared in Portrait Photography Made Easy - a bookazine from the makers of PhotoPlus.
Now read:
- 30 free Photoshop brushes every creative must have!
- 101 Photoshop tutorials
- 20 best Photoshop plugins

The Creative Bloq team is made up of a group of art and design enthusiasts, and has changed and evolved since Creative Bloq began back in 2012. The current website team consists of eight full-time members of staff: Editor Georgia Coggan, Deputy Editor Rosie Hilder, Ecommerce Editor Beren Neale, Senior News Editor Daniel Piper, Editor, Digital Art and 3D Ian Dean, Tech Reviews Editor Erlingur Einarsson, Ecommerce Writer Beth Nicholls and Staff Writer Natalie Fear, as well as a roster of freelancers from around the world. The ImagineFX magazine team also pitch in, ensuring that content from leading digital art publication ImagineFX is represented on Creative Bloq.
