How to give illustrations a retro look in Photoshop
Top illustrator Peter O'Toole shows you how to create a vintage aesthetic using textures.
Sign up to Creative Bloq's daily newsletter, which brings you the latest news and inspiration from the worlds of art, design and technology.
You are now subscribed
Your newsletter sign-up was successful
Want to add more newsletters?

Five times a week
CreativeBloq
Sign up to Creative Bloq's daily newsletter, which brings you the latest news and inspiration from the worlds of art, design and technology.

Once a week
By Design
Sign up to Creative Bloq's daily newsletter, which brings you the latest news and inspiration from the worlds of art, design and technology.

Once a week
State of the Art
Sign up to Creative Bloq's daily newsletter, which brings you the latest news and inspiration from the worlds of art, design and technology.

Seasonal (around events)
Brand Impact Awards
Sign up to Creative Bloq's daily newsletter, which brings you the latest news and inspiration from the worlds of art, design and technology.
07. Fine-tuning the texture
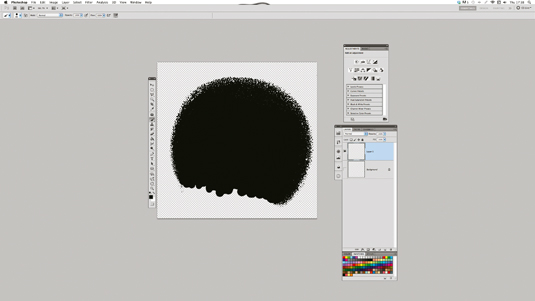
Select the Eraser tool and start rubbing out any markings you don't want. Now hit B and start filling in the gap you just left with the Brush tool. I'm trying to create a circle but we are missing a bit. In the next step we are going to use what we have to fill in the missing area of the texture.
08. Prepare the texture
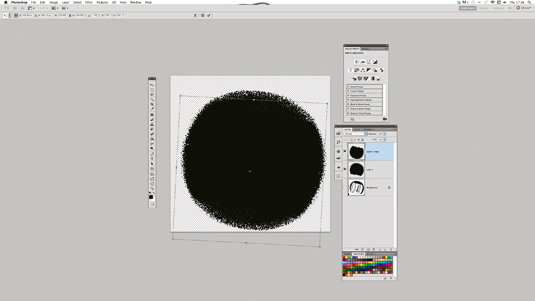
To fill the gap, press Cmd/Ctrl+J to duplicate the layer then Cmd/Ctrl+T to transform it. Hover your cursor above a corner and rotate it around until it fits the gap, and move it into place. Now select both layers and hit Cmd/Ctrl+E to merge them and then Cmd/Ctrl+I to invert the image. Your texture should now be a circular shape and white in colour.
09. Reshape the texture
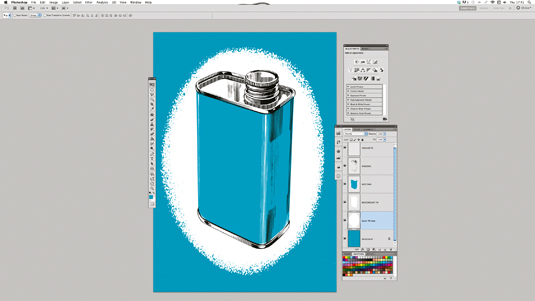
Drag this layer into your working document and set it behind your other layers. Use Cmd/Ctrl+T to stretch and align it into the shape you want. My circle didn't fit the shape of the tin, so I squashed it in at the sides and stretched the top and bottom. However, don't stretch it too much as it can distort the pixels and look ugly. You can see the impact the texture has immediately.
10. Add a background
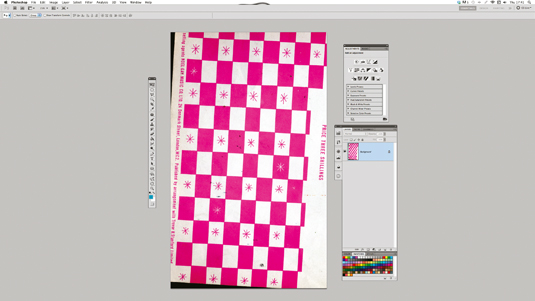
If the background is too plain for your liking, revert back to your reference material for some more textures. I found some old song sheets, which work nicely.
11. Touch up the textures
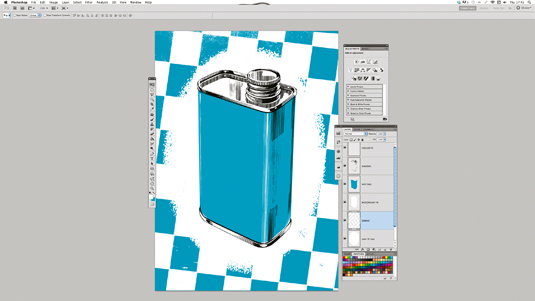
Repeat steps 05-07. I removed the stars from my texture with the Eraser and Brush tools and dragged it back into my working document, putting it above the background layer and under everything else. Next, rotate it slightly for a sense of wear and tear.
12. Finishing touches
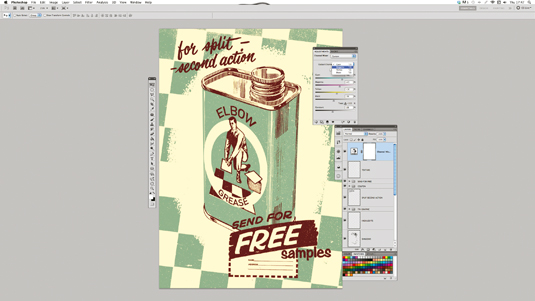
Add some type to give it more of a retro advert feel. Next, find a nice floor texture. Lastly, finalise your colours using the Channel Mixer, moving the sliders in each channel until you are happy.
Words: Peter O'Toole
Sign up to Creative Bloq's daily newsletter, which brings you the latest news and inspiration from the worlds of art, design and technology.
Freelance illustrator Peter O'Toole has worked for clients including Doritos, NME, Microsoft and Cancer Research UK. He also co-founded Dirtcheap magazine and The Fresh Kids Club. This tutorial first appeared in Computer Arts issue 199.
Like this? Read these!
- The best collage maker tools – and most are free!
- The best photo editors
- Photoshop tips, tricks and fixes to try today

The Creative Bloq team is made up of a group of art and design enthusiasts, and has changed and evolved since Creative Bloq began back in 2012. The current website team consists of eight full-time members of staff: Editor Georgia Coggan, Deputy Editor Rosie Hilder, Ecommerce Editor Beren Neale, Senior News Editor Daniel Piper, Editor, Digital Art and 3D Ian Dean, Tech Reviews Editor Erlingur Einarsson, Ecommerce Writer Beth Nicholls and Staff Writer Natalie Fear, as well as a roster of freelancers from around the world. The ImagineFX magazine team also pitch in, ensuring that content from leading digital art publication ImagineFX is represented on Creative Bloq.
