Illustrator CS6’s new feature for applying gradients across strokes is a quick and effective way to transform a simple path into a complex shape. You can add depth to an illustration and even quickly create 3D type that pops with the Pen tool. Gradients can be applied along the length, width or within a stroke.
This new feature gives you complete control over gradient placement and opacity, so you can now use strokes rather than fills for sophisticated artwork.
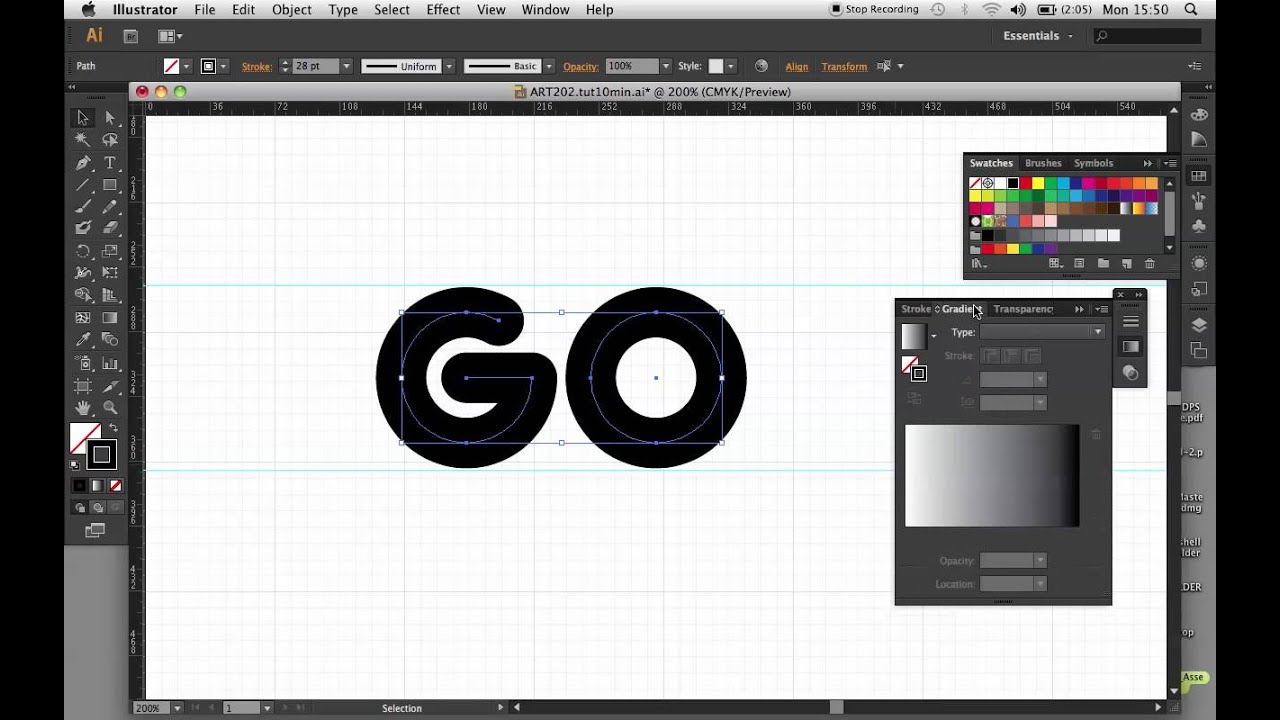

01 Open Illustrator and ensure your workspace is set to Essentials. Then draw any two basic letters with the Pen tool to start off your 3D typeface. Use a simple black stroke, and change the thickness to 28pt to create bold letters.

02 There is now a new option to add variable width to strokes with the Variable Width Profile box. We will keep ours as Uniform this time, but the variable widths are fun to experiment with and are great tools for shading elements of illustrations and contours.

03 Open up the Stroke panel and set Cap and Corner to Round Join, to round the letters off. Now open the Gradient panel and start adding colours to create a faded fill. Apply darker shades to the outside of the fill and lighter shades towards the inside.

04 Now you have the option to apply a gradient either within, along or across your stroke. When applying along the stroke, you have the option to change the angle and positioning of the gradient. I applied the gradient across the stroke to achieve a quick, realistic 3D effect.

05 Once you’re happy with the gradient, add it to your swatches using the Add to Swatches button on the drop-down Swatches menu. There are also some preset swatches you can experiment with. For example, the Reverse the Gradient button above the Swatches bar creates a glow effect rather than 3D.
Don't forget to check out the Adobe Illustrator CS6 review over at Creative Bloq.

