Illustrate more effectively with Kuler - part 1
Ben the Illustrator reveals how you can generate colour palettes on the move using the Kuler iPhone app – and then take them into Illustrator CC to create a stunning illustration.
With each new version of any software there should be some clear improvements and, we hope, some new functionality. When Adobe released Creative Cloud, it didn't let us down: the newest iterations of its flagship applications have really moved the software along, while also introducing some fantastic new facilities to improve workflow. Illustrator, particularly, has been updated with some valuable new additions and the hope is that this will be the way of the future, as software and online resources become increasingly interconnected.
The initial focus in this tutorial is on the integration of Illustrator CC and the new Adobe Kuler iPhone app, which enables you to quickly generate colour themes from your photos or create new palettes using a colour wheel. Crucially, you can then access these palettes immediately and efficiently in Illustrator CC.
You'll need an Adobe ID to integrate Kuler and Illustrator CC together, but once you're set up you'll find that curating original colour palettes from your own photos to use in your creative work is an enjoyable process.
Time-saving
We'll also look at a selection of other new time-saving tools in Illustrator CC (the improved stroke profiles and the new Touch Type tool), before running through the process of uploading your artwork - whether it's a work-in-progress or the finished article - to Behance.
Once you know how to use them, the new features within Illustrator CC, plus the improved ability to share your work with others, can only increase the opportunities available to you.
01. Select your subject

Whatever creative area you work in, you'll likely have some interest in colour. Adobe Kuler enables you to collect and curate your own colour palettes, and with the Kuler iPhone app you can now take direct inspiration from your photographs. My starting point for this project is an old snap of my son wearing a bright outfit.
02. Fire up Adobe Kuler for iPhone
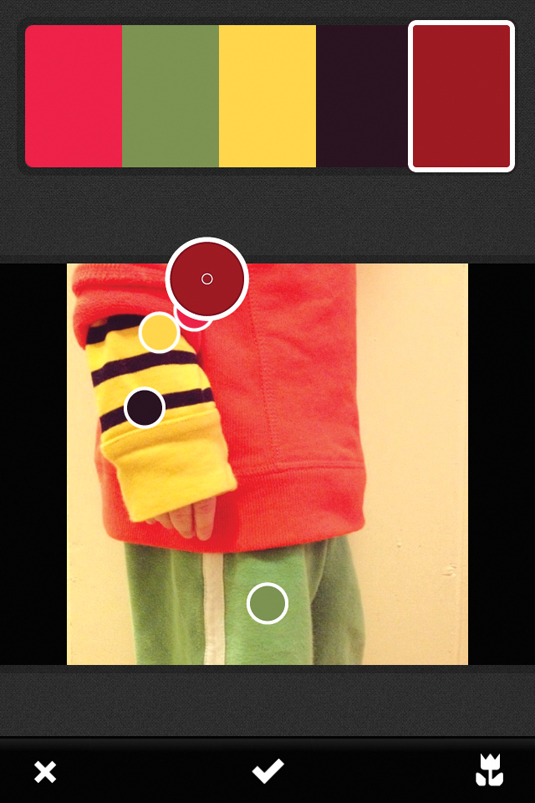
Open up the Kuler app. You can choose to either take a new photograph if you have a subject in front of you, or pick one from your photo library. Kuler will select five colours automatically, each indicated by a circular cursor. If you prefer a different selection, you can drag the cursors to the colours you require for your new theme.
Daily design news, reviews, how-tos and more, as picked by the editors.
03. Save your new palette
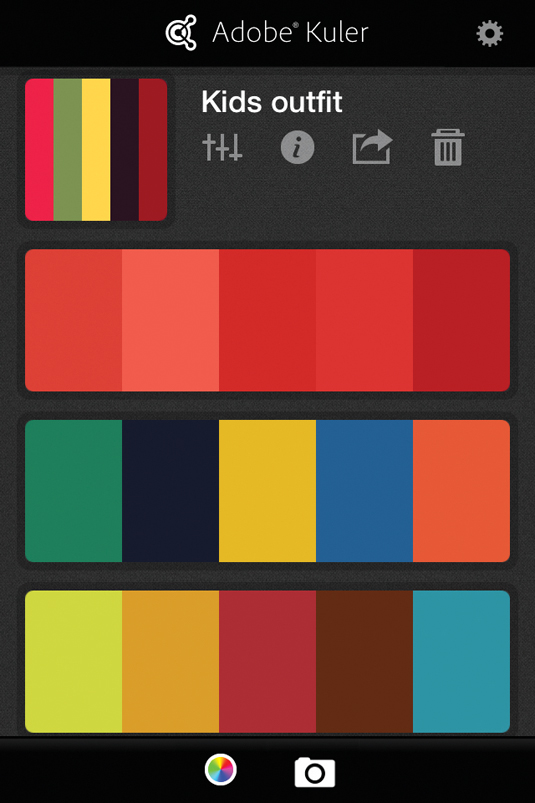
When you're happy with your selection, hit the tick icon at the bottom of the screen. On doing so, you'll see all your palettes saved together and various options will appear, including the ability to share your palette via Twitter or email - which is particularly useful if you’re working remotely and wish to share with colleagues.
04. Make it easy to find
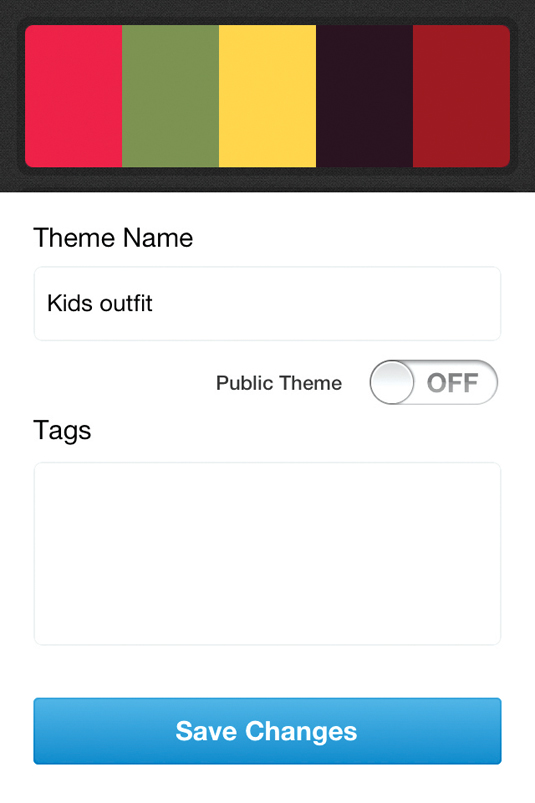
I seem to have built up quite a library of palettes, so my first step is to select the circled 'i' icon and name, tag and save the new palette. Adobe Kuler lets you post your palettes online to be shared (at https://kuler.adobe.com). If you're doing this, then tagging your palette will help the Kuler community find it.
05. Fine-tune the details
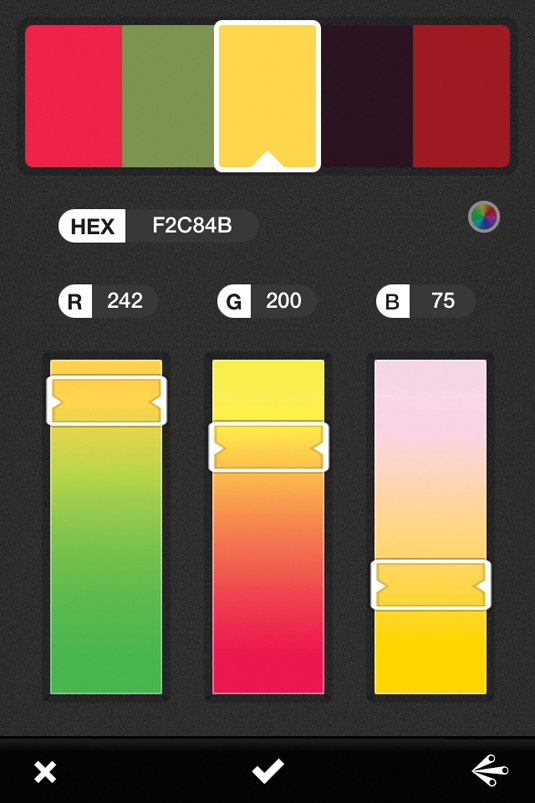
Back in the Palette Library, tapping the first icon for each colour theme will open up the RGB values and hex numbers. Perhaps most importantly at this point, you are able to fine-tune your palette. This functionality is especially useful if a couple of your colours are not quite perfect at this stage.
06. Build up themes
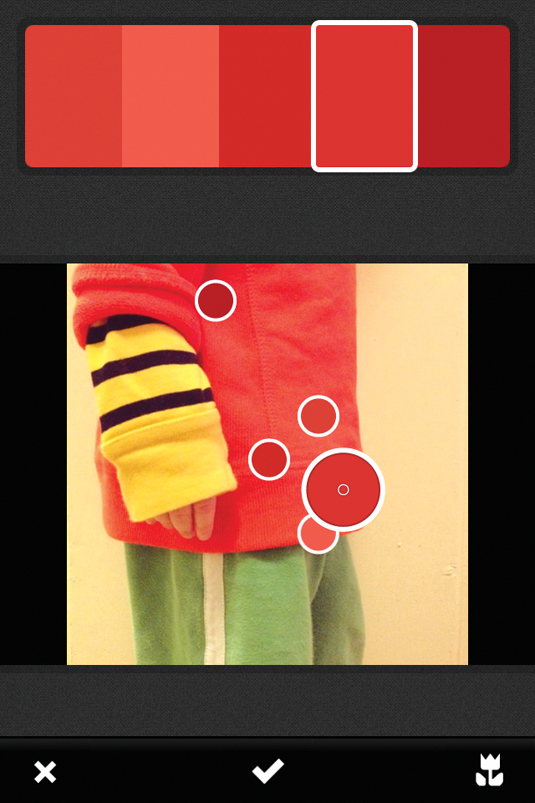
Remember that a single photograph can have almost endless colour palettes within it: you don't need to settle with just one. I also recommend building up themes using varying tones of the same colours. Doing so is particularly valuable if you're going to be illustrating anything that's textured or has varied shadows and highlights.
07. Launch the colour wheel
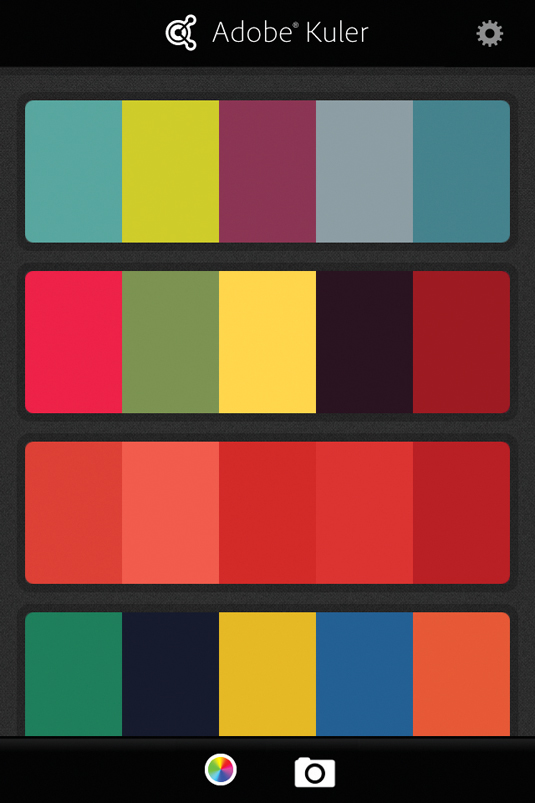
Adobe Kuler is not only a brilliant resource for generating colour themes from photos and building up a library of new palettes without having to be at your desk or inside your studio, you can also create brand new themes by opening up the colour wheel using the tab at the bottom of your Palette Library.
08. Choose your structure
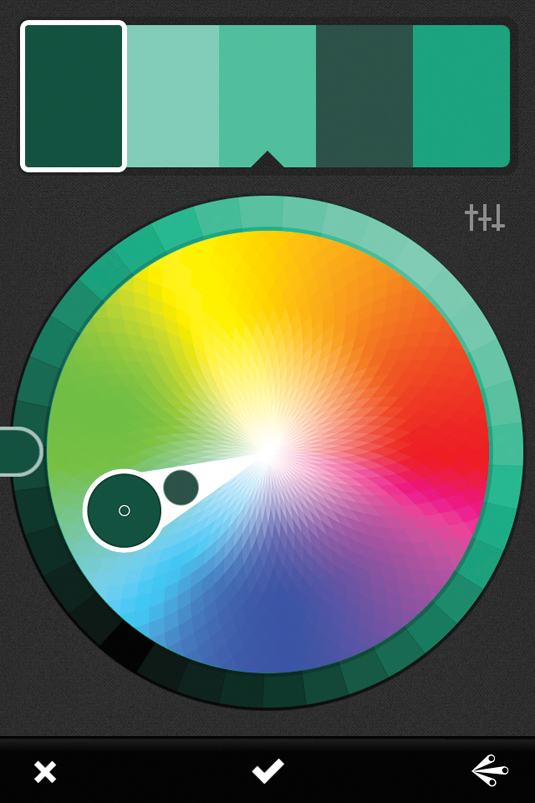
This requires some playing with as the combinations are endless. Tapping the symbol in the bottom-right enables you to choose what structure you want for your palette, from complementary to monochromatic to shades and beyond. As before, drag the circular cursors around the wheel to perfect your palettes.
09. A licence to obsess
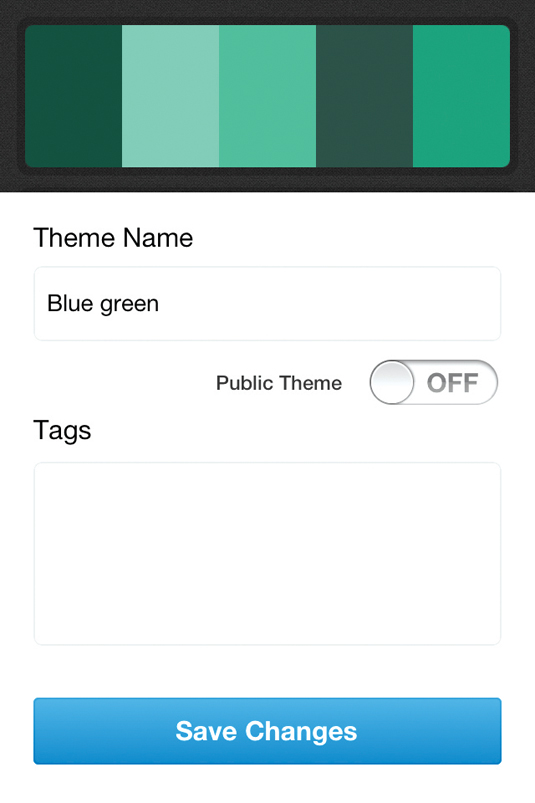
If you obsess over the use of colour, then getting to know the Adobe Kuler app will prove fruitful. It's a great tool for creating wherever you are. I use the colour wheel almost as a toy or game, building up palettes and colour combinations that I otherwise might not have considered while working at my desk.
10. Move into Illustrator CC

In this illustration, I'm taking inspiration from my chosen colour palette. I've drawn something that sits well with the varied colours, making good use of the more natural green and yellow tones, and also that solid bright orange. If you're working from a drawing, place it onto the artboard in Illustrator CC (File>Place).
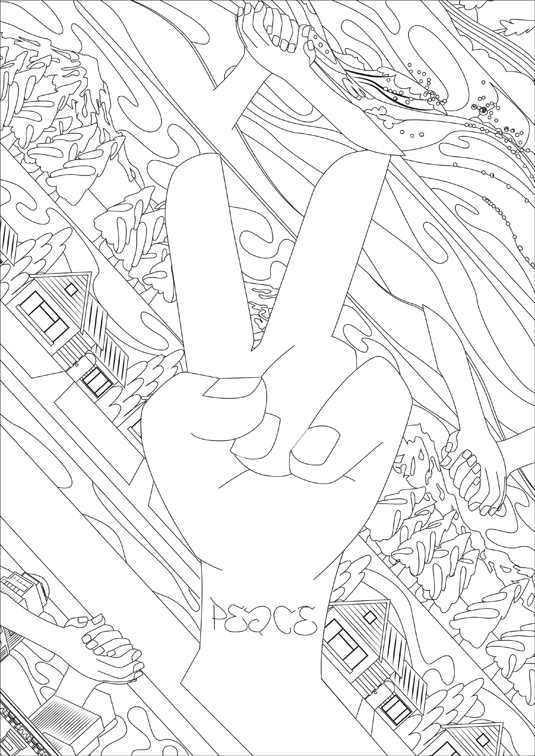
11. Open your Kuler palettes
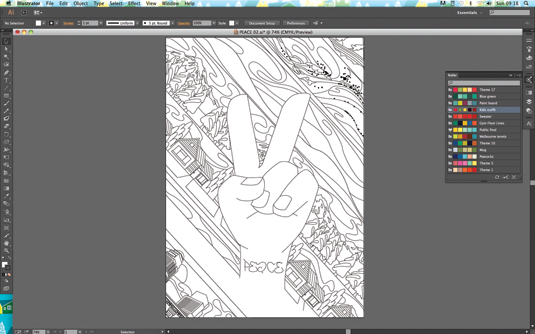
I've traced my drawing using the Pen tool. When you're ready to colour your illustration, navigate to Window>Kuler (having logged in with the right Adobe ID). Your new Kuler palettes created using the phone app will be waiting for you.
12. Build up your palettes
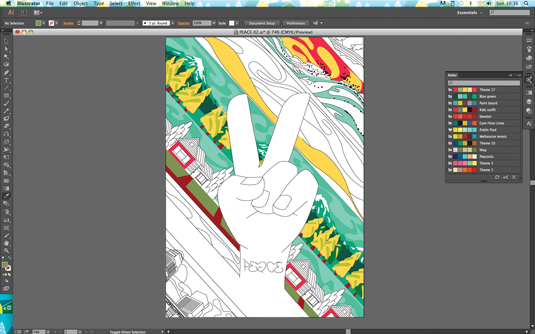
Now use your new Kuler palettes as you would any swatch or palette in Illustrator. I'm not restricting myself solely to the two colour themes I created earlier - instead I'm using them as a base for my illustration. I'm keen to build on them by using varying tones of those original colours.
13. Edit in the Swatches panel
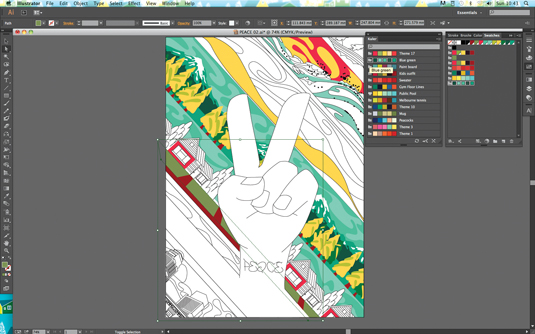
It isn't possible to edit a colour palette in the Kuler panel. However you can save the palettes to your Swatches panel (Window>Swatches) by clicking the folder icon next to each palette. Now you can edit colours or group more into your colour palette folder in the Swatches panel.
14. Add impact with the Width tool
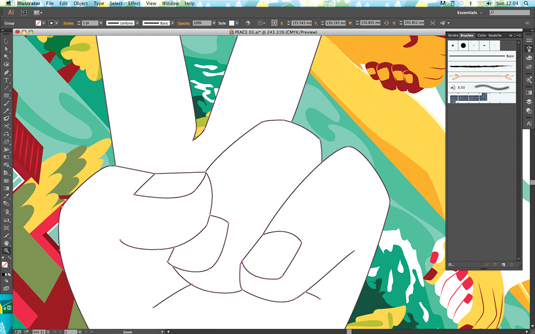
I've finished combining my two colour palettes and I'm now keen to add impact to the main hand by playing with the linework. You can add effects to linework in Illustrator CC using the Width tool (Shift+W) or experimenting with the new images in brushes functionality.
15. Speed up workflow with stroke panels
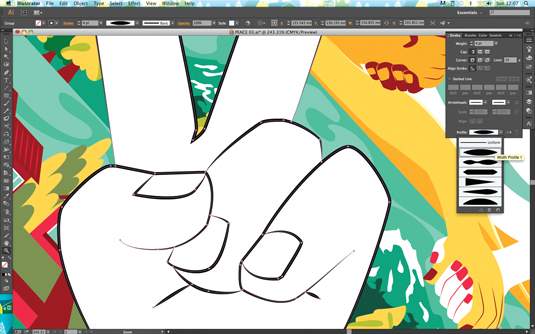
Alternatively, you could use the new stroke profiles in Illustrator CC, which have been much improved since their introduction and will turbocharge the efficiency of your workflow. Open the Stroke panel (Window>Stroke) and at the bottom you’ll see a drop-down menu containing some simple but effective profiles.
16. Adding a hand-drawn effect
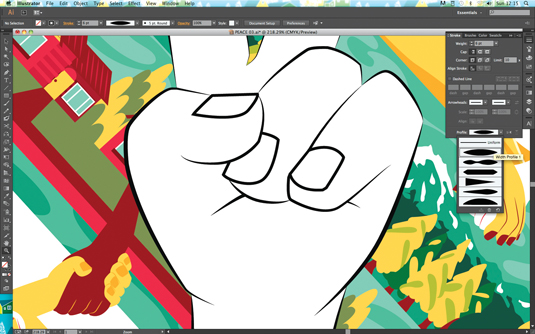
To apply a new profile to a line, simply select the line and then choose the profile you want. You can still alter the thickness of each stroke individually - the profile will adjust accordingly. In my opinion, the first option found at the top of the Profiles drop-down menu is perfect for adding a hand-drawn ink style to vectored artwork.
That's the end of part one - here's part 2...
This feature first appeared in The Ultimate Guide To Adobe Creative Cloud.
Now read these:
- Photoshop tips, tricks and fixes to try today
- Free Photoshop brushes every creative must have
- Free Photoshop actions to create stunning effects
- The best Photoshop plugins
What features of Kuler do you love - or hate? Tell us in the comments...

The Creative Bloq team is made up of a group of art and design enthusiasts, and has changed and evolved since Creative Bloq began back in 2012. The current website team consists of eight full-time members of staff: Editor Georgia Coggan, Deputy Editor Rosie Hilder, Ecommerce Editor Beren Neale, Senior News Editor Daniel Piper, Editor, Digital Art and 3D Ian Dean, Tech Reviews Editor Erlingur Einarsson, Ecommerce Writer Beth Nicholls and Staff Writer Natalie Fear, as well as a roster of freelancers from around the world. The ImagineFX magazine team also pitch in, ensuring that content from leading digital art publication ImagineFX is represented on Creative Bloq.
