16 steps to streamline your painting process
Artist Xavier Collette explains how to make your painting process more efficient as he brings a dark faerie to life in a woodland setting.
Sign up to Creative Bloq's daily newsletter, which brings you the latest news and inspiration from the worlds of art, design and technology.
You are now subscribed
Your newsletter sign-up was successful
Want to add more newsletters?

Five times a week
CreativeBloq
Sign up to Creative Bloq's daily newsletter, which brings you the latest news and inspiration from the worlds of art, design and technology.

Once a week
By Design
Sign up to Creative Bloq's daily newsletter, which brings you the latest news and inspiration from the worlds of art, design and technology.

Once a week
State of the Art
Sign up to Creative Bloq's daily newsletter, which brings you the latest news and inspiration from the worlds of art, design and technology.

Seasonal (around events)
Brand Impact Awards
Sign up to Creative Bloq's daily newsletter, which brings you the latest news and inspiration from the worlds of art, design and technology.
09. Liquify is your friend
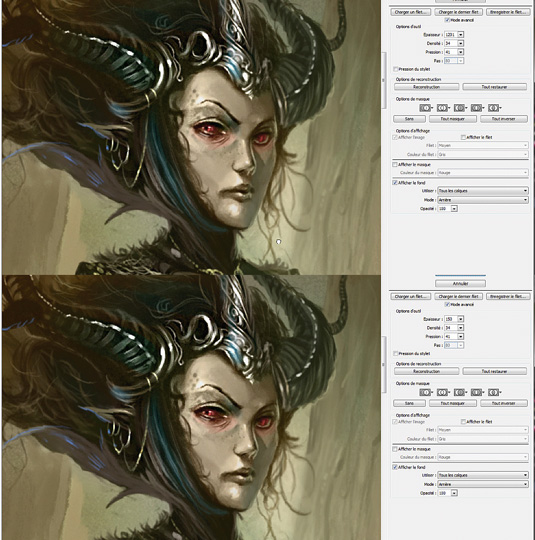
Remember to take advantage of the features in a digital painting program. For example, Photoshop's Liquify tool is a powerful editing option. Here, I use it to fix the faerie's face, which I have decided is too long.
10. Finish her
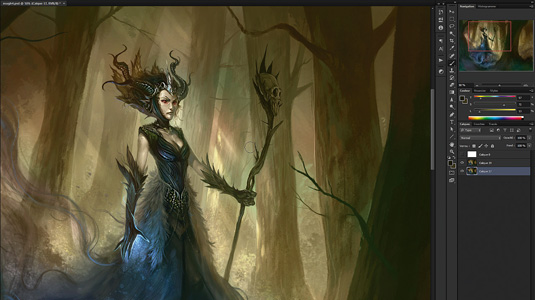
Time to add the final details to the character. I lay down the last brush strokes on her corset, finalise the look of her skull sceptre, fix the little glows of blue light on her costume, and so on.
Now is a good time to add some life to the background with rays of light and some noise – a spotted brush in Color Dodge mode will do this perfectly.
11. Creature feature
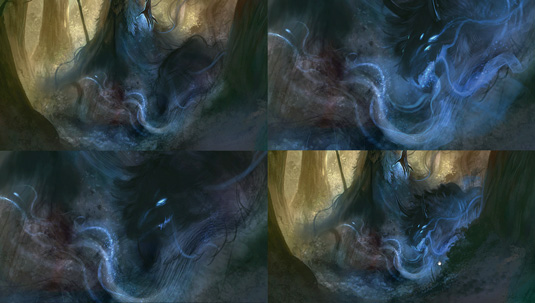
I want my dark faerie to have some… pets. The bottom of the composition is a little loose, so it's the ideal area to introduce creatures that have been brought to life through her dark magic.
I don't have a definite idea of what I'm going to do, so I sketch with a dark brush, then use a brush set to Color Dodge to add details such as eyes and a mouth with some magic coming out.
12. A menagerie of monsters
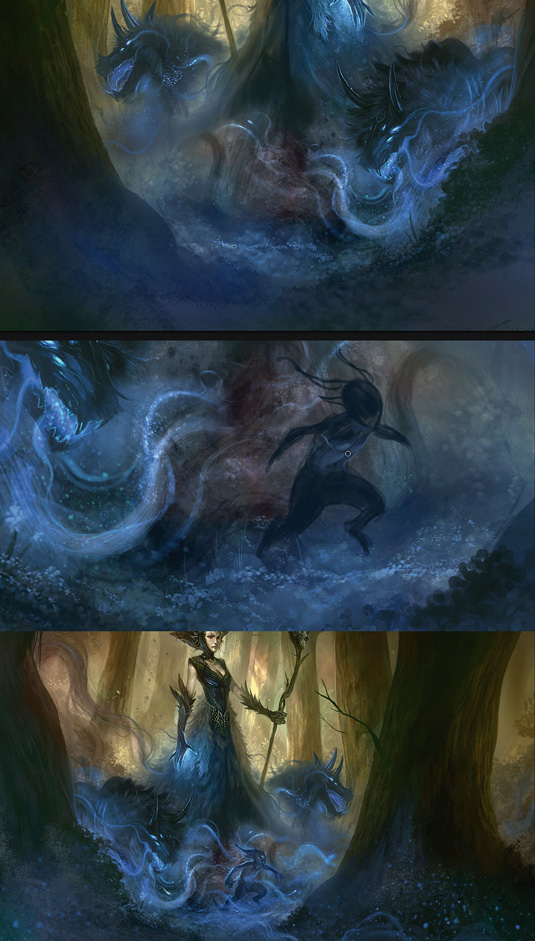
I just work on instinct until I'm happy with the design of my creature. Then I can add another one. I apply the same work process: create a little sketch and then add details using a brush set to Color Dodge.
I also add another creature – a kind of faun – and create a magical wispy cloud that straddles the background and foreground. This adds further depth to the scene.
Sign up to Creative Bloq's daily newsletter, which brings you the latest news and inspiration from the worlds of art, design and technology.
13. Blurry elements

I've almost finished this illustration, and now I'll apply some little tricks that I've learned over the years. I want my faerie to see the watcher – the viewer – who's hiding in the forest.
So I draw some branches with a Hard Stroke brush. There's no need to paint in details – I simply use big, flat strokes. Then I add a Gaussian Blur to it, and that's done!
14. Grain adds texture
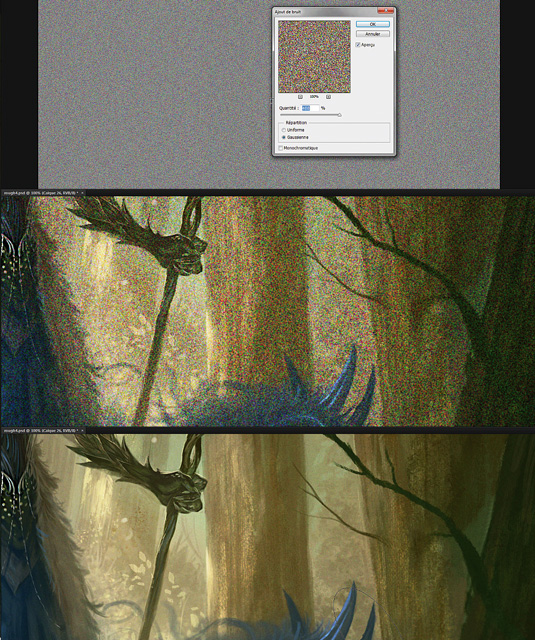
I like to apply texture to my paintings. Sometimes it's just a paper texture on an Overlay layer. But here I'll do something different.
I add a neutral grey layer (Saturation 0, Luminosity 50) and apply Filter>Noise>Add Noise twice (set to maximum) and Filter>Blur>Blur three times. Then I set the layer to Overlay and tweak the Opacity, settling on five to six per cent.
15. More magical life
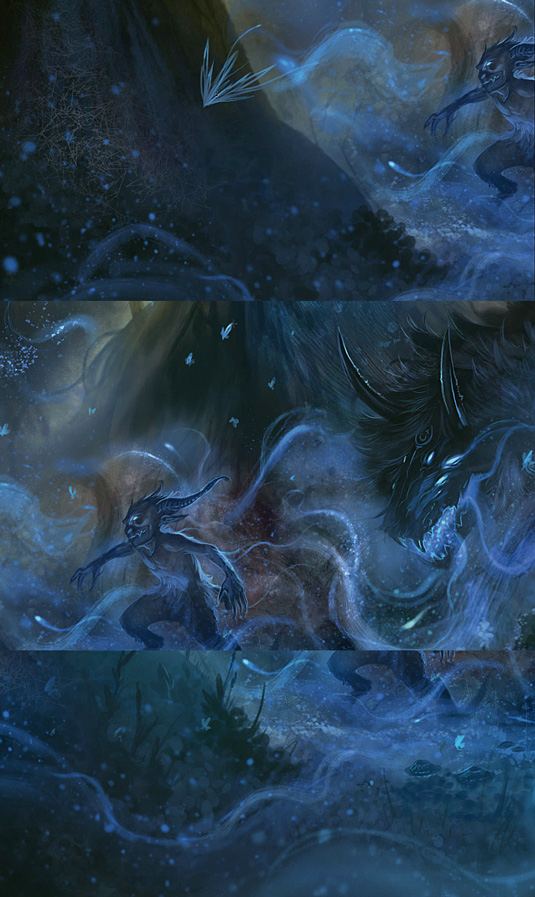
I decide that the painting needs more life. My solution is to quickly paint some butterflies in the foreground, again to give the scene more depth, together with smaller ones around the magical cloud and the main character.
I also introduce a range of forest flora, such as small vegetables, leaves, herbs and mushrooms. I'm happy with these late additions.
16. Final trick
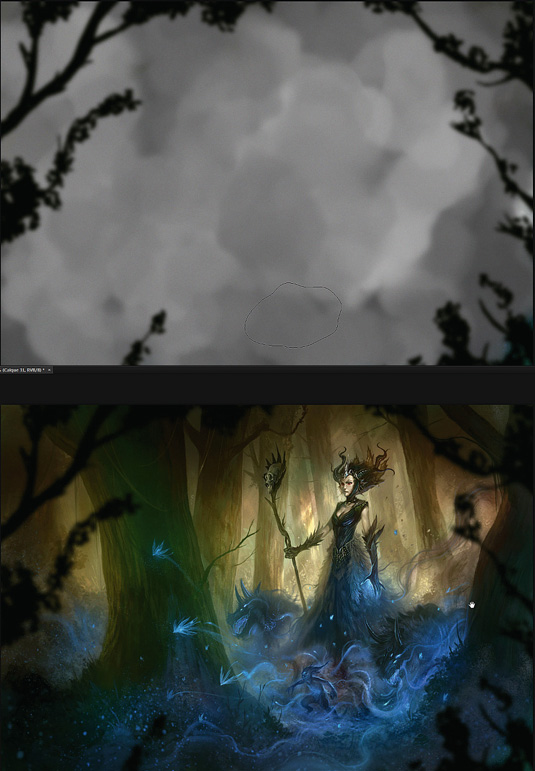
One last piece of advice. Variations are good, and a simple way to add little more variety to your art is to create a new layer and fill it using a cloudy brush.
Set your primary colour to a light grey and your secondary to a dark one, and use the cloudy brush to generate a decent amount of contrast. Then set the layer to Overlay. I follow my own advice, and finish the painting!
Words: Xavier Collette
Belgium-born Xavier is a full-time freelancer who works on book covers, boardgames,RPGs, children's titles and comic books. This article originally appeared in ImagineFX magazine issue 85.
Like this? Read these...
- How to create striking horror art
- How to draw a fantasy female manga character
- Free Photoshop brushes every creative must have

The Creative Bloq team is made up of a group of art and design enthusiasts, and has changed and evolved since Creative Bloq began back in 2012. The current website team consists of eight full-time members of staff: Editor Georgia Coggan, Deputy Editor Rosie Hilder, Ecommerce Editor Beren Neale, Senior News Editor Daniel Piper, Editor, Digital Art and 3D Ian Dean, Tech Reviews Editor Erlingur Einarsson, Ecommerce Writer Beth Nicholls and Staff Writer Natalie Fear, as well as a roster of freelancers from around the world. The ImagineFX magazine team also pitch in, ensuring that content from leading digital art publication ImagineFX is represented on Creative Bloq.
