Create a glowing neon text effect
Use Photoshop to build your own font from scratch, light it up and animate it for a neon effect.
Sign up to Creative Bloq's daily newsletter, which brings you the latest news and inspiration from the worlds of art, design and technology.
You are now subscribed
Your newsletter sign-up was successful
Want to add more newsletters?
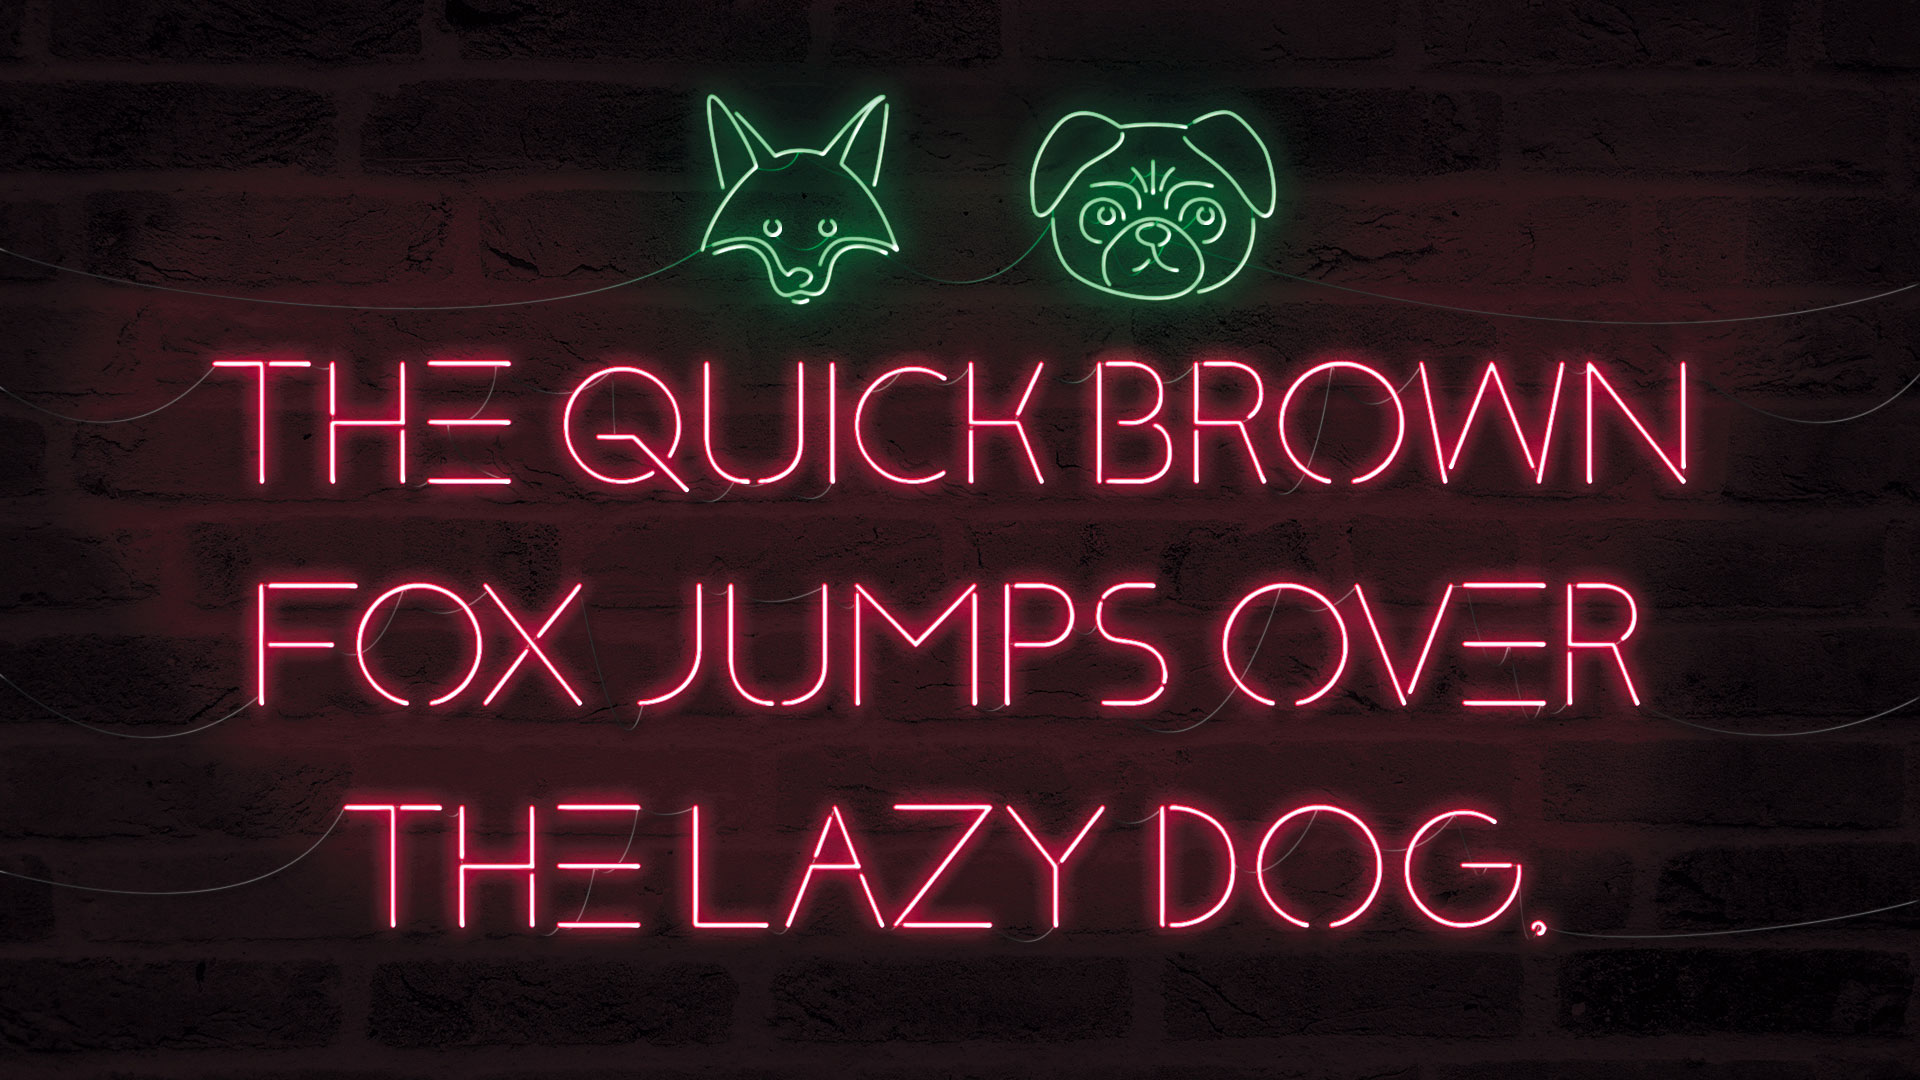
Often, it's the simplest effects that look the most striking, and neon text is one such project. It's also much easier to create a neon effect that looks realistic than you might think. While this entire tutorial only uses one background image, your brain tricks itself into seeing this as a real, functioning neon sign – that's the power of Photoshop CC's layer styles. Learn more about the amazing things you can do with Photoshop's layers here.
The fact that this entire project is built from scratch – from the font to the colours of the glow, to the eventual animation – means that there's a lot of scope for creativity. You can choose exactly what you want every part of this effect to look like.
Neon continues to be popular. Showing off saturated tones against a dark, muted background is a great way to present a landing page, a logo design or a header, and it's easy to animate your work and save it as a GIF with a low file size (keep your files safe in cloud storage). Let's dive into how to create it.
Article continues belowCreating a font to be displayed on a new website? You need a website builder and excellent web hosting.
01. Start creating the font
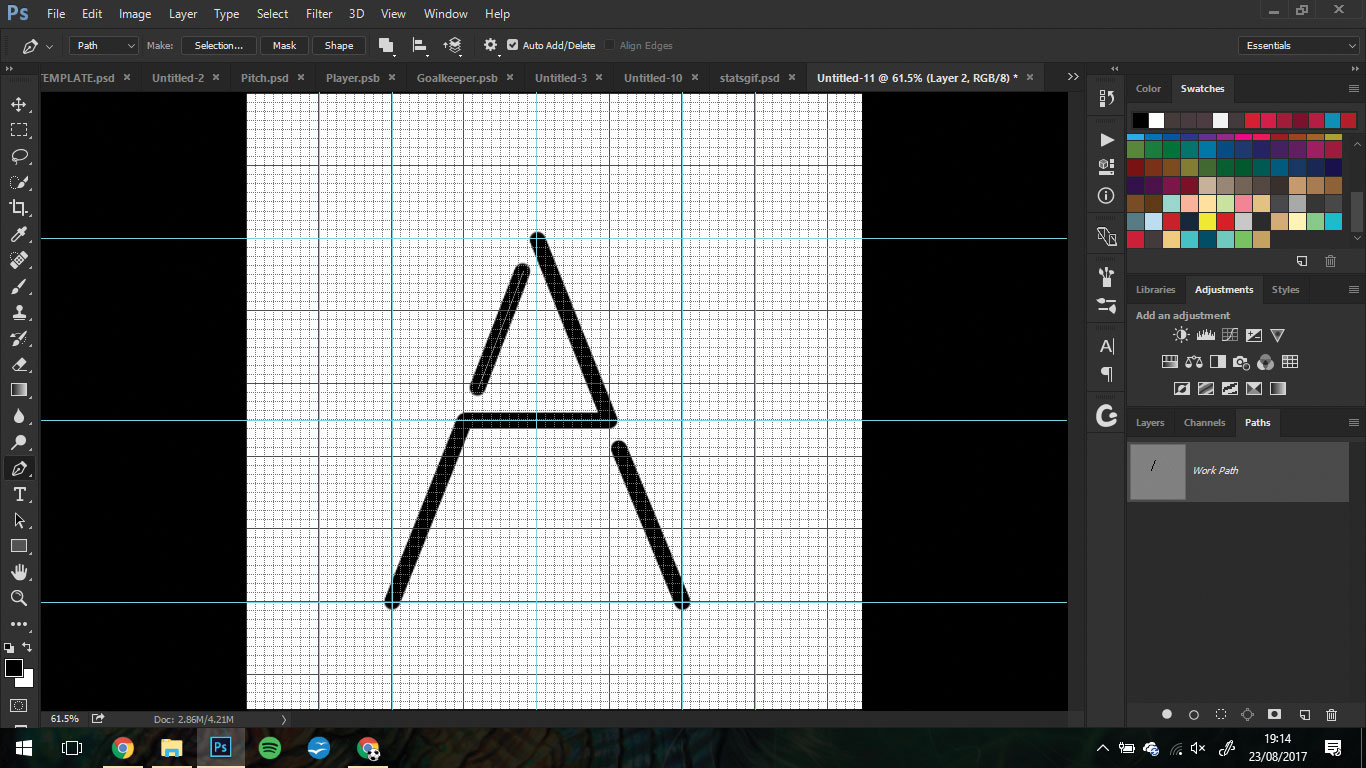
Create a new document 550x550px in Photoshop, and bring up the grid by hitting cmd/ctrl+'. Create a new layer and with the Pen tool, sketch out your first letter. Leave gaps in the character, as this is going to be a neon-style typeface. Once you're happy, hit Stroke within the Paths tab to draw in the letter.
02. Work through the alphabet
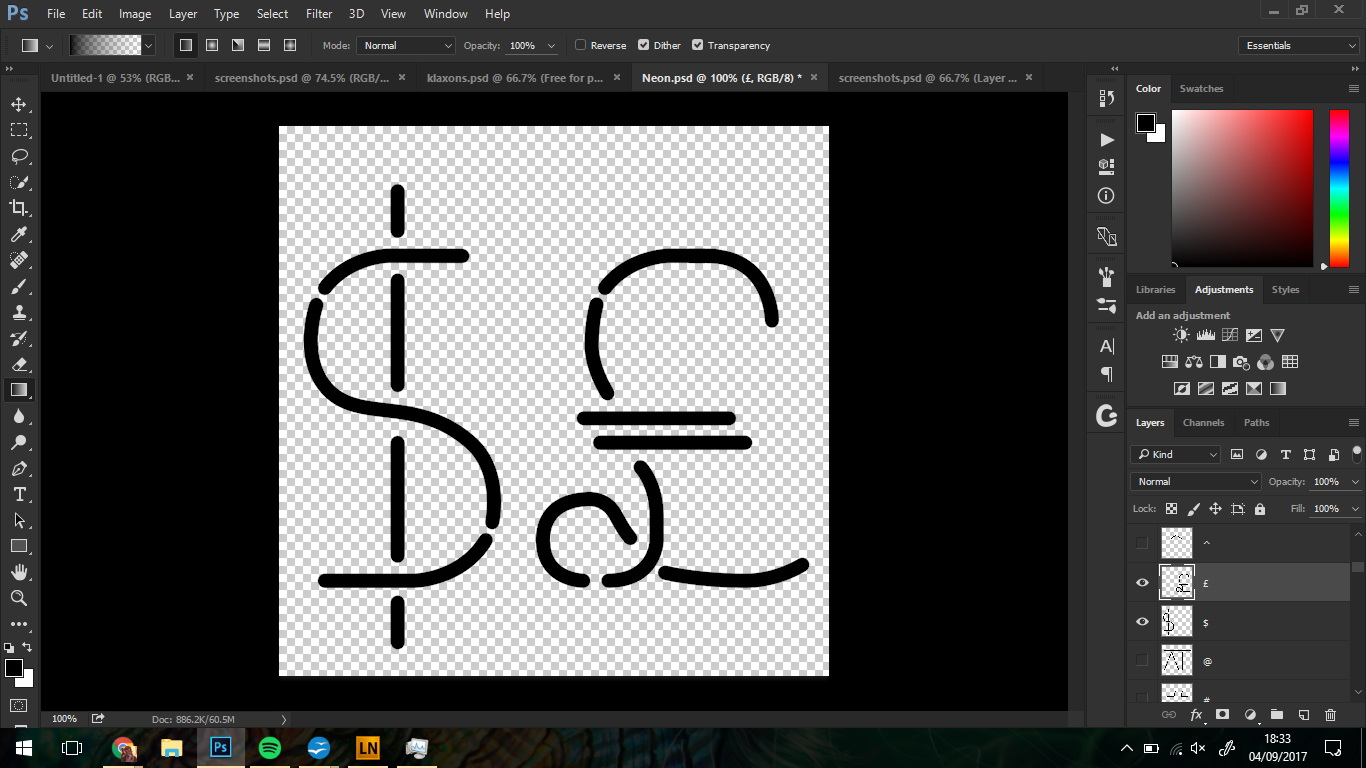
Create as many characters as you want, with the Pen on a new layer each time. If you want to, add in some special characters, such as currency symbols, punctuation and accented letters. Follow the same basic style that you started with, so your font is cohesive.
03. Move into FontCreator
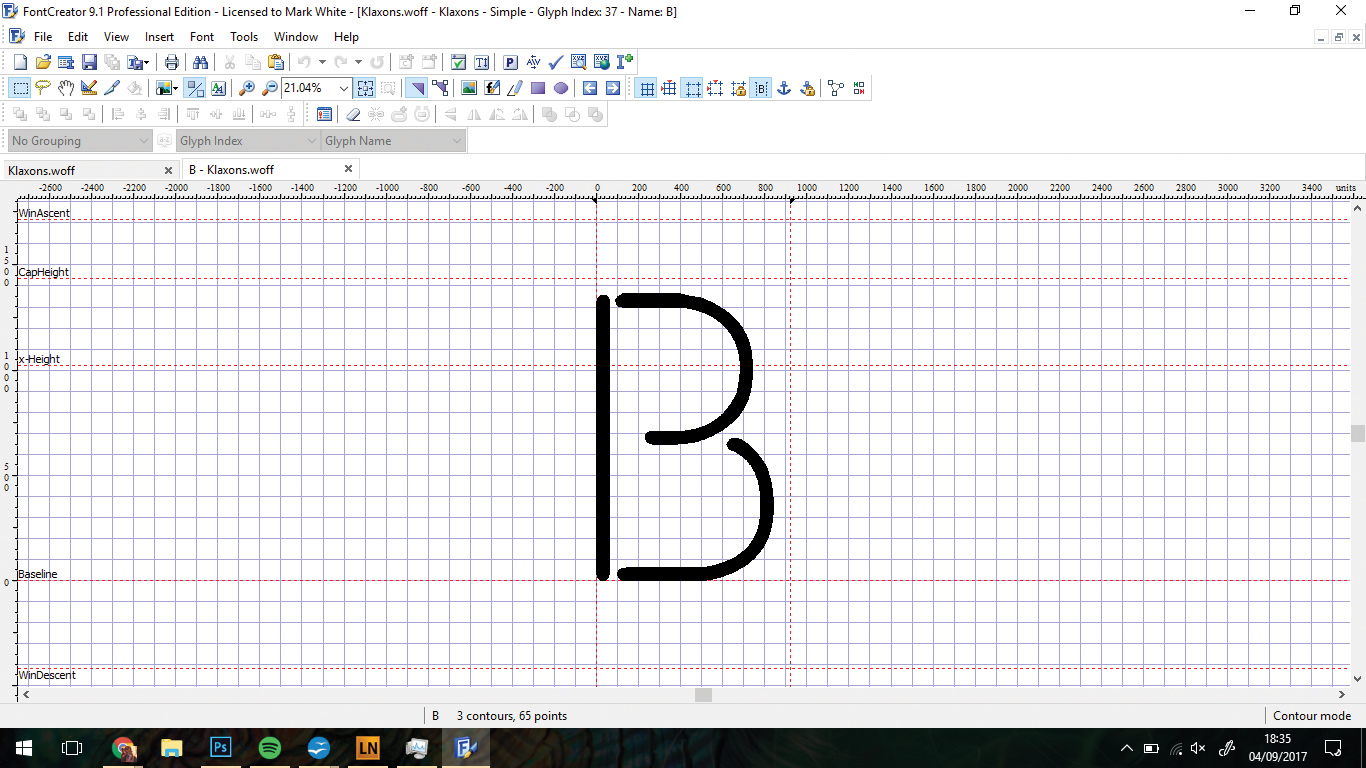
If you have High-Logic FontCreator, this is the part where you can turn your characters into a font. If you don't, a free trial is available. By pasting each character into FontCreator, we can create a useable typeface for Photoshop.
Sign up to Creative Bloq's daily newsletter, which brings you the latest news and inspiration from the worlds of art, design and technology.
Work your way through FontCreator by double-clicking each character and pasting in your Pen-drawn work. Make sure that each letter is on the same baseline.
04. Kern your text
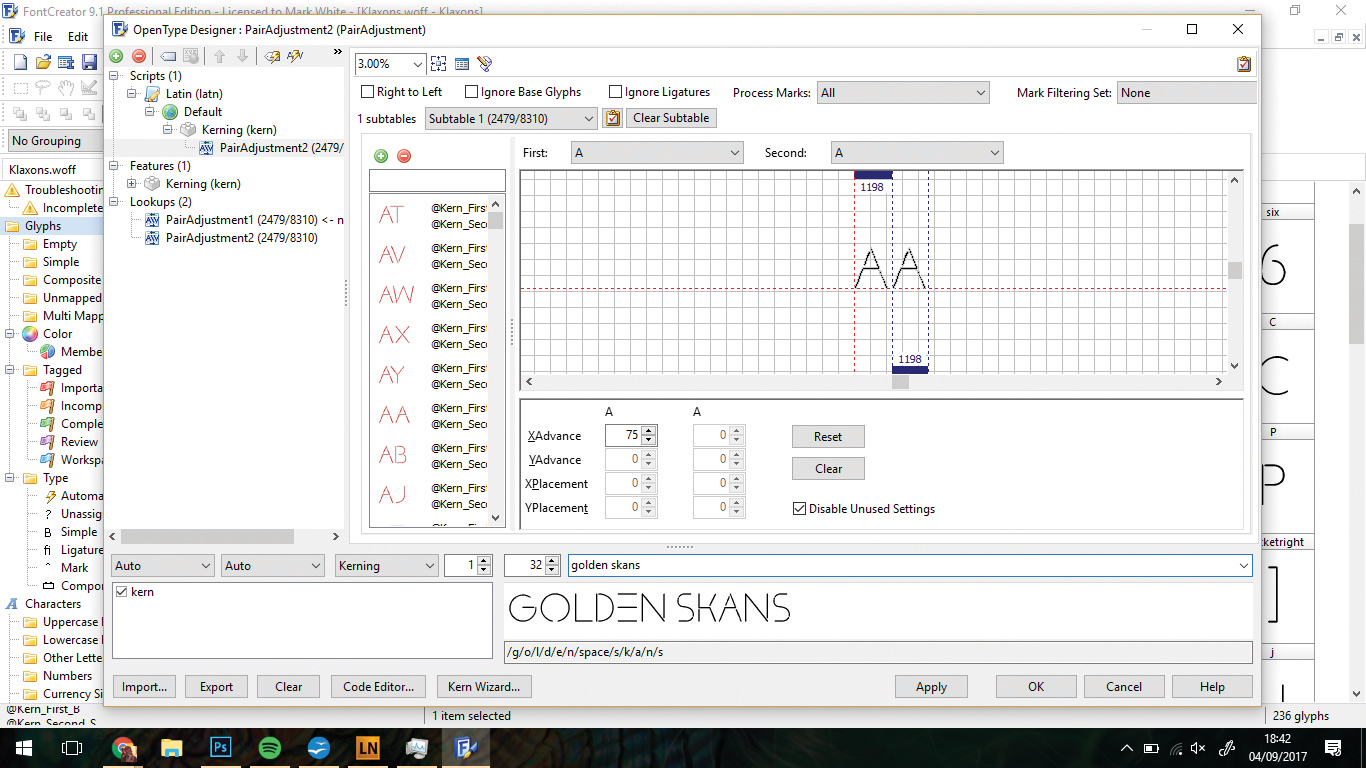
Kerning is the space between each of the letters (for more information, take a look at our typographic glossary), and the Auto-kerning option within FontCreator naturally spaces out your letters so that the font looks neat. Try this option and make sure each letter looks good together.
Once it's complete, export your font and install it into your computer. This will automatically add it to Photoshop CC.
05. Set up a Photoshop document
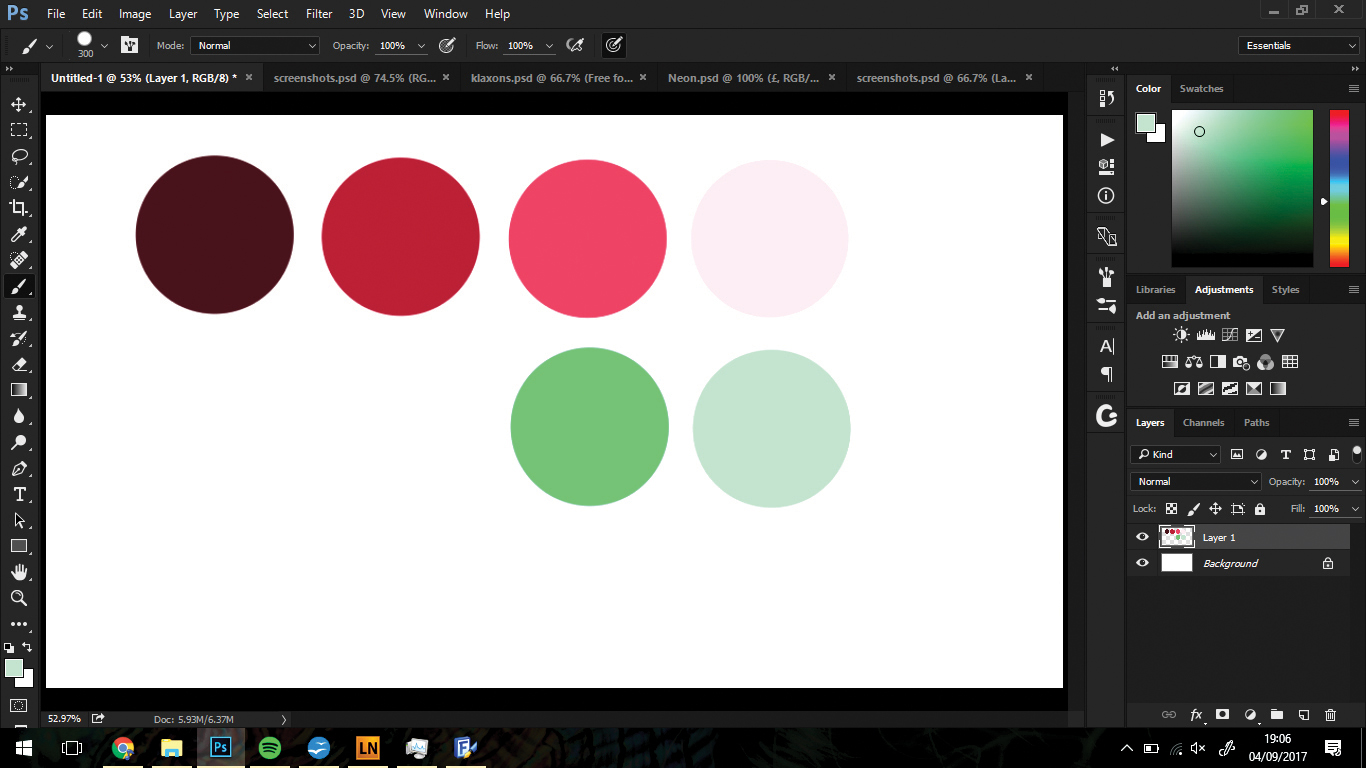
Create a new document in Photoshop. On a new layer, create a colour palette by using a big brush. We went with #501d26, #af273d, #f74663, #ffdae1, #35e985 and #b2dcc4.
Then find a suitable background image and drag it into Photoshop. Create a new layer, fill it the deep red colour, and duplicate. Set one layer to Multiply, and one to Colour. Create a Brightness/Contrast layer and set to -75 in Brightness. Duplicate this and mask the centre for a vignette.
06. Input the text
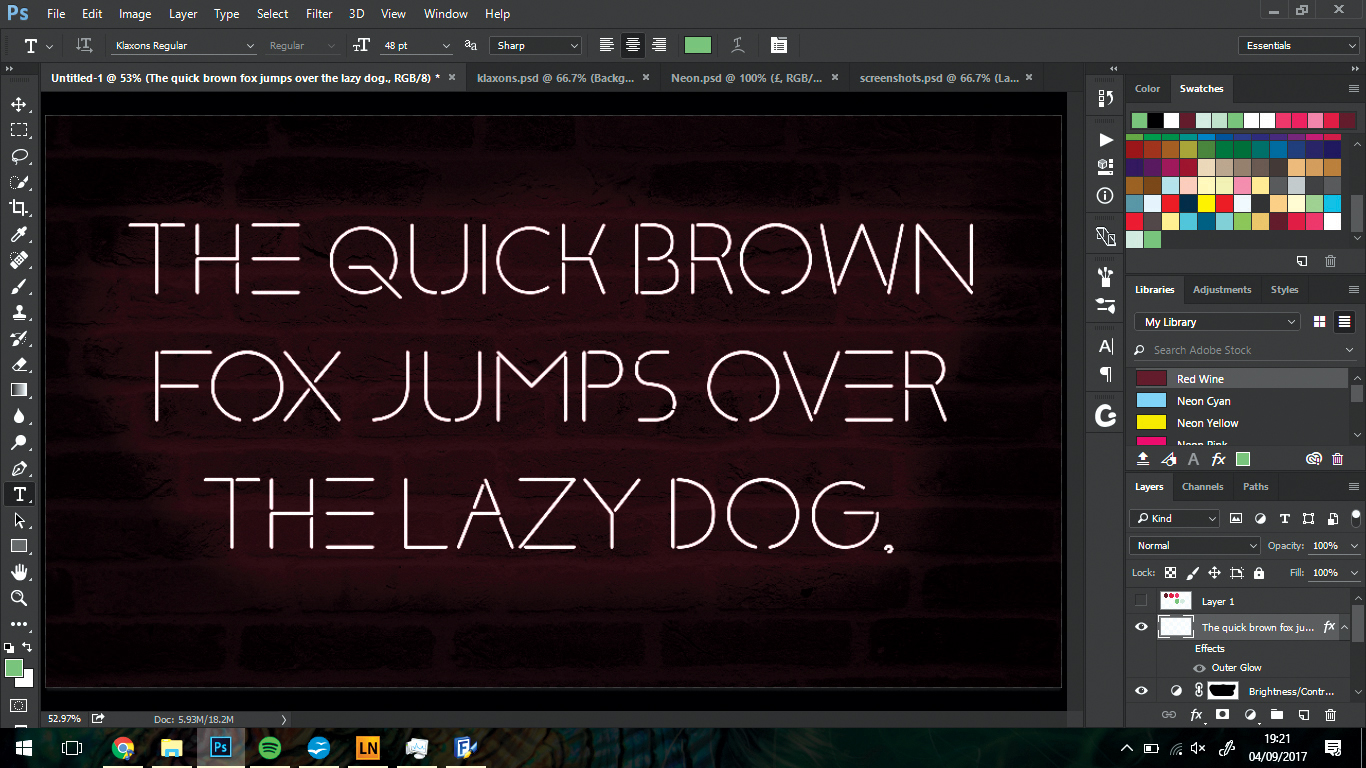
Grab the Type tool and select your font (if you didn't create a font earlier, just place in each letter individually). Spell out your text, before ctrl+right-clicking the layer and selecting Rasterize Type.
07. Create a glow
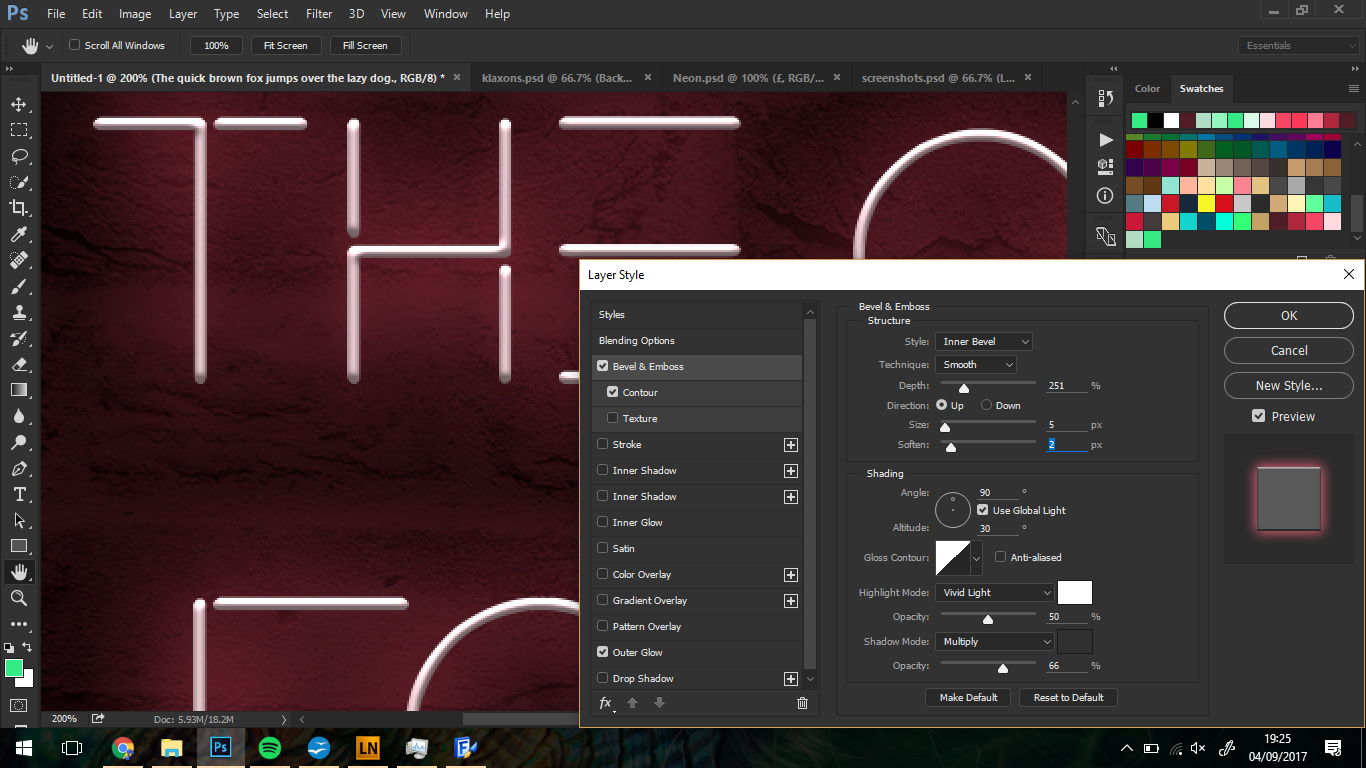
ctrl+right-click the layer, and go to Blending Options > Outer Glow. There, input an opacity of 50%, a spread of 5% and a size of 63px. Now, you can see your neon text beginning to look a lot more realistic. Choose a bright colour.
Click on Bevel and Emboss, still in the Layer Styles option. Choose Depth: 250%, size: 5px, Soften: 2px. Use the Highlight and Shadow modes to add a little more depth to the text, and play with these options until you find the right mix.
08. Play around with shadows
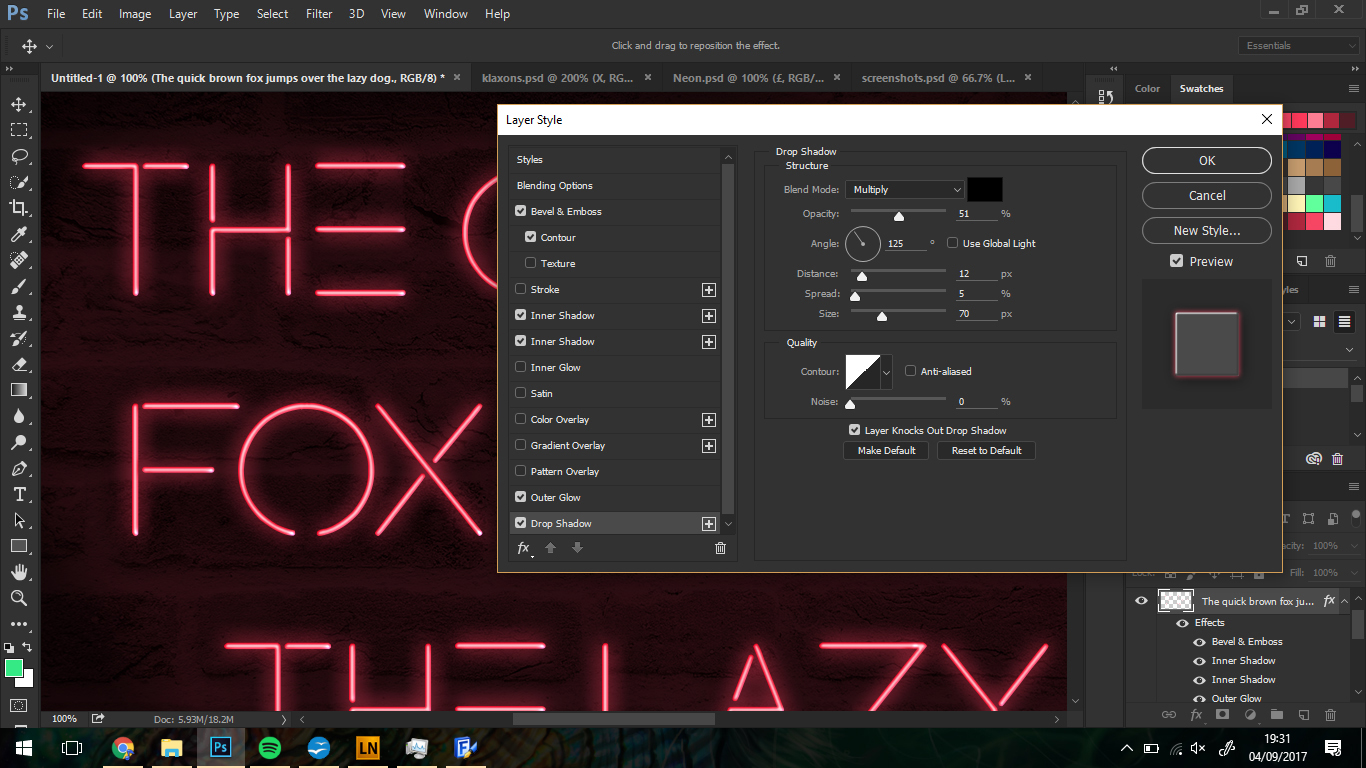
For the Inner Shadow, choose the same bright colour you picked for the Outer Glow. All you'll need to edit here is the size, depending on how big the text is. Alter this and leave all other values at 0.
As the neon text is going to be sitting off the wall slightly, we're going to need a subtle drop shadow, but not too much as we don't want to compromise the Outer Glow. Use a low opacity, and give this one some more Distance and Size.
09. Light it up
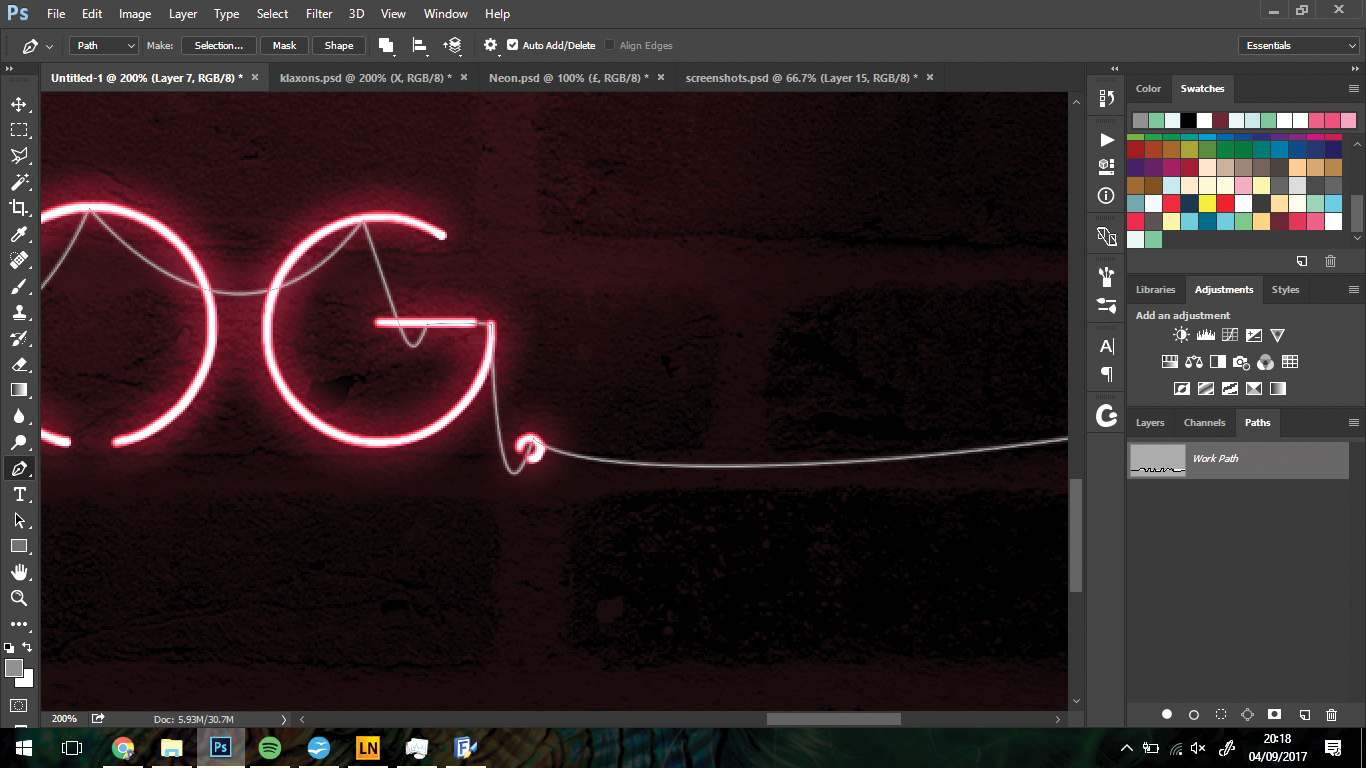
Go to the text layer, ctrl/right-click and choose Copy Layer Styles. Click on the animal layer, ctrl/right-click and choose Paste Layer Styles. Double-click on the FX icon and turn the pink colours to green for a little contrast to the text.
Grab the pen tool and create a string through the neon text and the animals that you've created. Make sure that it follows through all of the characters, and then stroke with #808080, with a 2px brush selected with 1% spacing.
10. Add a drop-shadow
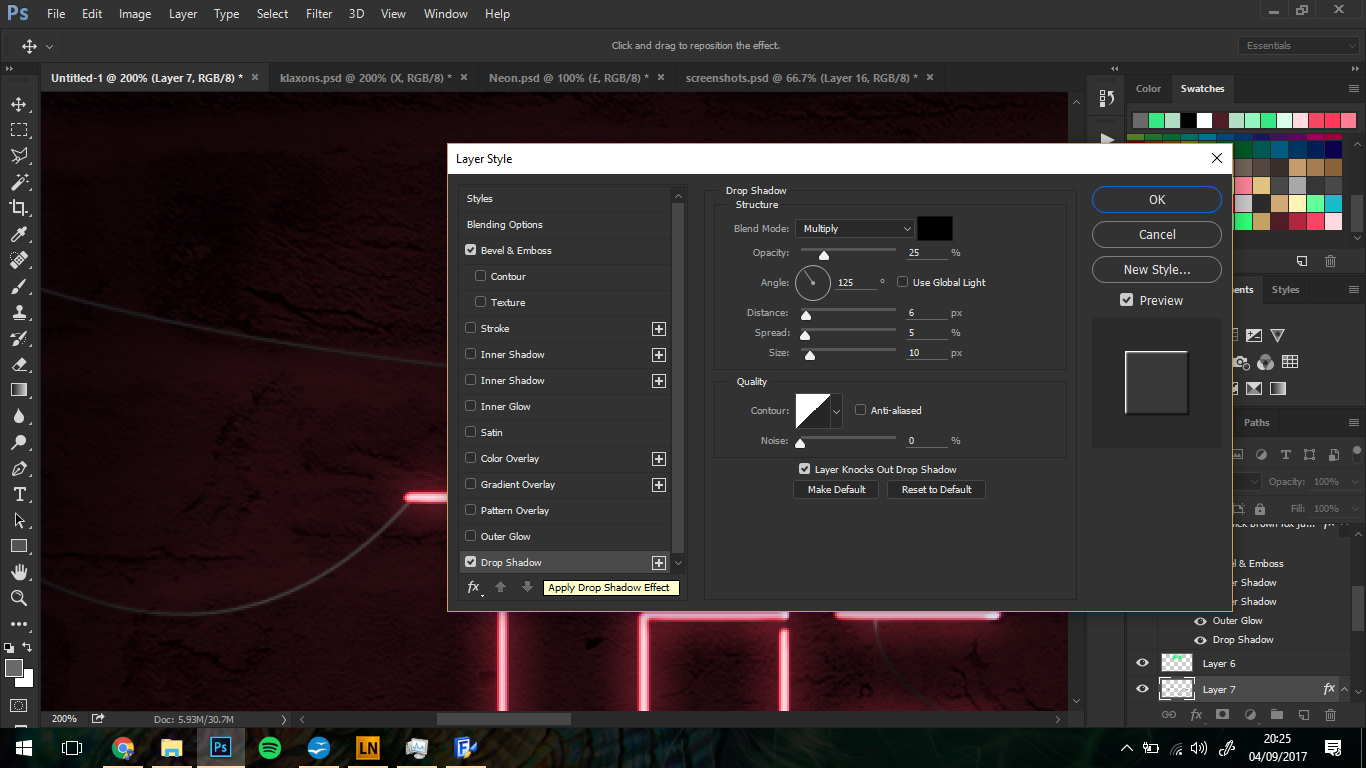
Go to the Blending Options for the string you've just made. Head to Bevel to give it a subtle shape, and give it a subtle drop shadow, too. The variables here depend on the size and shape of the string you've created, so just experiment to see what works.
11. Create an 'off' version
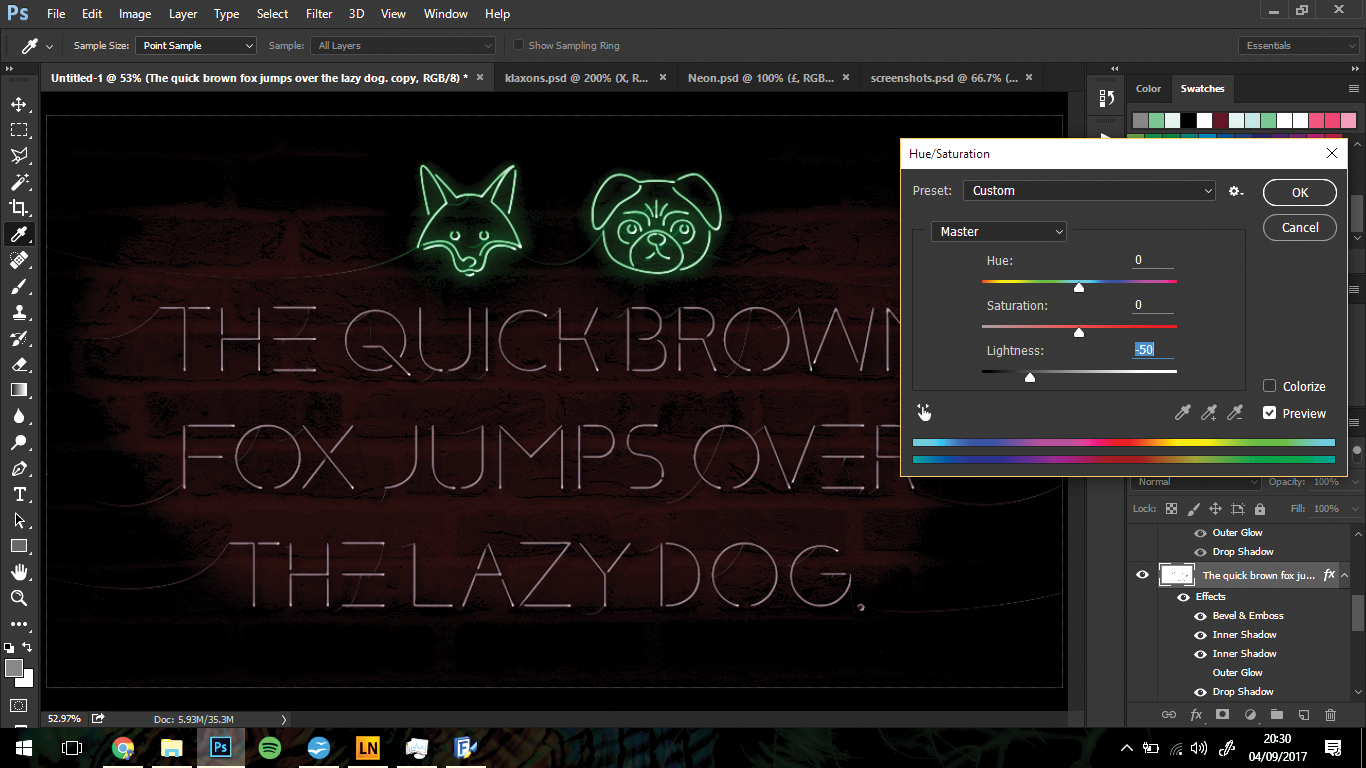
Let's create a layer of text that isn't glowing, so we can animate a flicker on some of the letters. Duplicate the text layer, then hide the Outer Glow style. Set the Inner Shadow to #808080, then alter the Lightness of this layer to -50, using Hue/Saturation (cmd/ctrl+U).
On the glowing text layer, grab the Marquee tool and select a few letters you want to switch off briefly in the animation. Make duplications of this layer, with these letters masked out until you have sufficient layers to create an animation.
12. Animate your design
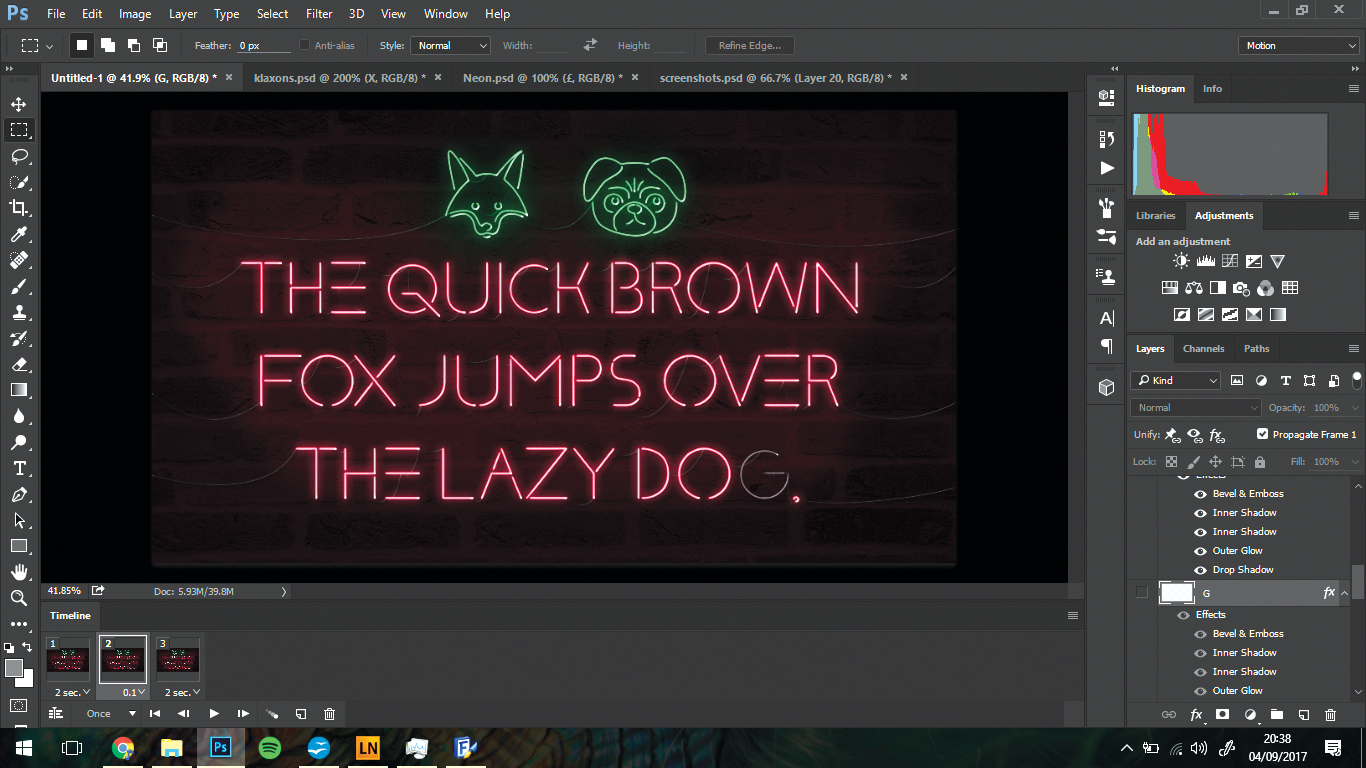
Go to the top-right of Photoshop and select Motion as a Workspace option. The animation timeline will appear at the bottom; here, you can define which layers are shown or hidden at for however long you want them to be.
Create new frames along the bottom with various letters either glowing or not glowing, depending on whether the layer is visible or not. Set the time of each layer's animation using the little arrow on each frame, too. Save as a GIF using Save For Web.
This article was originally published in Web Designer, the creative web design magazine – offering expert tutorials, cutting-edge trends and free resources. Subscribe to Web Designer here.
Related articles:

Mark is the former techniques editor at Photoshop Creative magazine. He uses Photoshop almost exclusively, and has been using the software for over a decade.
