How to digitally sculpt in ZBrushCore
How DynaMesh makes it easy to sculpt in 3D.
Sign up to Creative Bloq's daily newsletter, which brings you the latest news and inspiration from the worlds of art, design and technology.
You are now subscribed
Your newsletter sign-up was successful
Want to add more newsletters?
ZBrushCore ($149.95 for a single user licence) is a simplified version of ZBrush that serves as an introduction to digital sculpting. It has some of the key features of ZBrush and it's easy to learn. Here we'll share various workflows for 3D sculpting using ZBrushCore, with an emphasis on particular processes and features that will help you produce professional-looking objects and 3D art.
- Christmas offer: Save up to 47% on a subscription to ImagineFX
DynaMesh is a clever process that removes the technical barriers when sculpting in 3D. There are a few concepts that you might have heard of, such as polygons, geometry or topology, and they generally refer to the structure of a 3D object.
Often, when you edit a mesh or an object in 3D, you need to be aware of how the changes you're making affect the structure. DynaMesh takes care of all of these technical aspects, enabling you to focus on sculpting and designing your object.
Article continues belowThink of this as working digital clay. You can push, pull, flatten or stretch areas of your model without worrying about the distribution of polygons. If you start sculpting and the mesh becomes distorted, you can run the DynaMesh process to redistribute and create more polygons that will help you describe the shape you're trying to make.
01. Enable DynaMesh
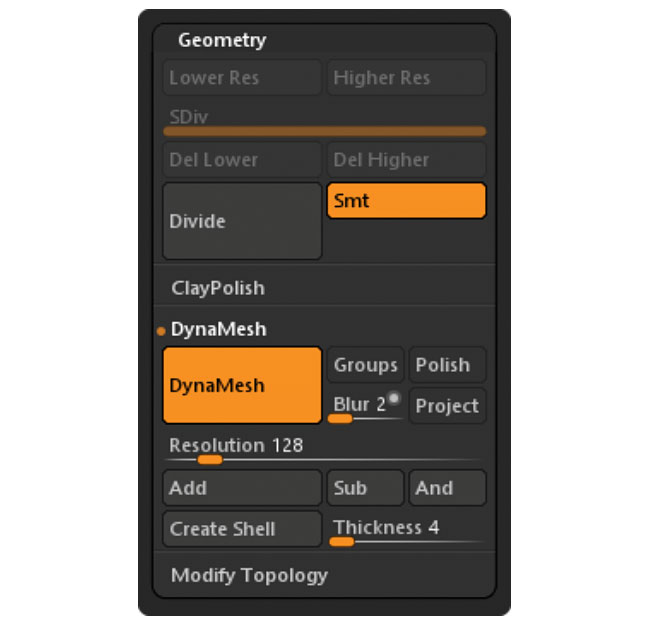
When you first open ZBrushCore, you'll see a sphere that's loaded by default and you can select any of the brushes at the bottom of the UI to start adjusting the mesh in different ways. Click the DynaMesh sub-palette on the right-hand side of the screen to expand it. You'll see the DynaMesh switch is orange, which means that it's turned on.
02. Get the hang of re-DynaMeshing
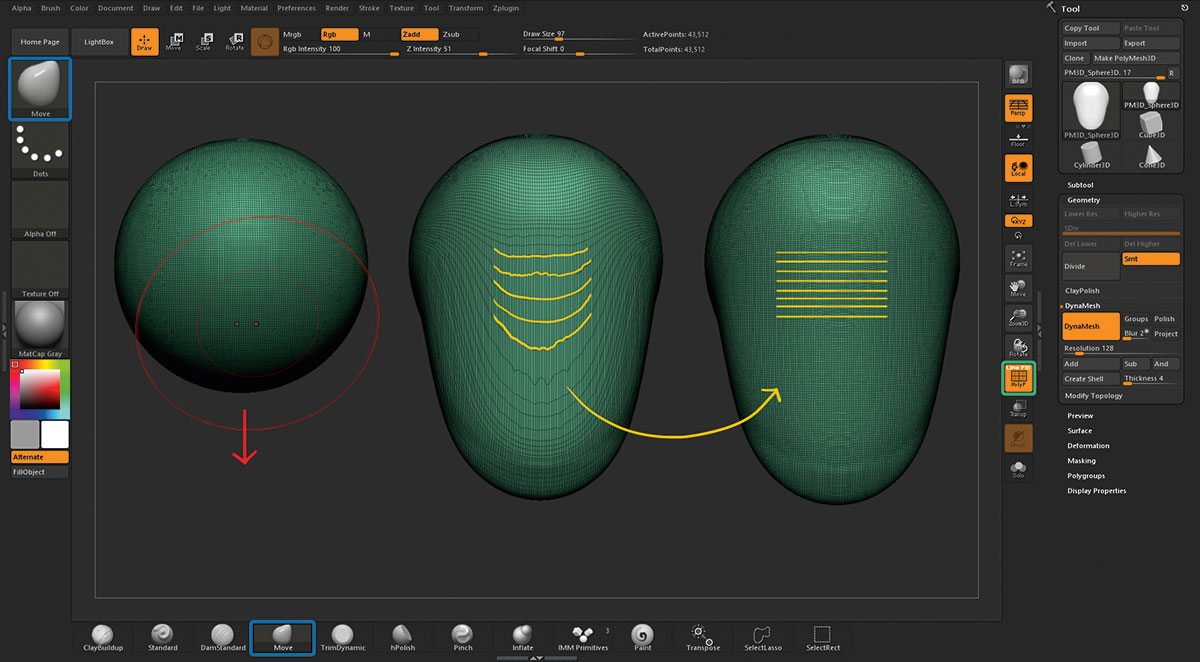
Let's turn Polyframe on so we can see the underlying structure by pressing Shift+F. Go ahead and select the Move brush: you can use the shortcuts from the bottom of the screen or the brush's thumbnail to access the library. Click the sphere and drag to create an interesting shape. The polygons are now getting stretched, but we can hold down Ctrl and click and drag on an empty space to re-DynaMesh.
03. Adjust the DynaMesh resolution
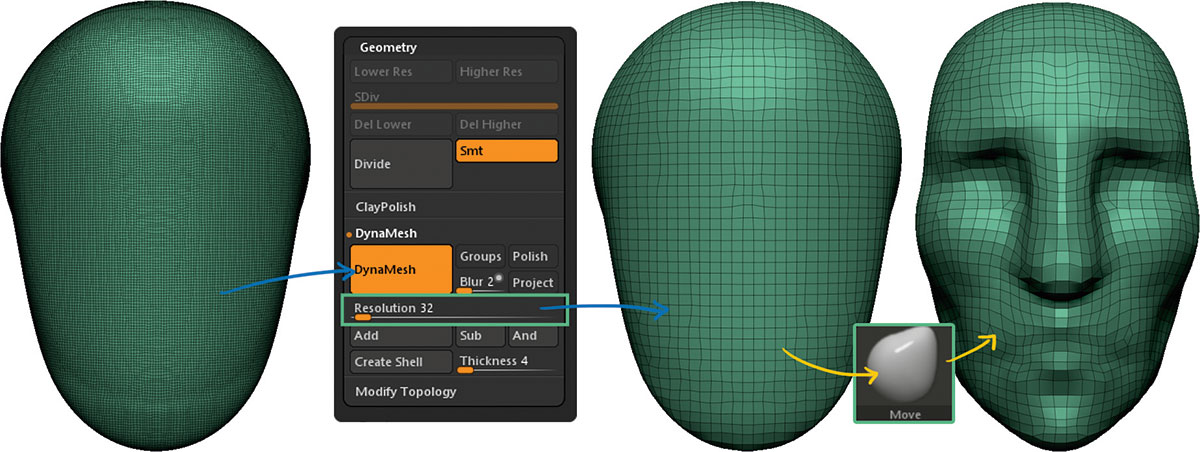
During the blocking stages it's good to keep the amount of polygons very low so that we can perform large proportional changes. You'll notice a few other options under the DynaMesh sub-palette. Select the Resolution slider and reduce the number from 128 to about 32, so the next time you perform a re-DynaMesh action (Ctrl+click drag), ZBrushCore will maintain the shape but with fewer polygons.
Sign up to Creative Bloq's daily newsletter, which brings you the latest news and inspiration from the worlds of art, design and technology.
04. Polishing the model
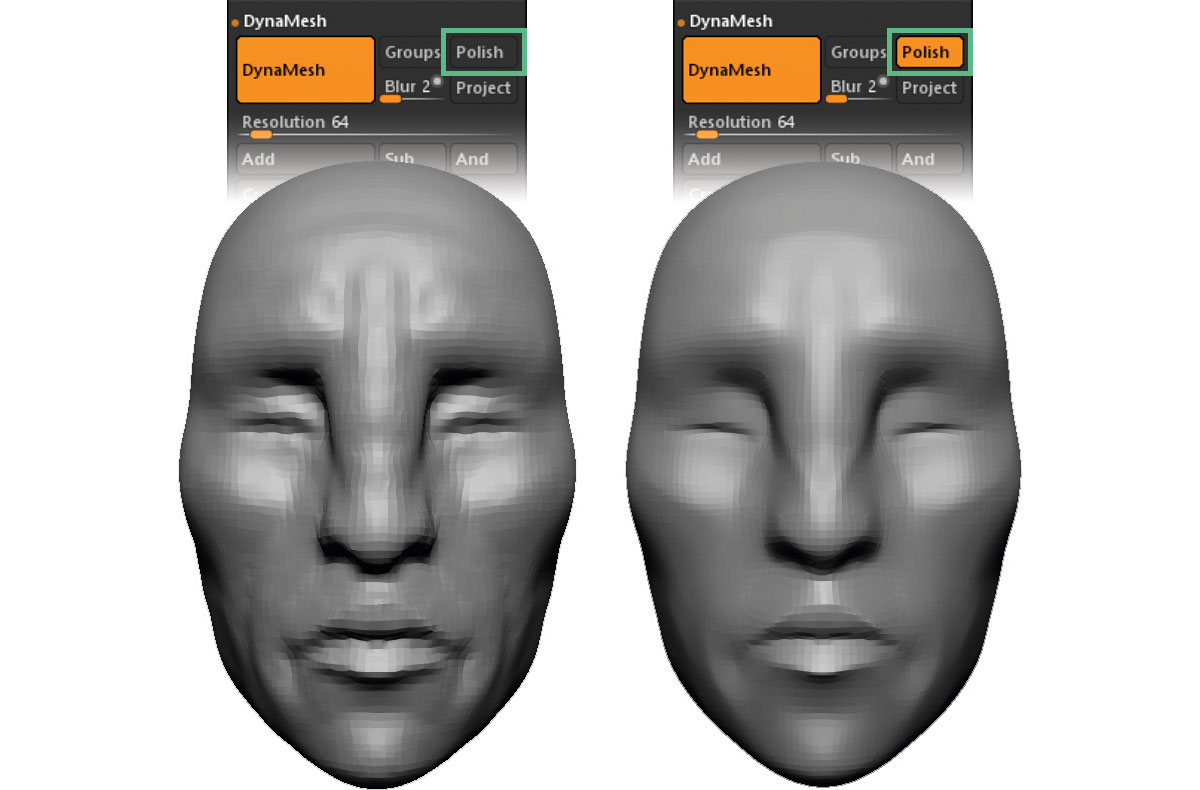
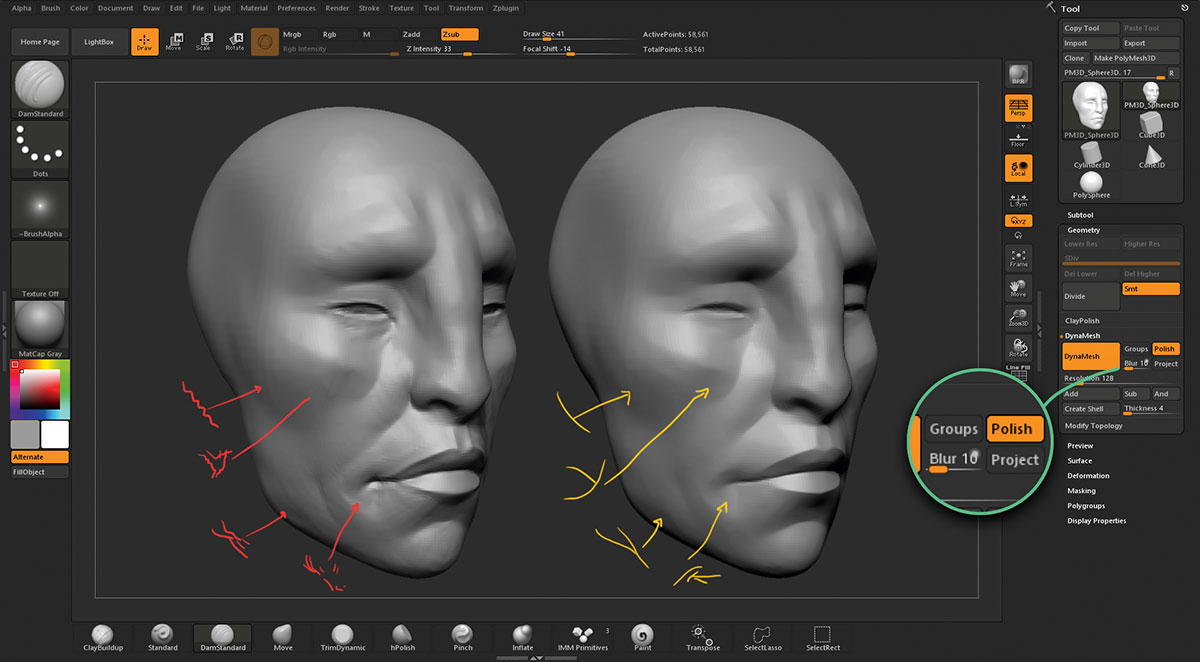
I increase the resolution slightly (64) and work on some details. However, there are areas that feel a bit 'bumpy'. You can use the Smooth brush (holding the Shift key) to even out these areas or simply enable the Polish switch from the DynaMesh sub-palette. Once Polish is turned on, the re-DynaMesh process will also perform a polishing operation on the model.
05. Apply blur
I add a few more details and definition using the ClayBuildup brush. At this point we probably need more resolution to work on more details, so I increase the Resolution. The Polish switch defines the planes of the face after DynaMeshing, but you can also use the Blur slider to smooth all major details on the model: high values produce a smoother surface, while a value of 0 will respect the smaller details.
This article was originally published in issue 152 of ImagineFX, the world's best-selling magazine for digital artists – packed with workshops and interviews with fantasy and sci-fi artists, plus must-have kit reviews. Buy issue 152 here or subscribe to ImagineFX here.
Special Christmas offer: Save up to 47% on a subscription to ImagineFX for you or a friend for Christmas. It's a limited offer, so move quickly...
Related articles:
