Sculpt realistic anatomy in ZBrush
How to create a realistic likeness in anatomy sculpts using ZBrush.
If you want to go further than just using free 3D models and learn how to sculpt realistic anatomy in ZBrush, this is the tutorial for you.
As you will see, ZBrush is an amazing tool for a project like this because it provides you with the much-needed freedom required when shaping forms.
Download the files you'll need for this tutorial.
01. Look for references

If you're going for a full body anatomy study like I am, then make sure you have enough reference material for each part. You can find some 360-degree pictures of a model in various poses here. In addition, Google and Pinterest are great resources to search for images.
I decided on Michael Phelps because of his well-defined muscle structure, the huge amount of reference material available and his unusual body proportions.
02. Check body proportions
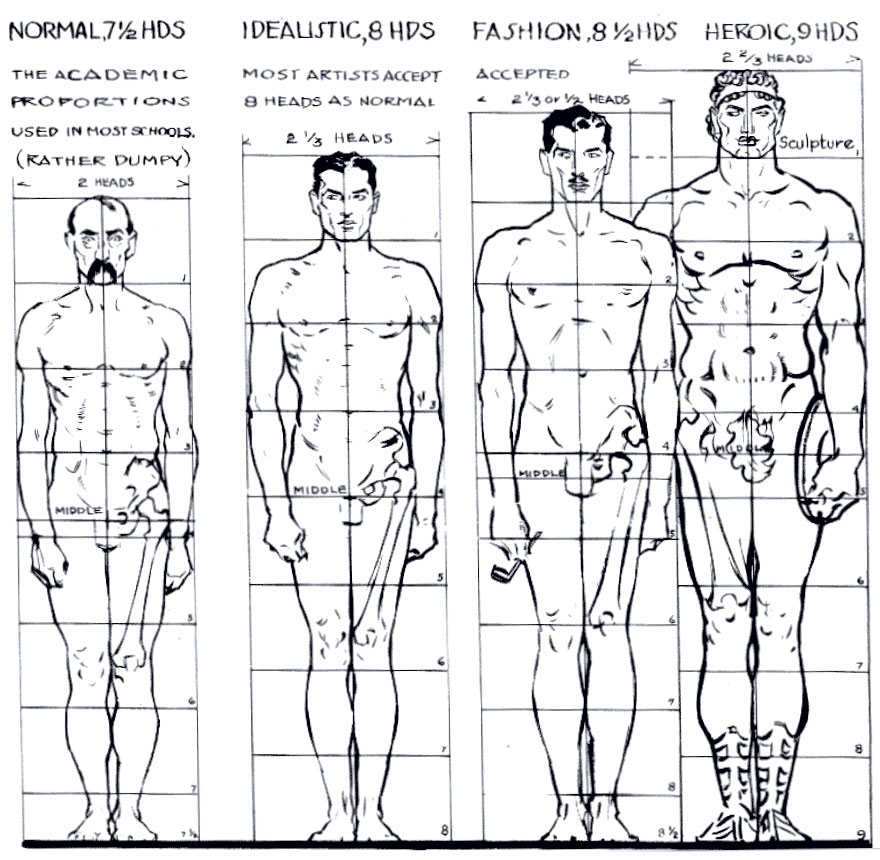
Probably the most important thing in any kind of art – whether you draw, sculpt or paint – is the proportions. It doesn't matter how much attention you pay to detail, rendering and composition, it will all be meaningless work if your character doesn't look real.
The easiest way to measure a character is with ‘heads'. This is why I always start by getting my base shape for the face and using the Transpose tool to measure 7.5/8 heads for my character.
Daily design news, reviews, how-tos and more, as picked by the editors.
Of course, you need to be aware that there is always an exception. For example, with Michael Phelps, his torso is longer, he has shorter legs and his arm span is bigger than the average person.
The steps below explain how to measure your character in ‘heads' using ZBrush:
- Once you have finished shaping your base head, turn off perspective (by pressing the P key), select the Transpose tool and draw out a line from the top of the head to the bottom of the chin holding Shift. This will ensure that it's straight.
- In the top menu, go to Preferences > Transpose Units, set Minor Ticks to 0 and Calibration Distance to 1.
- Now if you draw a line from the top to the bottom of the character, you will see that it's divided by heads.
03. Make ZBrush body base mesh
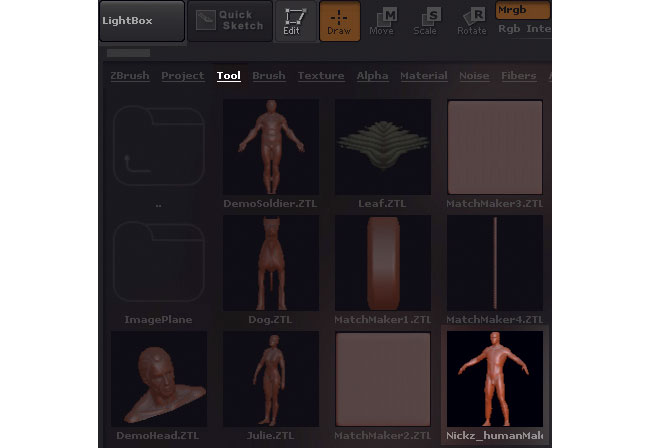
To get an easier start, you can always use the base mesh that comes with ZBrush, if you're not feeling too confident with your knowledge of proportions. The base mesh comes with the Skull SubTool, so you can always take a look at how it's built.
I don't want to spend a lot of time on proportions, so this time I will use the base mesh. To load the base mesh, do the following:
- Select Lightbox
- Click on the Tool sub palette
- Find and double click on Nickz_humanMale
- Drag it out with the left mouse button on the viewport and click Edit Object (or press T on the keyboard).
04. Make adjustments to the base mesh
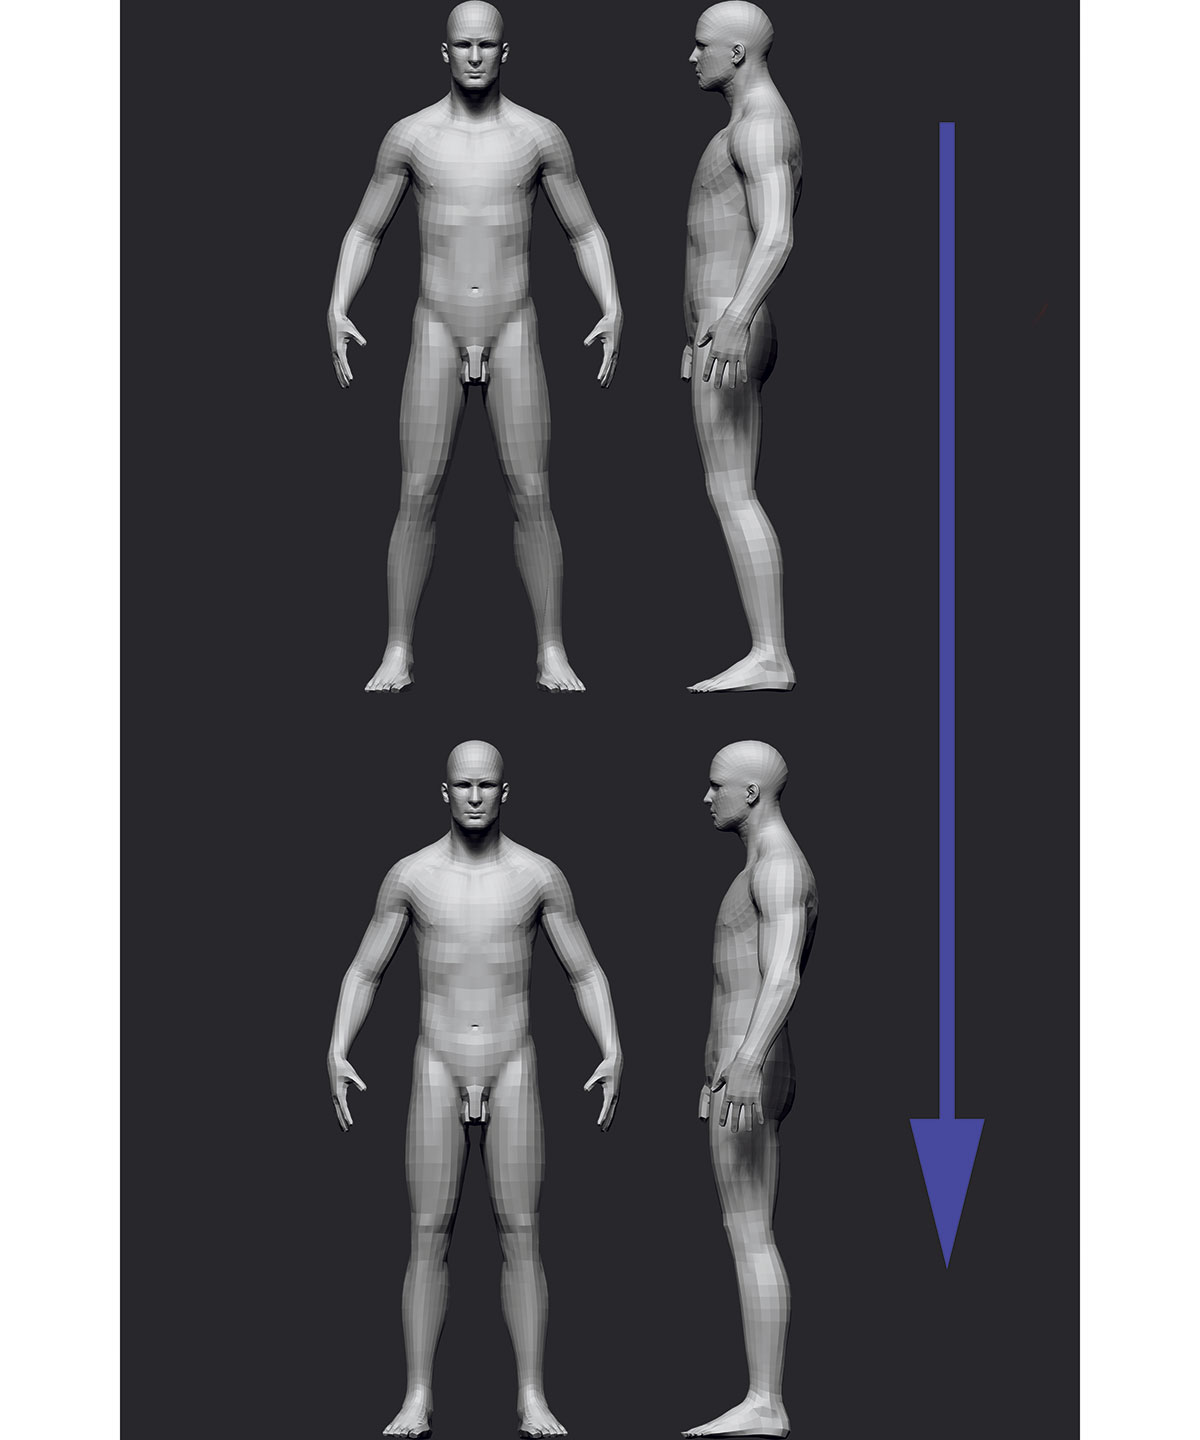
I don't find the initial pose of the base mesh appealing, so I will change it using the Transpose Master plugin, and give it a more natural silhouette. Transpose Master combines the lowest resolution of all SubTools and creates a mesh that you can pose together. The pose can then be transferred back to the original SubTools. To use the Transpose Master, work through the following steps:
- Go to Zplugin > Transpose Master and click on TPoseMesh.
- Pose your model by masking out the parts that you want to move, by holding Ctrl to mask and inverting the mask by holding Ctrl+LMB on the viewport.
- Once you've finished with the posing, go back to Zplugin > Transpose Master and click on TPose > SubT.
- Your changes will now be transferred to your original model.
While posing your model, you can always export your pose by selecting TPoseMesh. You can then load it manually by going to the scene with your original model and selecting TPose > SubT.
05. Paint body bone landmarks
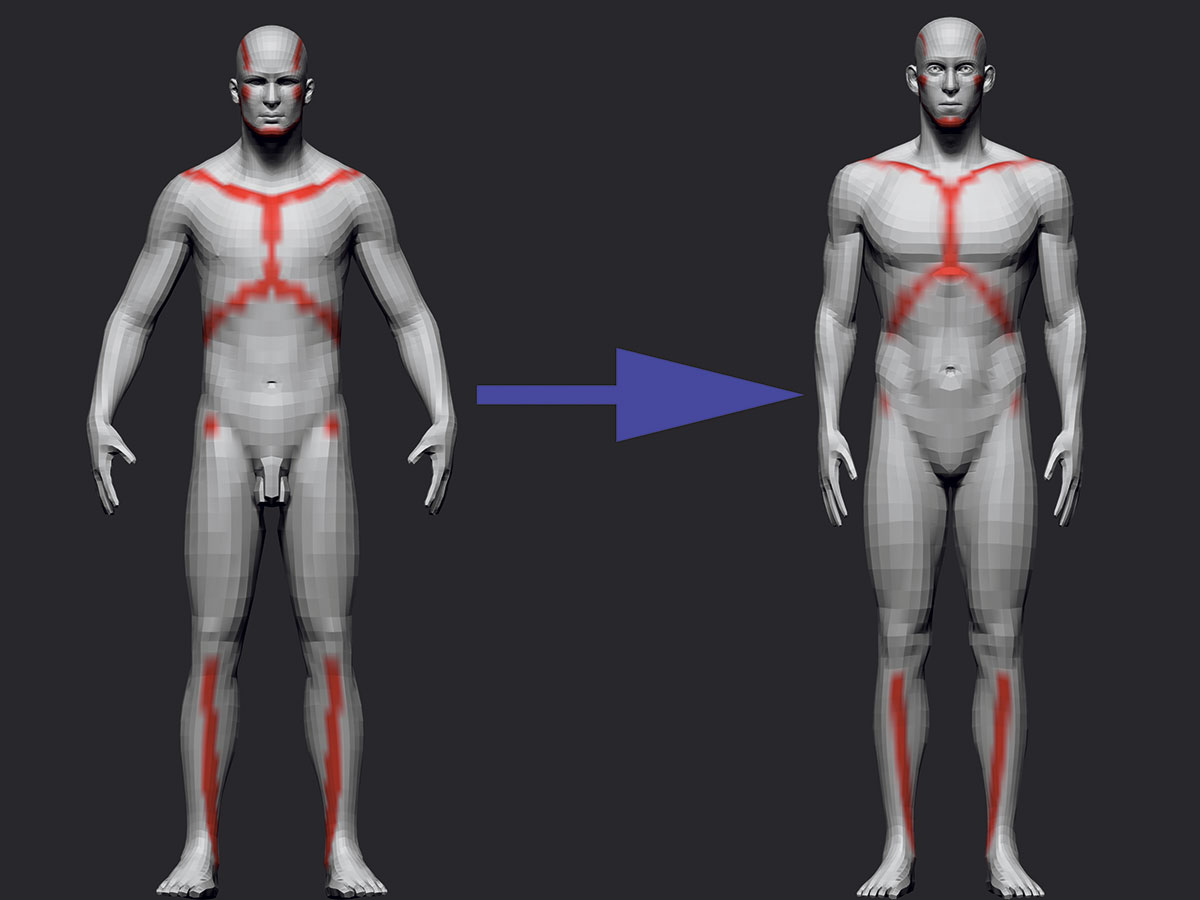
Before I start the sculpting process, I do my best to paint all the skeleton landmarks that are seen on the human body. It allows me to keep a better track of the shapes and proportions. You can paint on your model in ZBrush by following these steps:
- Firstly, fill it with white colour by selecting white on your palette on the left, going to Colour in the top menu and selecting Fill Object. Make sure that your RGB Channel is turned on.
- Select your Standard brush and uncheck the ZADD above the Intensity slider, while keeping RGB turned on. This will ensure your Standard brush only paints the desired colour, without impacting on the surface of the mesh.
- Pick the colour that suits you and start painting your model.
The main landmarks that I usually paint are the sternum, costal cartilage, iliac crest, vertebrae, anterior superior iliac spine, curve of tibia, clavicle, scapula, acromion process, zygomatic bone, mandible and the temporal line.
06. Use subdivisions
The powerful part of using the base mesh is having the correct topology on your body from the very beginning. This allows you to use subdivision levels in ZBrush, which increases the polygon count of a model by replacing each polygon with multiple polygons – the higher it is the more detail you can add. In addition, you can always come back to your first subdivision level and adjust shapes, and this change will be reflected when you come back to the highest subdivision. Let's look at an example of how this works:
- I know that I'm going to sculpt details like veins, skin stretching and so forth on the highest subdivision, as it will give me millions of polygons to work with.
- In case I want to change the bulkiness of his chest, I can always go back to a lower subdivision and add some volume to it. All the detail I added on the highest subdivision won't be visible on the lower one, but it will still be there when I come back to the highest level.
07. Block out shapes
Throughout my whole sculpting process, I only use a few brushes: Standard, Dam_Standard, Clay Buildup, Clay, Smooth and Move.
I am not concerned about the likeness at this time; for now I want to focus on getting all the muscles blocked-in with the correct shape and placement. I use Clay Buildup and Smooth to get the shape, by adding clay and smoothing it out until I get what I want. I try to maintain as low a subdivision level as I can. I go higher once I don't have enough polygons for the shapes I want to add.
08. Add muscle volume
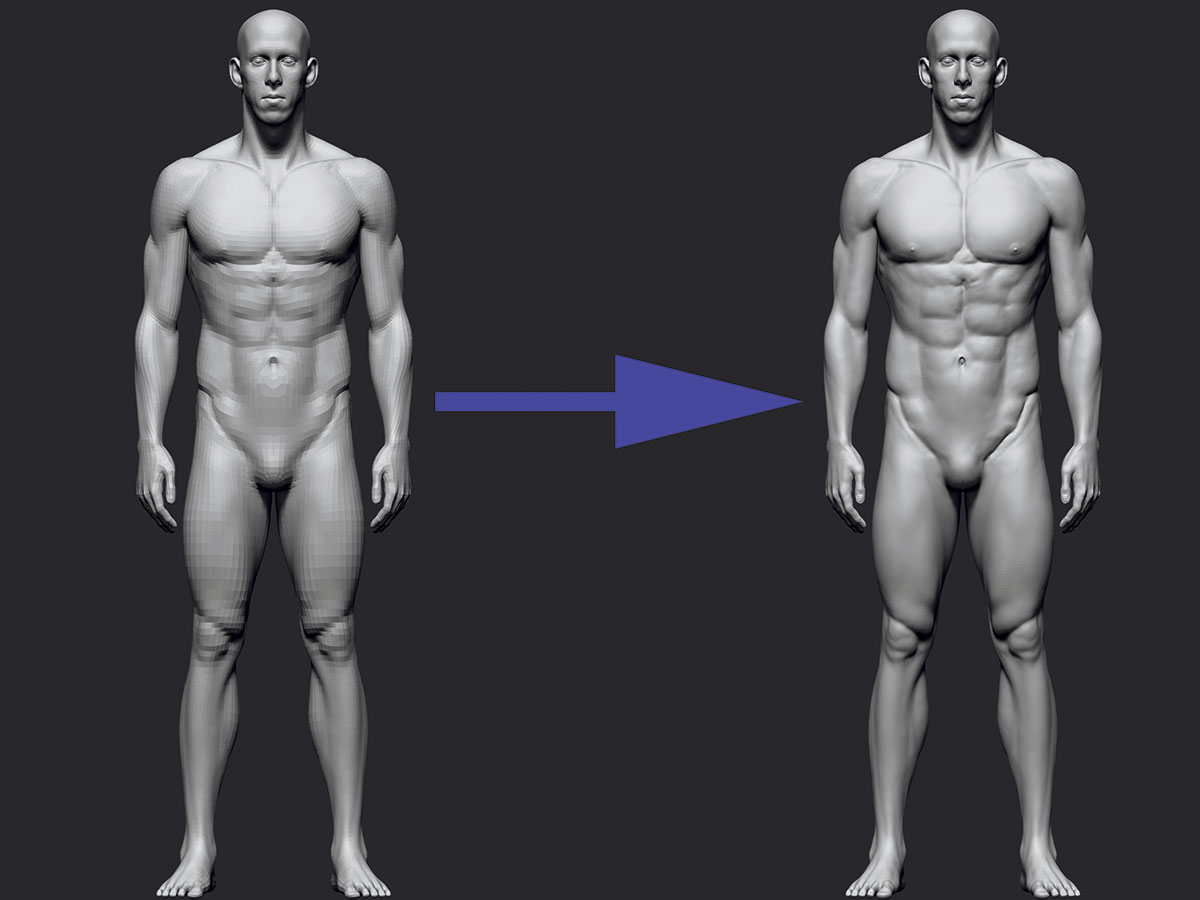
I give my model some more subdivisions and start adding volume by using the Clay Buildup and Clay brush on very low intensity settings, going slowly and not overdoing it.
At this stage I stop using symmetry, because I want to be as close to realistic filling as I can. I have noticed that I get the best results when I turn it off early. In addition, I use Transpose Master (like in step 04) to bend the fingers.
Make sure that you are not focused on one part of the body all the time – jump between them. This will make you see your sculpture as a whole. Also pay attention to your references, as they play an important role at this stage.
Next page: 5 more steps for sculpting realistic anatomy in ZBrush
