How to make your web apps perform better
Using the RequireJS library to manage code file dependencies improves the functionality of web apps. Dennis Odell explains how to get started.
As each year passes, developers tread further into the brave new world of JavaScript-heavy web sites and applications. Using code libraries like jQuery and frameworks such as Backbone.js or Ember.js, together with a Swiss Army knife of reusable plug-ins, it's possible to simplify the core aspects of JS development in order to free us up to build richer user experiences that are both functional and a joy to use.
Each JavaScript file we add to a project introduces an extra level of complexity, notably in terms of how we manage that file's relationship with the rest of the JS files in the codebase. We may write some code in one file to interact with a page using a jQuery plug-in from a separate file, which in turn relies on jQuery being present and loaded from another file.
As the size of the project grows, so do the number of possible connections between files. We say that any JavaScript file that requires another file to be present for it to function correctly has a dependency on that file.
Management styles
Most often we manage our dependencies in a linear and manual way. At the end of our HTML file, before the closing </body> tag, we usually list our JavaScript files in order, starting with the most generic library and framework files and working through to the most application-specific files. We need to ensure that each file is listed after its dependencies to prevent errors when trying to access variables defined in other script files that aren't loaded yet.
As the number of files grows, this method of dependency management becomes increasingly difficult to maintain, particularly if you wish to remove a file without affecting any other code relying on it.
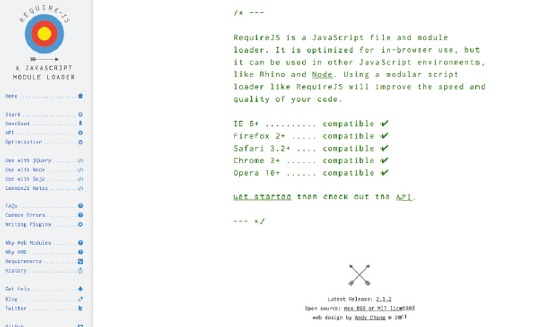
A more robust method is needed for managing dependencies in larger websites and applications. This tutorial will explain how to do so using RequireJS, a JavaScript module loader created to solve this exact problem, which has an added advantage of on-demand script file loading.
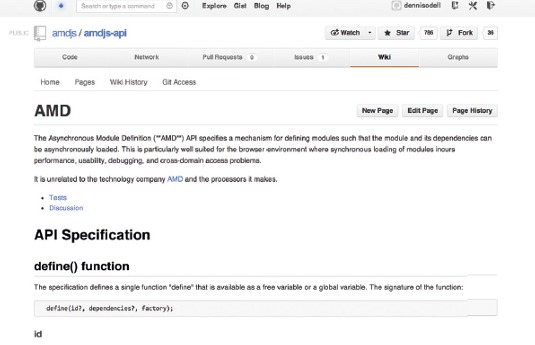
The RequireJS library is based upon the Asynchronous Module Definition (AMD) API, a cross-language unified way of defining code blocks together with their dependencies, which is gaining a lot of traction in the industry (it's used on sites such as BBC, Hallmark, Etsy and Instagram, among others).
Daily design news, reviews, how-tos and more, as picked by the editors.
Let's start by creating a simple HTML page, naming it index.html, and coding in it a very simple form, which posts an email address to a separate page called thank-you.html. I'll let you create this page yourself – or you can download an example, together with some example CSS styles, from the tutorial zip file package.
<!doctype html>
<html>
<head>
  <meta charset="utf-8">
  <title>Mailing list</title>
  <link rel="stylesheet" href="styles/main.css">
</head>
<body>
  <form action="thank-you.html" id="form" method="post">
    <h1>Join our mailing list</h1>
    <label for="email">Enter your email address</label>
    <input type="text" name="email" id="email" placeholder="e.g. me@mysite.com">
    <input type="submit" value="Sign up">
  </form>
</body>
</html>
Before we go any further, let's download a copy of RequireJS. (At the time of writing, the current version of this library is 2.1.4, and it's supported in all the major web browsers back to Internet Explorer 6, Firefox 2, Safari 3.2, Chrome 3 and Opera 10.)
Now, before we add RequireJS to our page, let's review which JavaScript files we're going to need for our application and organise them into an appropriate folder structure.

We'll start with our main application script file, which, using jQuery, will listen for the submit event on the HTML form and perform form validation when this occurs, only allowing the form to continue submitting if there are no errors. Therefore, we will have three JavaScript files in addition to RequireJS:
- Latest version of jQuery (jquery-1.9.0.js)
- Form validation script jQuery plugin (validation-plugin.js)
- Our main application script file (main.js)
Let's arrange these files together with RequireJS and the rest of the files for the tutorial into a sensible folder structure:
–index.html
–thank-you.html
–styles/
–main.css (Add your own CSS files)
–scripts/
–require.js
–main.js
–lib/
–jquery-1.9.0.js
–validation-plugin.js
Note that we've placed all our JavaScript files together into a scripts folder and placed RequireJS at the root level of this folder together with the main application script file. All other reusable third party scripts are stored together in the lib sub-folder.
Up and running
Get RequireJS loaded and set up on the HTML page by adding a <script> tag to the end of our HTML page, just before the closing </body> tag, pointing to the location of the library. Although we could then add multiple <script> tags after this point containing the rest of our code, we can instead rely on the asynchronous file loading feature of RequireJS.
By adding a data-main attribute to our <script> tag, we can specify the location of the main application script for our page. When RequireJS initialises, it will load any file referenced within that attribute value automatically and asynchronously. We only then need have one <script> tag on the page:
<script src="scripts/require.js" data-main="scripts/main"></script>Note that, as in our data-main attribute here, it's fine to exclude the .js file extension when referencing any files with RequireJS, because it assumes this extension by default.
Reusable blocks of code or modules are defined with RequireJS using its define method, which follows this pattern:
define(
  moduleName, // optional, defaults to name of file
  dependencies, // optional array listing this file's dependencies
  function(params) {
    // Function to execute once dependencies have been loaded
    // params contains return values from the dependencies
  }
);
All that's required to be present within a call to the define method is a function containing the module code. Typically, we would create a separate file for each module in our code base, and by default the module name would be identified in RequireJS by its file name.
If your code relies on other code to function correctly (for example, a jQuery plug-in requires jQuery), you should list these so-called dependencies in an array within the define method before the function parameter. The names to use in this array usually correspond to the file names of the dependencies relative to the location of the RequireJS library file itself.
In our example, if we wanted to list jQuery as a dependency of another module, we would include it in the dependencies array like so:
define(["lib/jquery-1.9.0"], function($) {});We don't need to specify the file extension, so we leave this off when listing our dependencies. Incidentally, if this is present on the page, recent versions of jQuery contain code to register themselves as modules using the define method so we do not need to write any special code to turn the jQuery library into the format we need for use with RequireJS.
Any return values provided by dependent scripts are passed through to the module function code itself through input parameters. Only these parameters passed through to this function should be used within this module, so as to properly encapsulate the code with its dependencies.
We now have a way to codify the relationship between our module code and the code to which it depends. It's this relationship that tells RequireJS to load in all the code essential to our module function before executing that function.
Getting the names right
We know that jQuery has a convention of naming its files with the version number included, as you've seen above. If we had numerous references (throughout multiple files) to jQuery as a dependency, we would be creating a maintenance problem for ourselves should we wish to update the site's version of jQuery at a later date. We would have to make changes to all of these files to match the new file name.
Fortunately, RequireJS enables us to get around this issue by defining alternative names for certain modules. We're able to create a single module name mapping to our versioned file name, so we can use that name throughout our files in place of the direct file name. This is set up within the RequireJS configuration object.
Let's start our main application script file (main.js), creating this module name to file name mapping for jQuery:
requirejs.config({
  paths: {
    "jquery": "lib/jquery-1.9.0"
  }
});
We can now use the module name jquery in our dependency arrays in other modules, and this will map to the specific jQuery file.

Content delivery networks
Many developers prefer to reference a copy of jQuery from one of the many global content delivery networks (CDNs) around the web. With the right conditions, this decreases the time taken to download the file and increases the likelihood that the file may be cached on the user's machine already if they have previously visited another website that loads the same version of jQuery from the same CDN.
RequireJS allows you to link to modules hosted on other domains simply by using its URL in the dependencies array. But we can simplify the management of our external file dependencies using the same configuration setting we used to configure jQuery earlier.
We will replace the last code snippet with a new one to reference jQuery from Google's CDN - while still allowing it to fall back to a local version of the file should the external file fail to load. We chain the list of fallback scripts using an array:
requirejs.config({
  paths: {
    "jquery": [
      "https://ajax.googleapis.com/ajax/libs/jquery/1.9.0/jquery.min",
      // If the CDN fails, load from this local module instead
      "lib/jquery-1.9.0"
    ]
  }
});
Now we have our file structure in place and RequireJS loaded and configured on our page, it's time to think about how the files within our application depend on each other. We've established that our main application script is dependent on jQuery in order to set up the form submit handler and the validation script to validate that form. Since the validation script will be built as a jQuery plugin, it too is dependent on jQuery. We can describe this with a table:

We can now write the code for our validation jQuery plug-in module within the validation-plugin.js file, specifying jQuery as its only dependency. The module checks whether the value of a given field is in the typical format of an email address, and that it returns true if it's a valid and false if not:
define(["jquery"], function($) {
  $.fn.isValidEmail = function() {
    var isValid = true,
      regEx = /\S+@\S+\.\S+/;
    this.each(function() {
      if (!regEx.test(this.value)) {
        isValid = false;
      }
    });
    return isValid;
  };
});
We omitted the optional module name parameter from our call to the define method, so the module will be registered with the name of the file relative to the location of RequireJS. It can be referenced in other dependencies by the module name lib/validation-plugin.
Completing the code
Now we've established our dependencies, it's time to finish off the code in our main application script file. We're not going to use the define method here. Instead we're going to use the require method of RequireJS. The two methods have identical patterns, but they differ in the way they're intended to be used.
The former is used to declare modules for later use, while the latter is used to load dependencies for immediate execution without needing to create a reusable module from it. This latter case suits our main application script, which will be executed once only.
Here, below the configuration code in our main.js file, we declare our code for attaching to the submit event of our HTML form, performing validation using our new plug-in script and allowing the form to submit if the provided email address is valid:
require(["jquery", "lib/validation-plugin"], function($) {
  var $form = $("#form"),
    $email = $("#email");
  $form.on("submit", function(e) {
    e.preventDefault();
    if ($email.isValidEmail()) {
      $form.get(0).submit();
    } else {
      $email.addClass("error").focus();
    }
  });
  $email.on("keyup", function() {
  $email.removeClass("error");
  });
});
When this code is executed in the browser, the jQuery library will be loaded first, followed by our validation plug-in module. You will recall that when we defined our validation module, we specified that it, too, had a dependency on jQuery.
One of the really strong features of RequireJS is that, if it comes across a dependency that has already been referenced, it will use the stored value from memory rather than downloading it again. This enables us to properly define our dependencies without affecting the amount of data downloaded.
Once the dependencies have loaded, the function is executed - with any return values from the dependencies passed through as parameters. Because we defined the validator module to be a jQuery plug-in, we specified no return value; it will be added to the jQuery $ variable (as is common with other plug-ins).
Going further
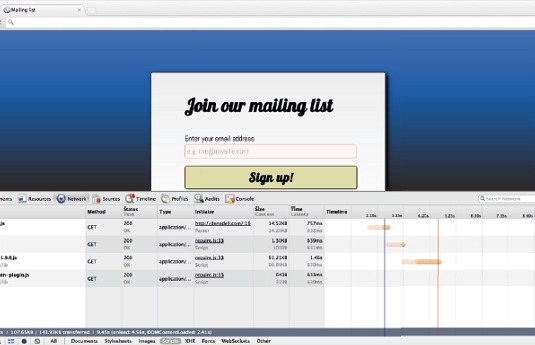
We can extend our code to take advantage of the fact that RequireJS can load JavaScript dependencies on demand at the exact point in time they are needed. Rather than load in our validation plug-in on page load (as we're doing now), we only really need that plug-in loaded and available when the user is submitting the form. Doing this would boost page load performance by reducing the amount of data downloaded and code executed when the page is requested.
RequireJS enables us to accomplish this simply by calling the require method, at the point at which we wish to download extra dependencies. We can rewrite our main application script, removing the dependency on the validation plug-in on page load, and adding it into the point at which the user attempts to submit the form.
If the user never submits the form, this file is never loaded.
require(["jquery"], function($) {  var $form = $("#form"),    $email = $("#email");  $form.on("submit", function(e) {    e.preventDefault();    require(["lib/validation-plugin"], function() {
      if ($email.isValidEmail()) {
        $form.get(0).submit();
      } else {
        $email.addClass("error").focus();
      }
    });
  });
  $email.on("keyup", function() {
    $email.removeClass("error");
  });
});
When the user attempts to submit the form, the validator plug-in is loaded and validation attempted. If the user attempts validation a second time, the validator plug-in is already loaded so it will not be downloaded again.
Of course, form submission couldn't occur until the file has downloaded, so, if the plug-in script were a large file, this may impact on the perceived responsiveness of the page.
Should you wish, you can counteract this by downloading the validator plug-in at the point at which the user first focuses on the text field in the form. This should give the browser enough time to download the plug-in file, so it's ready for the point at which the user attempts to submit the form.
Conclusion
In this tutorial, I've taken you through how to build a simple page that uses RequireJS to simplify the management of code file dependencies and enable the delay of script file loading until it's needed. Not only does this approach make it easier to manage your code as it grows, it also allows you to improve the performance of your web applications by only loading the code needed at the exact moment it's required.
RequireJS is capable of more than I've covered here. I encourage you to read the documentation on the library homepage to learn how to use the many configuration options, how to give modules alternative names, how to load and store data from JSONP web services directly, and how to load and manage multiple versions of the same module at the same time (among many other features).
This approach to code dependency management and script file loading is an emerging best practice in today's world of ever-growing JavaScript-heavy codebases for websites and applications. Learn more and adopt it in your own sites to reap the benefits. Happy coding!
Words: Dennis Odell
This article originally appeared in net magazine issue 240.
Liked this? Read these!
- Discover the best jQuery plugins
- Brilliant Wordpress tutorial selection
- Excellent examples of landing page design
Any questions? Ask away in the comments!

The Creative Bloq team is made up of a group of art and design enthusiasts, and has changed and evolved since Creative Bloq began back in 2012. The current website team consists of eight full-time members of staff: Editor Georgia Coggan, Deputy Editor Rosie Hilder, Ecommerce Editor Beren Neale, Senior News Editor Daniel Piper, Editor, Digital Art and 3D Ian Dean, Tech Reviews Editor Erlingur Einarsson, Ecommerce Writer Beth Nicholls and Staff Writer Natalie Fear, as well as a roster of freelancers from around the world. The ImagineFX magazine team also pitch in, ensuring that content from leading digital art publication ImagineFX is represented on Creative Bloq.
