How to create a mechanical 3D character
3D artist Francesca Forzoni explains the process behind and most important aspects of creating mechanical objects or characters.

I've built a few mechanical objects and characters in recent years, my favourite being this Steampunk Butterfly. The first thing I like to do is work out the mechanics behind the object you're about to build.
I normally start by looking at the anatomy of organic equivalents, such as humans or butterflies, if I'm building a mechanised character. I study the basic fundamentals of structure, joints and movement range, and this allows me to get a basic understanding of how the mechanics in my object or character are going to work. It just adds a level of realism to whatever it is you are creating.
I usually find that building the model from the inside out helps me to make my mechanical objects much more convincing. So for my butterfly, I started by splitting up the abdomen and thorax into sections and building the inner cogs and joints between them. I enclosed
the entire body with glass, and then proceeded to add a metal casing, which I envisioned would protect the inner working mechanics.
From there, I focused on separately constructing the legs, head, and finally the wings. What I found with this layering system is that it allows you to focus on adding very intricate detailing to each individual section of your object – it just wouldn't look the same without it.
For example, when I added the metal casing to protect the inner mechanics, I had to make sure the metal shields were bolted to the inner case somehow. Adding the nuts and bolts, and working out where the hinges and joints of all the metal pieces in your model should go is key, and the tiny detailing makes the image so much more interesting.
The last step in my process is to texture the parts of my model. Metal will always have scratches on it or grease from fingerprints, or some smudges or rust – something that creates an irregular highlight and adds realism. Even when working with brand new objects, there will be small irregular details to be added when you add the textures.
01. Work out the anatomy
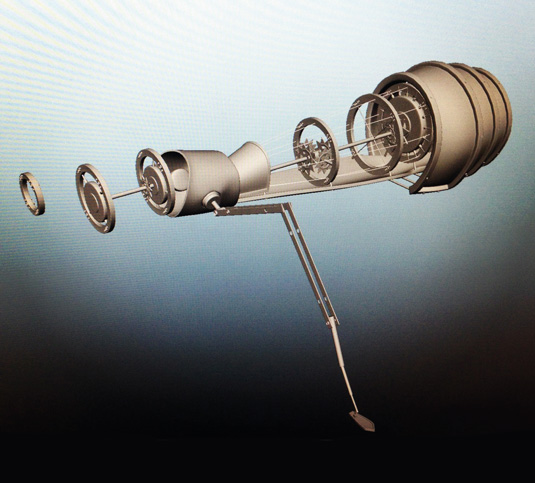
Break your structure down: work out the engineering behind certain joints and the range of movement needed. Work out the mechanics behind the object you're building.
Daily design news, reviews, how-tos and more, as picked by the editors.
Start by sketching it, then in 3D you can look at the hinges more closely by moving pivot points, parenting smaller parts to larger ones and so on. This basic skeletal structure helps when positioning your model and makes mechanical objects more convincing to the viewer.
02. Inside out
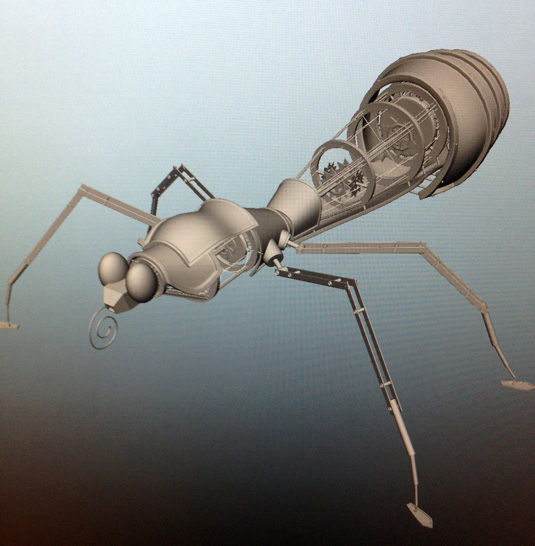
Breaking down your model into sections allows focus, and starting from the inside and building an entire structure around it gives it a depth that will get noticed. The layering adds more interest and again, a more convincing final product.
03. Focus on the details
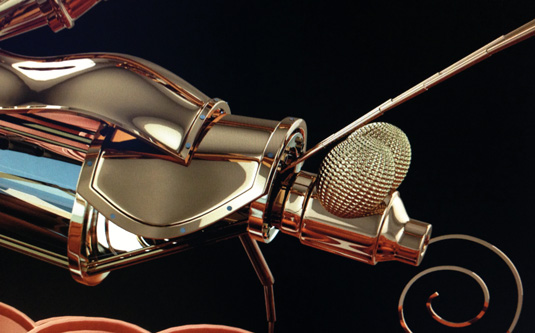
How do pieces fit together? How do parts move (if they need to)? Do certain parts have functions? You have to make sure everything looks like it's meant to be where you put it.
Be aware of why you're adding certain parts to your construction – this makes you think about why it's there, how it would look physically and how it connects to other parts of the model. Again, it validates your creation and makes it more convincing to the viewer.
04. Make interesting textures

Don't just create a clean material and leave it. For mechanical objects, add a slight bump or a texture into your reflection glossiness. Give your metals some age and realism by rusting up the textures.
Materials always have some elements of irregularity to them – make sure you don't forget this when building mechanical objects.
Words: Francesca Forzoni
Francesca Forzoni is a 3D artist and visualiser in London. She has recently moved from working in post-production to branding and packaging. This article originally appeared in 3D World issue 181.

The Creative Bloq team is made up of a group of art and design enthusiasts, and has changed and evolved since Creative Bloq began back in 2012. The current website team consists of eight full-time members of staff: Editor Georgia Coggan, Deputy Editor Rosie Hilder, Ecommerce Editor Beren Neale, Senior News Editor Daniel Piper, Editor, Digital Art and 3D Ian Dean, Tech Reviews Editor Erlingur Einarsson, Ecommerce Writer Beth Nicholls and Staff Writer Natalie Fear, as well as a roster of freelancers from around the world. The ImagineFX magazine team also pitch in, ensuring that content from leading digital art publication ImagineFX is represented on Creative Bloq.
