Pose a character in ZBrush: 4 top tips
Harness the tools of ZBrush to create interesting character poses.

If you're after a way to make your 3D models more interesting, making them walk or hold an object can work wonders. ZBrush has a wide range of tools to help with this, offering a few posing processes to choose from:
Option 1: You can start your modelling right off with a pose, using ZSpheres. This one is useful when you are creating a model that does not need to be in an A-pose for rigging and animation purposes. It enables you to block out a silhouette before modelling and detailing.
Option 2: Transpose Master. This one combines all subtools into one. Just like the generic Transform, it is a process of masking and repositioning the model bit by bit, which can be somewhat tedious but gives you a full control of the model. However, if you find yourself not so fond of a pose, you will basically have to start posing it again.
Article continues belowOption 3: ZSphere Rig. This combines ZSpheres and Transpose Master, allowing a quick and very easy way to pose characters. It can be a little uneasy to control the skinning weight, but I find it way more enjoyable than masking. Repositioning with ZSphere Rig is much faster too.
There is no reason to export your model to another application just to rig and pose it for an image. ZSphere Rig has been available in ZBrush for years, but if you have not tried it yet, follow these four steps and find out for yourself just how easy it is to use.
01. Prepare the model
Before you start rigging the character, make sure you drop it down to the lowest subdivision level. If your lowest subdivision is very dense and uneven, for example due to Sculptris Pro mode, ZRemesher can bring it down. Rigging always works best on proper topology, so the edge loops and quads allow nice mesh deformation.
02. Activate ZSphere Rig
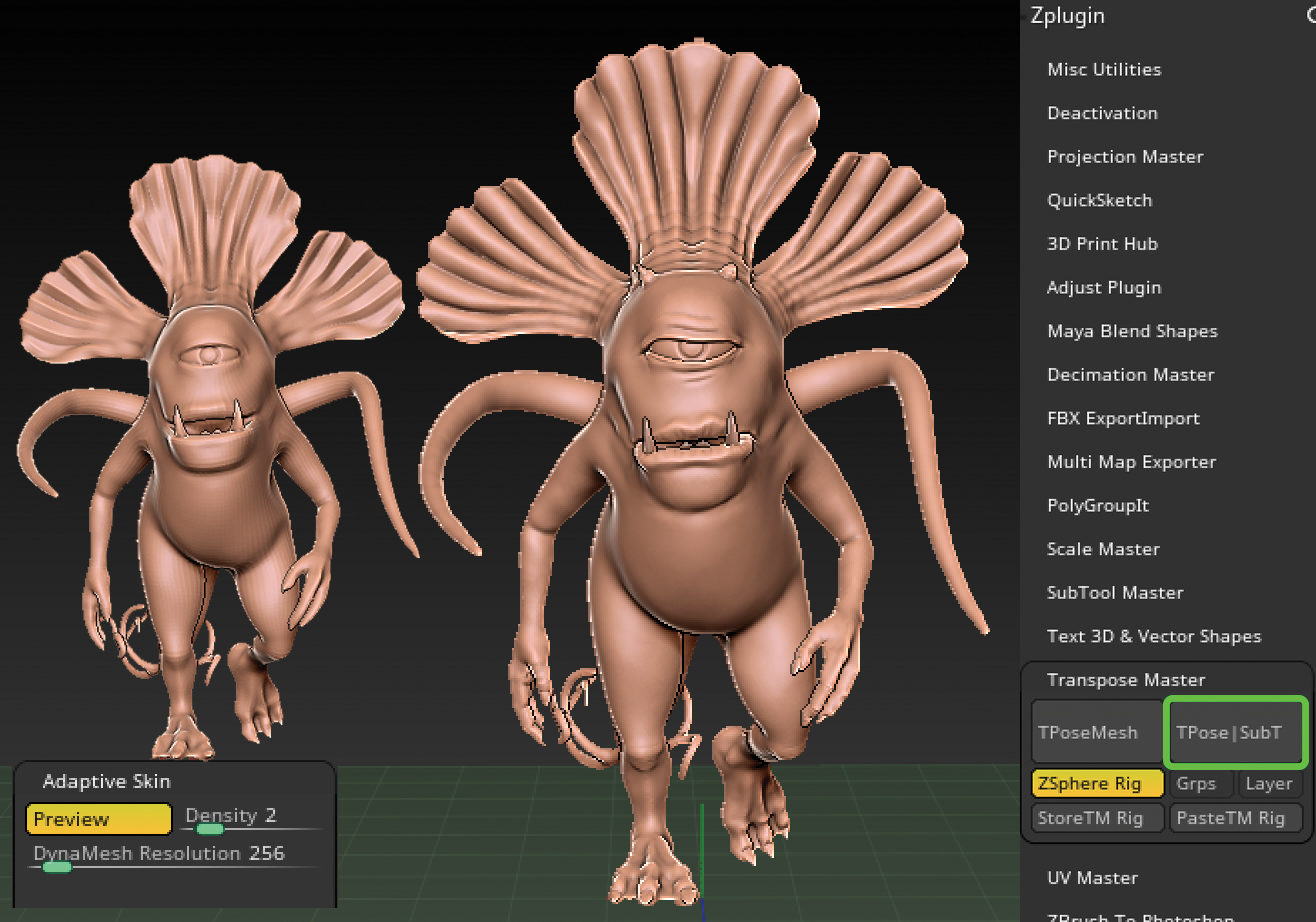
With your main subtool selected, go to the ZPlugin > Transpose Master menu and activate the ZSphere Rig, then click the TPoseMesh button. A red ZSphere should appear on screen and the model will go into ghost mode. Just like with the ZSphere modelling, draw out a sphere chain/rig and position it within your model.
Sign up to Creative Bloq's daily newsletter, which brings you the latest news and inspiration from the worlds of art, design and technology.
03. Bind mesh
Notice how activating Transpose Master changes some of the tabs in the Tool menu and some new options are made available. Navigate to Tool>Rigging and click on the Bind Mesh button. Your model should now be skinned to the rig. Next use the Move and Rotate tools in order to pose and position your character as desired.
04. Commit changes
To check how your pose is looking or to get a better idea of mesh deformation, go to Tool > Adaptive Skin > Preview. You can also update the density level to preview it at a higher subdivision level. When you are happy with the pose, go back to the Transpose Master and commit changes with the TPose|SubT button.
This article originally appeared in 3D World magazine issue 236; subscribe here.
Read more:

Maya is a 3D artist with a broad set of skills, diverse portfolio and extensive experience creating 3D assets for games and learning programmes. She has an excellent knowledge of Blender, ZBrush, Keyshot, Autodesk 3ds Max and Maya, Substance Painter and Designer, Photoshop; and integrating assets into Unity and Unreal Engine.


