Reinterpret iconic album artwork in Illustrator
Matt Needle shows you how to transform an iconic image into a visually striking, unique print
Sign up to Creative Bloq's daily newsletter, which brings you the latest news and inspiration from the worlds of art, design and technology.
You are now subscribed
Your newsletter sign-up was successful
Want to add more newsletters?
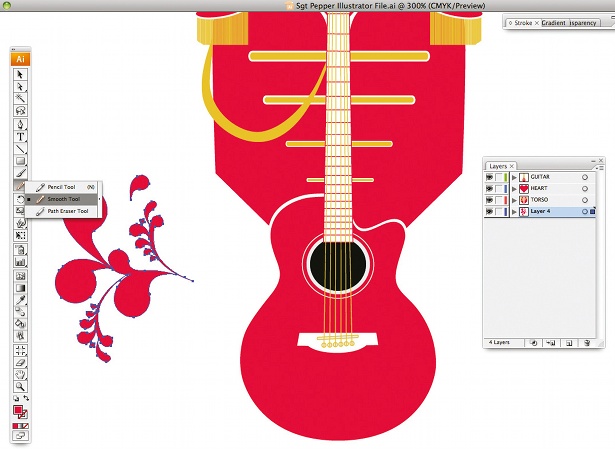
06 Now create some background details with the Pen tool. For this piece, draw an abstract leaf shape or droplet design. If the edges are jagged, hold down the Pencil icon on the toolbar, select Smooth Tool from the menu, and drag it over the jagged lines. Copy, paste and reflect the shape, and align it with the points of the jacket.
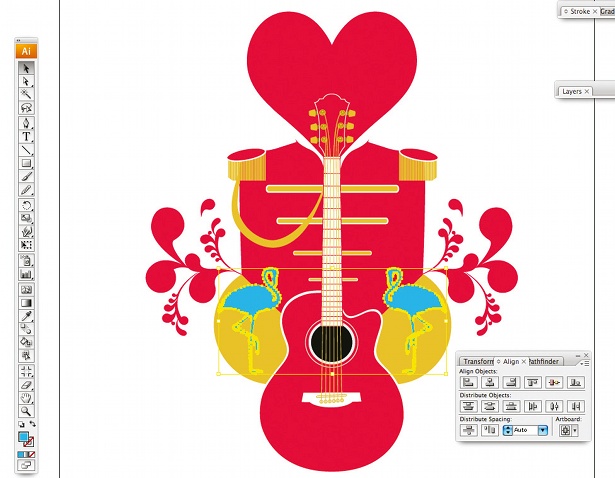
07 When you’re happy, choose another reference point from the original artwork to work into your piece. Select the Needle Stock Illustrations.ai file from the support files and copy over the flamingo. Place gold circles on a separate layer behind the jacket and guitar. Check that the colour of the flamingo is C:68, M:9, Y:0, K:0 and copy and paste it, before reflecting and aligning the copy.
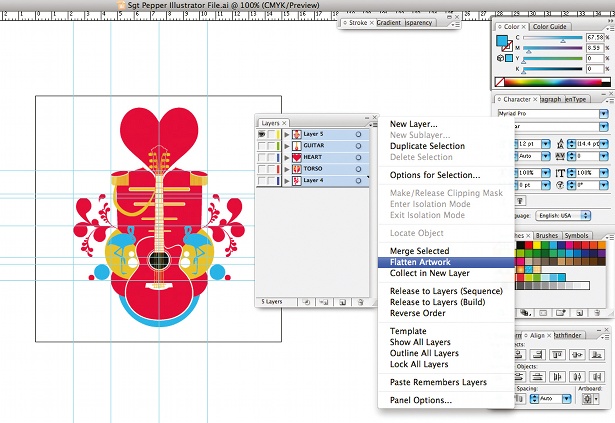
08 Now add in some circular details at various sizes, using the Circle tool, in the same red, gold and blue hues. This piece requires symmetry, so reflect and align any additional details that you add. Hit Cmd/Ctrl+R to bring up the rulers and use them to make sure everything lines up. After that, select all the layers in the Layer panel, open the drop-down menu and select Flatten Artwork.
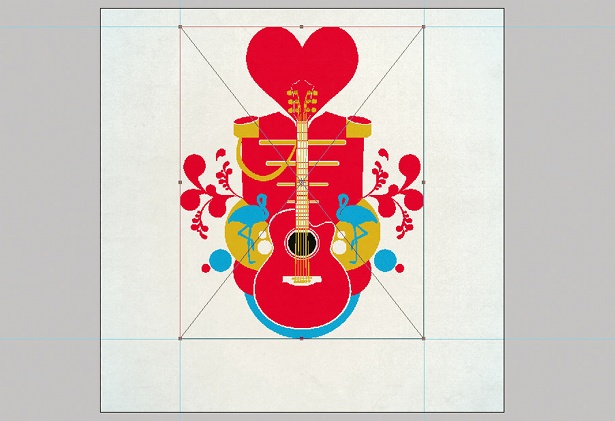
09 Once you’ve finished your design, add some texture in Photoshop. Open up the NeedleDesignBackground.psd file from the support files: this contains a pre-created canvas with texture. Copy the flattened artwork over from Illustrator, paste it as a Smart Object and set the layer transparency style to Multiply. Align the horizontal axis but make the image closer to the top of the canvas.
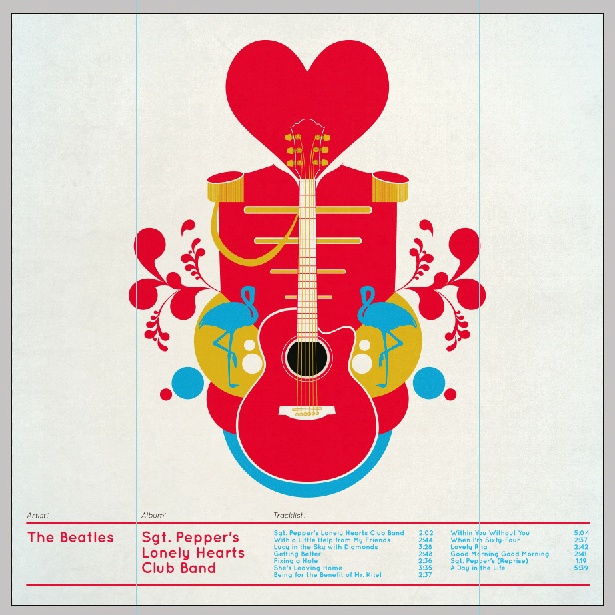
10 Lastly, create and add the typographic elements, ensuring the style and colour match your image. You will find the typographic element for this piece in the support files – Needle Stock Illustrations.ai. I used Quicksand by Andrew Paglinawan.
Sign up to Creative Bloq's daily newsletter, which brings you the latest news and inspiration from the worlds of art, design and technology.

The Creative Bloq team is made up of a group of art and design enthusiasts, and has changed and evolved since Creative Bloq began back in 2012. The current website team consists of eight full-time members of staff: Editor Georgia Coggan, Deputy Editor Rosie Hilder, Ecommerce Editor Beren Neale, Senior News Editor Daniel Piper, Editor, Digital Art and 3D Ian Dean, Tech Reviews Editor Erlingur Einarsson, Ecommerce Writer Beth Nicholls and Staff Writer Natalie Fear, as well as a roster of freelancers from around the world. The ImagineFX magazine team also pitch in, ensuring that content from leading digital art publication ImagineFX is represented on Creative Bloq.
