How to use bright white light without losing detail in your art
Illustrator Paco Rico Torres reveals a few ways to master this cool-looking, easy-to-achieve effect.
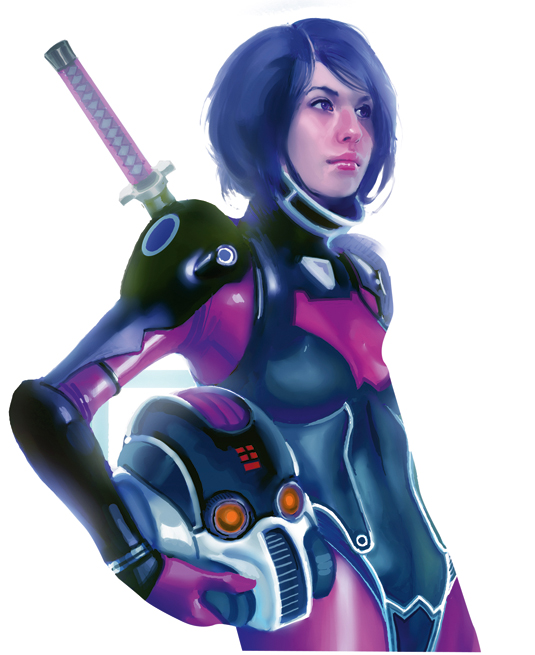
Painting a character surrounded by light using Photoshop is relatively easy. It's a tricky effect to recreate with traditional media, but it's one of these things that digital painting has made a lot easier to do.
Hone your illustrator skills with these brilliant tutorials
The one thing that you must bear in mind is that applying these cool-looking, easy-to-achieve effects won't make a poor painting any better. If you don't put enough effort into creating your character then the image won't work, no matter what else you do to it.
With that caveat out of the way, let's begin the process. The elements you need are an image of your character backlit (that usually means, white or almost white background, and the character in shadows with light around the edges of his/her silhouette).
This is important because if the background either isn't bright enough or the character isn't lit from behind, the final result won't make much sense.
Once these elements are in place, you just need to use Low Opacity Overlay and Screen Mode layers. In these layers, paint a white outline around the character and then blur it using the Gaussian Blur. You'll achieve a decent backlighting effect without hiding the details on the figure.
01. Start at the end
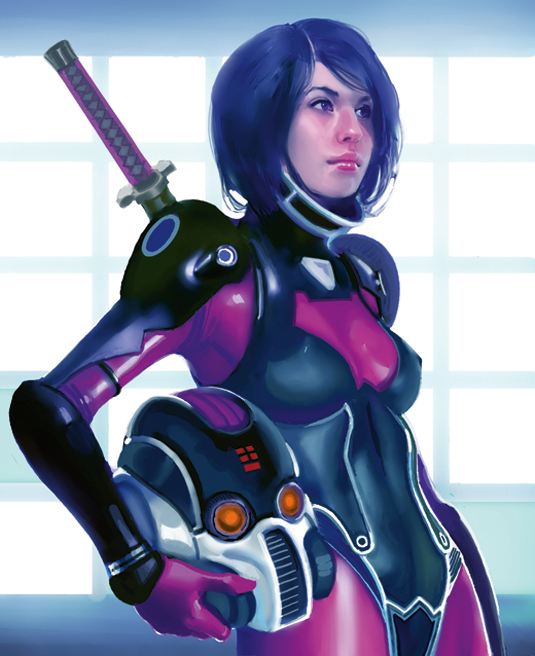
First, you need to finish the painting. Here, as you can see, I've painted all the light in the background and placed the character in shadows, lit from behind.
Daily design news, reviews, how-tos and more, as picked by the editors.
I strongly recommend painting the background and the character on two separate layers, as well as keeping the edges of the character clean. Doing this will make the following steps much easier.
02. Onionise it
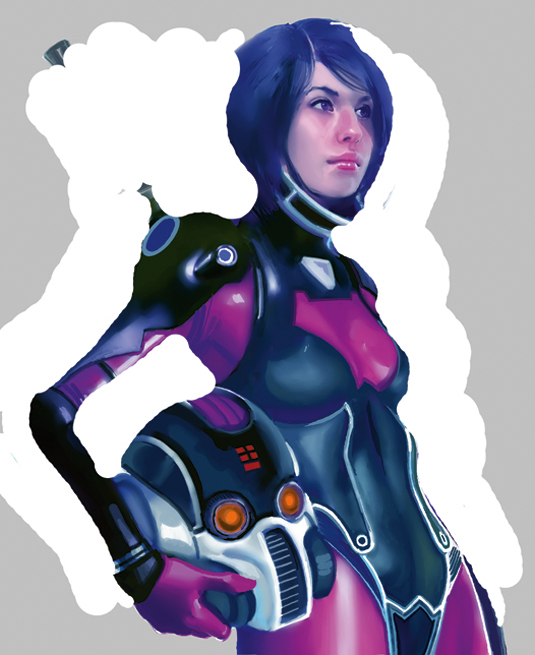
Then, in a new layer, paint a thick white line around the character. You'll eventually blur this line and it'll become the glow that's surrounding the figure, so don't paint it randomly.
Note that you'll need to paint in the areas where the light around the silhouette of the character will be stronger. Once you've done this, use the Gaussian Blur tool to blur it (around 100 pixels).
03. Copycat
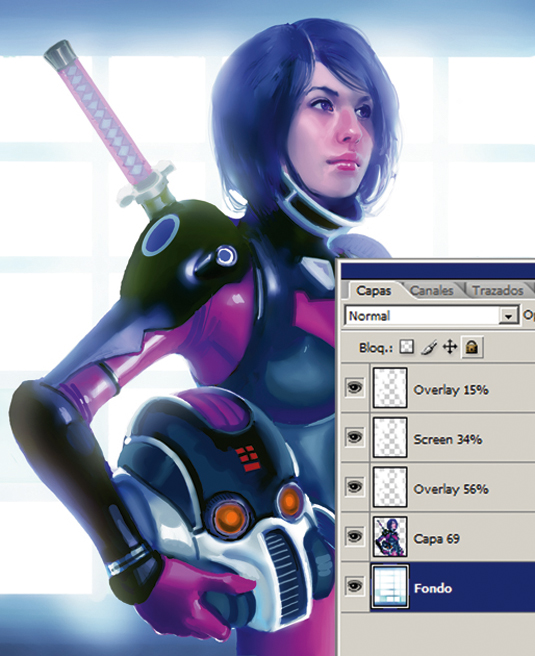
Next you need to copy that layer several times (or repeat step two on different layers), decrease their opacity and set their mode to Overlay and/or Screen.
The number, mode and opacity of the layers is up to you. For this image I use an Overlay layer with 56 per cent Opacity, a Screen layer with 34 per cent Opacity and an Overlay layer set to 15 per cent Opacity.
04. Dayglow
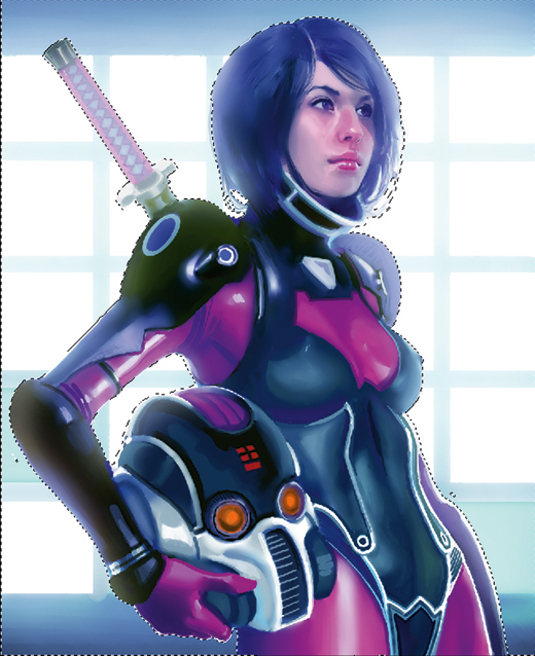
Now you just need to erase the white glow outside the edge of the character.
If you've done things correctly and kept the silhouette of the character clean (so there's nothing on the character's layer) then it should be easy to select the character, invert the selection, and delete the unwanted glow. Finally, just fix whatever else needs to be fixed in the image.
05. Easy ways to select a figure
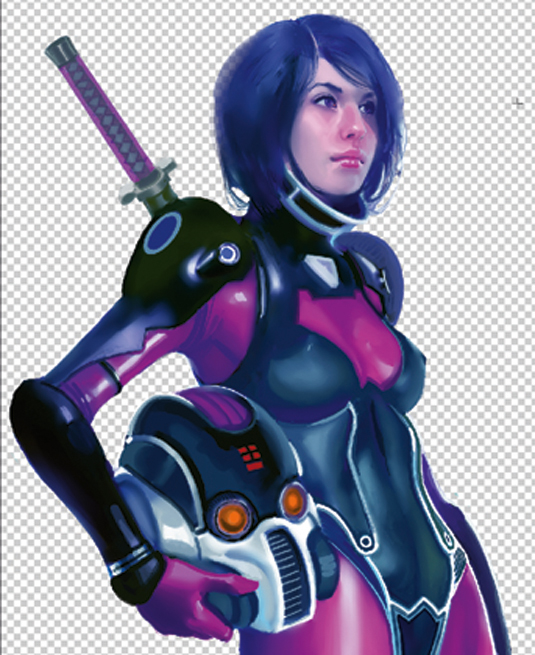
If you've kept the edges of your character clean, the easiest way of selecting it is by Ctrl-clicking the icon of the layer that your character's on. If the edges of the figure aren't clean, you can clean them using a Selection Mask.
Words: Paco Rico Torres
Paco Rico Torres is a freelance illustrator living in Spain who's produced art for several card games, magazines, books and role-playing games. This article originally appeared in ImagineFX issue 93.
Like this? Read these...
- Become a film concept artist with ImagineFX
- The B-movie art that's so bad it's good
- 3 top tips for illustrating personality

The Creative Bloq team is made up of a group of art and design enthusiasts, and has changed and evolved since Creative Bloq began back in 2012. The current website team consists of eight full-time members of staff: Editor Georgia Coggan, Deputy Editor Rosie Hilder, Ecommerce Editor Beren Neale, Senior News Editor Daniel Piper, Editor, Digital Art and 3D Ian Dean, Tech Reviews Editor Erlingur Einarsson, Ecommerce Writer Beth Nicholls and Staff Writer Natalie Fear, as well as a roster of freelancers from around the world. The ImagineFX magazine team also pitch in, ensuring that content from leading digital art publication ImagineFX is represented on Creative Bloq.
