5 software tips for graphic designers
Covering Photoshop, Illustrator and InDesign, these handy sofware tips will save you valuable time and energy.
Sign up to Creative Bloq's daily newsletter, which brings you the latest news and inspiration from the worlds of art, design and technology.
You are now subscribed
Your newsletter sign-up was successful
Want to add more newsletters?
However long you've been using design software like Photoshop, Illustrator and InDesign, there are always a few tricks you don't know about. These expert tips are all aimed at making your design process more streamlined and product, give you more time and energy to expend on being creative.
- Read all our graphic design articles here
01. Resize images for print
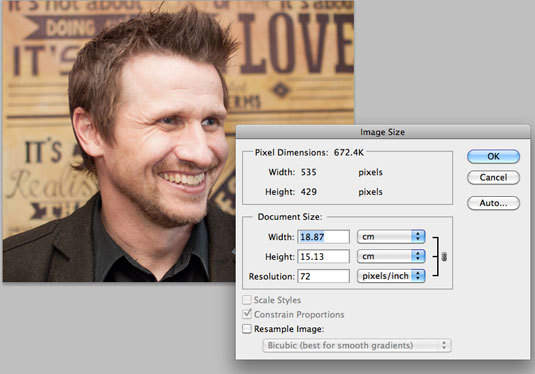
When resizing images for print in Photoshop (Image>Image Size) you can see how big your image will print by using the Resample Image check box, along with the View>Print Size command. Uncheck the Resample Image box and change the resolution to 300dpi (pixels/inch in the dialogue). Then go to View>Print Size to see how big your image will print.
Some of the time you can get away with 150-200dpi. If you really need to resample the image (and it's a photo or similar image) make sure Resample Image is checked, then drop down the bottom menu (on Bicubic by default) changing it to Bicubic Smoother.
Article continues belowExperiment with enlargements until you get the balance right - but it's best to avoid doing this altogether.
02. Quick formatting with style sheets
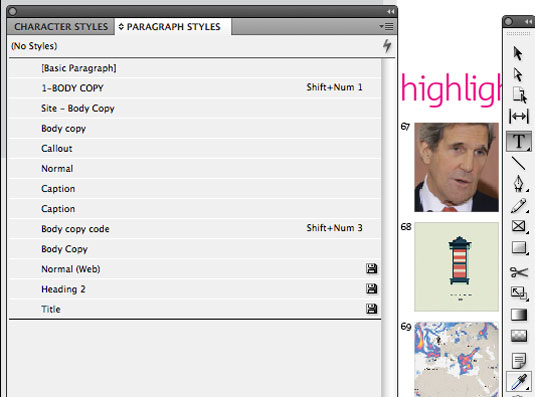
Style sheets in page layout applications have been around for a very long time, and in the latest version of InDesign you can do some pretty clever things with them.
Essentially, style sheets enable you to quickly format text in a certain way, saving you from changing the font, size, colour and so on every time. They're best suited to longer documents for this reason.
Go to Window>Styles>Paragraph and using the dropdown, choose New Paragraph Style. Name it and then work through the options assigning font, colours, spacing and so on. Hit save and then you can select any text and apply this using the Paragraph Styles panel.
Sign up to Creative Bloq's daily newsletter, which brings you the latest news and inspiration from the worlds of art, design and technology.
You can also use the Eyedropper tool to assign styles by clicking on a paragraph of text (or whatever you want to copy the properties of) and then selecting your text with this tool. Handy.
03. Preserve colour when changing modes
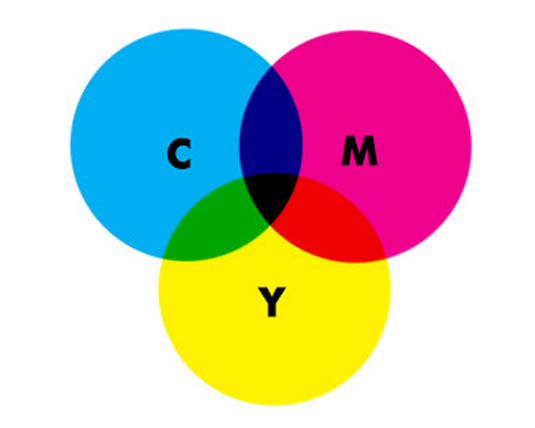
Changing colour modes in Photoshop (Image>Mode) can sometimes be problematic, especially when converting from RGB to CMYK. The problem is colour space, or gamut. Simply put, CMYK cannot show as many colours as RGB. To get an idea of how your image will be affected, you can use the Eyedropper tool to scan over your image, taking readings from the Info panel.
A small exclamation mark will appear next to the affected colour, meaning it will change when you convert. Having identified what will change, you can then use Photoshop's image-editing tools on the converted image to adjust the hue, levels and brightness of colours that have been dulled (you'll find blues and greens may need a lot of work).
04. Save images for the web
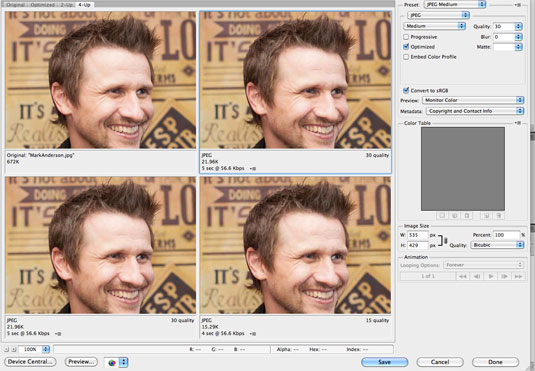
When printing, you'll normally want your images to appear in as high a resolution as possible. But when emailing multiple images to a client, or uploading them to your portfolio website, large image file sizes can slow things down, and sometimes even break the whole system.
Photoshop gives you the option to quickly and easily save your images for uploading to the web. Saving this way gives you the utmost control of how your image will appear online.
Hit Cmd+Alt+Shift+S on the Mac or Ctrl+Alt+Shift+S on the PC to bring up the Save for Web dialog. Now, change the tab to 4-UP and you can click on each, using the optimization settings on the right, to get a preview (and compare) how your image will look when it is compressed. You can even click on one window, save it out, then use a different setting for another window and save that out. It's a very versatile feature.
05. Design multi-page documents with Artboards
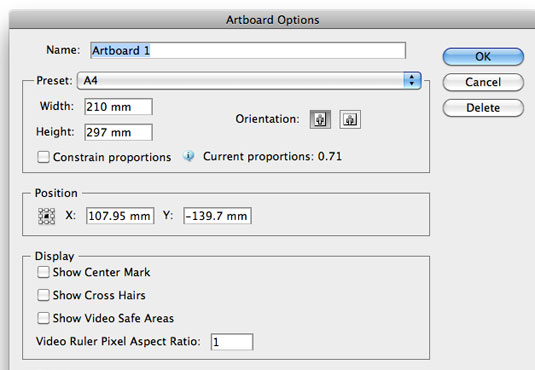
Want to design multiple-page documents in Illustrator? Well, Artboards are the answer.
The great thing about Artboards is you can create many different ones for many different purposes. Say you have to design a leaflet or flyer, a business card, a T-shirt and CD artwork all using the same assets or logo, well, just create different artboards using the Artboards tool (hit Shift+O) in the main tool panel, drawing them on the pasteboard.
If you need to edit the name or size, just use the Artboards panel (Window>Artboards). Then get on with designing. You can print each artboard separately or all at once using the Print dialog.
Words: Rob Carney
Liked this? Read these!
- Brilliant examples of kinetic typography
- The best free fonts for designers
- Download free fonts: great resources
Do you have any software tricks up your sleeve? Let us know in the comments box below!

The Creative Bloq team is made up of a group of art and design enthusiasts, and has changed and evolved since Creative Bloq began back in 2012. The current website team consists of eight full-time members of staff: Editor Georgia Coggan, Deputy Editor Rosie Hilder, Ecommerce Editor Beren Neale, Senior News Editor Daniel Piper, Editor, Digital Art and 3D Ian Dean, Tech Reviews Editor Erlingur Einarsson, Ecommerce Writer Beth Nicholls and Staff Writer Natalie Fear, as well as a roster of freelancers from around the world. The ImagineFX magazine team also pitch in, ensuring that content from leading digital art publication ImagineFX is represented on Creative Bloq.
