Get started with Flame Painter
Learn the basics of digital art software, Flame Painter.
Sign up to Creative Bloq's daily newsletter, which brings you the latest news and inspiration from the worlds of art, design and technology.
You are now subscribed
Your newsletter sign-up was successful
Want to add more newsletters?
Flame Painter is a standalone paint and particle effects package that enables you to quickly and easily create original paintings, light effects, unconventional designs or fantastic backgrounds. This software from Escape Motions expands on the possibilities of digital painting, providing you with a range of lifelike organic brushes that will help you to enhance your artworks.
As a go-to effects program for illustrating particles and – perhaps unsurprisingly – fire effects, Flame Painter has evolved over its 10 years. Initially, the program was limited to simulating cool-looking flame effects but version four introduces a raft of innovations such as new Particle Systems, procedural brushes with limitless customisation features, and expanded options for vector layers.
All these new features can be applied to a range of creative projects, such as poster pieces, character studies (see our character design tips for inspiration) and card game art. For more digital art options, here's our roundup of the best digital art software.
Article continues below01. Launch Flame Painter
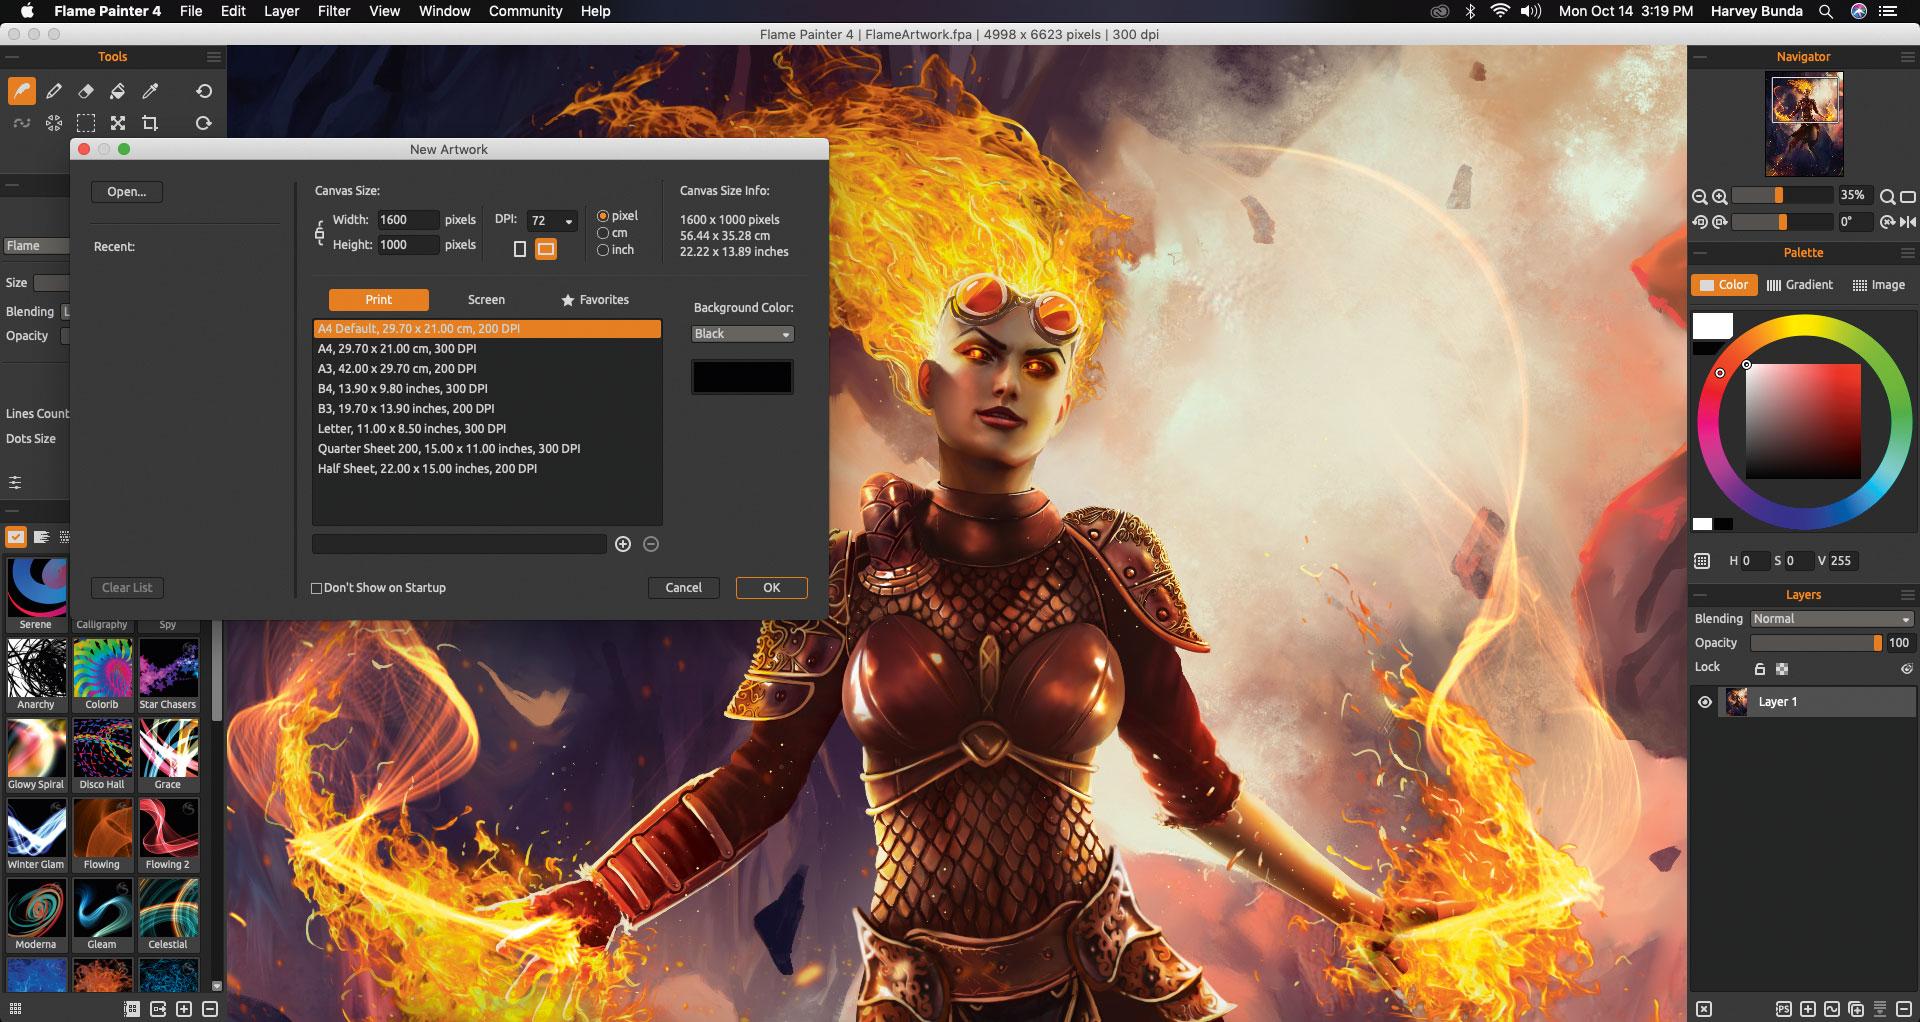
When you open Flame Painter you'll be greeted by the New Artwork window, where you'll be able to set the size of your canvas and its resolution. You can also open an existing artwork – choose these from the left-hand side of the window.
02. Get to know the user interface
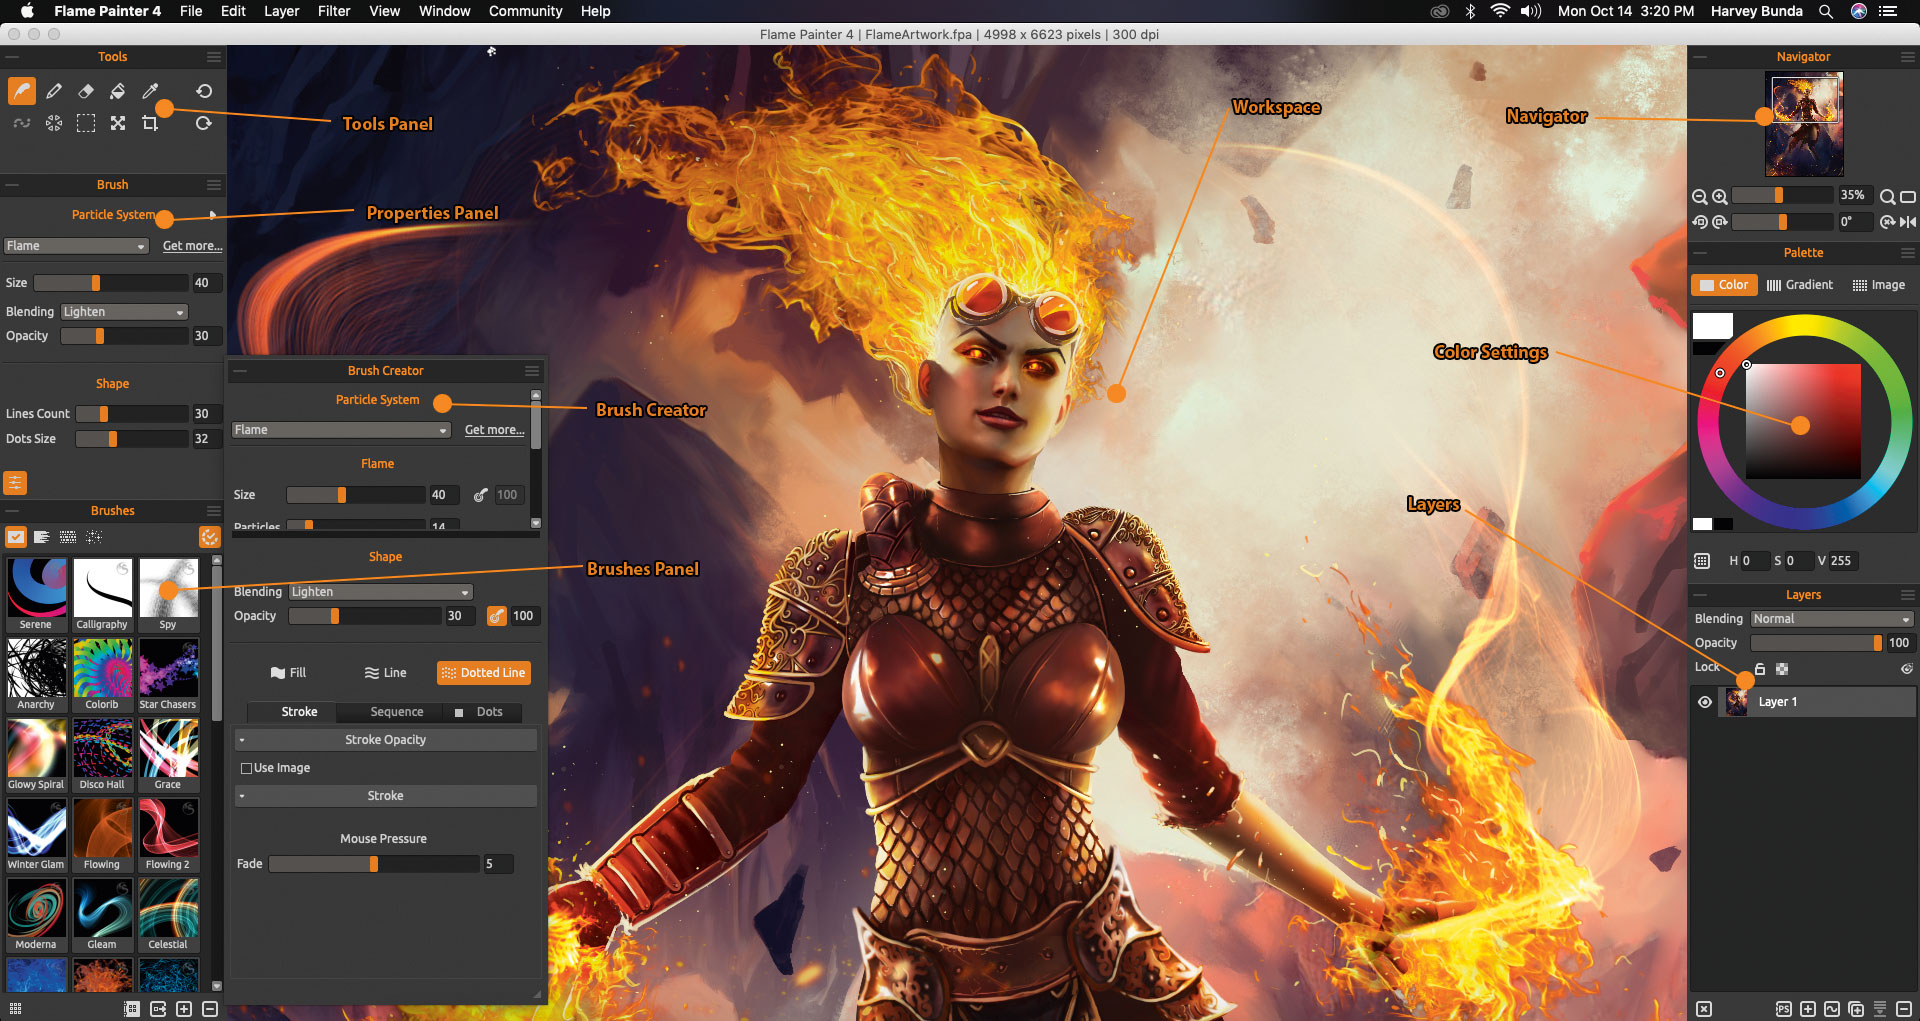
On the left-hand side is the Tools panel where you can access all of the program's tools. The Properties panel sits below this and enables you to edit the behaviour of your brush, including its Size, Blending and Opacity settings.
03. Configure the properties of your brushes in the Brush Creator panel
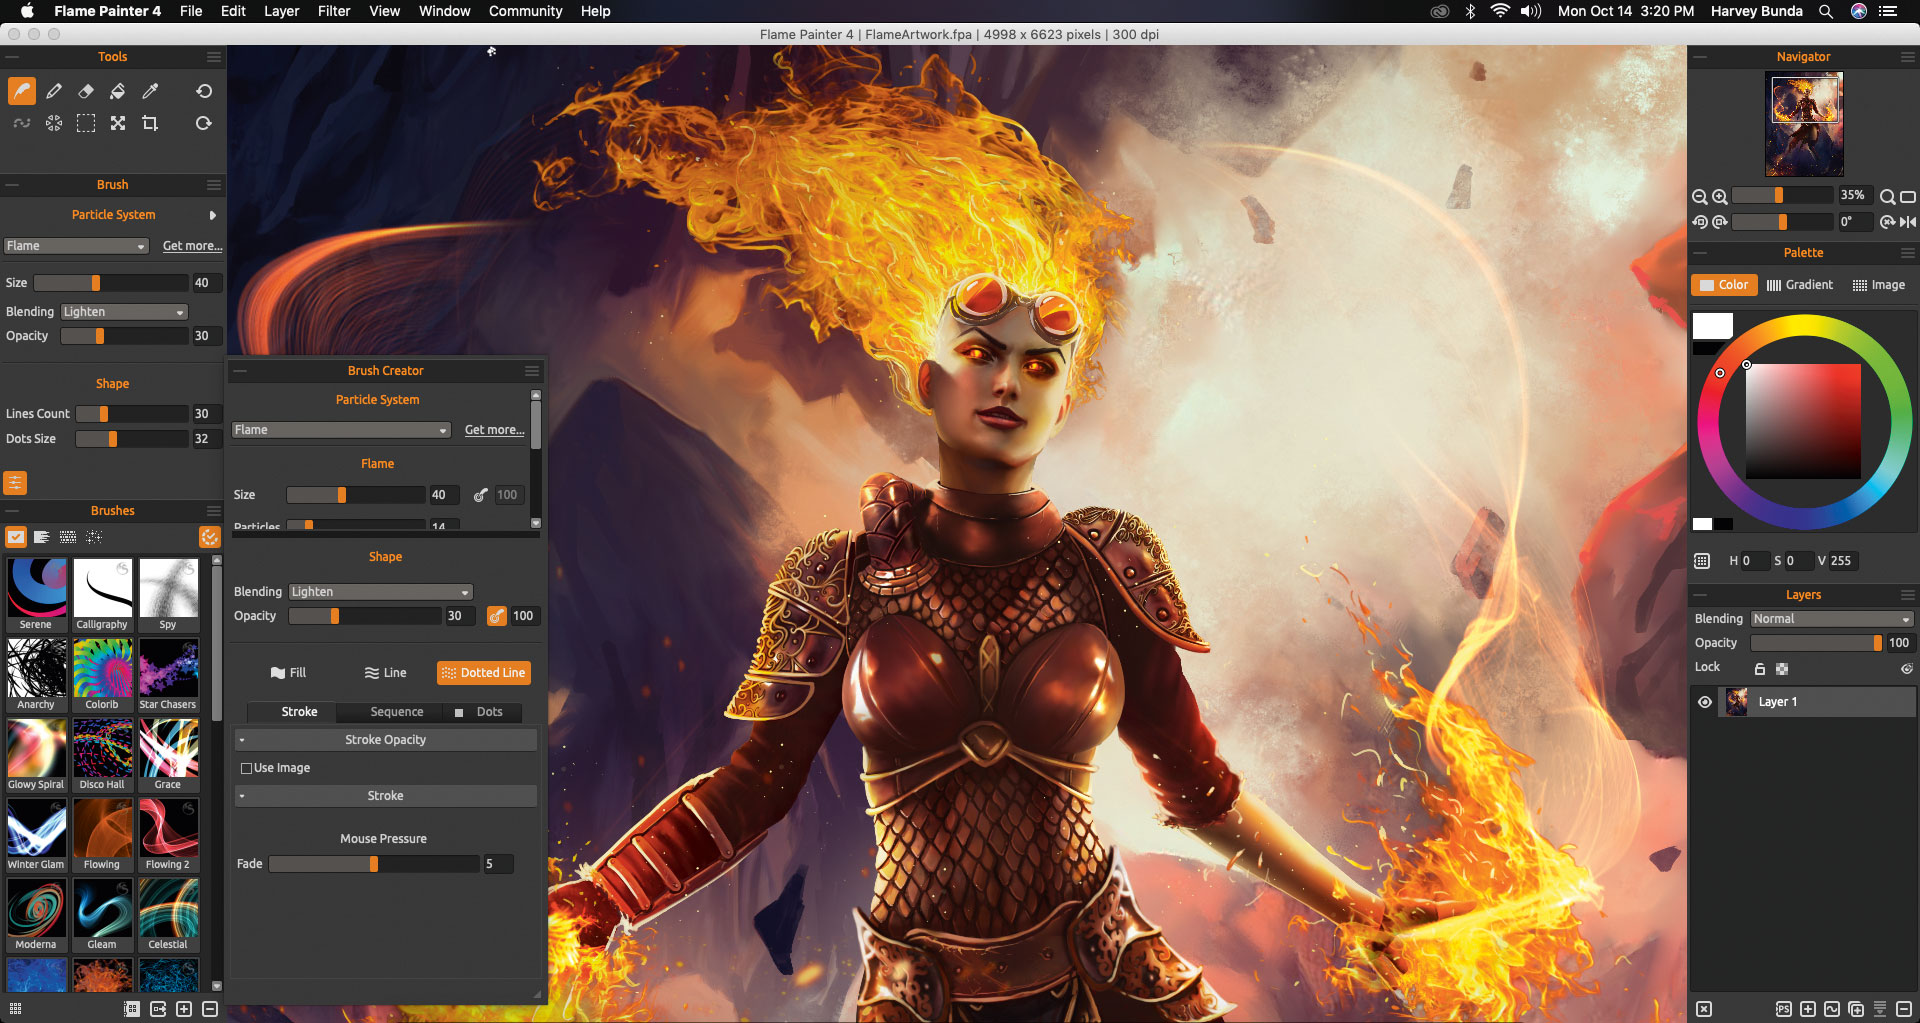
Here you can edit the properties of your selected brush and at the same time set how the particles will behave. You can also save your brush settings via the right-hand corner of the Brush Creator panel window, or reset the settings to their defaults.
04. Access the Colour panel and the Layers panel
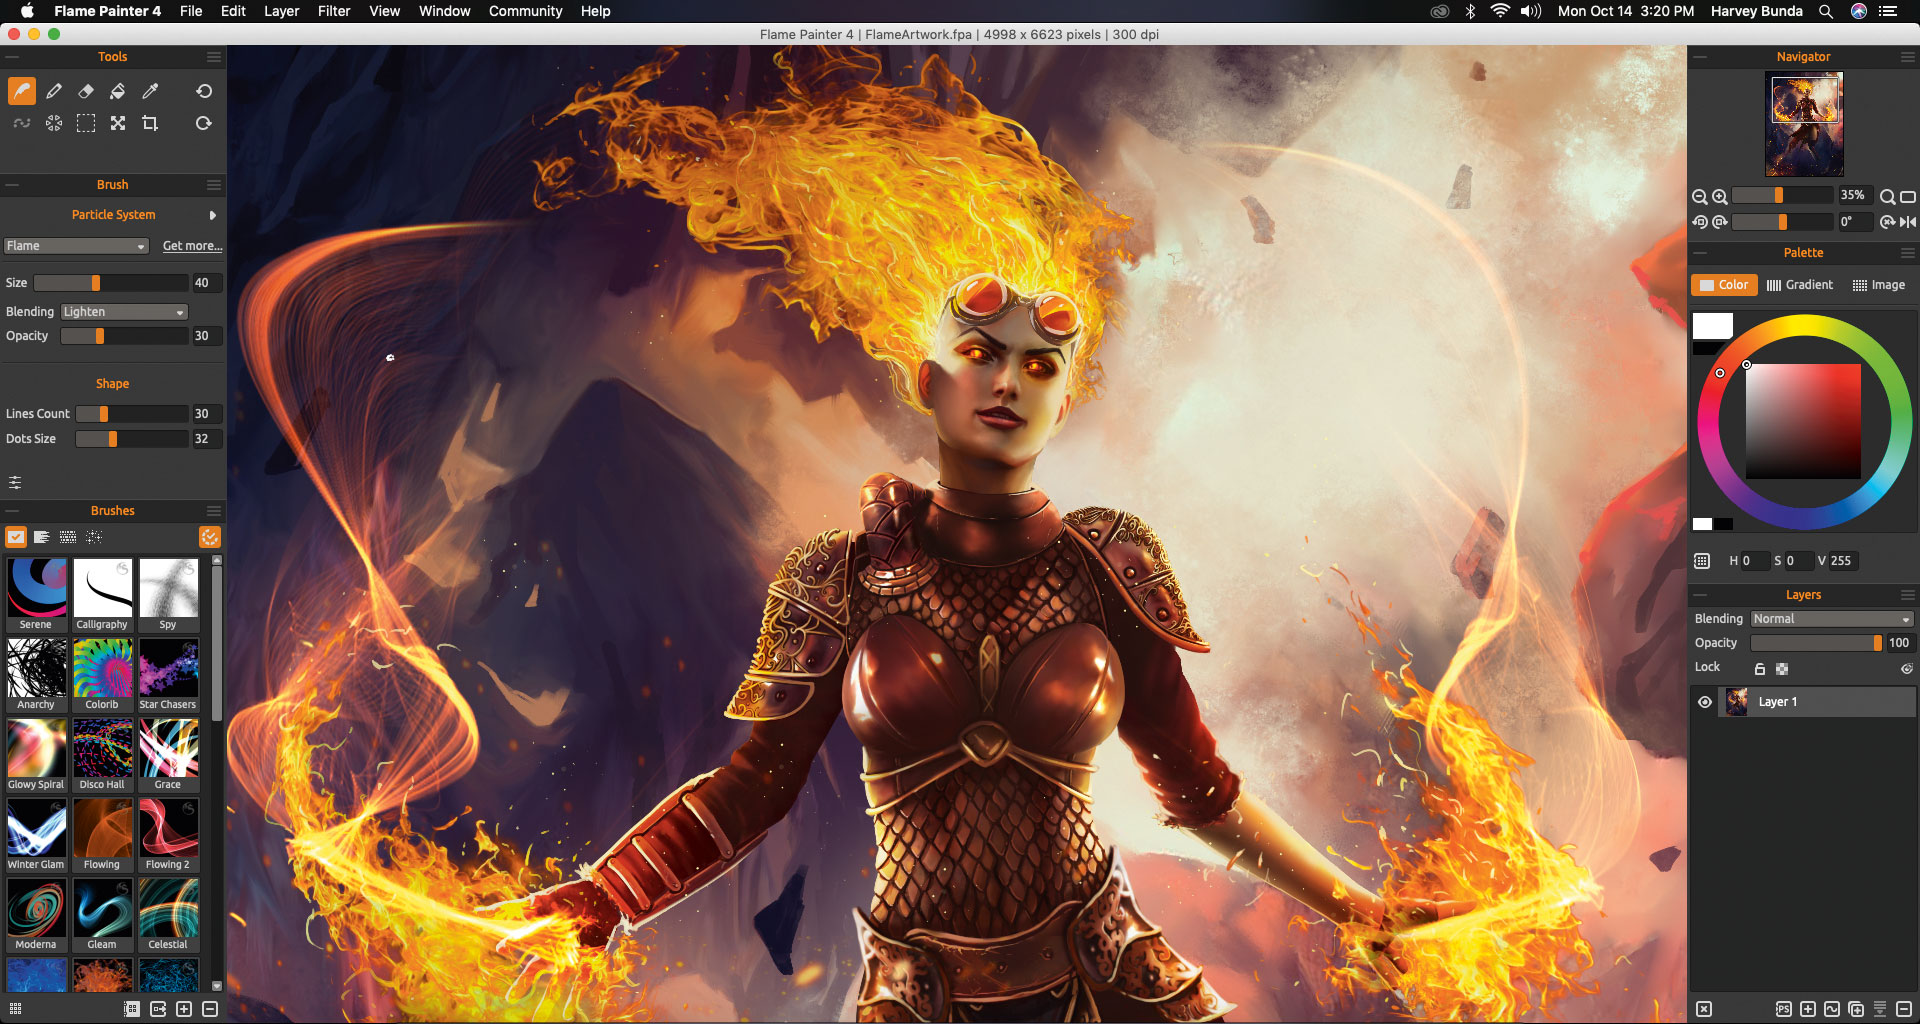
You can access the Colour panel and adjust the hue, saturation and value settings of a selected colour. On the Layers panel you can access the various blending options that can be used to adjust how the effects appear on the canvas.
05. Save your painting for working in other art programs
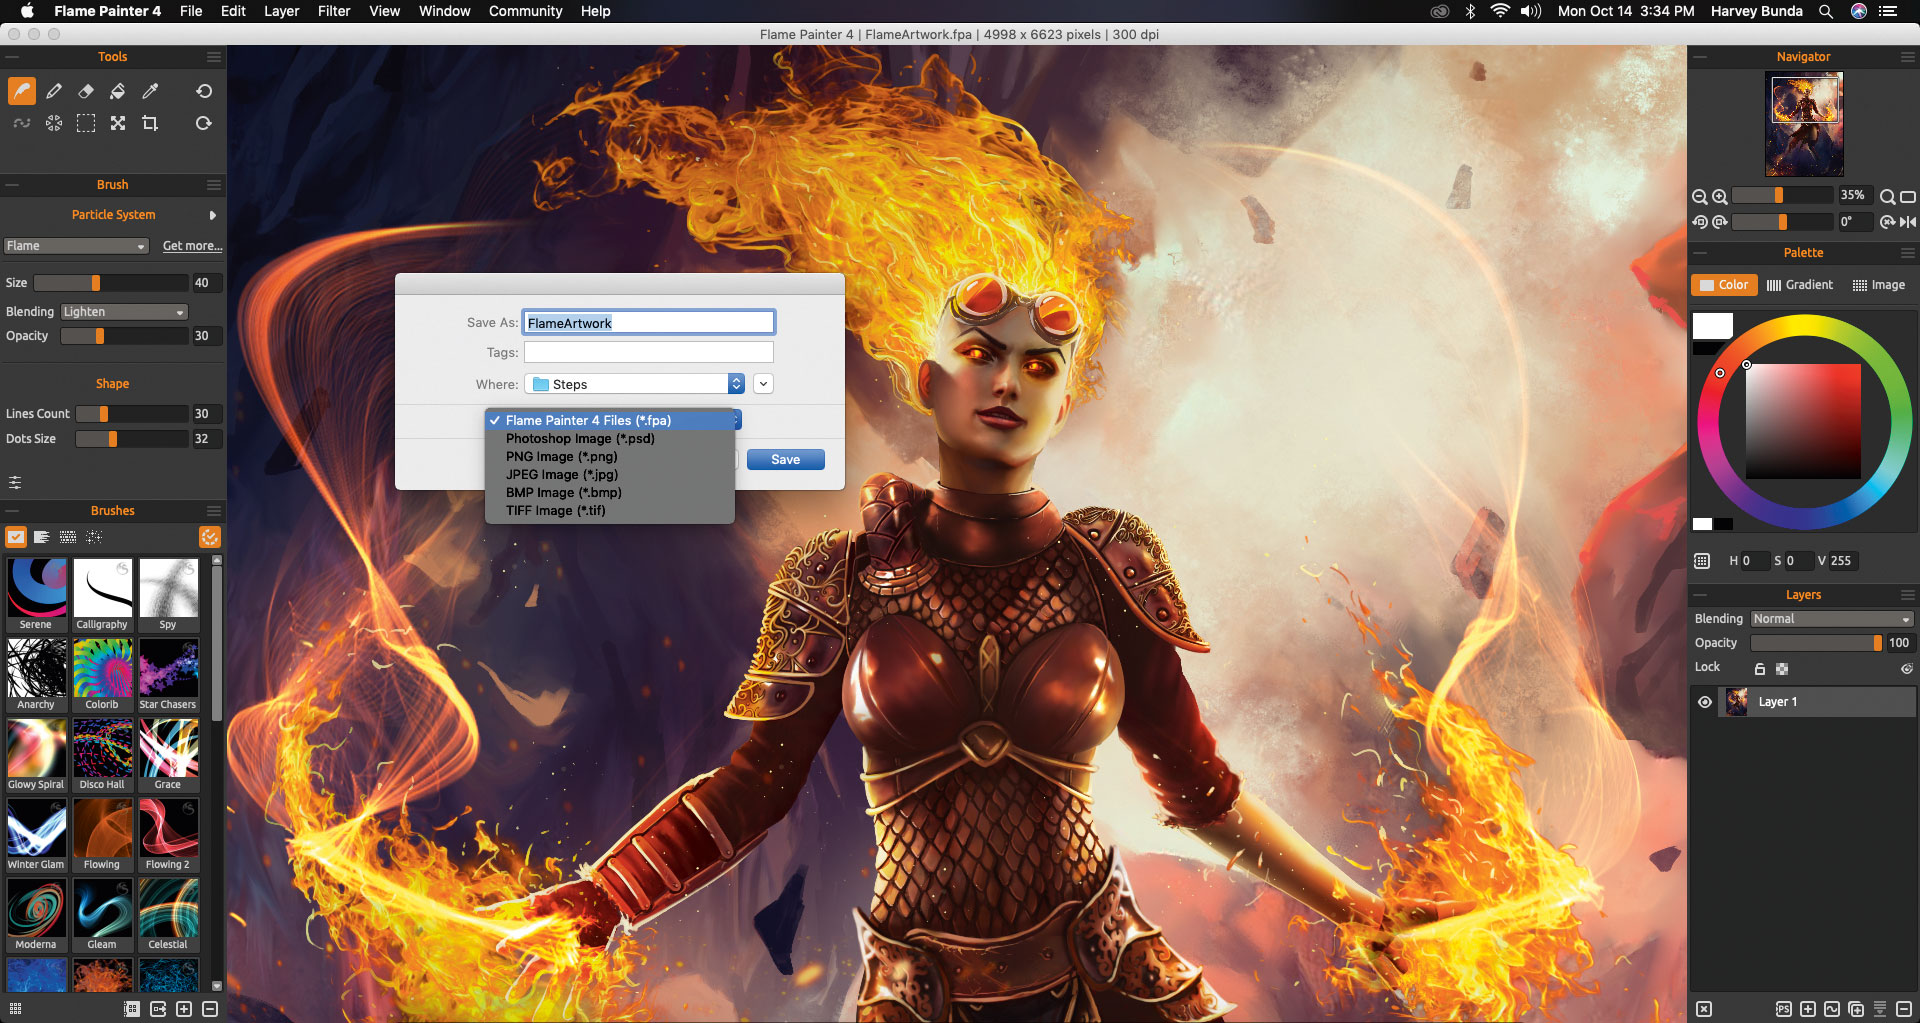
When saving your file you can choose from the usual standard image file formats, including PSD and TIF – ideal for exporting into other painting programs. At the same time Flame Painter also has its own file format – FPA – enabling you to natively save your art.
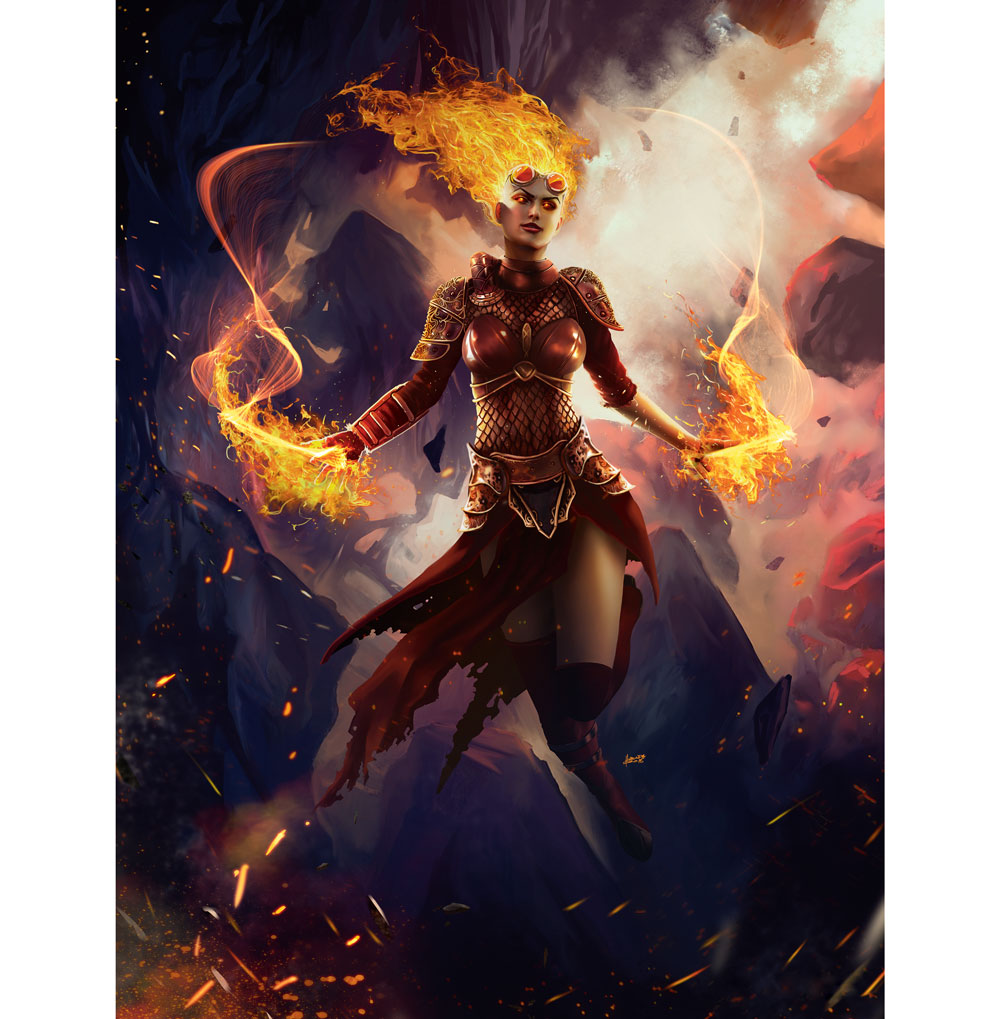
This article was originally published in ImagineFX, the world's best-selling magazine for digital artists. Subscribe to ImagineFX.
Read more:
- The best painting and drawing apps for iPad
- Mixed-media art tutorial: How to watercolour over digital artwork
- 11 top animation tools for digital artists
Sign up to Creative Bloq's daily newsletter, which brings you the latest news and inspiration from the worlds of art, design and technology.
