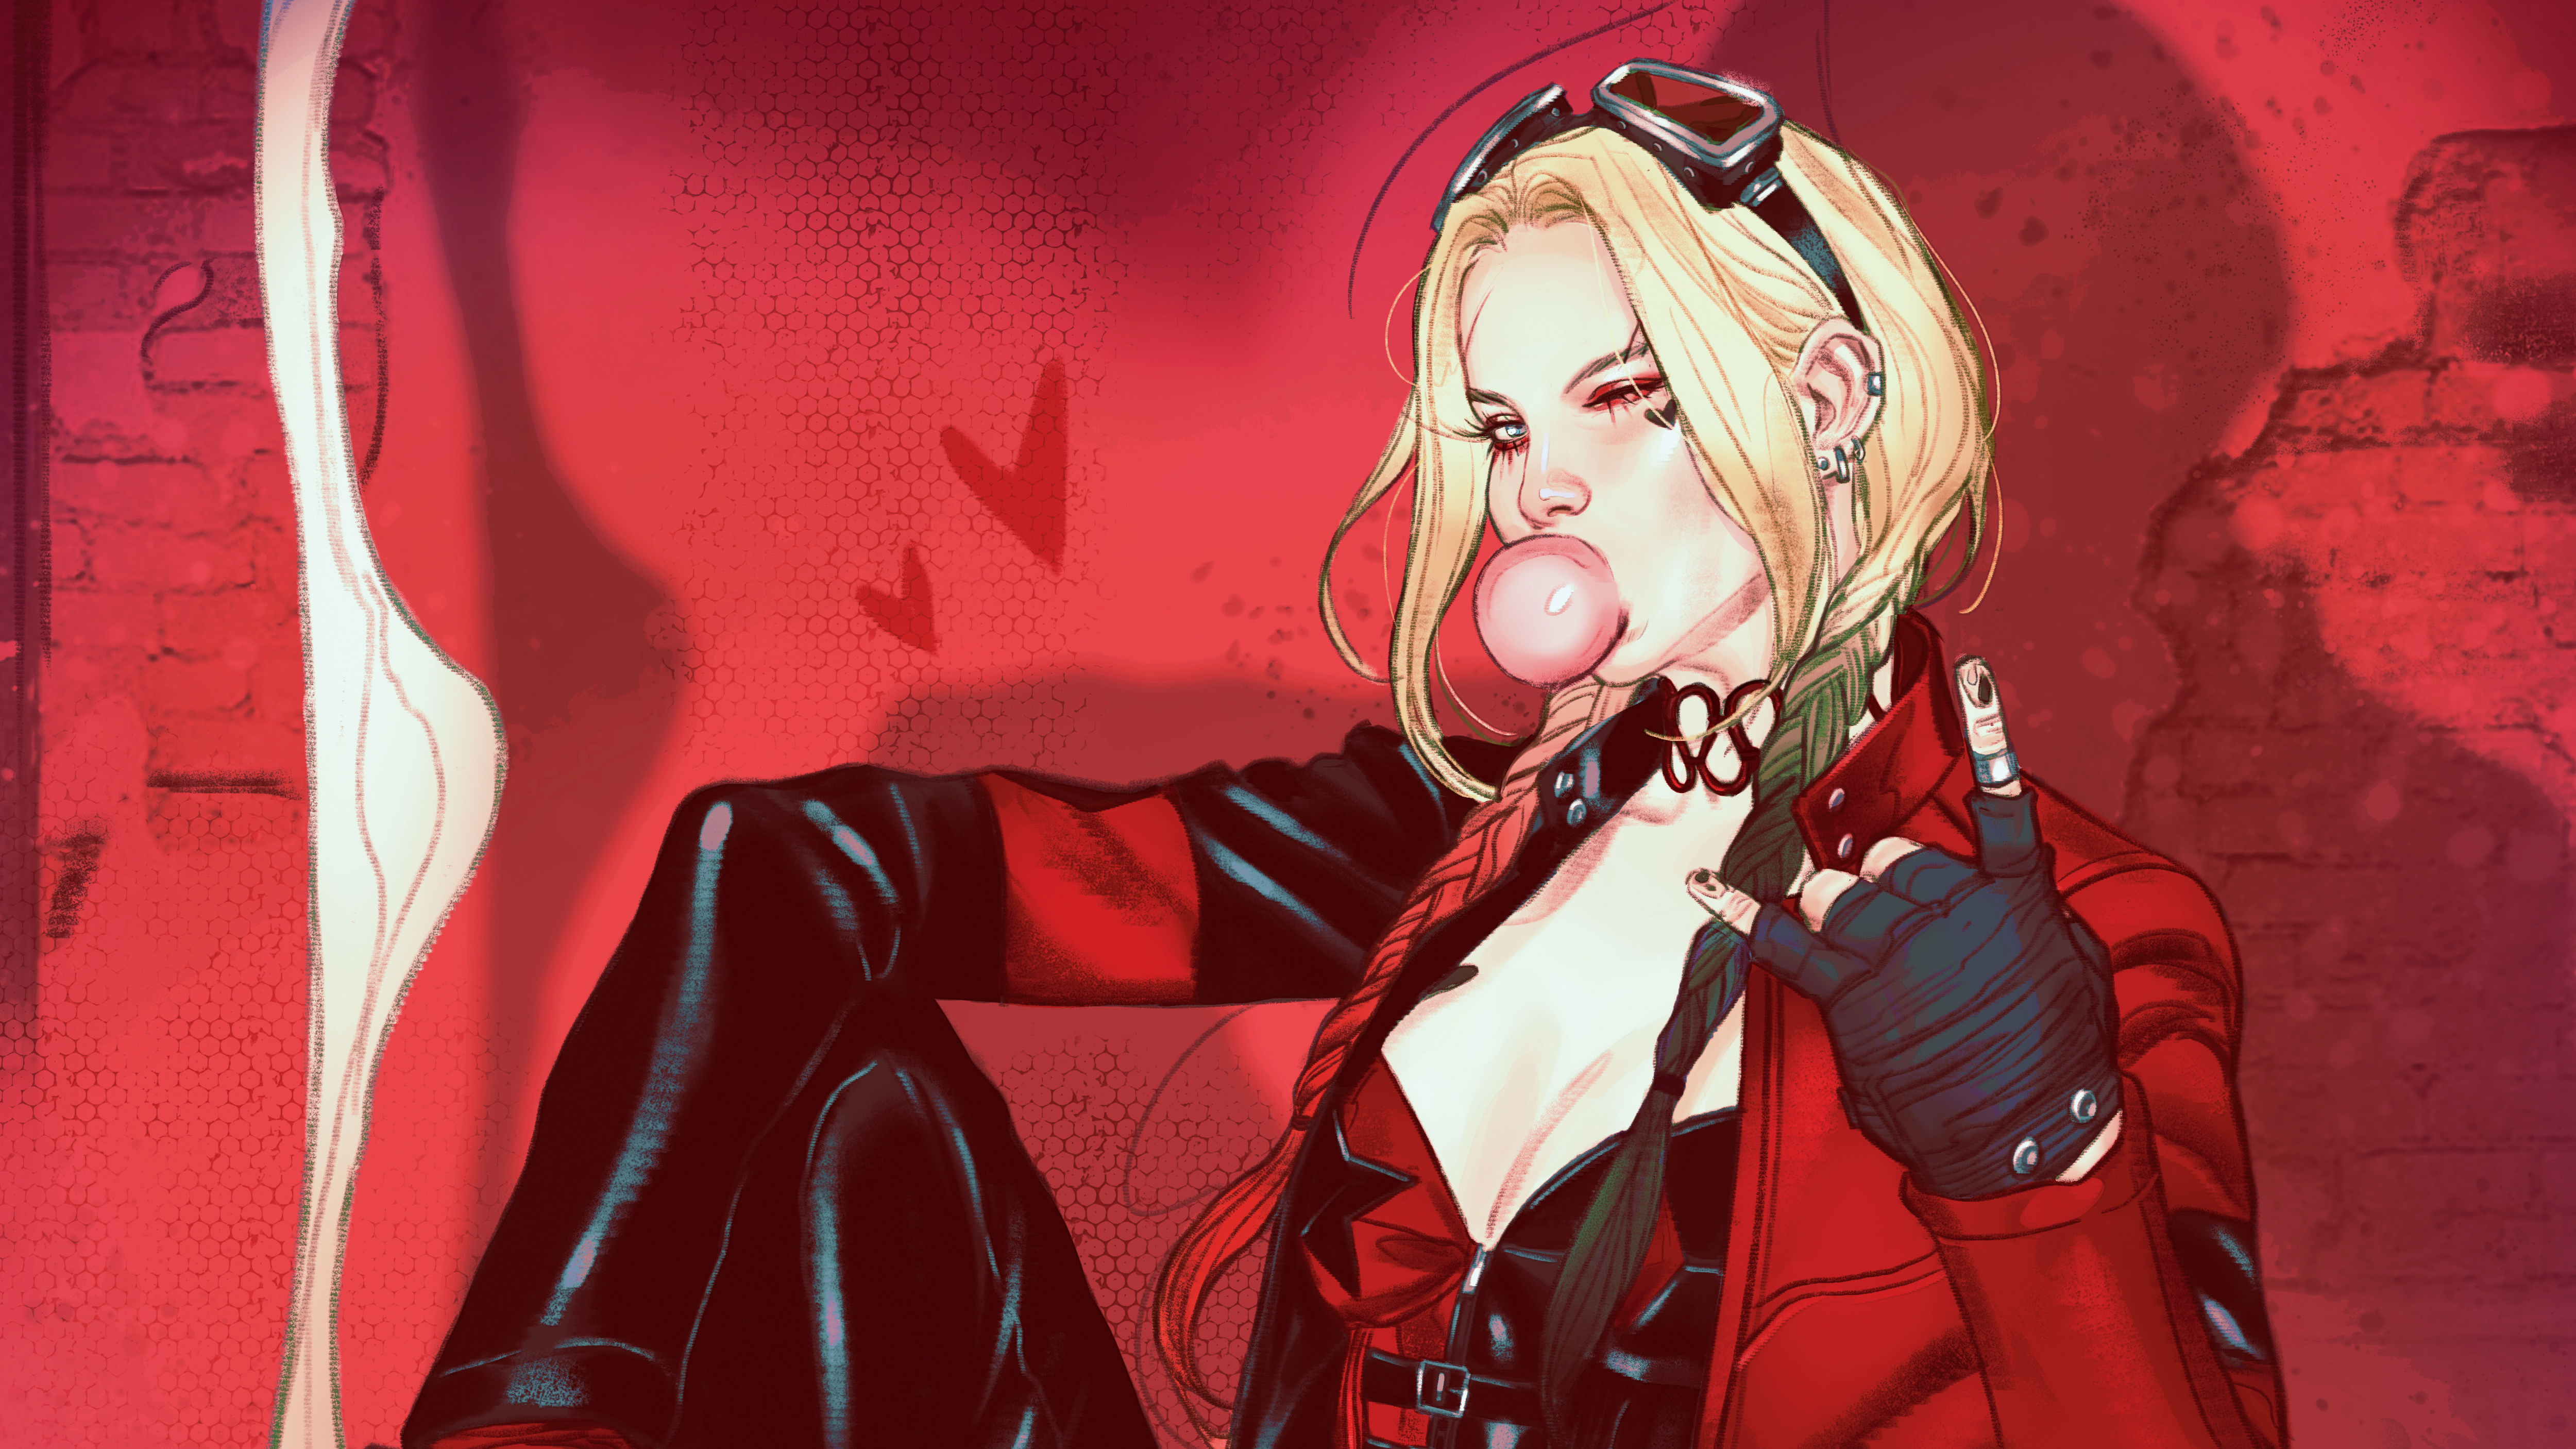
How to paint Harley Quinn using Photoshop
Use Photoshop to paint an original Harley Quinn artwork.
Sign up to Creative Bloq's daily newsletter, which brings you the latest news and inspiration from the worlds of art, design and technology.
You are now subscribed
Your newsletter sign-up was successful
Want to add more newsletters?

Five times a week
CreativeBloq
Sign up to Creative Bloq's daily newsletter, which brings you the latest news and inspiration from the worlds of art, design and technology.

Once a week
By Design
Sign up to Creative Bloq's daily newsletter, which brings you the latest news and inspiration from the worlds of art, design and technology.

Once a week
State of the Art
Sign up to Creative Bloq's daily newsletter, which brings you the latest news and inspiration from the worlds of art, design and technology.

Seasonal (around events)
Brand Impact Awards
Sign up to Creative Bloq's daily newsletter, which brings you the latest news and inspiration from the worlds of art, design and technology.
For this workshop, Marvel and DC artist Joshua Swaby is painting Harley Quinn. "She’s fun to draw, because you can do so much with her," says the artist. "She’s a witty and vibrant anti-hero – even though she’s a psycho!" For this cover Swaby will combine those traits, and add her unique punk style.
Rising star Swaby is becoming one of Marvel's hottest new artists, and he shares his process below. But if you want to learn some Marvel art and career advice from one of the industry's legends then check our Adi Granov's 10 Marvel comic art tips. Swaby will reveal his workflow for digital painting a specific character, you want to learn some broader skills try one of our brilliant Photoshop tutorials.
When Swaby creates digital art for comic covers, he keeps things fairly simple: sketch, line, flats and colour. He always begins by finding references that support the idea he has in mind, and to help achieve the concept. He then goes on to draft thumbnails of the concepts, trying to capture the feeling and mood he wants to pursue in the final piece.
Get 40% off an ImagineFX subscription!
Swaby keeps his line-work loose, but well-defined. He achieves this by using a brush that has a traditional feel of a pencil or charcoal. Then for the greys, he uses mid- to dark tones to help flat individual areas and avoid unwanted spots to help ease into my colouring phase. For colouring, he uses hard and soft brushes to help render certain areas and textures in the skin and fabrics.
The artist uses this process for many of his covers, creating professional art for some of the world's leading comic publishers. Follow his detailed step-by-step workflow…
01. Start with reference
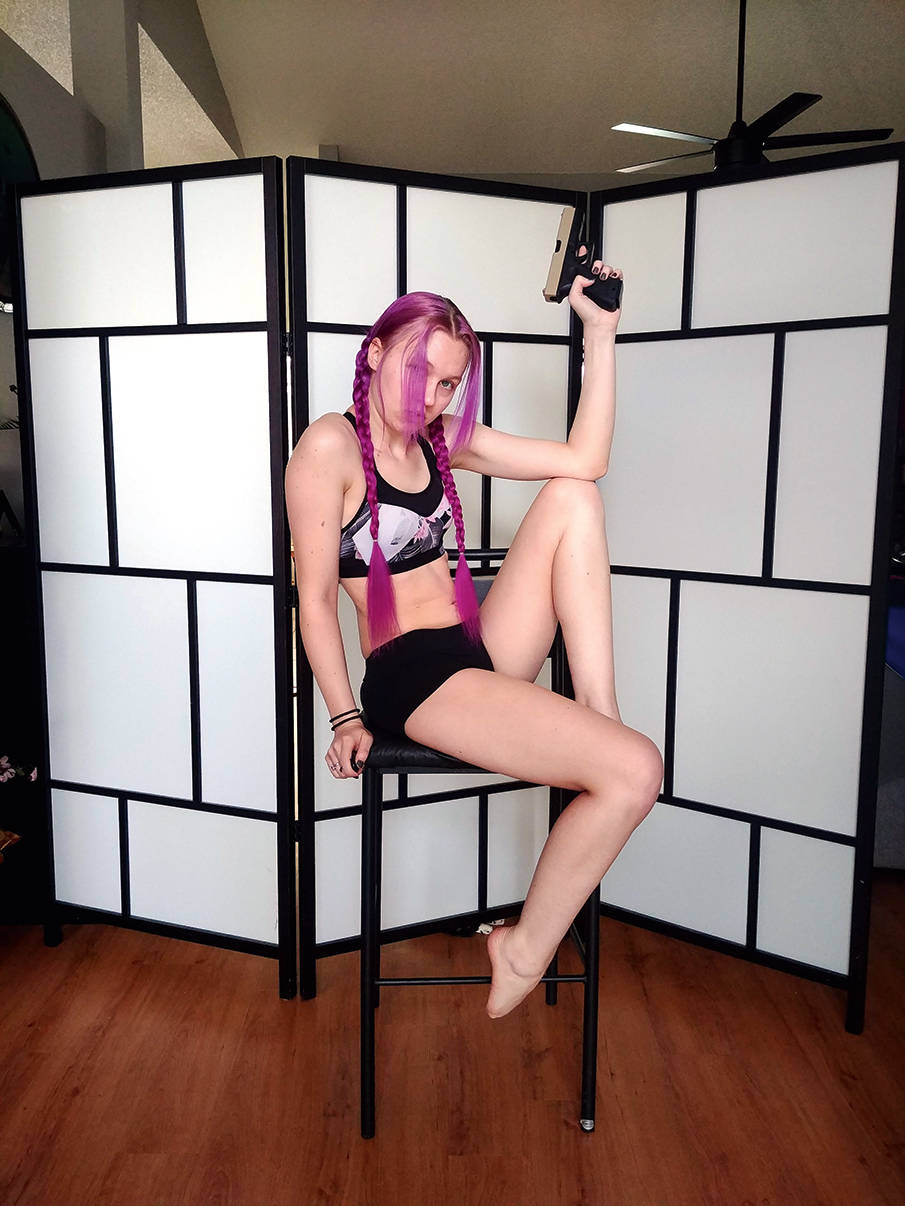
Before I start a project or a drawing, reference is an important part in figuring out what I want to do. For this Harley Quinn piece, I want this cover to be very punk, very stylish and fun. I ask an amazing model, StitchedSpade, to help with the poses that I’m looking for. This, in turn, helps me when figuring out the ideas for my thumbnails. Good reference is invaluable.
02. Sketch the thumbnails
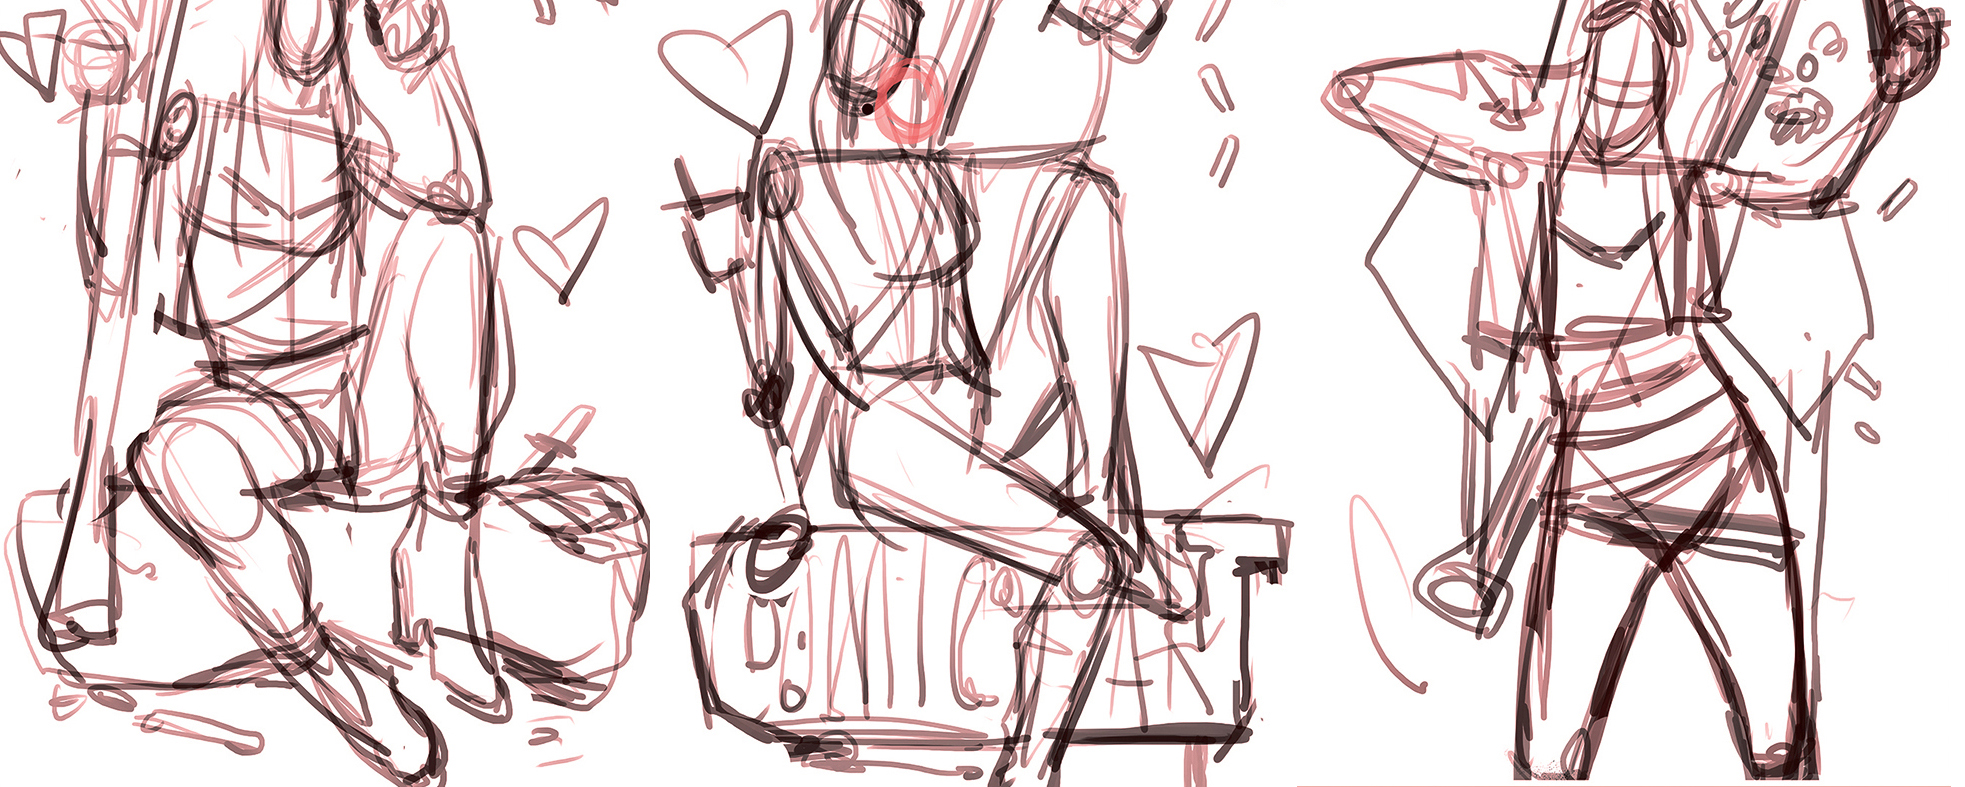
After studying the reference photos, I start drawing thumbnails. The references of the model are helpful in bringing out my ideas for my take on Harley Quinn. Across my three thumbnails I want to bring out the energy of Harley’s punk-ish, carefree character. Note that thumbnails should be loose and be free of detail. I'll combine ideas from these to form the final composition.
03. Create the final sketch
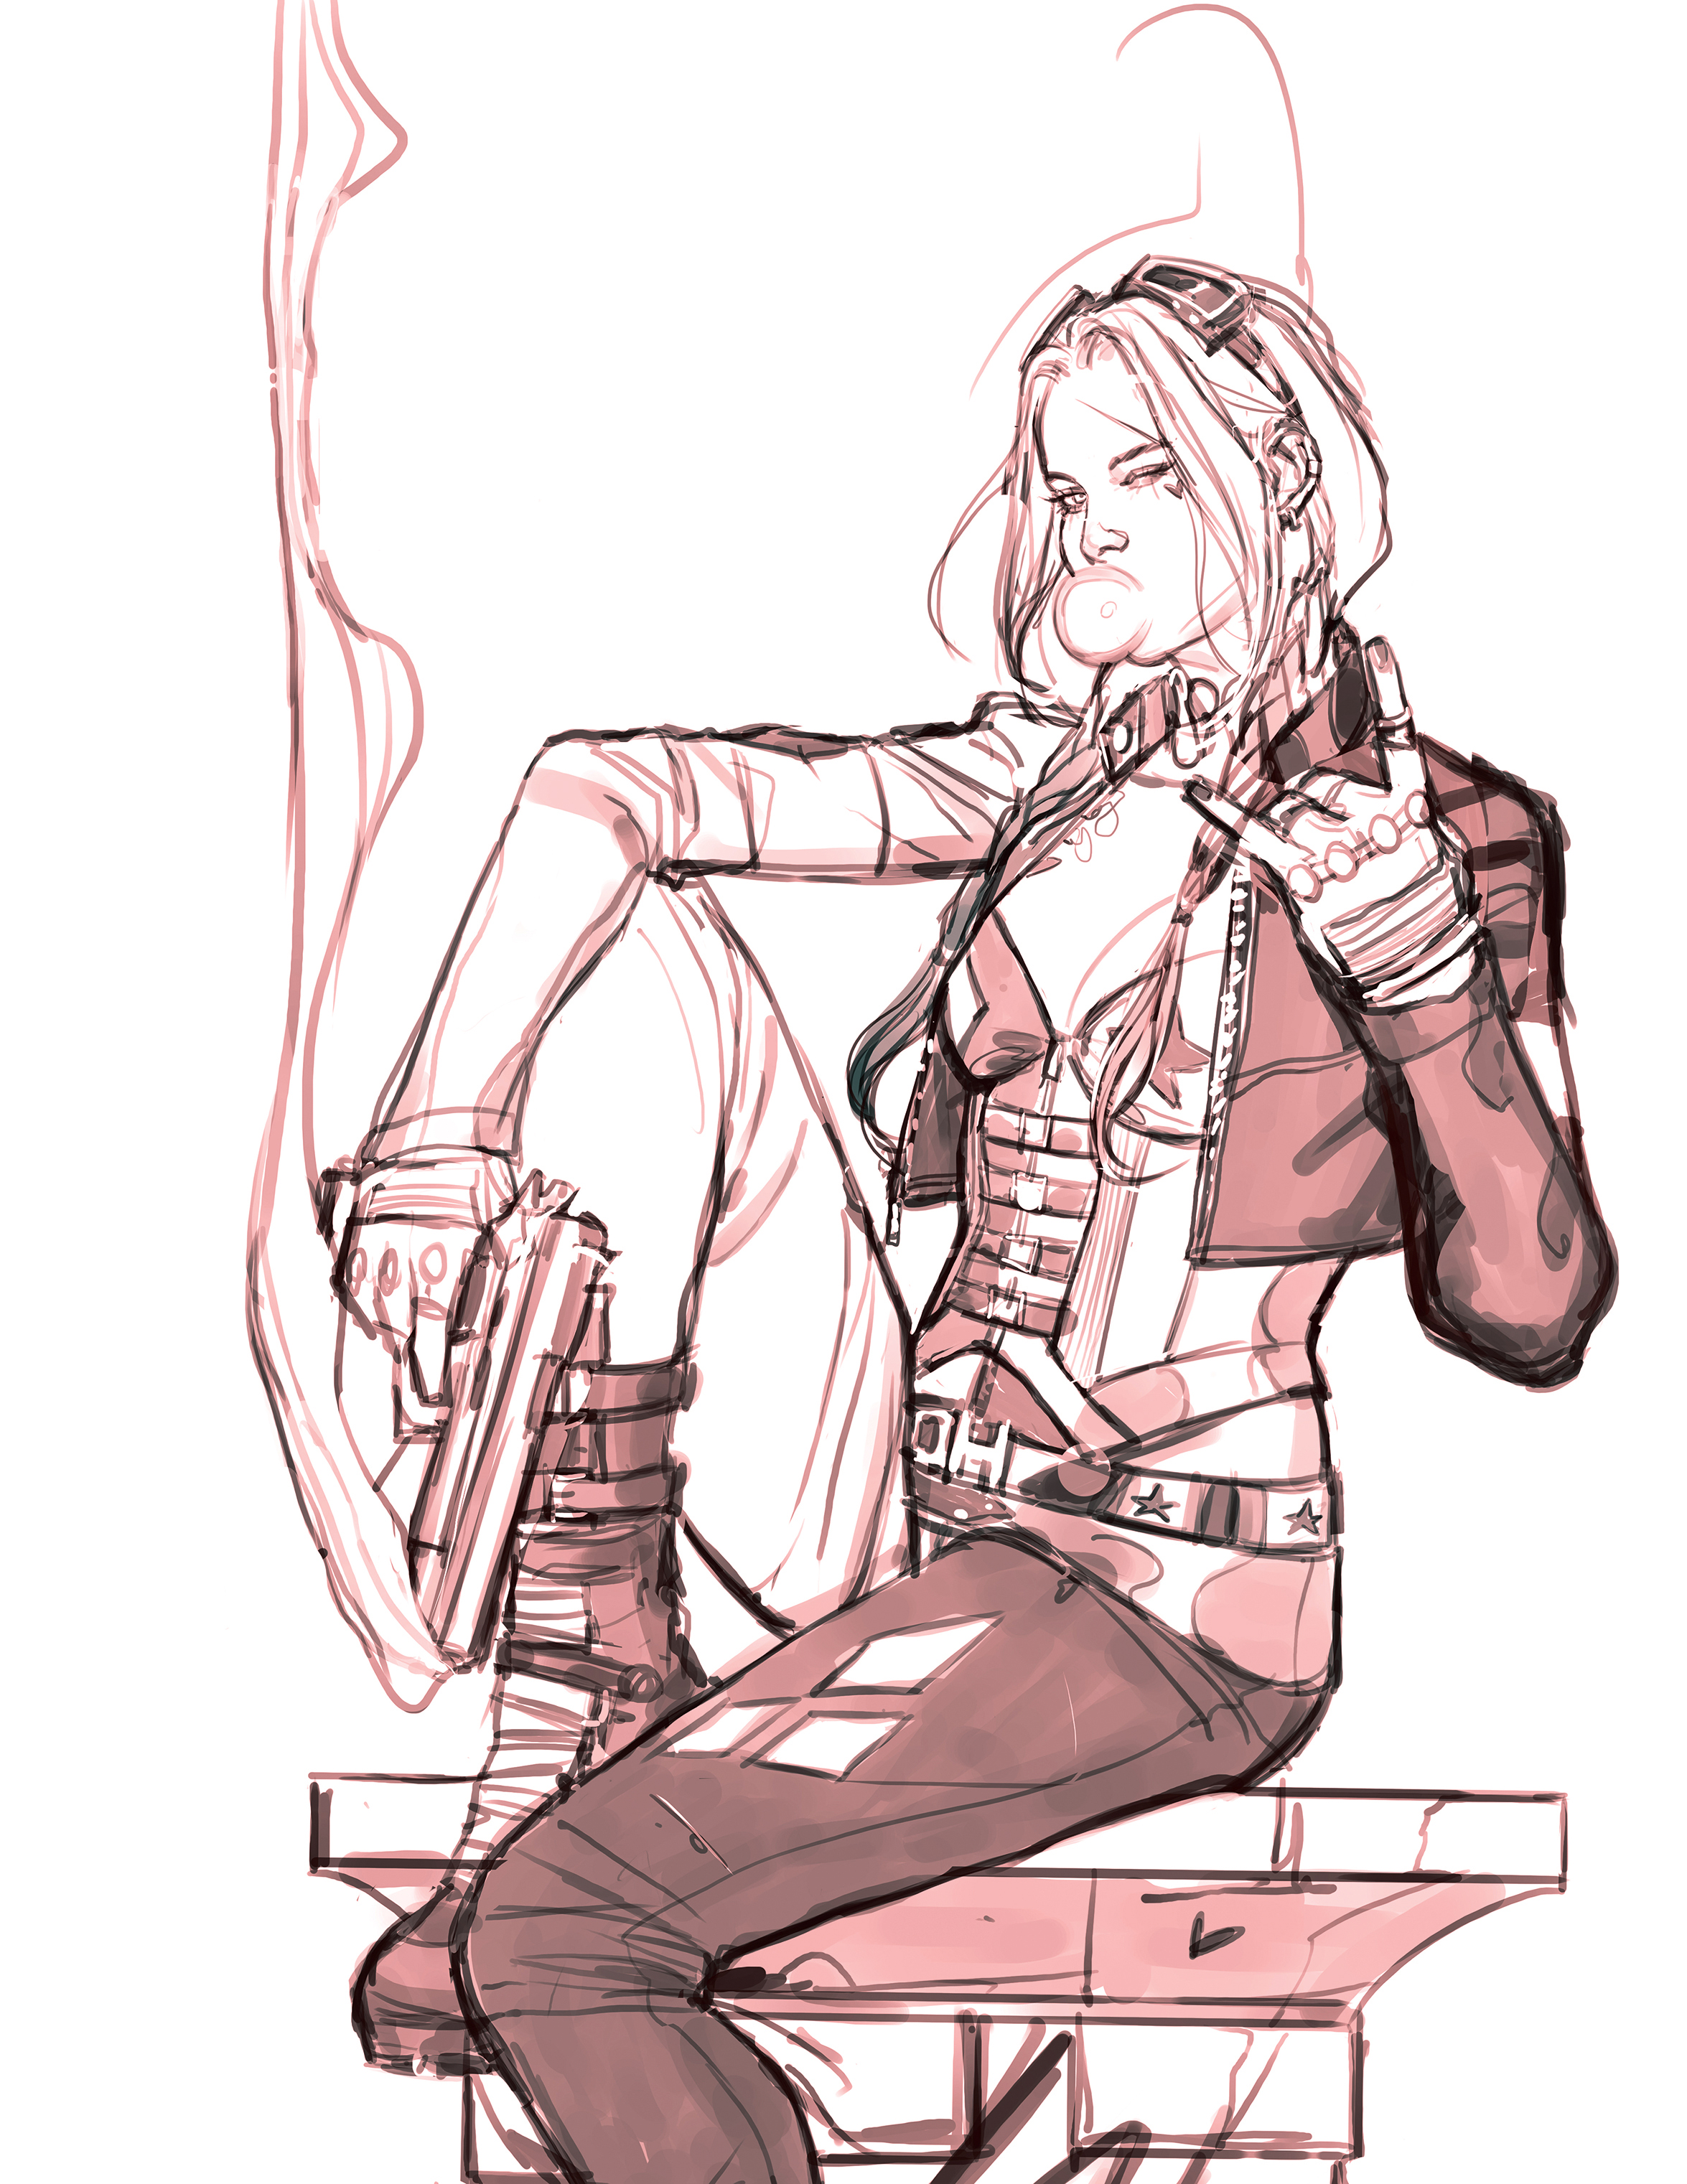
Once one of the thumbnails is approved I create the final sketch that will help me with my line-art, using a default Photoshop brush set to red. I never draw with black: I need my final sketch to be a lighter colour because I’ll be laying down my lines on top of it.
04. Work up the line-art
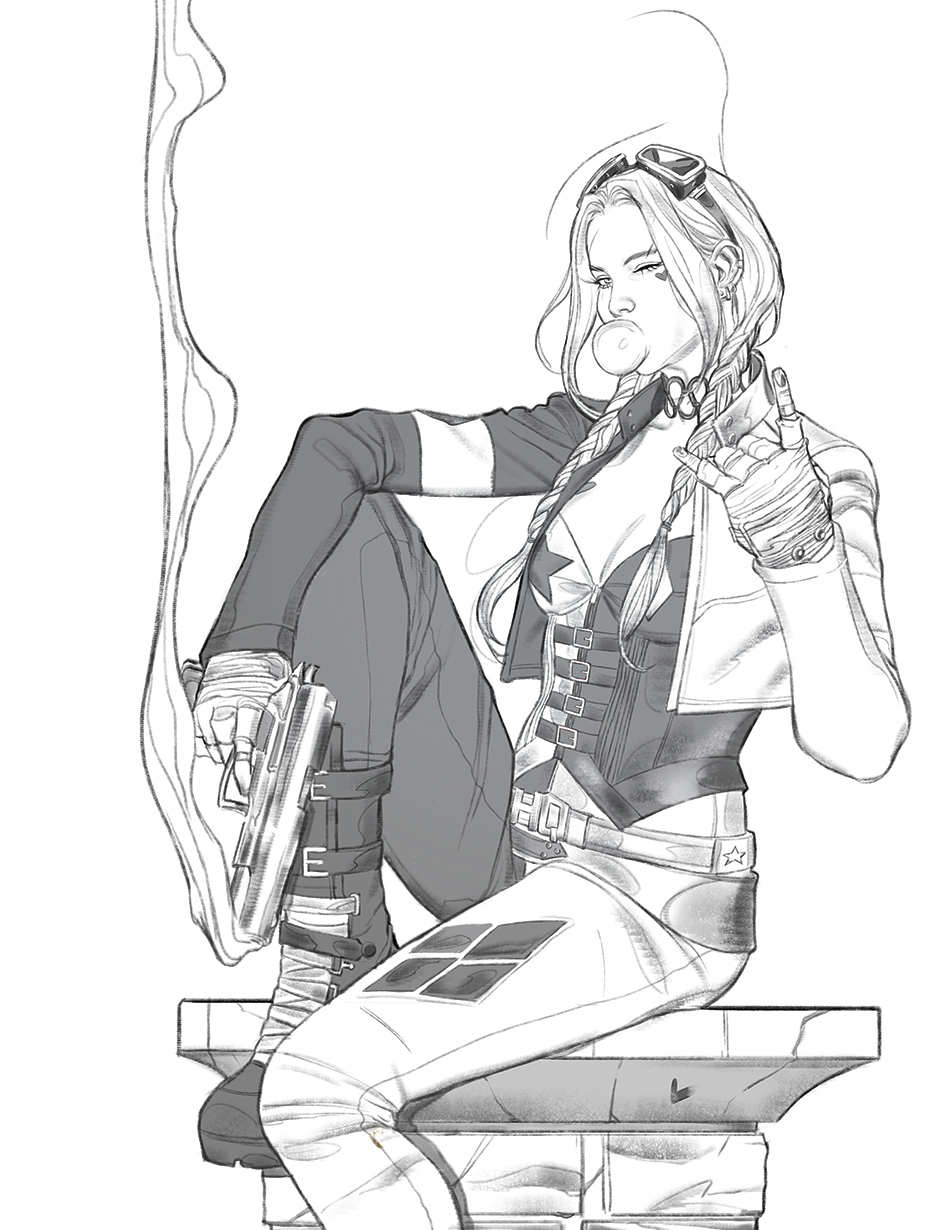
Next, I reduce the Opacity to 50 per cent and start work on my line-art layer that’s on top of the final sketch layer. My line-art is crucial to my art style and process. It’s present in my final stages of my work because my line work is loose, yet refined. The main brush that I use in all of my art is from Ilya Kuvshinov’s brush set. It’s called Forme echantillonne, and has an amazing traditional feel, much like using pencil or charcoal in real life.
05. Add a grey tone
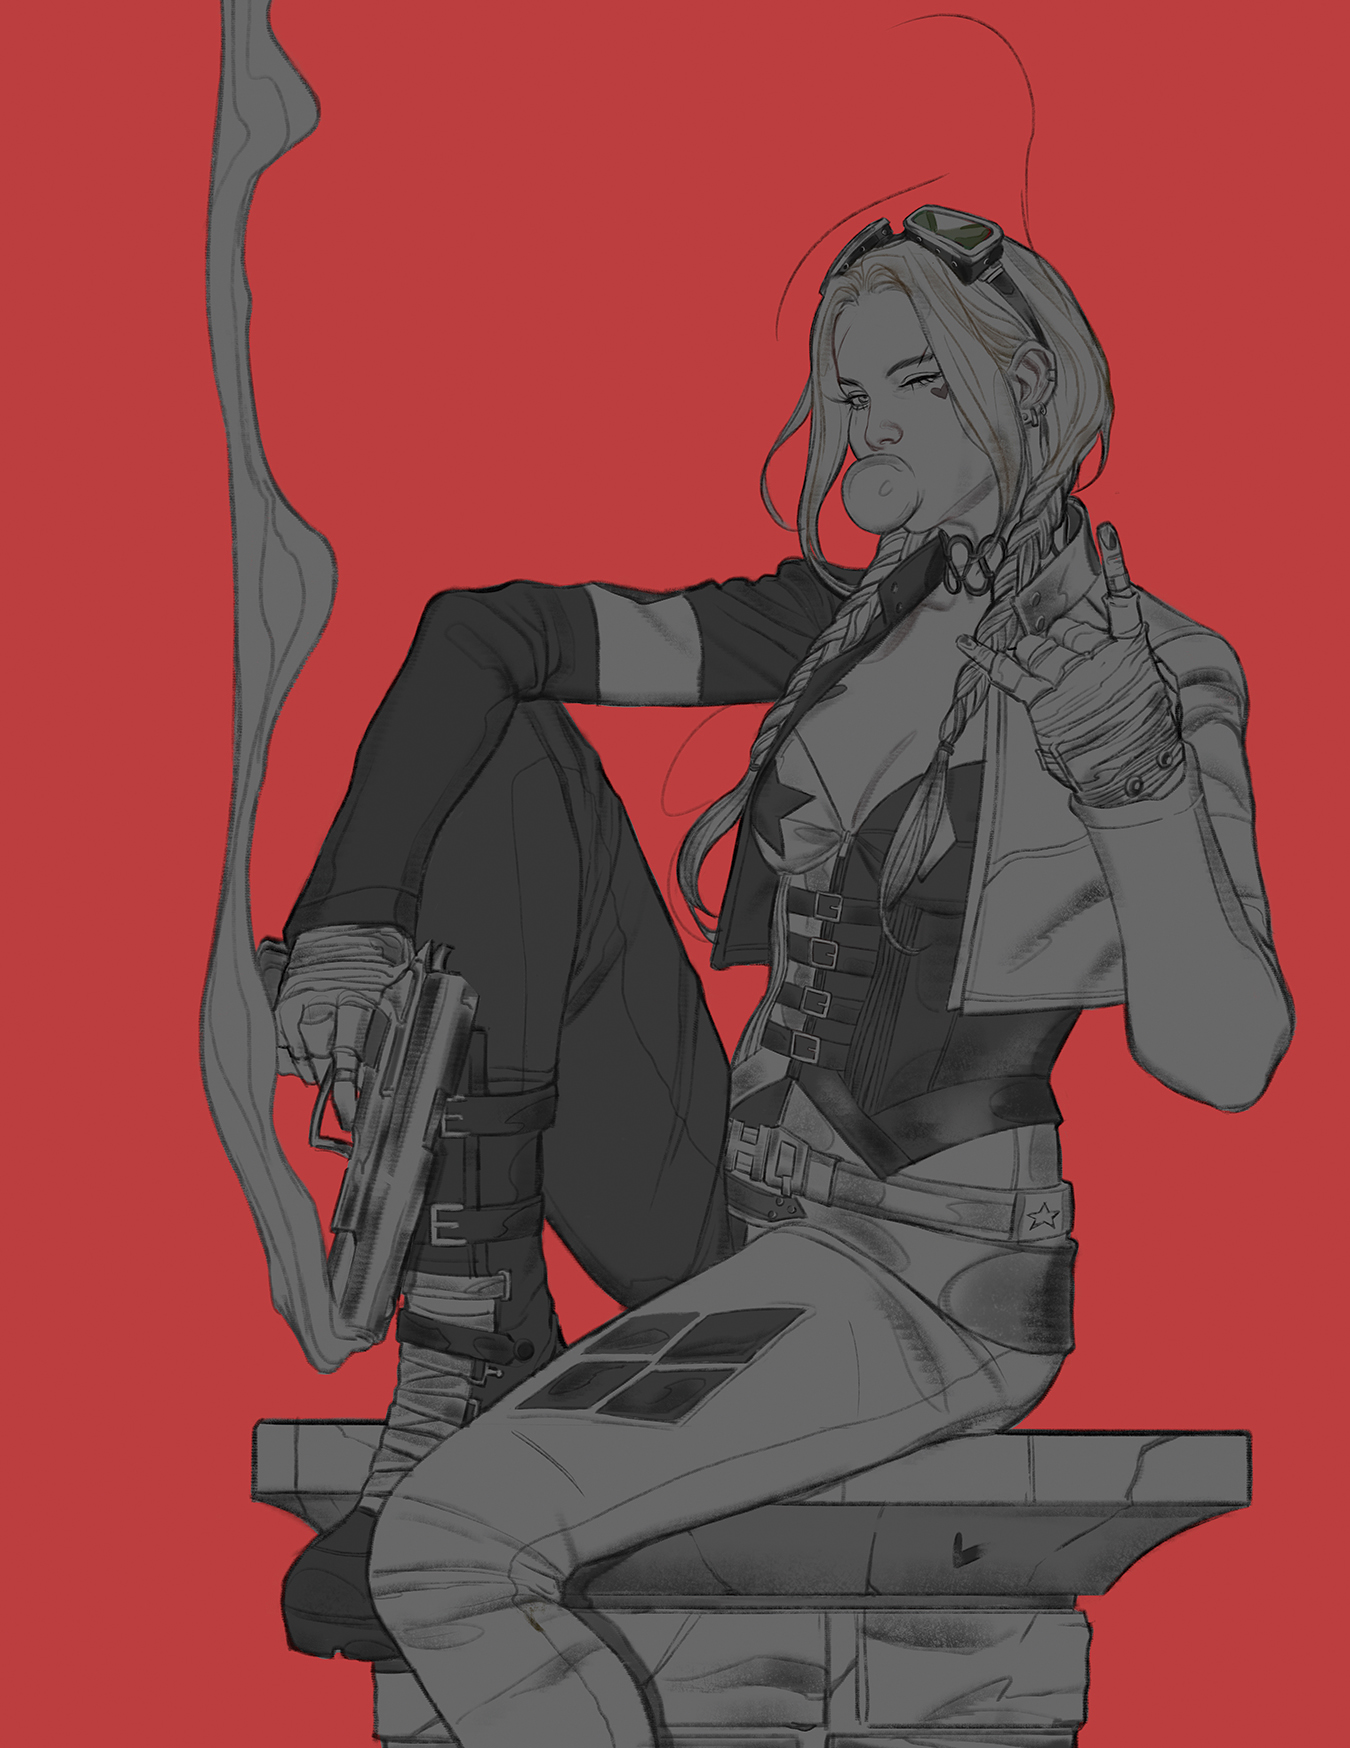
Once I’m satisfied with the line-art, I create a layer underneath it for my greys. Here I use a default brush and the Lasso tool to colour the figure. The grey is my base tone before I start flatting individual areas, to highlight any gaps, contrast with the background layer, and helps me keep in mind the depth of the character. It’ll also assist with my next step, when I’ll create a clipping mask over the greys to start flatting the image without having to clean the outer areas of the line-art.
06. Paint the flat colours
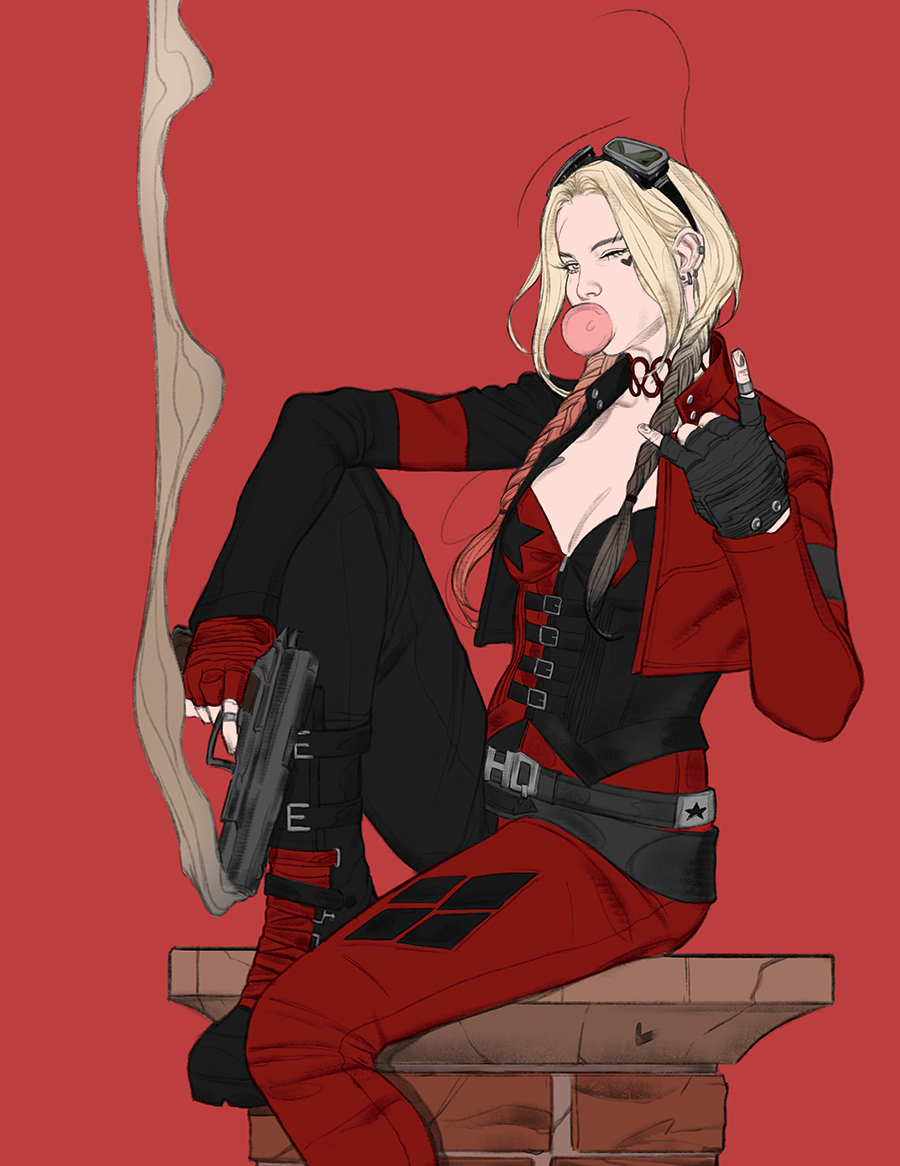
Now that I’ve finished with the greys, I can start flatting – painting even tones and hues within the lines of the art to set the colour. Before you start flatting, create a clipping mask over the grey layer using Alt+Ctrl+G. It’s a helpful trick to colour over a layer that’s locked, and enables me to paint freely and not have to worry about going over the lines. Work smart, not harder!
07. Render Harley’s face
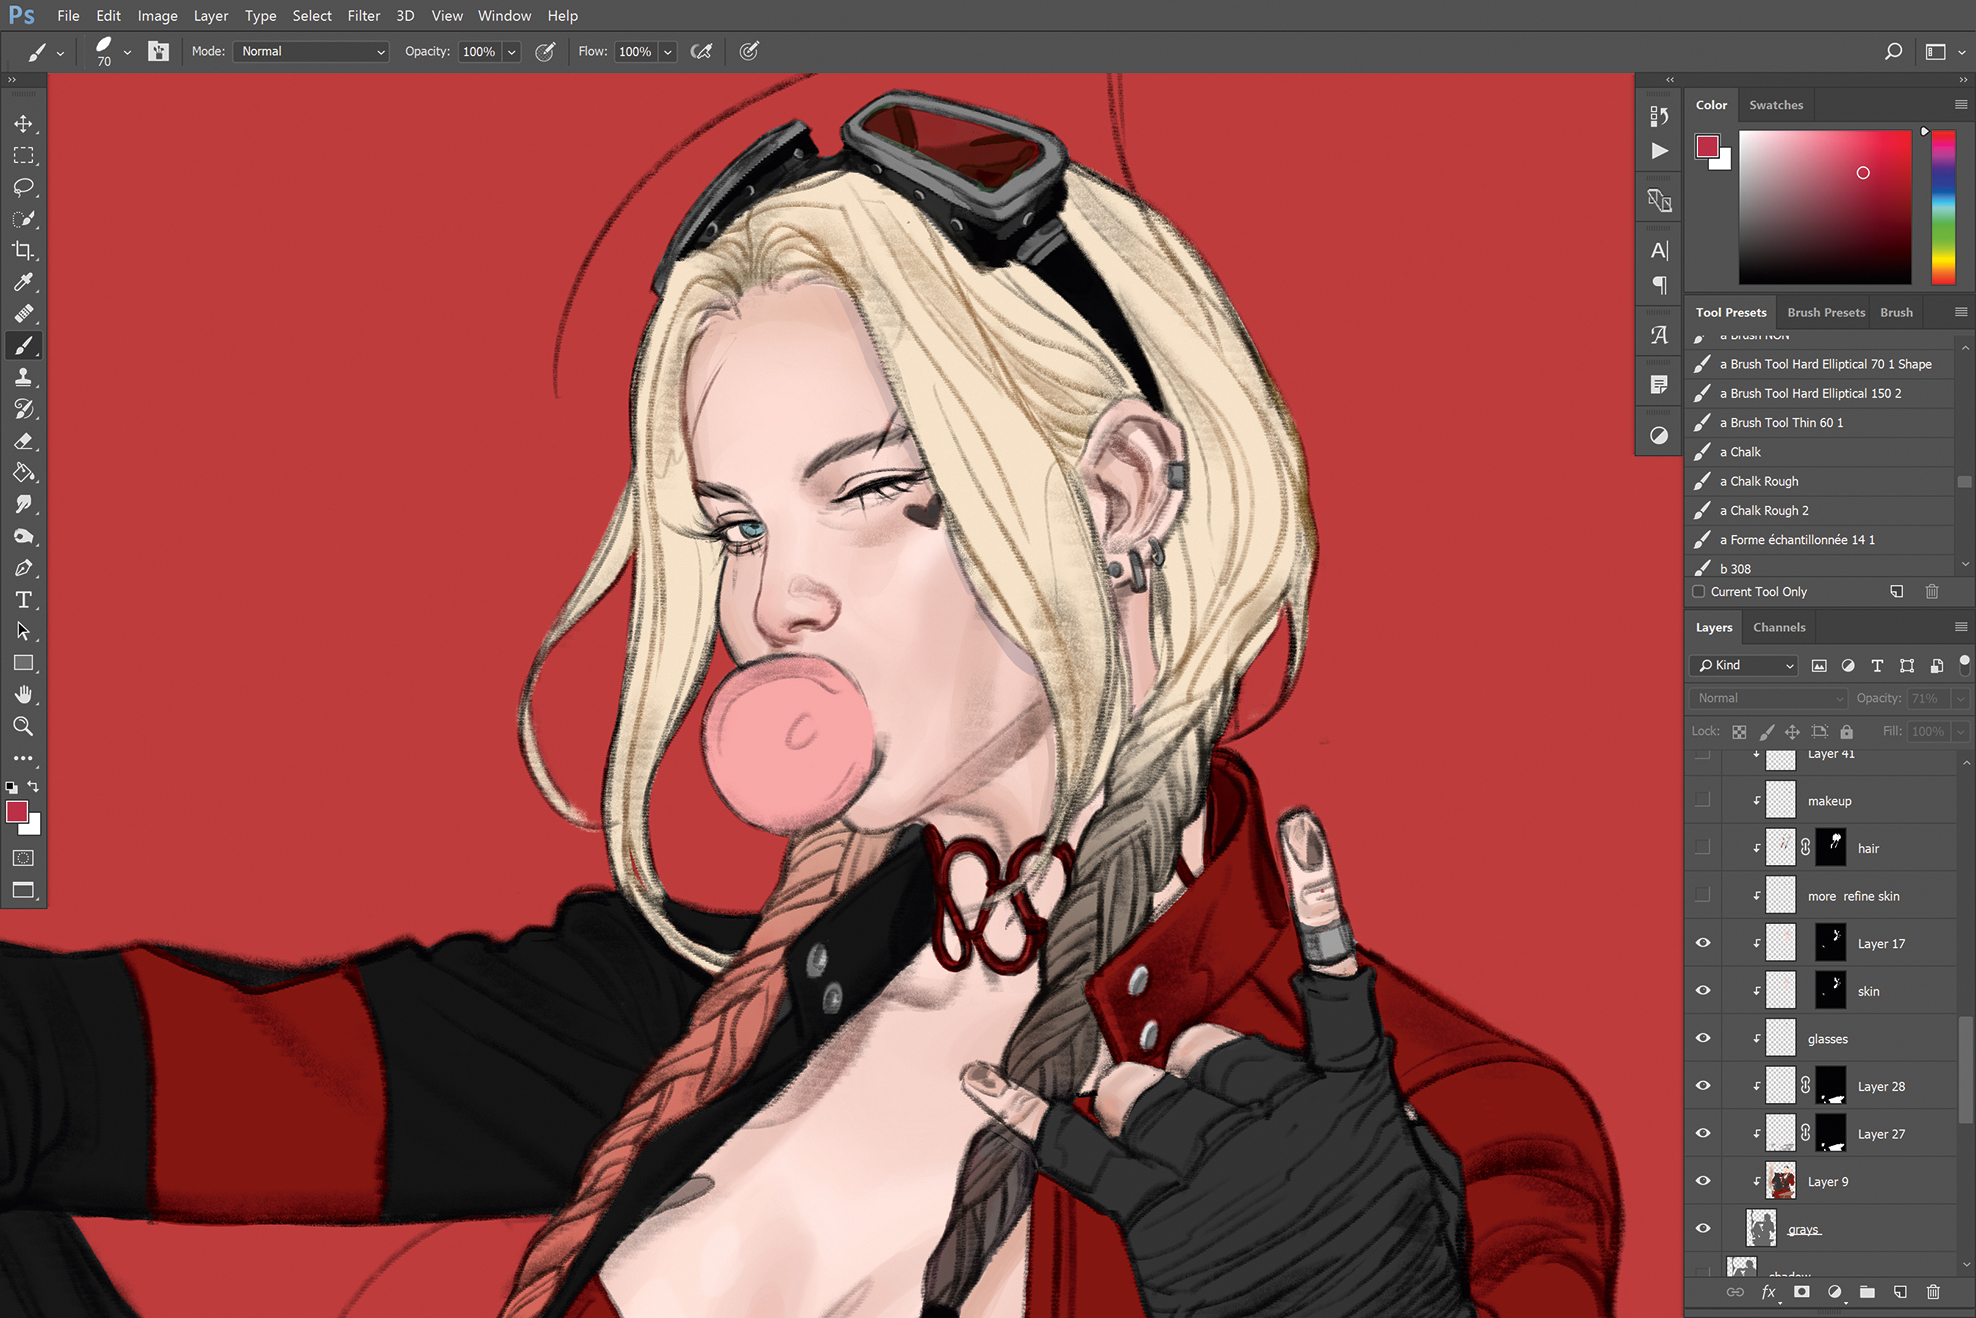
Before rendering the face I set up a layer called skin over my flats that’s been clipped to my grey layer. Then I mask it by selecting the skin area (Layers>Mask tool) from the Quick Selection tool. Once masked, I now can render using a brush also from llya called Hard Elliptical 70 1 Shape, and this tool is super-useful because of its Pen Pressure setting.
08. Paint the different fabrics
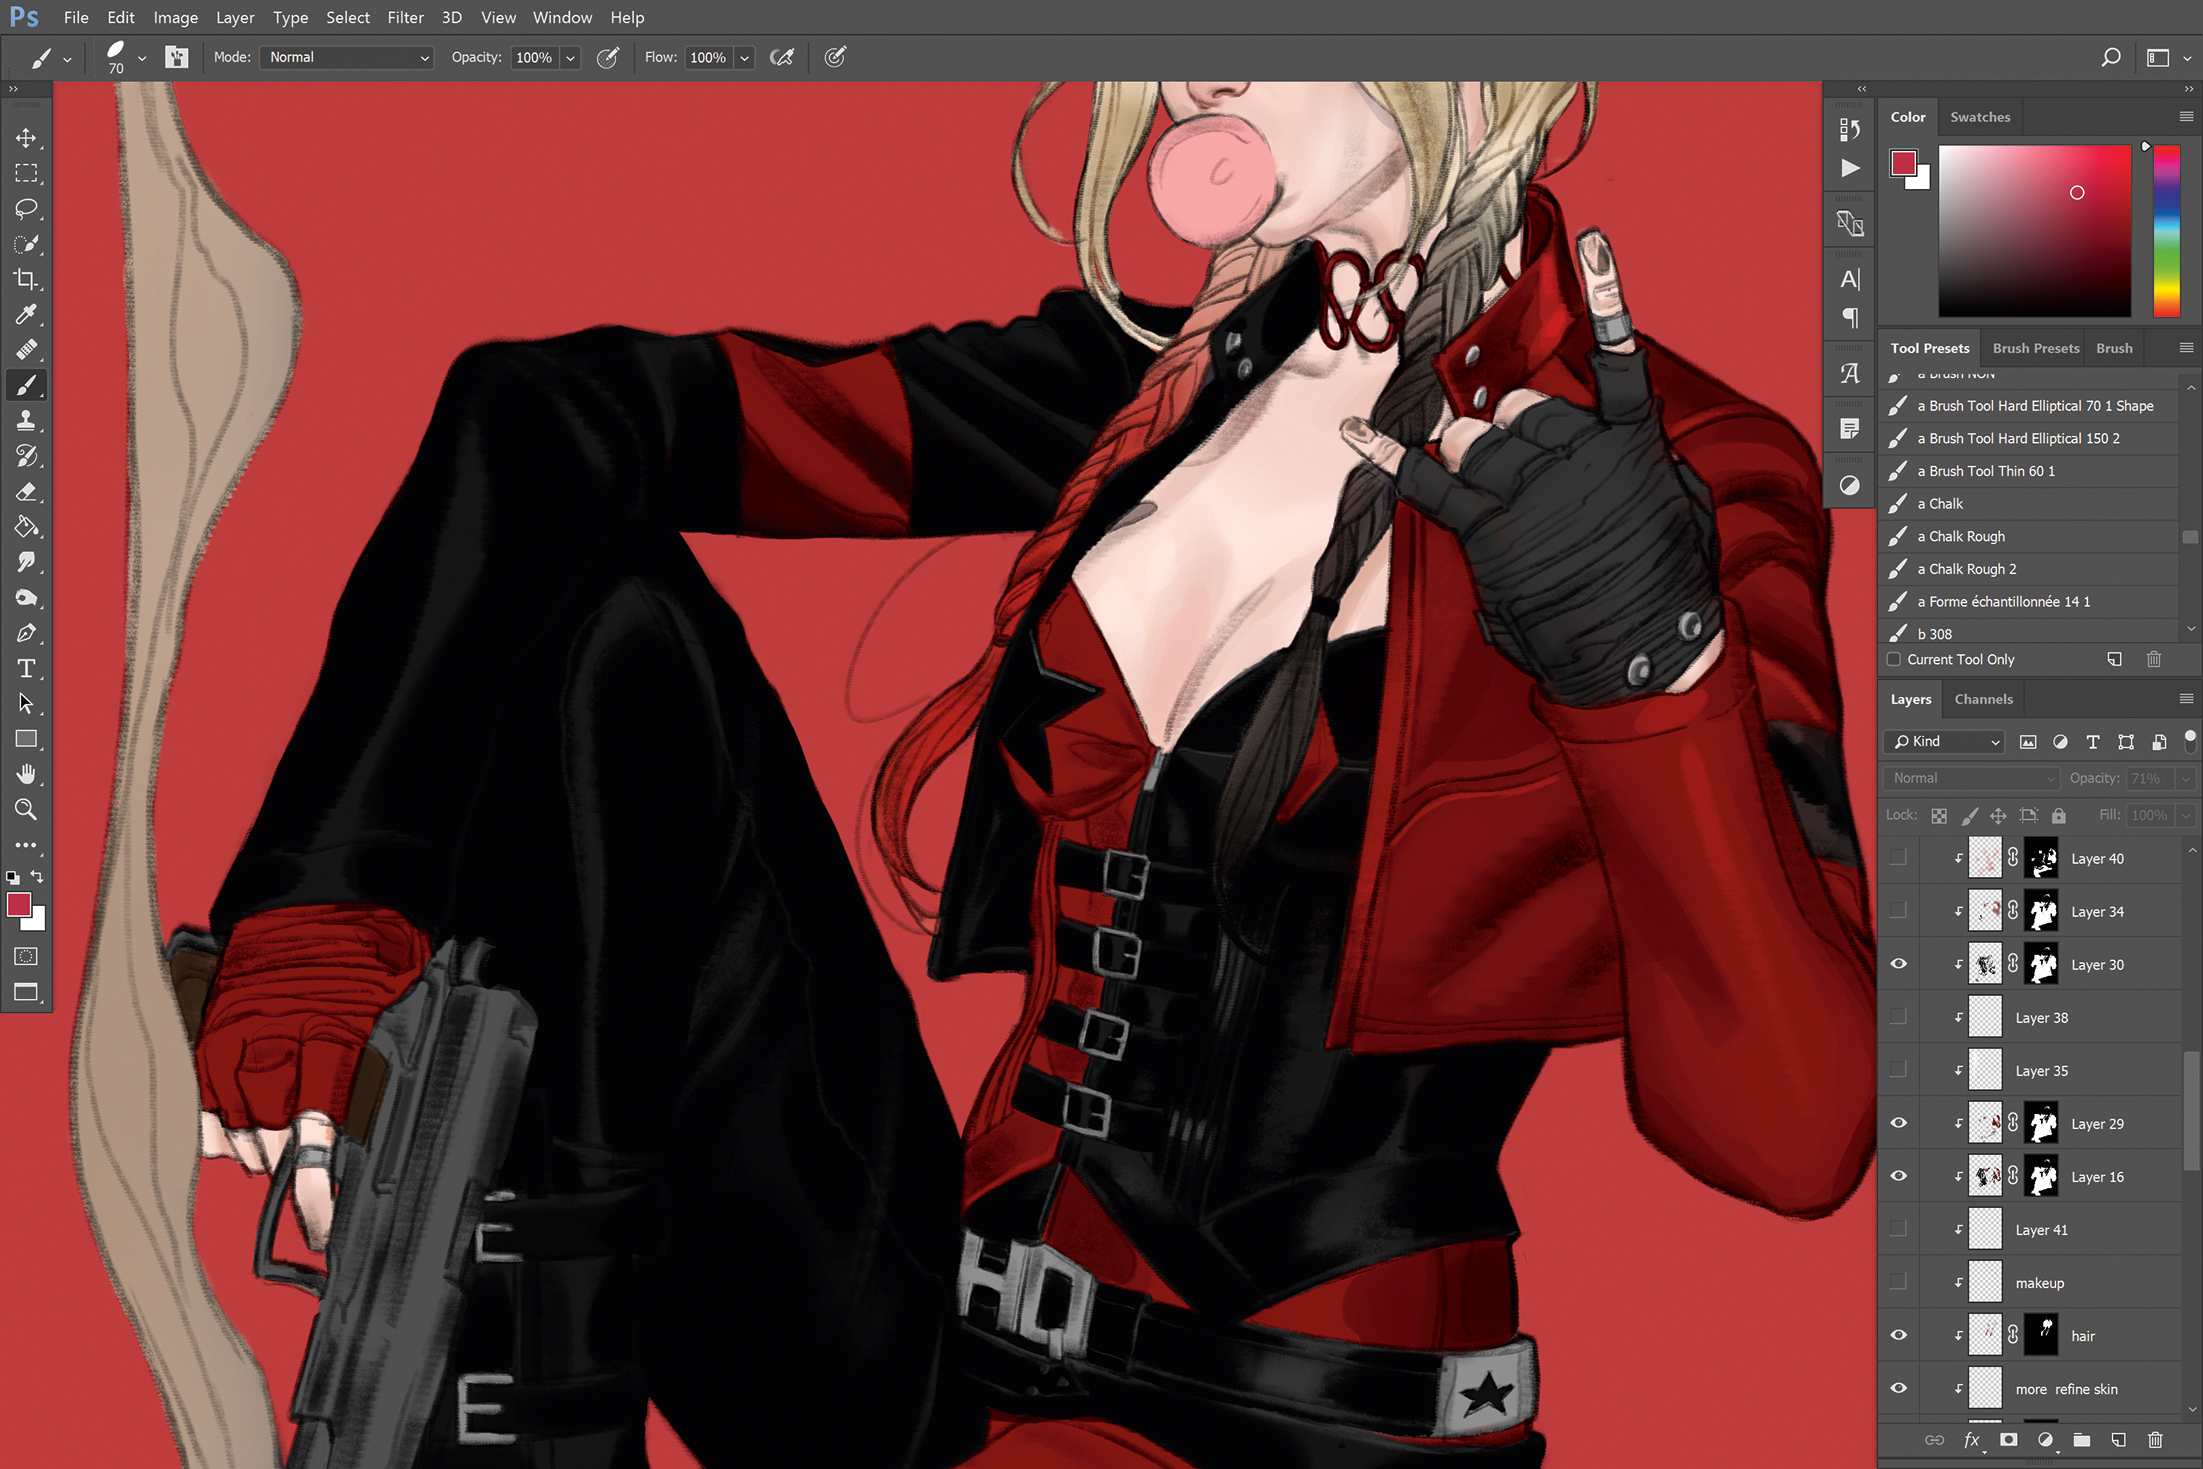
I repeat the earlier step when rendering Harley’s clothes. I select areas of her outfit and mask the layer before painting. I use the same brush that I used for my line-art, because I want the piece to have a traditional feel. The brush is also ideal for depicting leather and latex.
09. Apply highlights using Color Dodge
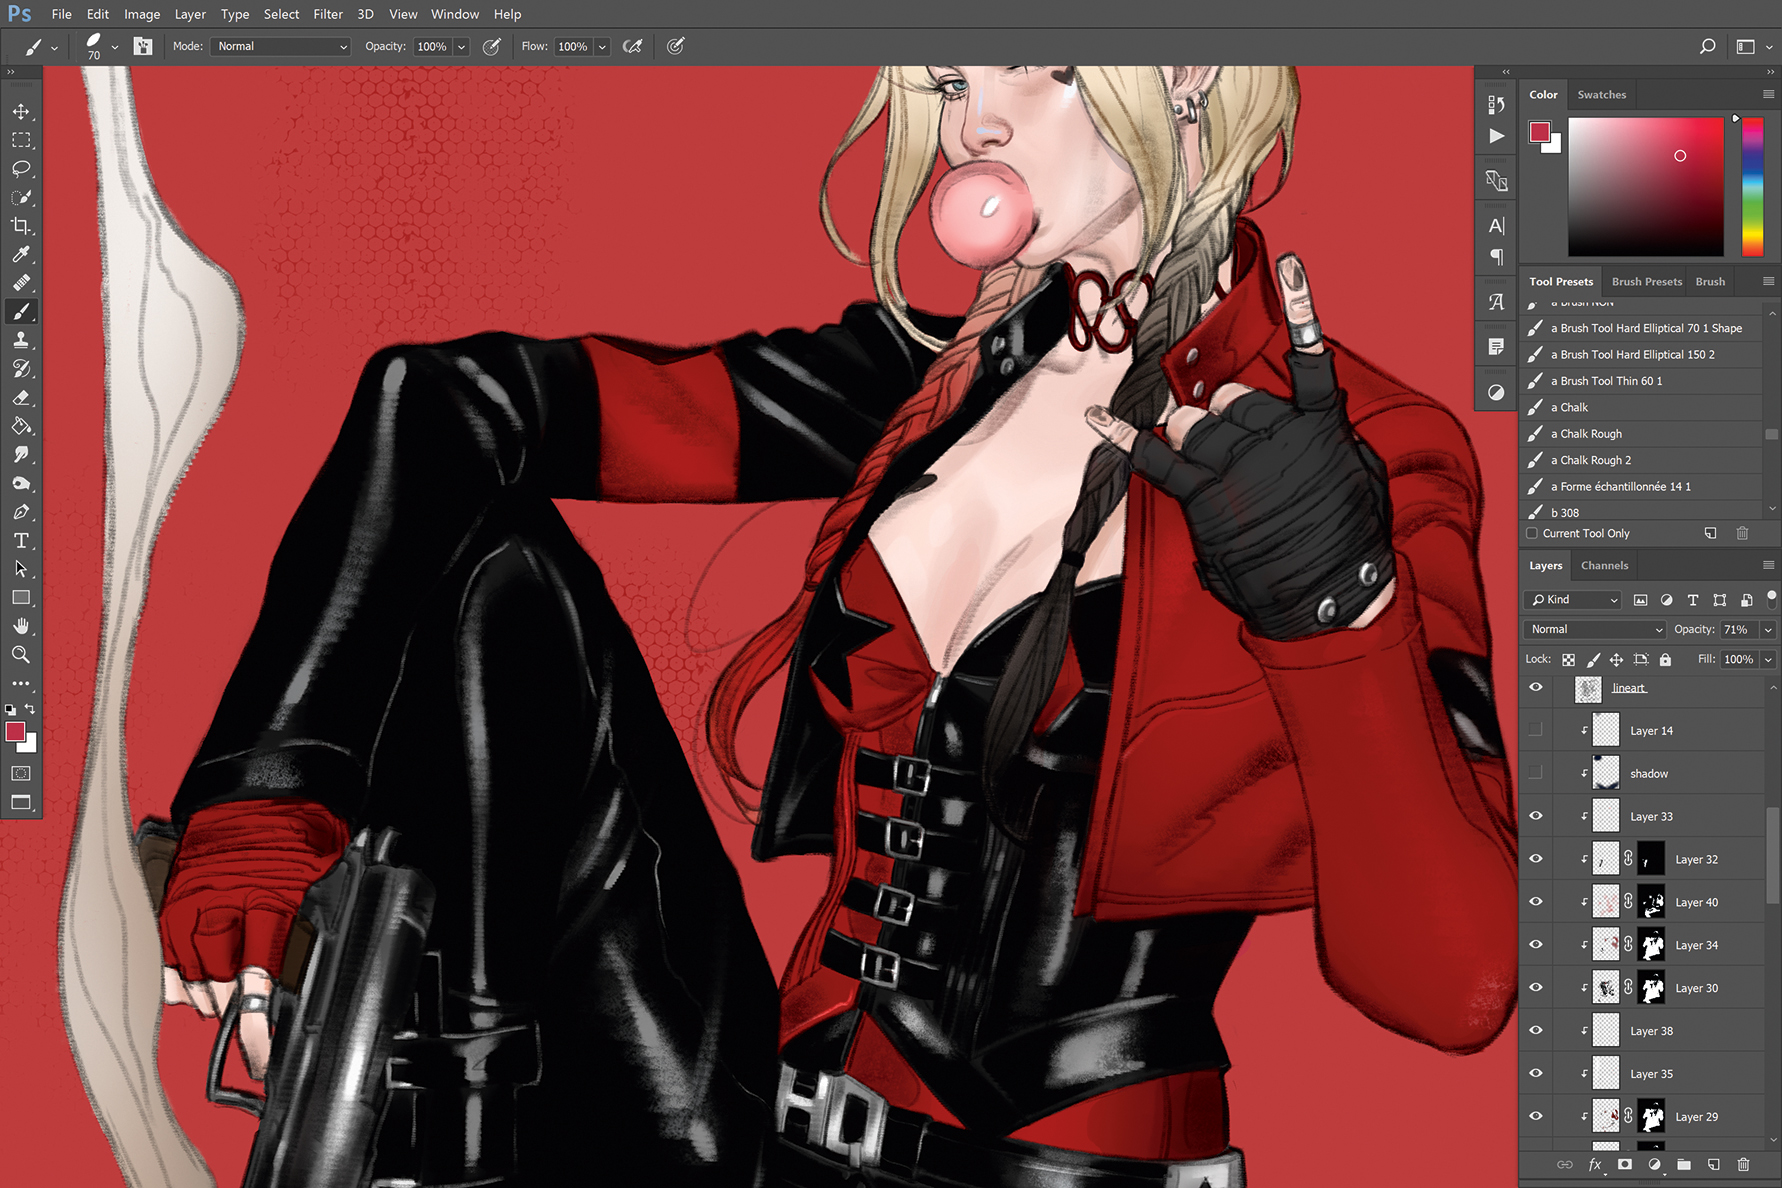
I go back and use the same Forme brush to bring out the highlights. I use lighter greys and whites, add Pen Pressure to the brush and reduce the Opacity to 60-80 per cent. I change the brush mode to Color Dodge to help intensify the highlights. I recommend playing around with the brush’s mode during this stage.
10. Add make up to the character
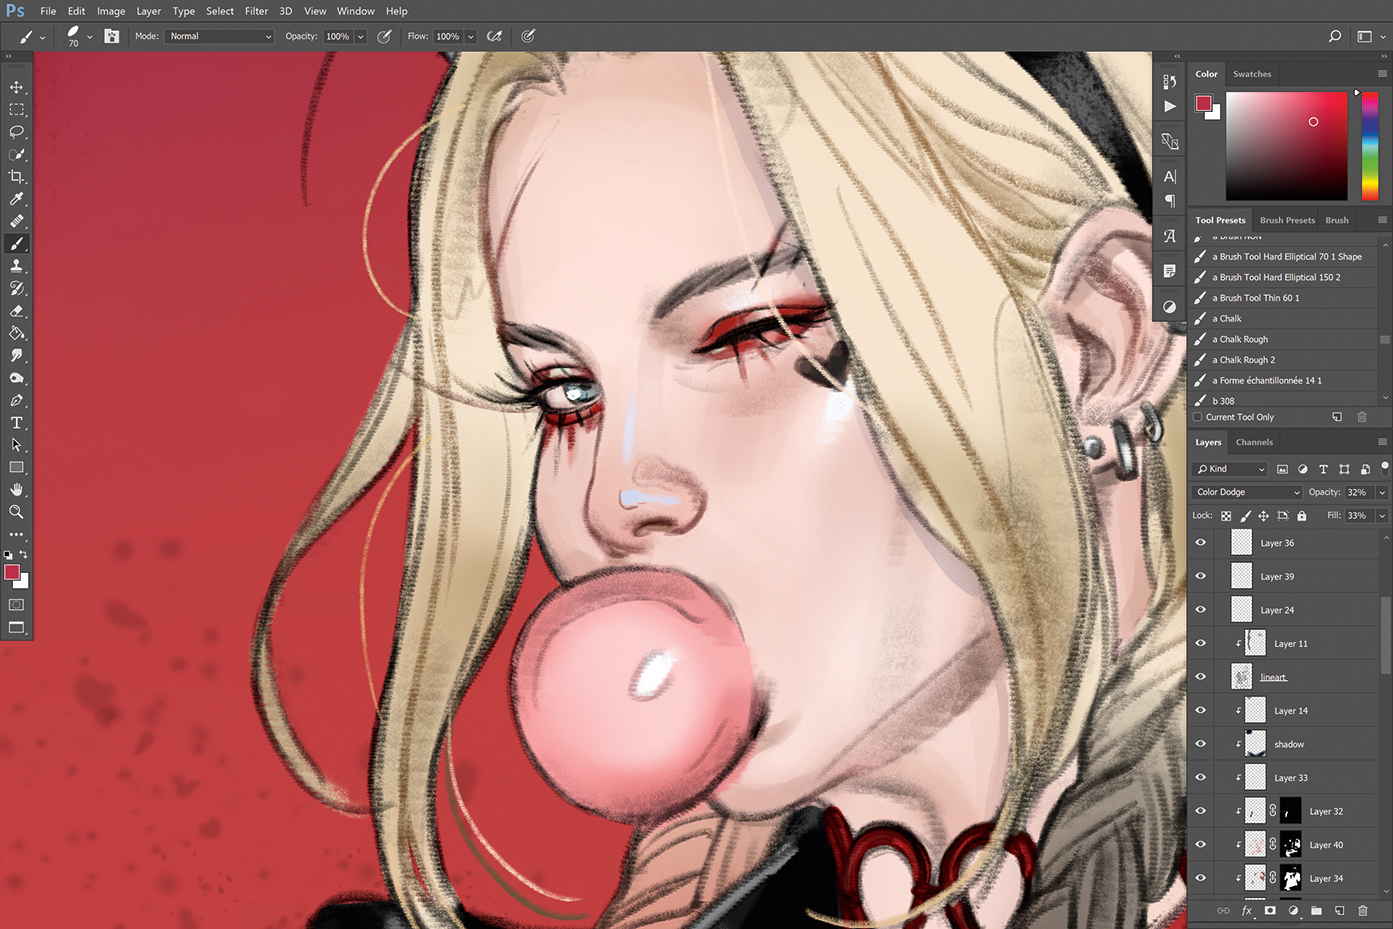
Painting makeup is my favourite part, because I love looking at avant-garde, high fashion makeup styles. I always try to bring that into my own work. For this stage I create a new layer and use a soft Airbrush tool (the NISS Airbush by IIya Kuvshinov) that produces a red, grungy look that Harley has in the films. Then I lower the Opacity to 53 per cent, which reduces the intensity of the colour so that it doesn’t look like she’s bleeding. Then I add another layer on top and paint in light green highlights to complement the strong reds.
11. Paint background detail
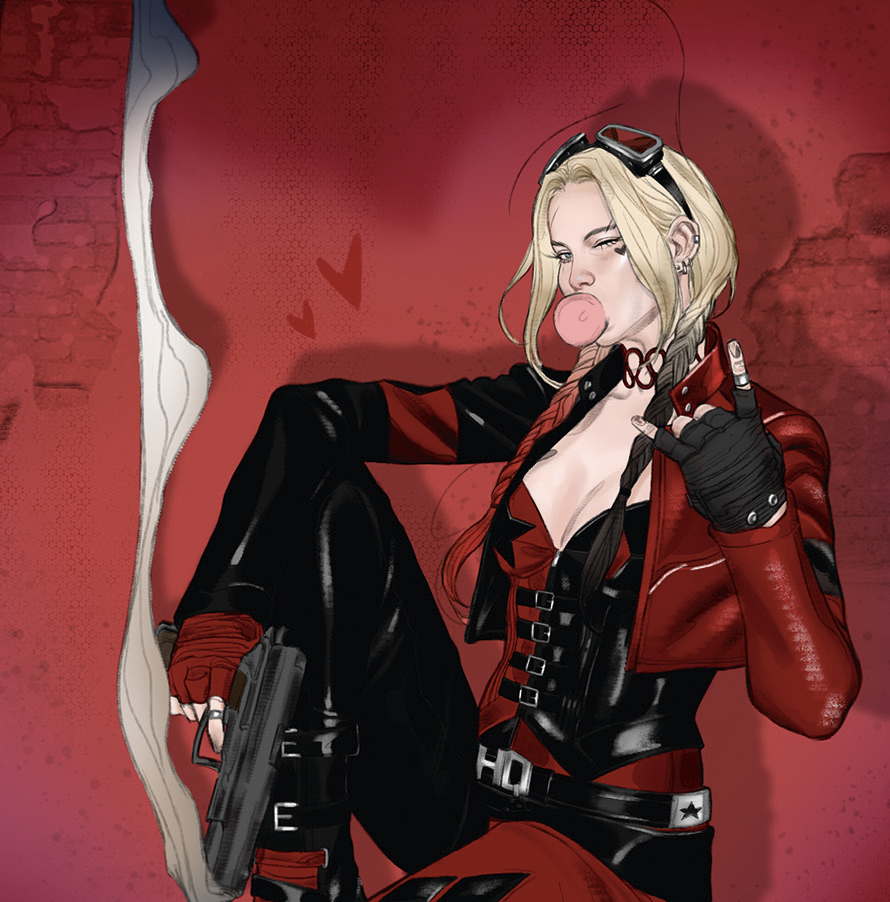
The image needs something extra, so I add a brick wall in the background, which helps to emphasise Harley’s gritty and rough surroundings. I set the layer of bricks to Multiply, to make it feel translucent with the strong red of the background. I then add more texture to the background using a splatter tool from IIya. I also want to light Harley with a heart-shaped spotlight. I use the Airbrush tool set to dark blue on an Overlay layer to bring in some purple mid-tones. For Harley’s cast shadow I simply duplicate the grey layer from earlier.
12. Detail the scene
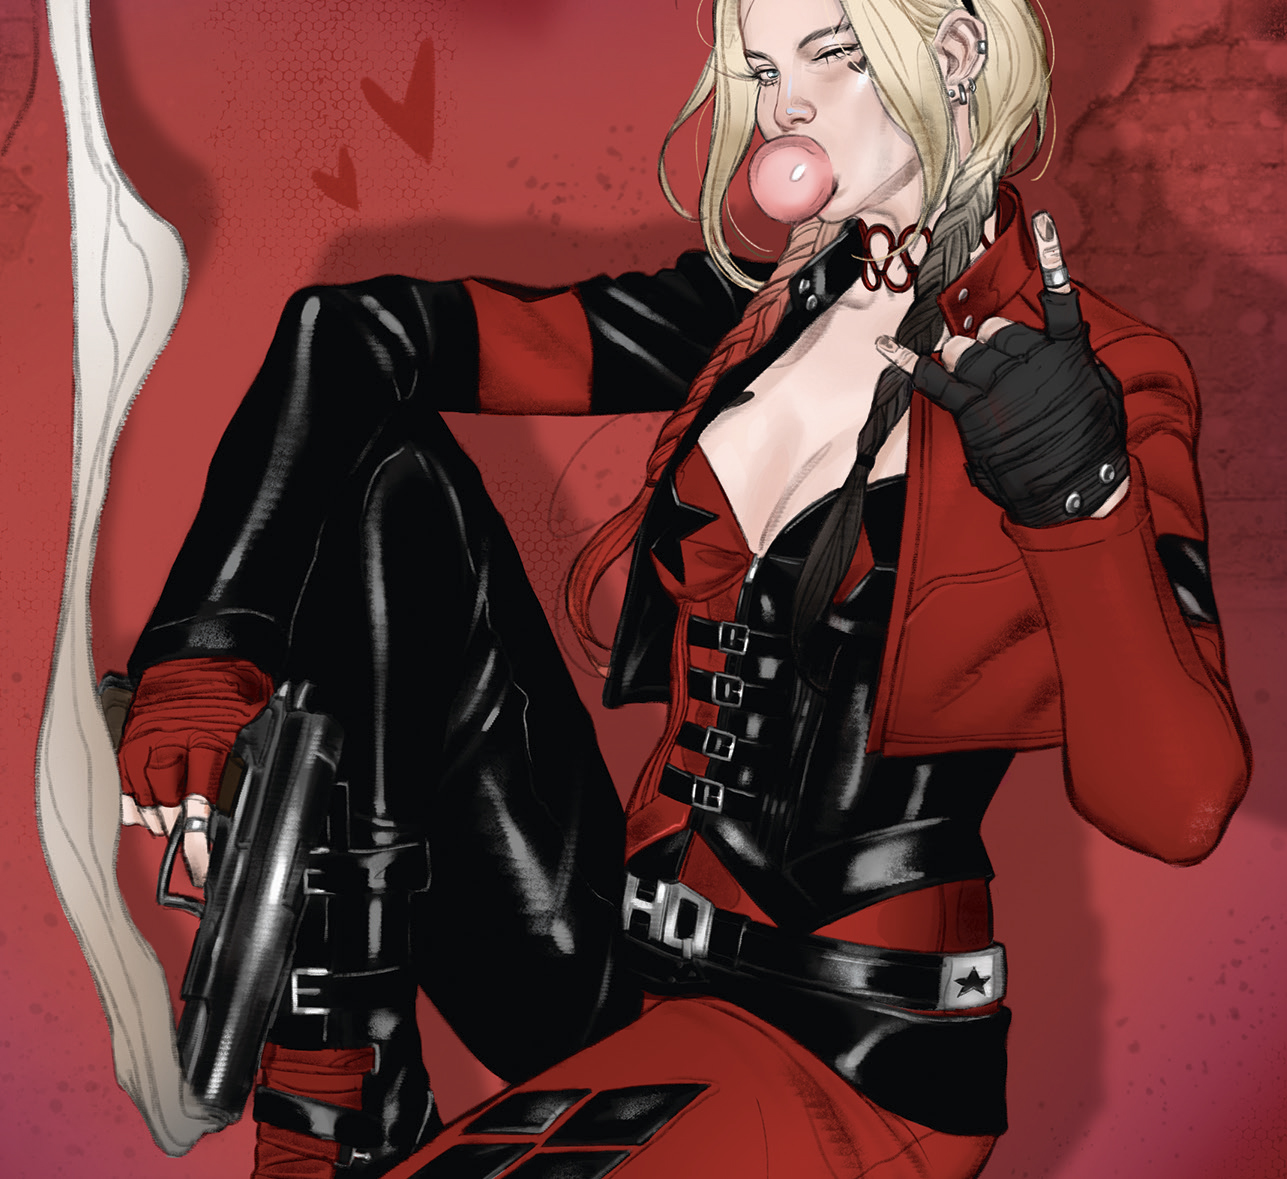
I continue to render more of Harley’s features, by adding more hair, more blush into her cheeks and also rendering the gun that’s resting against her leg. This stage is primarily about building up the piece and making it feel more solid. During this stage I also brighten some of the reds in Harley’s jacket.
13. Adjust the colours
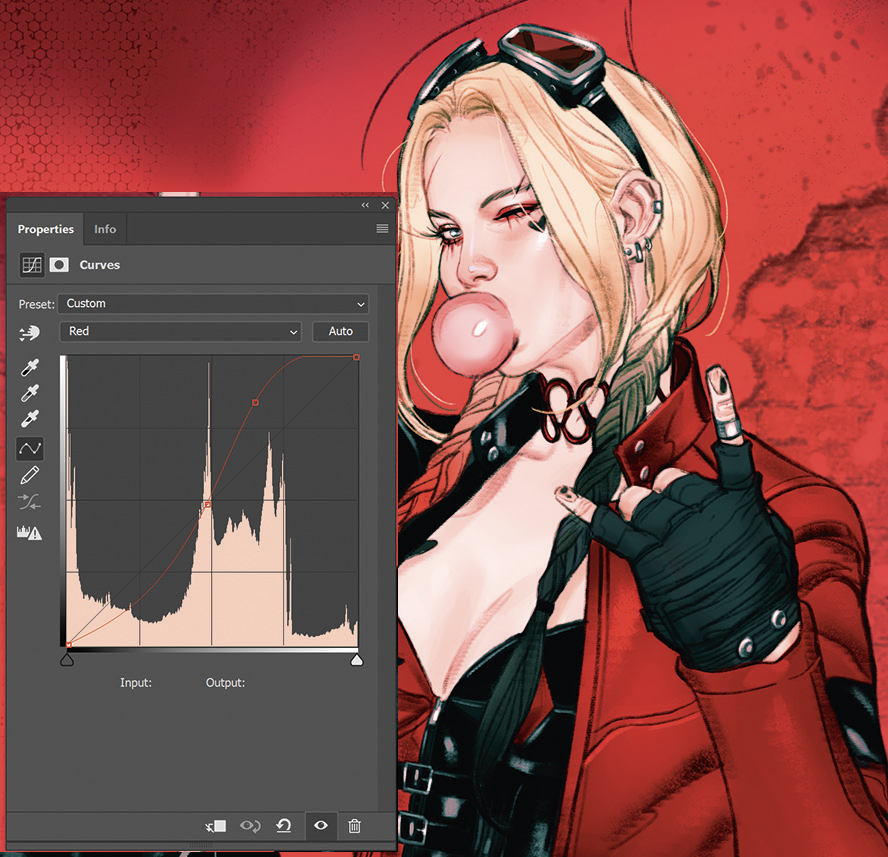
Once I’m done with my rendering and have refined certain details, the fun begins. The Curve tool is ideal for helping to make certain colours look right or for capturing the mood you’re going for in your work. I want to accentuate the reds in the piece, so I move the wavelengths, and then add another Curve tool to further play with the wavelengths using blues and more reds. Then I lower the Opacity and Fill to 34 per cent. This stage is about personal preference and finding out what’s good enough – and what’s a little too much.
14. Make the final edits
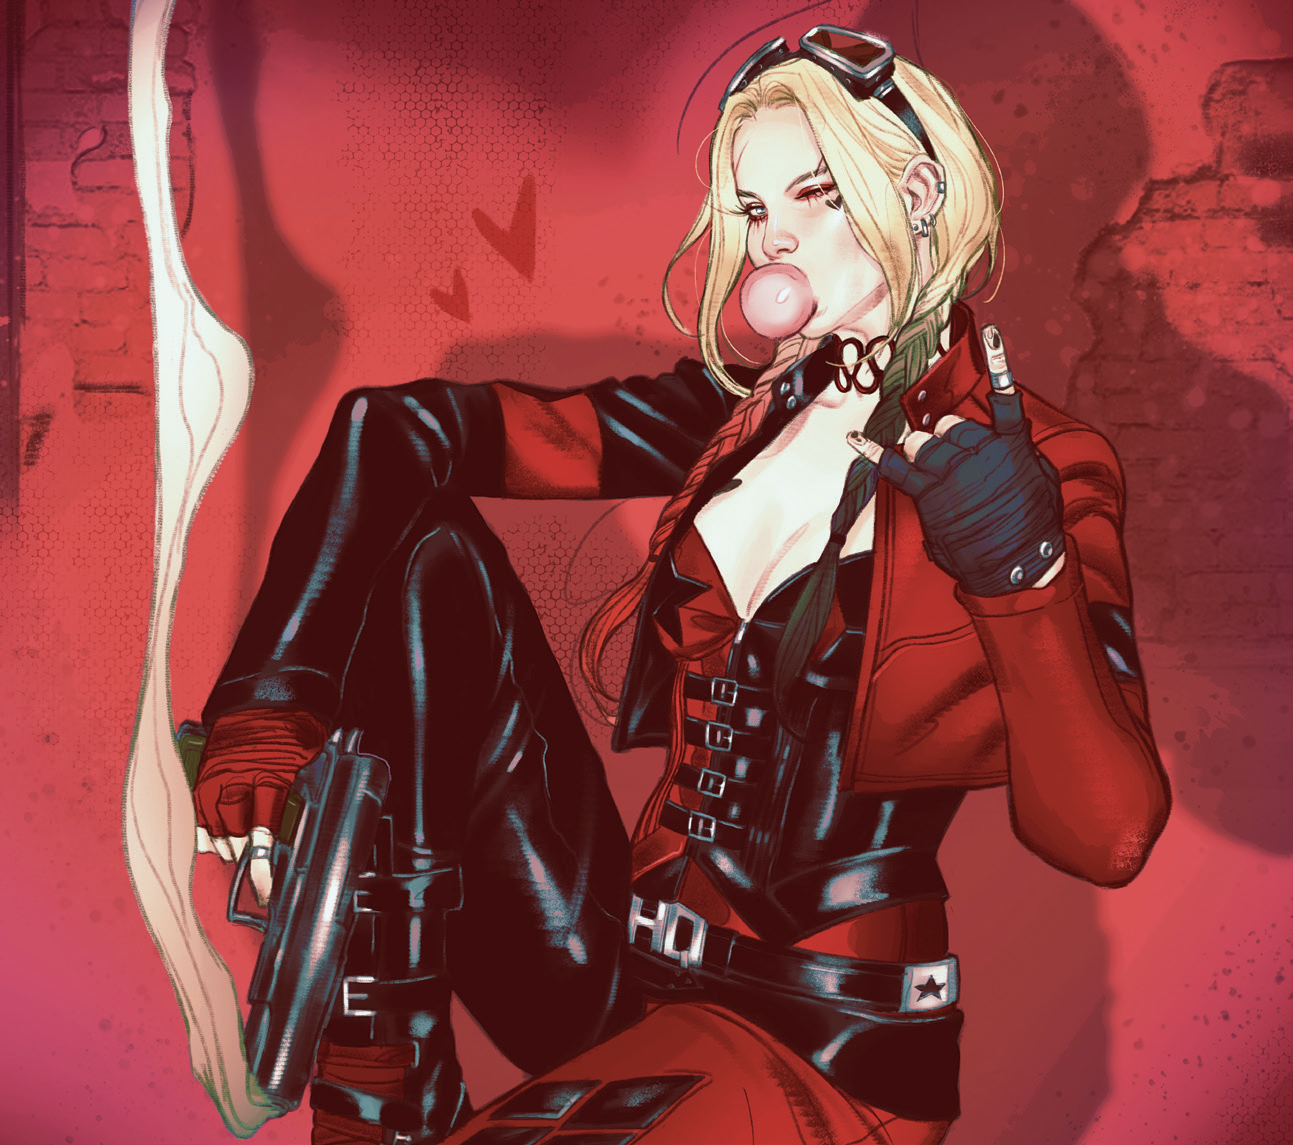
To finish, I like to add a shade of another colour to bring my colours together. I use a strong cobalt blue and set that layer on Saturation mode. Be careful, because the colour can become a little too vibrant: you just want enough to bring out some elements in the textures. Set the Opacity to 60 per cent and Fill to 45 per cent.
Never miss an issue of ImagineFX
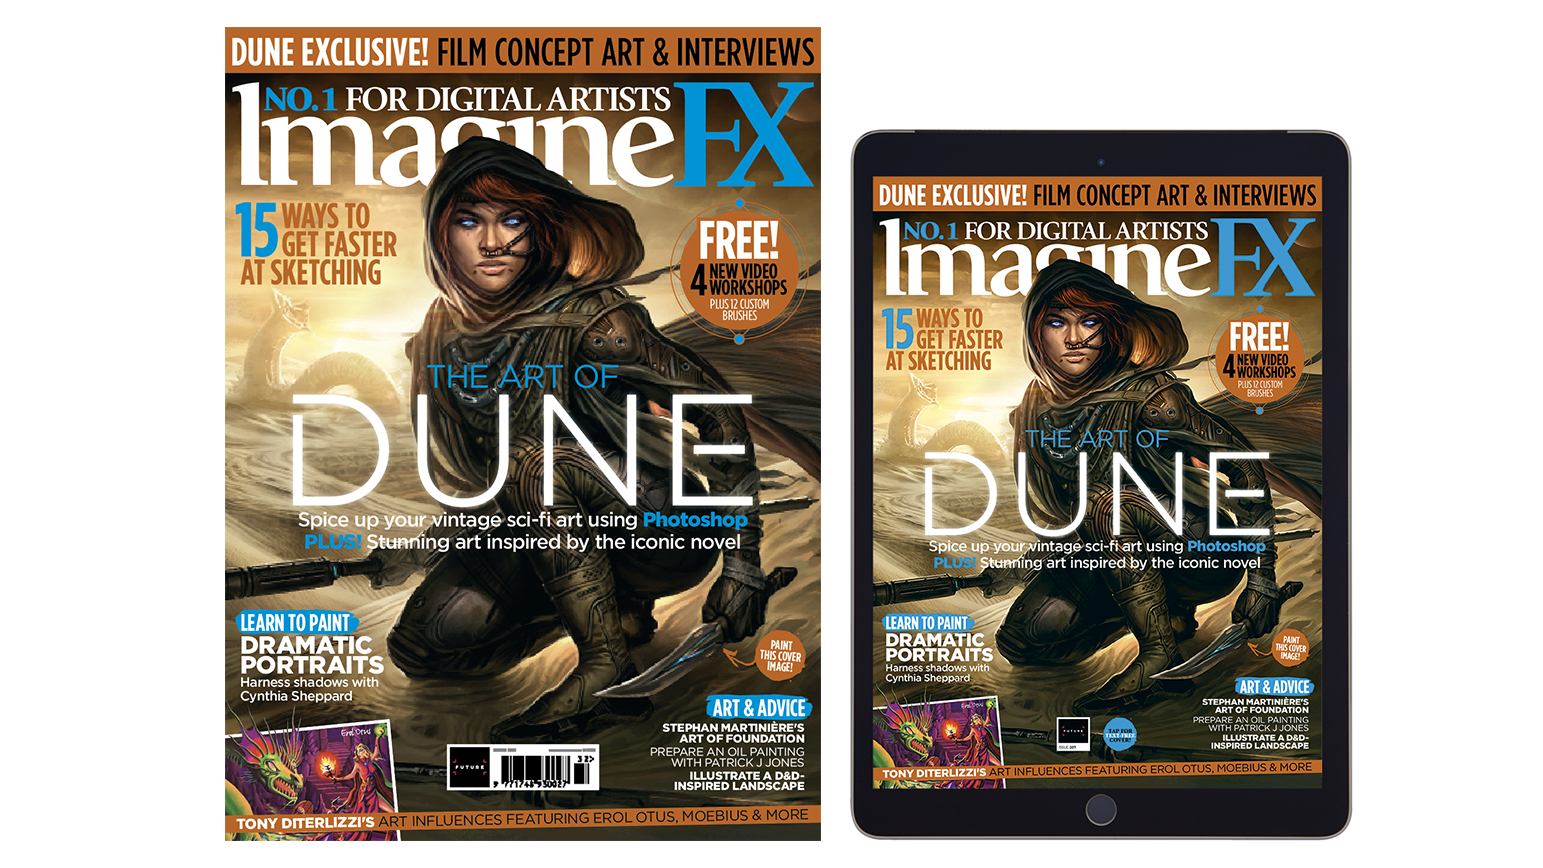
If you liked this piece, you'll love ImagineFX. The world's favourite digital art magazine is on sale in the UK, Europe, United States, Canada, Australia and more. Limited numbers of ImagineFX print editions are available for delivery to over 120 countries from our online store (the shipping costs are included in all prices).
Sign up to Creative Bloq's daily newsletter, which brings you the latest news and inspiration from the worlds of art, design and technology.
Read more:
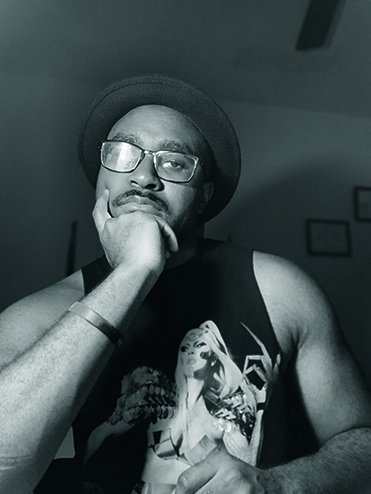
New York-based Joshua is a freelance comic artist and illustrator whose clients include Marvel, DC Comics, Entertainment Weekly and Marvel Studios. He is the artist behind the stunning variant cover for DC's new Wonder Woman, and current queen of Themyscira, Nubia.
