Create a kaleidoscope effect in Photoshop
Amber Grayson reveals how to combine handmade and digital elements to create a kaleidoscope effect in Photoshop.
08. Add another mark
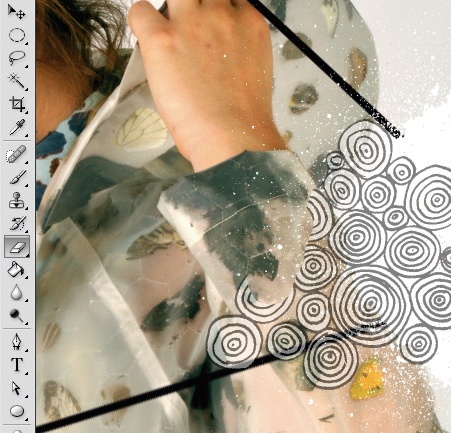
Now drag the circle pattern across to the photo and rasterise this layer. Again, as in step 07, delete the background and then place the circles as if they are growing around the model. Lower the opacity so that you can see the model below. As before, duplicate these a number of times around the composition. Using the Eraser tool, remove the unwanted parts of the circles leaving some overlapping the model. When you're happy, increase the opacity of all the shapes back to 100% again.
09. And more…
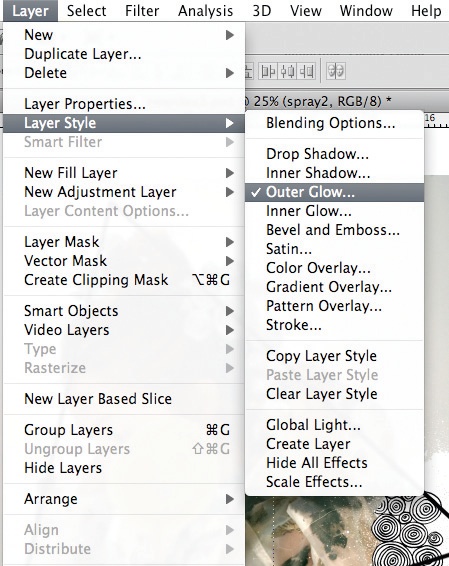
Back to the handmade marks: choose the gold spray paint, drag it over to the photo and erase its background. Use the Free Transform command on this shape (Cmd/Ctrl+T) to alter its size, then position it to mask part of the model's face. To make it appear more realistic, add an outer glow (Layer>Layer Style>Outer Glow), choosing the Screen blending mode with opacity set at 75% and noise at 25%.
10. Create a bubble
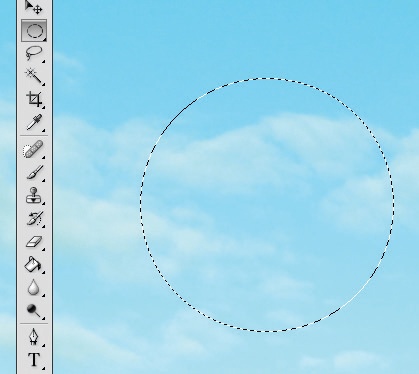
Open the supplied cloudy sky image in a new document, play with the levels and choose the green channel. Reduce the midtones to 1.75 to make the image more vibrant. Then, with the Elliptical Marquee tool and holding down Shift, drag out a circle. Copy this shape and paste it onto the photo. Add a layer style to the shape, choosing Soft Light and setting the opacity to 88%. This creates a bubble-like effect. As before, duplicate the bubble a number of times around the image, altering its size.
11. Add a handmade look
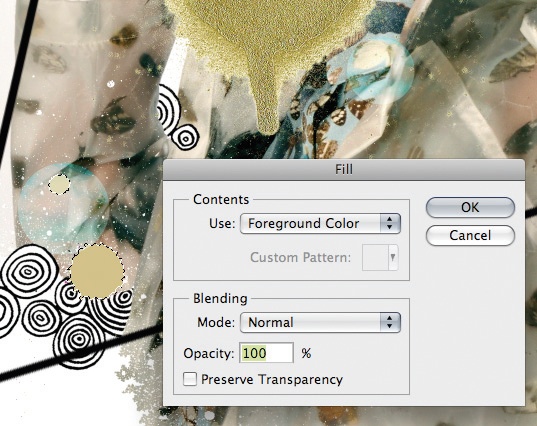
Now drag across the black splatter shape. Select part of the mark using the Magic Wand tool, then go to Select>Similar so that all parts of the splatter are selected. Change their colour by using the Fill panel (Shift+F5). Use the Color Picker to select a golden tone from the spray-painted mark. As with the bubbles, duplicate these marks, arranging them around the composition to create a random, handmade look.
12. Add some more detail
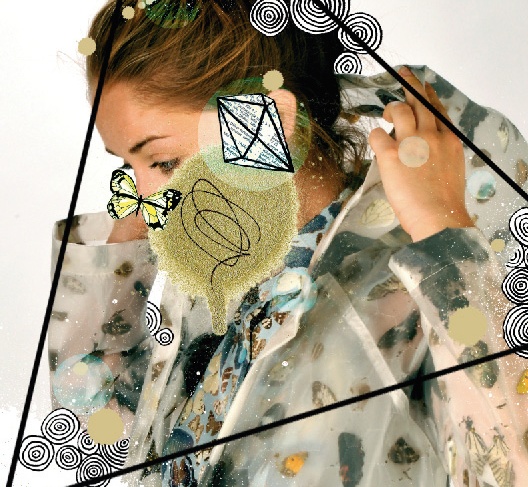
For some finishing touches to the collage, add some more elements of detail. I chose to use a handmade squiggle, which I placed over the spray paint, along with a more detailed diamond shape and a butterfly drawing, which reflects what is on the outfit worn by the model.
13. Create the kaleidoscope
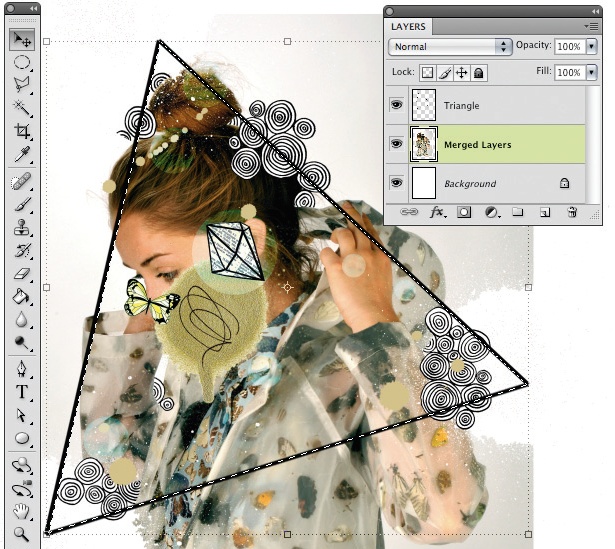
Now let's turn the collage into a kaleidoscope pattern. Make sure the triangle guide layer is at the top, and then merge together all the other layers, bar the triangle layer. Choosing the merged layers, select the Polygonal Lasso tool and carefully trace the triangle shape.
14. Duplicate the triangles
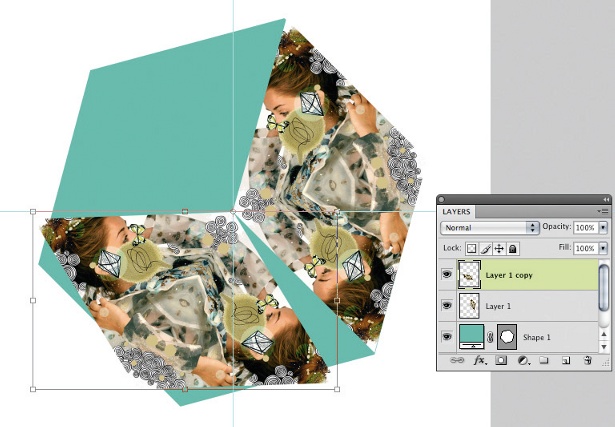
Create a new document at 222x300mm and 300dpi for the final pattern, and drag across the cut-out triangle. Duplicate the shape and flip it vertically (Edit>Transform>Flip Vertical). Next, use the Free Transform command (Cmd/Ctrl+T) to rotate this shape so it's against one edge of the first triangle, reflecting the image. Merge the triangles together to create one segment of your hexagon. Now duplicate this shape two more times to create the other segments and move them into place. Fitting the pieces in place correctly is easier with a hexagon shape guide to help you.
Daily design news, reviews, how-tos and more, as picked by the editors.
15. Duplicate the hexagons
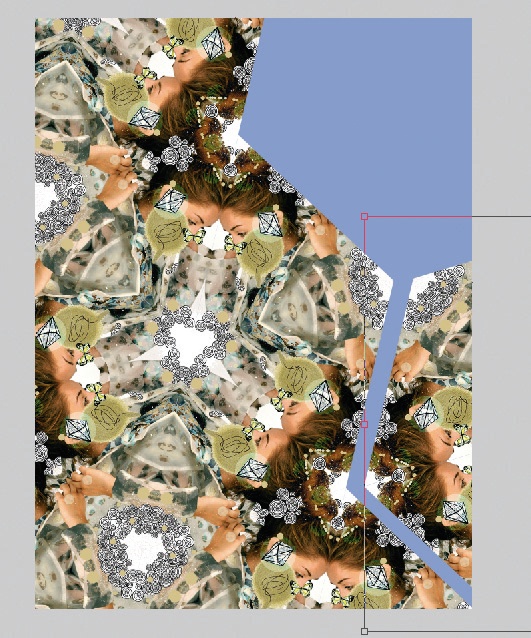
Lastly, group all the segments of the hexagon and duplicate the shape by hitting Opt/Alt and dragging it. Now use Free Transform to rotate the hexagon shapes so they fit against one another like a jigsaw puzzle and create a kaleidoscope pattern.
Words: Amber Grayson
This tutorial first appeared in Computer Arts magazine.
Liked this? Read these!
- Free Photoshop brushes every creative must have
- Free Photoshop actions to create stunning effects
- The best Photoshop plugins

The Creative Bloq team is made up of a group of art and design enthusiasts, and has changed and evolved since Creative Bloq began back in 2012. The current website team consists of eight full-time members of staff: Editor Georgia Coggan, Deputy Editor Rosie Hilder, Ecommerce Editor Beren Neale, Senior News Editor Daniel Piper, Editor, Digital Art and 3D Ian Dean, Tech Reviews Editor Erlingur Einarsson, Ecommerce Writer Beth Nicholls and Staff Writer Natalie Fear, as well as a roster of freelancers from around the world. The ImagineFX magazine team also pitch in, ensuring that content from leading digital art publication ImagineFX is represented on Creative Bloq.
