Boost your WordPress workflow with REST API
Ryan McCue explains how you can use this new API for pulling content and data out of WordPress, as well as writing or updating posts.
Sign up to Creative Bloq's daily newsletter, which brings you the latest news and inspiration from the worlds of art, design and technology.
You are now subscribed
Your newsletter sign-up was successful
Want to add more newsletters?

Five times a week
CreativeBloq
Sign up to Creative Bloq's daily newsletter, which brings you the latest news and inspiration from the worlds of art, design and technology.

Once a week
By Design
Sign up to Creative Bloq's daily newsletter, which brings you the latest news and inspiration from the worlds of art, design and technology.

Once a week
State of the Art
Sign up to Creative Bloq's daily newsletter, which brings you the latest news and inspiration from the worlds of art, design and technology.

Seasonal (around events)
Brand Impact Awards
Sign up to Creative Bloq's daily newsletter, which brings you the latest news and inspiration from the worlds of art, design and technology.
Over the past 12 years, WordPress has grown from being a small side project to a tour de force. This is clear from the hundreds of WordPress themes and WordPress tutorials that are now available. Recent studies estimate almost a quarter of all visible sites on the web are powered by it. However, while WordPress has been growing, websites have evolved.
We've seen the rise of web applications that take simple HTML pages and enhance them with complex JavaScript and API interactions. This has taken sites and software far past mere publishing to something far more interactive, using sites as full platforms. In the meantime, WordPress has been chugging away building traditional sites, but it hasn't had a standard option for those who need this functionality. At least, not until now.
For more APIs to explore, take a look at our guides to the best JavaScript APIs, HTML APIs and Google APIs.
For the past three years, a small team of core contributors has been working on a solution to this: the REST API (wp-api.org). The project started at the end of 2012, then became an official Google Summer of Code project in the middle of 2013. Since then the plugin has been under active development by the feature team, with over 70 contributors.
At present, the core of the API has been integrated into WordPress, so users can build APIs for plugins and themes. It is also possible to use the API for development, simply by installing the feature plugin available from WordPress.org. This is part of a new style of WP development, in which features are developed as installable plugins so you can try them out before release.
Full integration is scheduled for WordPress 4.5, and will make the API available to every site. The REST API has already seen plenty of use by production websites, including Wired.com's and the New York Times' live-blogging platform.
Getting set up
Although at time of writing the API is yet to be finalised, we can start building with it today. As it is just a regular plugin for WordPress, you can follow the same installation process that you would with normal plugins.
Sign up to Creative Bloq's daily newsletter, which brings you the latest news and inspiration from the worlds of art, design and technology.
To work with version 2 of the API, you'll need to download the plugin.
For the more advanced creation and update steps, you'll need the Basic Auth plugin. You'll also want to make sure you have pretty permalinks on – although it's possible to use the API without them, it makes things a bit more complicated.
Once you've activated the plugin, the API will be available at /wp-json/ on your site. For example, if your site is at http://example.com/, the API would be available from http://example.com/wp-json/. If your site is at http://example.org/foo/, the API would be available from http://example.org/foo/wp-json/. This is called the API root, and we'll be using it a lot, so remember it.
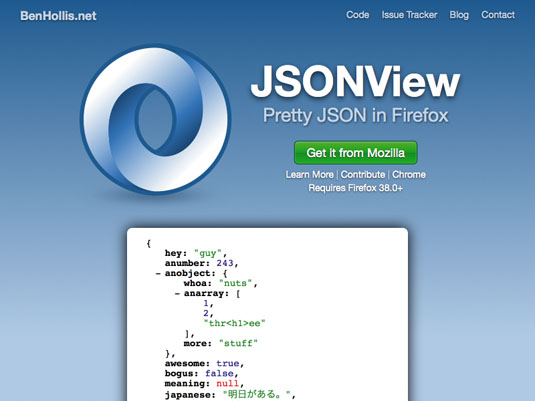
For viewing in your browser, you can install JSONView, available for both Firefox and Chrome. This will let you view the available data and click around through the links in the API to find everything that's available.
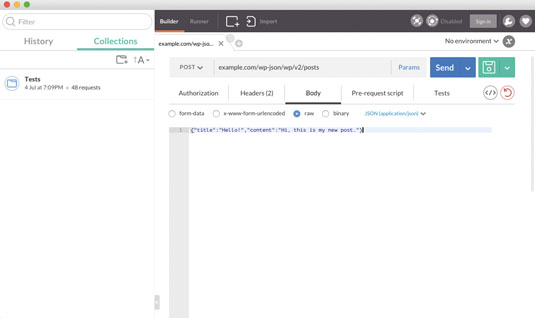
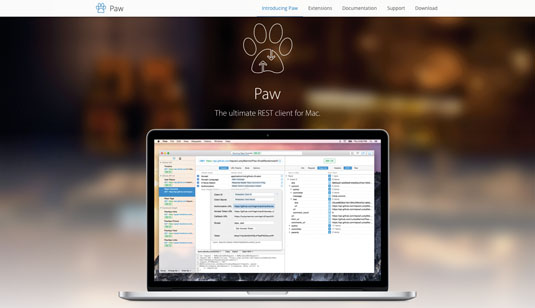
For more advanced usage, Postman for Chrome or Paw for Mac are fully featured API clients that will enable you to work with the API in a more complex way. For now, I'm going to be using JSONView for simply viewing data.
Now we have the API installed, we're ready to start looking at the data. At the API root you'll find the index. This gives you a bit of information about the site and the API itself, including available authentication methods and plugin APIs.
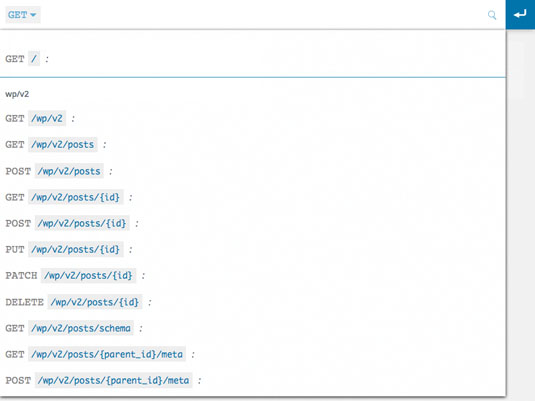
You'll also notice a list of available 'routes'. Routes are the URLs you use to access the various objects and collections (lists of objects) via the API. This includes all the core objects in WordPress: posts, comments, terms and users.
Let's take a look at the posts route. In the index, you'll see a route called /wp/v2/posts. This route is a collection, which lists a bunch of objects and contains links to the individual items. The /wp/v2/posts route gives you access to all the posts available on the site. It also exposes the ability to filter this down to search and browse through all the post data on the site.
This gives you the flexibility of WP_Query through the API, including text search, filtering by author, and querying by tags and categories. Click through to the posts route or head to /wp/v2/posts after your API root (for example, something like 'example.com/wp-json/wp/v2/posts').
You should find yourself looking at something like this:
[
{
"id": 89,
"date": "2015-06-26T02:44:23",
"title": {
"rendered": "Hello world!",
},
"content": {
"rendered": "<p>Welcome to WordPress. ...</p>"
},
...
}
{
"id": 1,
"date": "2015-06-03T22:12:40",
...
}
]
This is a JSON list (denoted by square brackets, and with items separated by commas) of the various posts you have on your site. By default, the number of items is limited to 10. Each post is a JSON object (denoted by curly brackets) giving data about the post and fields available on it.
The data here is basically everything that WordPress knows in relation to the object. For posts, this includes normal fields like the post title and content, publish date and status, through to custom meta and tags attached to the post. You'll also see links to the single post, which look like /wp/v2/posts/42, where 42 is the post ID.
All the data returned by the API follows the same pattern. WordPress objects are represented by JSON objects. You can access these directly via the single link (which looks like /wp/v2/<noun>/<id>), or you can access the collection they're part of (this looks like /wp/v2/<noun>). The single link is always an object, and the collection is always a list of objects.
Write the web
The REST API isn't just for pulling content and data out of WordPress. It can also be used for writing new posts, or updating existing ones. But don't be afraid, it's actually super easy!
The input format for data matches the output format, so to update a post you can simply send back the exact data you just received, but with any fields you want changed filled with new data. Or, if you want to keep it simple, you can send back just the changed fields. This data is sent as a JSON object, just like you received it.
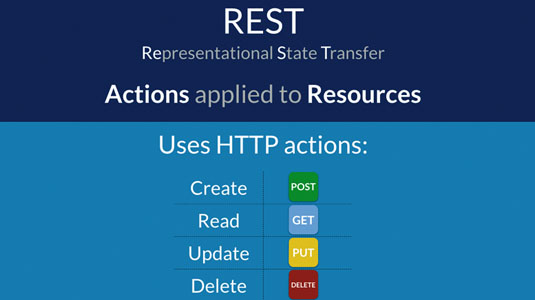
Before, when we wanted to get data for an object, we accessed it in our browser. Behind the scenes, this involved sending off a GET request via HTTP that asked the server to get the data for the given URL (resource). With REST, we use POST for creating, which will be familiar to you if you've ever written a HTML form. For updating, we use PUT, which works in a similar way to POST.
To start off, we'll create a new post. To do this, we want to send a POST request off to /wp/v2/posts on our site with the following data:
{
"title": "Hello!",
"content": "Hi, this is my new post."
}
To actually create this, we'll need to send off authentication too. The easiest way to do this is to use HTTP Basic authentication, which passes your username and password in plain text. This isn't the most secure or safest way to authenticate, but it's fine for development (for more on this, see boxout on page 120). This isn't built into the API, so you'll need to make sure you have the Basic Auth plugin activated. Basic authentication uses username:password as a string, which is then Base64 encoded before passing in the header.
Here's what our request should look like with headers and our body:
POST /wp-json/wp/v2/posts
Host: example.com
Authorization: Basic dXNlcm5hbWU6cGFzc3dvcmQ=

{"title":"Hello!","content":"Hi, this is my new post."}
When we send this to the server, we should then get back a post that looks just like the ones we received before, including a post date, automatically generated excerpt and author data. This should give you a 201 Created status code back too, plus a Location header indicating where you can access the post (this is a URL which looks like http://example.com/wp-json/wp/v2/posts/42).
{
"id": 42,
"title": {
"rendered": "<p>Hi, this is my new post.</p>",
}
"status": "draft",
"date": "2015-05-01T04:50:00",
...
}
If you check your site admin, you should now see the post has appeared in your dashboard. Congratulations! The post has a bunch of default data attached to it, like comment status, auto generated slug and sticky status. You'll notice the post also has the draft status by default, so it won't show on your live site just yet.
Let's fix this by taking the post we received before and publishing it. To do this, we need to update the post we just got. To update items, we will send a PUT request to the URL we got back in the Location header. We only need to send the data we want to change, so we'll set the status property to "publish". We'll also need to send authentication along with the request.
PUT /wp-json/wp/v2/posts/42
Host: example.com
Authorization: Basic dXNlcm5hbWU6cGFzc3dvcmQ=

{"status":"publish"}
We should get back a 200 OK response from the server, indicating that the post has successfully been updated. We'll also get back the updated post in the body, and we should see "status": "publish" there. Check your site, and you should see that the post is now live. Huzzah!
To finish off, let's delete the post to clean up our testing. We need to send a DELETE request to the same URL. We'll following almost the same process as before – we still need to send authentication, but this time we don't need to send any extra data along.
We should have a request that looks like this:
DELETE /wp-json/wp/v2/posts/42
Host: example.com
Authorization: Basic dXNlcm5hbWU6cGFzc3dvcmQ=
We should see the post disappear off our site now. Awesome work – we just went through the full publishing process with WordPress, and all via the REST API.
Building plugins
The API is designed to be easily usable with WordPress-based code too. If you have plugins or themes running on a site, you can use the REST API with minimal effort. In fact, authentication is handled for you automatically via WordPress' built-in cookie authentication system - you need only to pass an extra Cross-Site Request Forgery token along with your requests.
The REST API plugin also includes a JavaScript-based API that you can use. This includes methods for accessing data from the site, as well as creating, updating and deleting this data. All of this is achieved through Backbone-powered data models and collections.
To use the API, you need to enqueue the script in your theme or plugin. Simply call wp_enqueue_script('wp-api' ). Let's run through our example from before, first accessing the post:
var posts = new wp.collections.Posts();
var post = posts.get( 42 );
To create a new post, we use similar code to before, but in JavaScript:
var post = new wp.models.Post();
post.set( 'title', 'Hello!' );
post.set( 'content', 'Hi, this is my new post!' );
post.save();
We've just replicated the creation process from before, without having to worry about the intricacies of authentication or HTTP requests. We can then go and publish this as well:
post.set( 'status', 'publish' );
post.save();
Next steps
You've just learned how to interact with the API both via normal HTTP API requests and through the JavaScript API. We've barely scratched the surface of what's available through the API though. Luckily, it includes built-in documentation on possible routes and methods, as well as the data that is available. Take time to browse through the API from the index at the API root, and discover what's there.
The REST API is already being integrated into WordPress in version 4.4, with the final stages of merging to take place in early 2016. Comments on the project vision, bug reports and feature requests are welcome as we gather feedback before integration. Simply head over to GitHub and leave feedback on a new GitHub issue.
The API has the ability to change and improve how we work with WordPress. We're looking forward to seeing what you build with it now and in the future. Happy hacking!
Words: Ryan McCue
Ryan McCue is a senior engineer at Human Made. This article was originally published in issue 275 of net magazine.
Liked this? Read these!
- Free WordPress themes for creating blogs, portfolios and more!
- Top Chrome extensions for designers and devs
- Choose a website builder with these top tools
- Behold the very best in website templates
- How to draw a bear

The Creative Bloq team is made up of a group of art and design enthusiasts, and has changed and evolved since Creative Bloq began back in 2012. The current website team consists of eight full-time members of staff: Editor Georgia Coggan, Deputy Editor Rosie Hilder, Ecommerce Editor Beren Neale, Senior News Editor Daniel Piper, Editor, Digital Art and 3D Ian Dean, Tech Reviews Editor Erlingur Einarsson, Ecommerce Writer Beth Nicholls and Staff Writer Natalie Fear, as well as a roster of freelancers from around the world. The ImagineFX magazine team also pitch in, ensuring that content from leading digital art publication ImagineFX is represented on Creative Bloq.
