How to create an online game character with personality
Character modeller Inho Kim shares his workflow for this unique take on a character from video game Alliance of Valiant Arms.
Daily design news, reviews, how-tos and more, as picked by the editors.
You are now subscribed
Your newsletter sign-up was successful
Want to add more newsletters?

Five times a week
CreativeBloq
Your daily dose of creative inspiration: unmissable art, design and tech news, reviews, expert commentary and buying advice.

Once a week
By Design
The design newsletter from Creative Bloq, bringing you the latest news and inspiration from the worlds of graphic design, branding, typography and more.

Once a week
State of the Art
Our digital art newsletter is your go-to source for the latest news, trends, and inspiration from the worlds of art, illustration, 3D modelling, game design, animation, and beyond.

Seasonal (around events)
Brand Impact Awards
Make an impression. Sign up to learn more about this prestigious award scheme, which celebrates the best of branding.
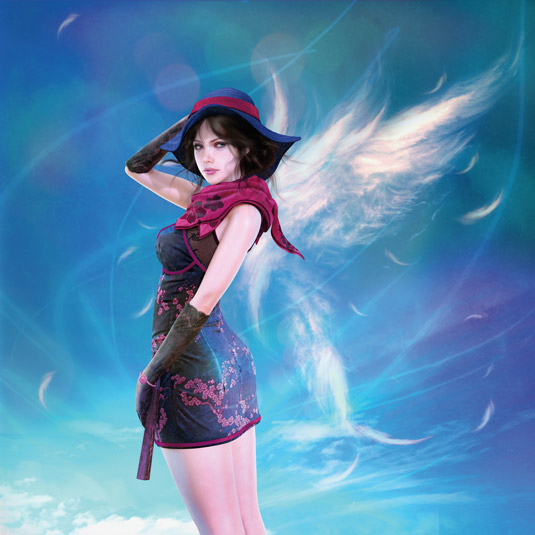
Alliance of Valiant Arms – or AVA to its fans – is an award-winning Korean video game, and the world's first online game to use Epic's game engine Unreal Engine 3.
It's also the game that character artist Inho Kim has been working on for the past seven years. Using 3ds Max with V-Ray to create the base, and then using ZBrush to add all the smaller details, Inho spent six weeks creating this image, which he calls simply 'Qipao Sniper Character'.
"I really enjoyed creating the character's eyes," Kim says when describing his work process. "When it comes to creating a character, I think the eyes should be given more weight as they are the windows to the soul, and they describe the personality and appearance of the character. I did a lot of testing on how to create depth in the eyes."
Inho currently works as a video game character artist, but this wasn't always the case: "I started working as a video editor then changed my career path by becoming a 3D artist," he says. "At that time, I was involved with the Korean TV animation series for children Ducky the Perky and Bumper King of Zapper."
But now, video games are Kim's passion, and beautiful female game characters in particular. So how and where does he find his inspiration? "I really love finding nice images through the Internet, especially of beautiful women," he says, unsurprisingly. "When I get some photos of models or gorgeous images from other artists, I am inspired by them to create new 3D stuff."
Kim will now take you through nine stages of his character creation process.
01. Pretty poly
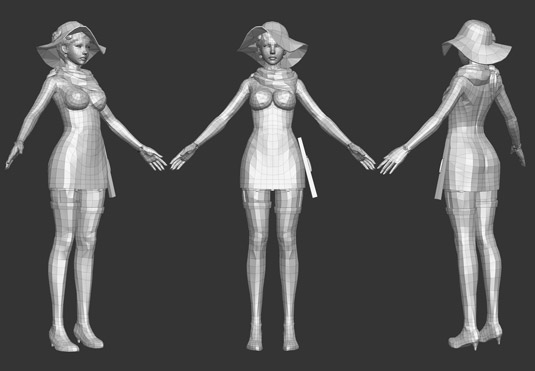
Initially my Qipao character was made with a low polygon count so it could be exported to Unreal Engine 3 for use in AVA. Then I needed to create a high-poly model for a 3D illustration image. When it came to creating the woman's body, I focused on describing her sophistication as I did not want it to be overtly sexual.
Daily design news, reviews, how-tos and more, as picked by the editors.
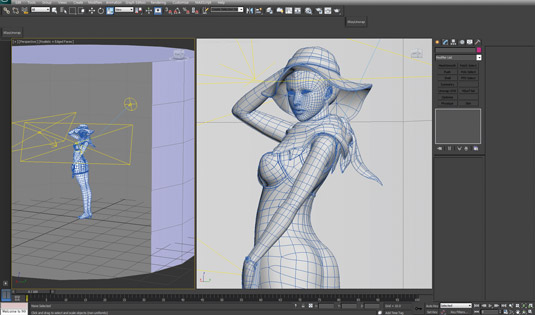
02. Rigging and posing
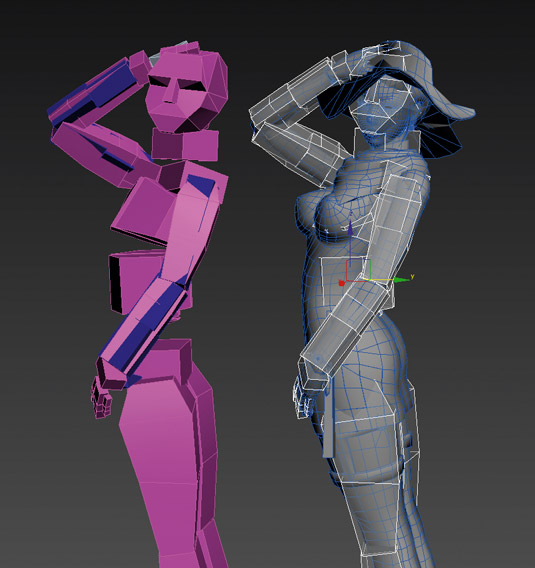
I rigged and posed my character with Biped and Skin in 3ds Max. I set up the camera to create a strong scene that highlighted the character's silhouette.
03. Move into ZBrush
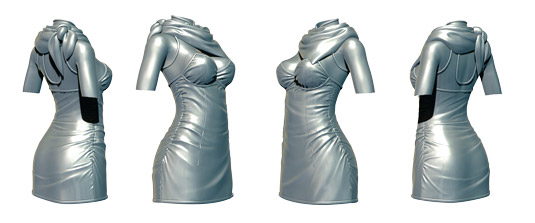
I exported the low-res version into ZBrush and then used ZRemesher to get a basic geometry. I added some detail, focusing on elements that highlighted the character's natural beauty.
04. Creating the character's eyes
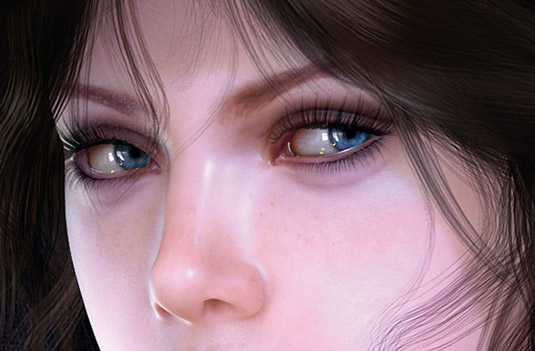
When it came to creating the character's eyes, I tried to make them photorealistic. For example, I used a pinkish map with some small vein-like lines to give the eyes depth. In addition, I think that the cornea is a very important component to this area because it gives the eye depth, so I made them transparent and added a light reflection map.
05. Baking out Normal and AO maps
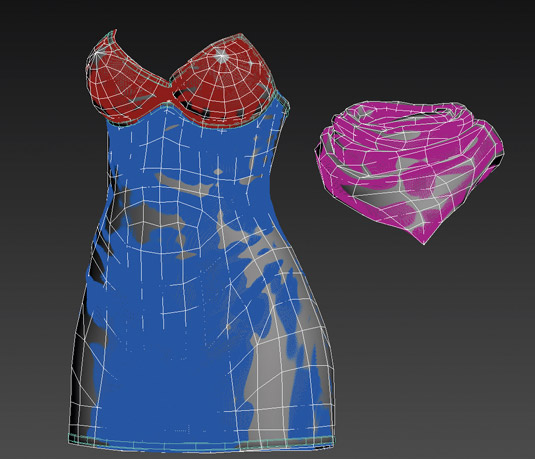
I baked Normal and Ambient Occlusion maps from the high-polygon mesh I made in ZBrush, and then used them for the elaborate textures.
06. Creating textures

I collected colours that I felt suited the character concept and mixed these tones with some material patterns to create some basic textures in Photoshop. I then used the green channel of the Normal map to add a sense of depth.
07. Assigning the textures
After creating the textures, I assigned them to every part of the mesh using V-Ray shaders. Then I added VRaySun and VRayLight to the scene, and also used HDRI lighting before rendering the image in V-Ray.
08. Creating and styling hair
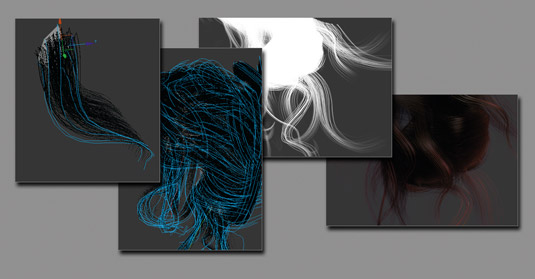
I set splines as guides for the hair, and used V-Ray Hair & Fur for styling. A few stray hairs were rendered separately and then I composited all of them in Photoshop.
09. Final editing stage

With all the rendered images complete I move onto the editing stage, including harmonising the colours and optimising the background in order to create a romantic and elegant atmosphere.
Words: Inho Kim
Inho Kim is a senior CG artist, creating characters and weapons for video games. He also creates 3D illustrations for advertising clients. This article originally appeared in 3D World issue 181.

The Creative Bloq team is made up of a group of art and design enthusiasts, and has changed and evolved since Creative Bloq began back in 2012. The current website team consists of eight full-time members of staff: Editor Georgia Coggan, Deputy Editor Rosie Hilder, Ecommerce Editor Beren Neale, Senior News Editor Daniel Piper, Editor, Digital Art and 3D Ian Dean, Tech Reviews Editor Erlingur Einarsson, Ecommerce Writer Beth Nicholls and Staff Writer Natalie Fear, as well as a roster of freelancers from around the world. The ImagineFX magazine team also pitch in, ensuring that content from leading digital art publication ImagineFX is represented on Creative Bloq.
