How to design and model a fantasy creature
Discover how to take your creature concepts to the next level using ZBrush and Quixel.
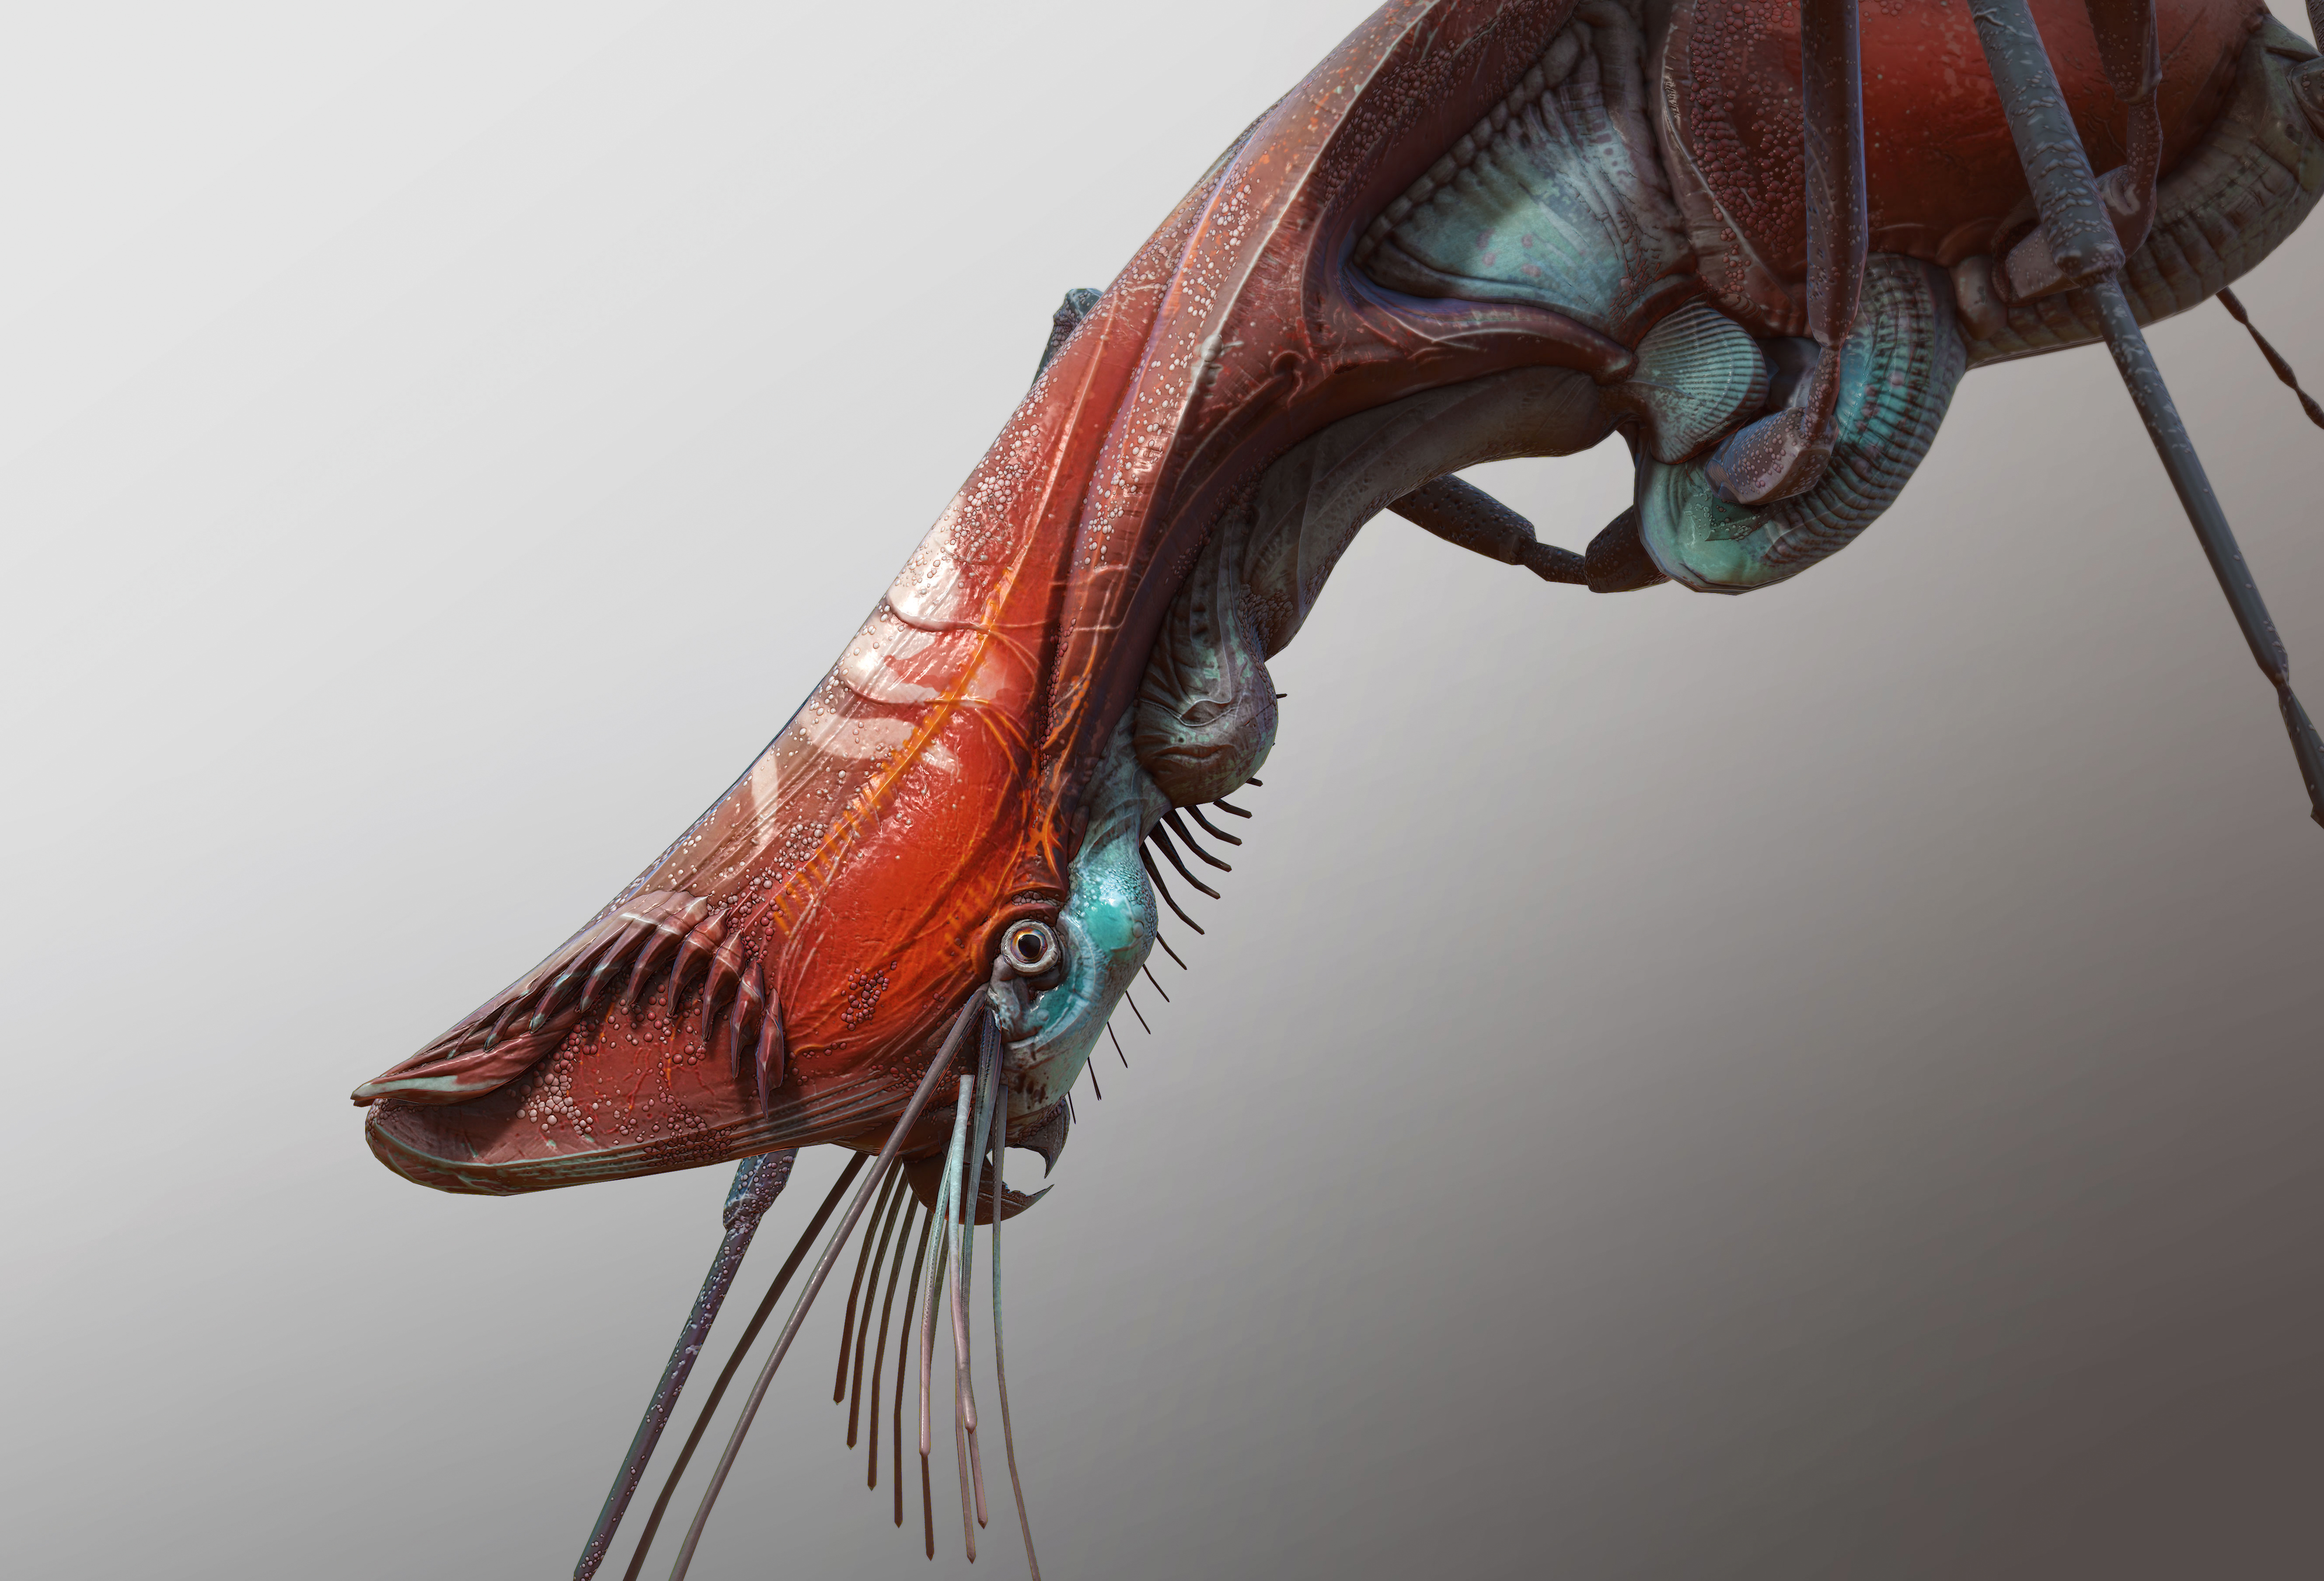
This tutorial will teach you the pipeline for designing, sculpting and rendering a fantasy creature. Before we get started, I want to establish a good design. There are a couple of main aspects to keep in mind.
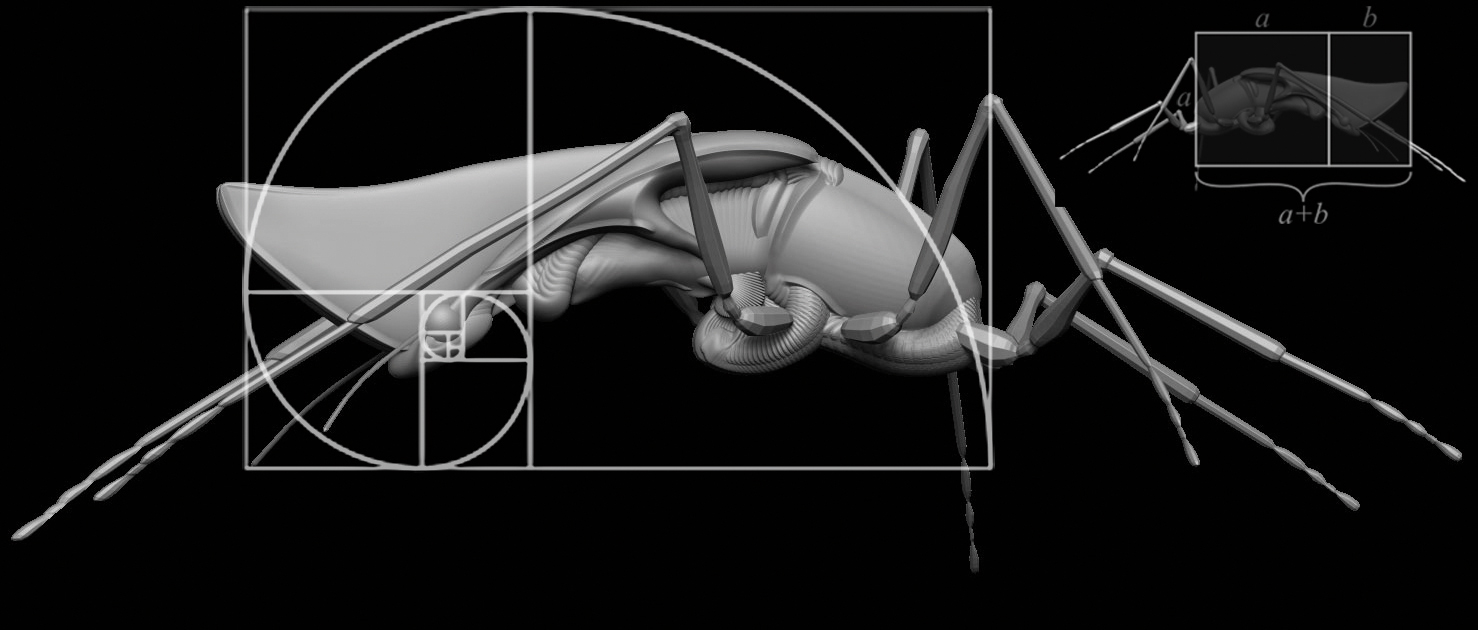
First, I want an attractive balance of shapes and detail. For this, I like to look to the rule of thirds, the Golden Ratio, and for lines that guide the eye over the creature.
Second, I consider the functionality of anatomy. I make sure the creature can hold its own mass and that the limbs, head and body stand alone as well as working together. Understanding animal anatomy is one of the essential skills needed for good creature design. Some good resources to start with are the works of Gottfried Bammes, Ken Hultgren and Terryl Whitlatch.
01. Consider the anatomy
Once you've established a good design, it’s time to go over what kind of anatomy is holding the shapes together. Determine if the creature is going to have an endo- or an exoskeleton, and start pulling reference for the creatures you want to represent in the design. When setting up the primary shapes, be sure to keep the poly count of your meshes low to prevent lumpy, uneven surfaces when you go in to sculpt later.
02. Look to nature to determine anatomy
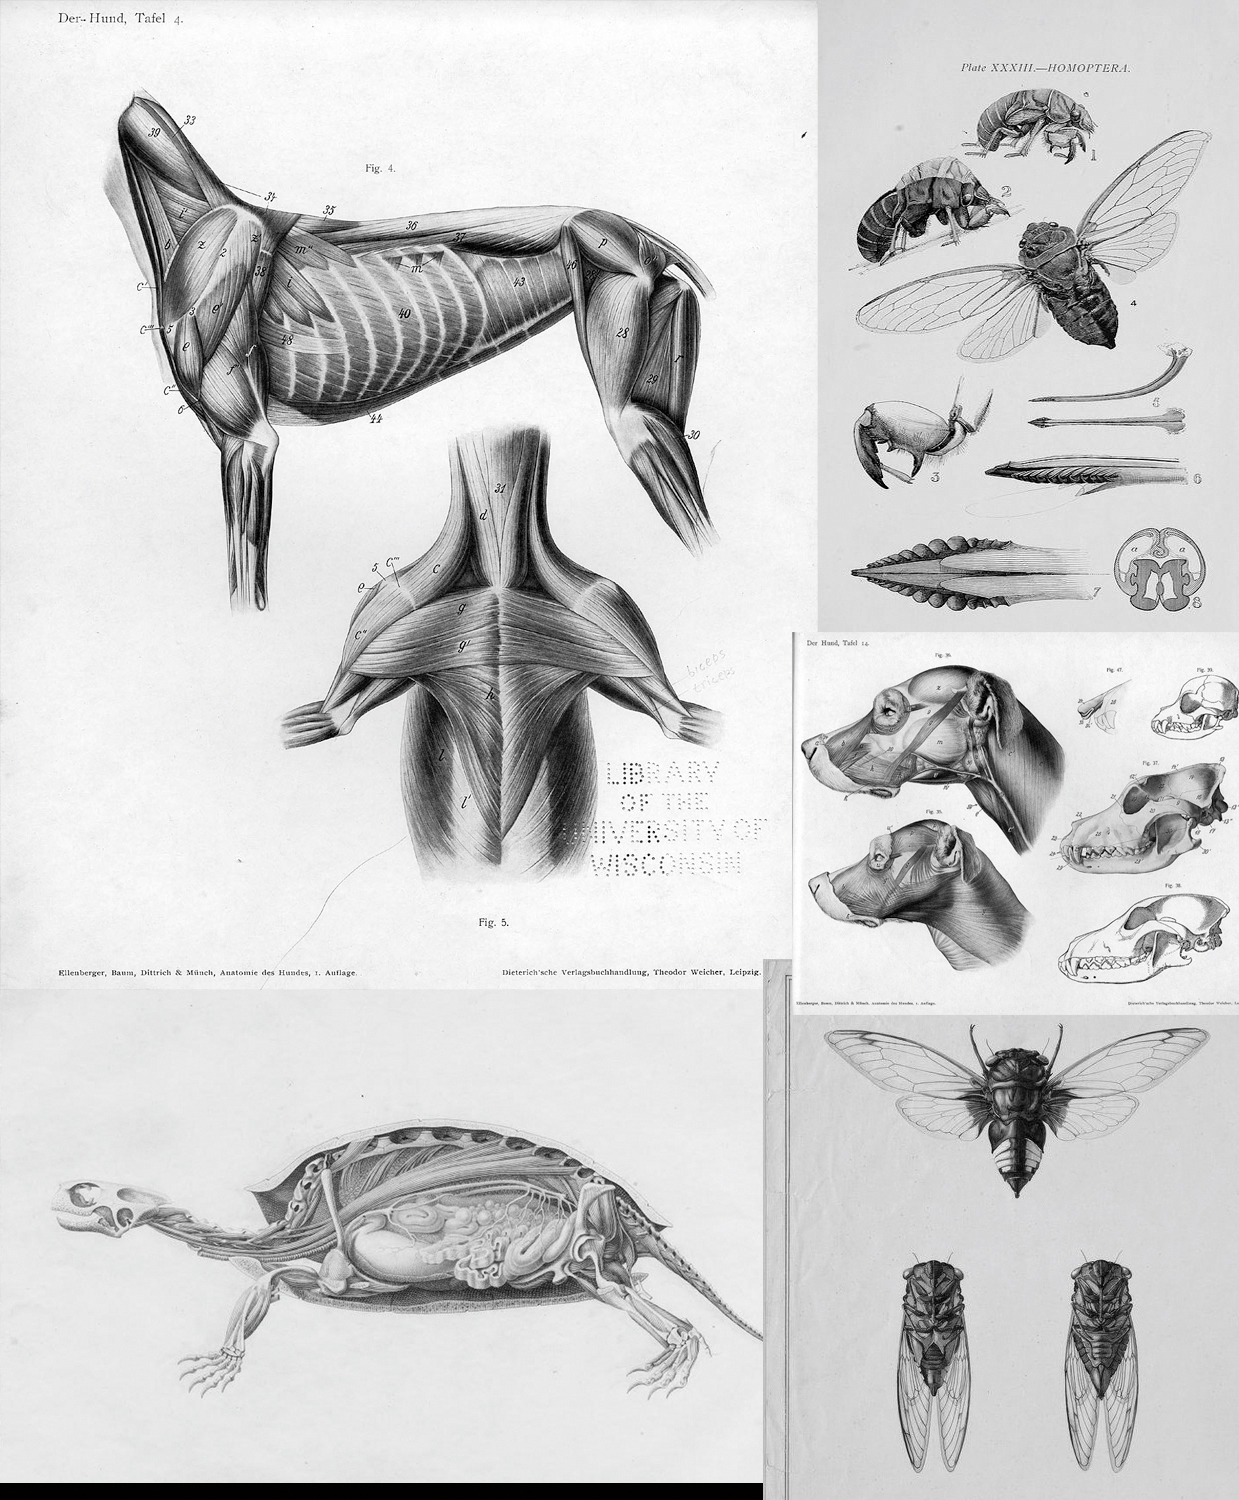
For this project, I was looking cicadas for the body; beetles for the crest and limbs; and squids and parrots for the face and mouth. I like to make sure there is a variety of different materials in the design. This creature has a soft, fleshy underbelly (for which I looked at the abdomens of spiders, pill bugs and crabs), and a hard shell on its crest and back (inspired by crab and beetle shells).
03. Sculpt the fleshy parts
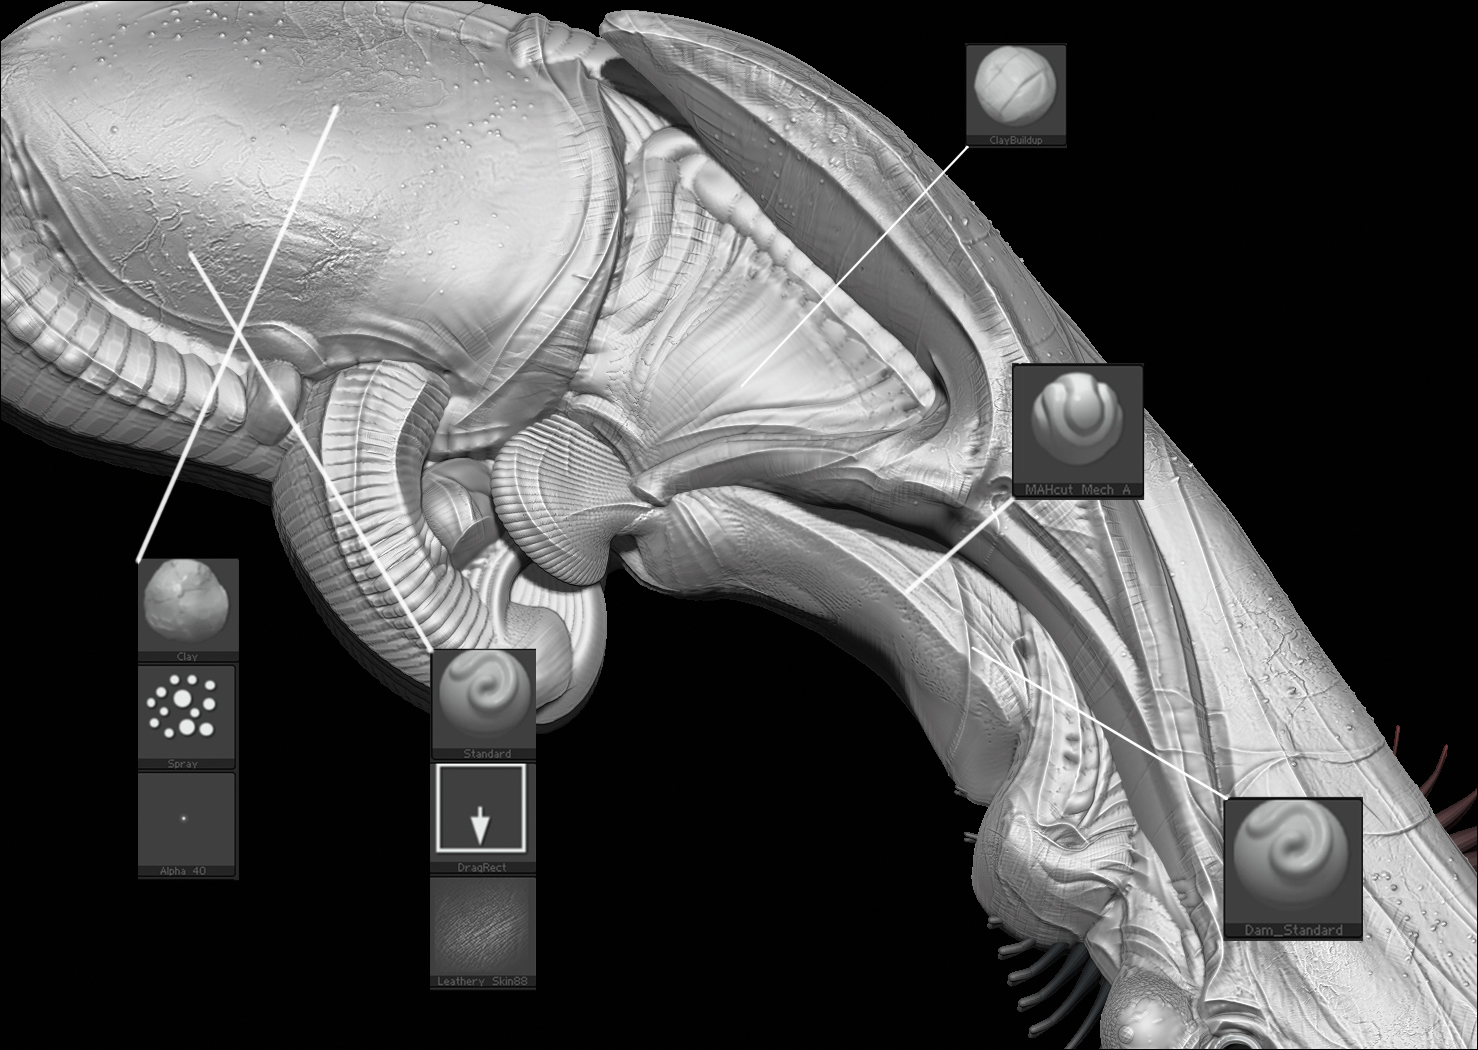
For the fleshy parts of the creature, I sculpt out a simple shape, then use the Array Mesh feature in ZBrush to achieve a ribbed flesh effect. Then I use a mixture of Offset, Scale and Rotation to create an interesting contour shape. Once the Array Mesh is ready, I use the Move brush to tweak the shape and then DynaMesh the shape to make an even sculpting surface for the additional details.
04. Start detailing
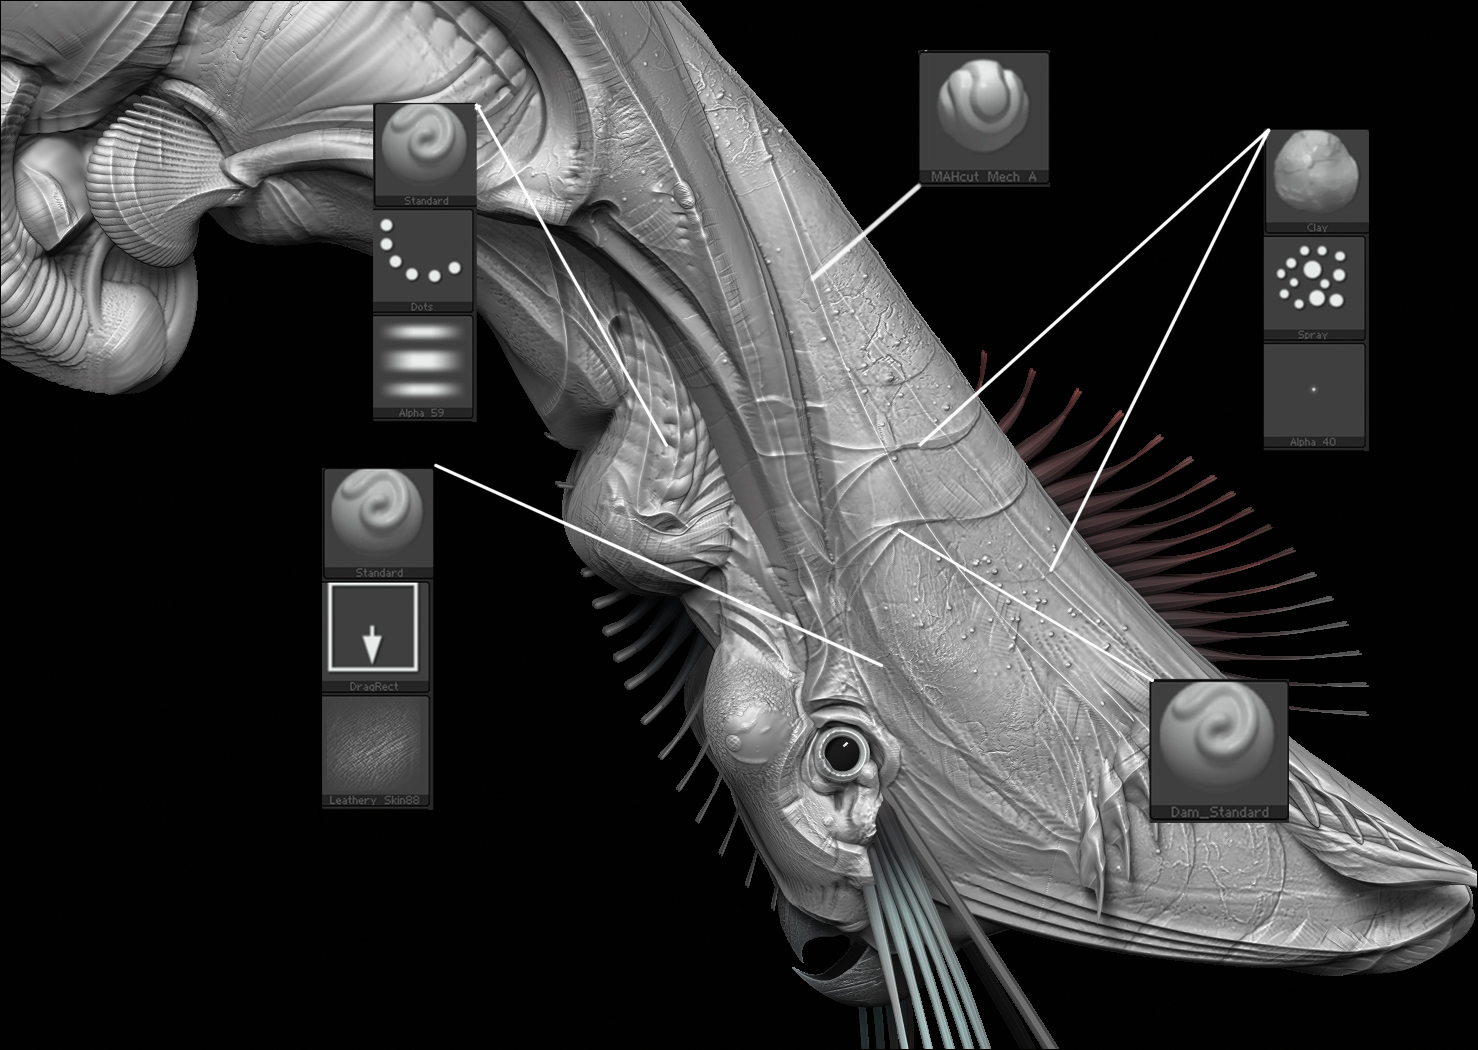
To create any veins or wrinkles in the form, I use Dam Standard, Mah Cut and Inflate. To create a bumpy crustacean texture on the shells, I’ll use a combination of rock alphas and Dam Standard to sharpen the edges. I also decimate the shell body and use a low-poly sphere NanoMesh to create a rocky and bubbly texture all over the surface.
Daily design news, reviews, how-tos and more, as picked by the editors.
LazyMouse is a fantastic tool for creating long, clean strokes along surfaces – I use it constantly when I am sharpening the edges of creatures' shells. If you set the step to around .7 and select an alpha, you can create some very cool patterns along a surface. Try it out for yourself.
05. Paint the materials
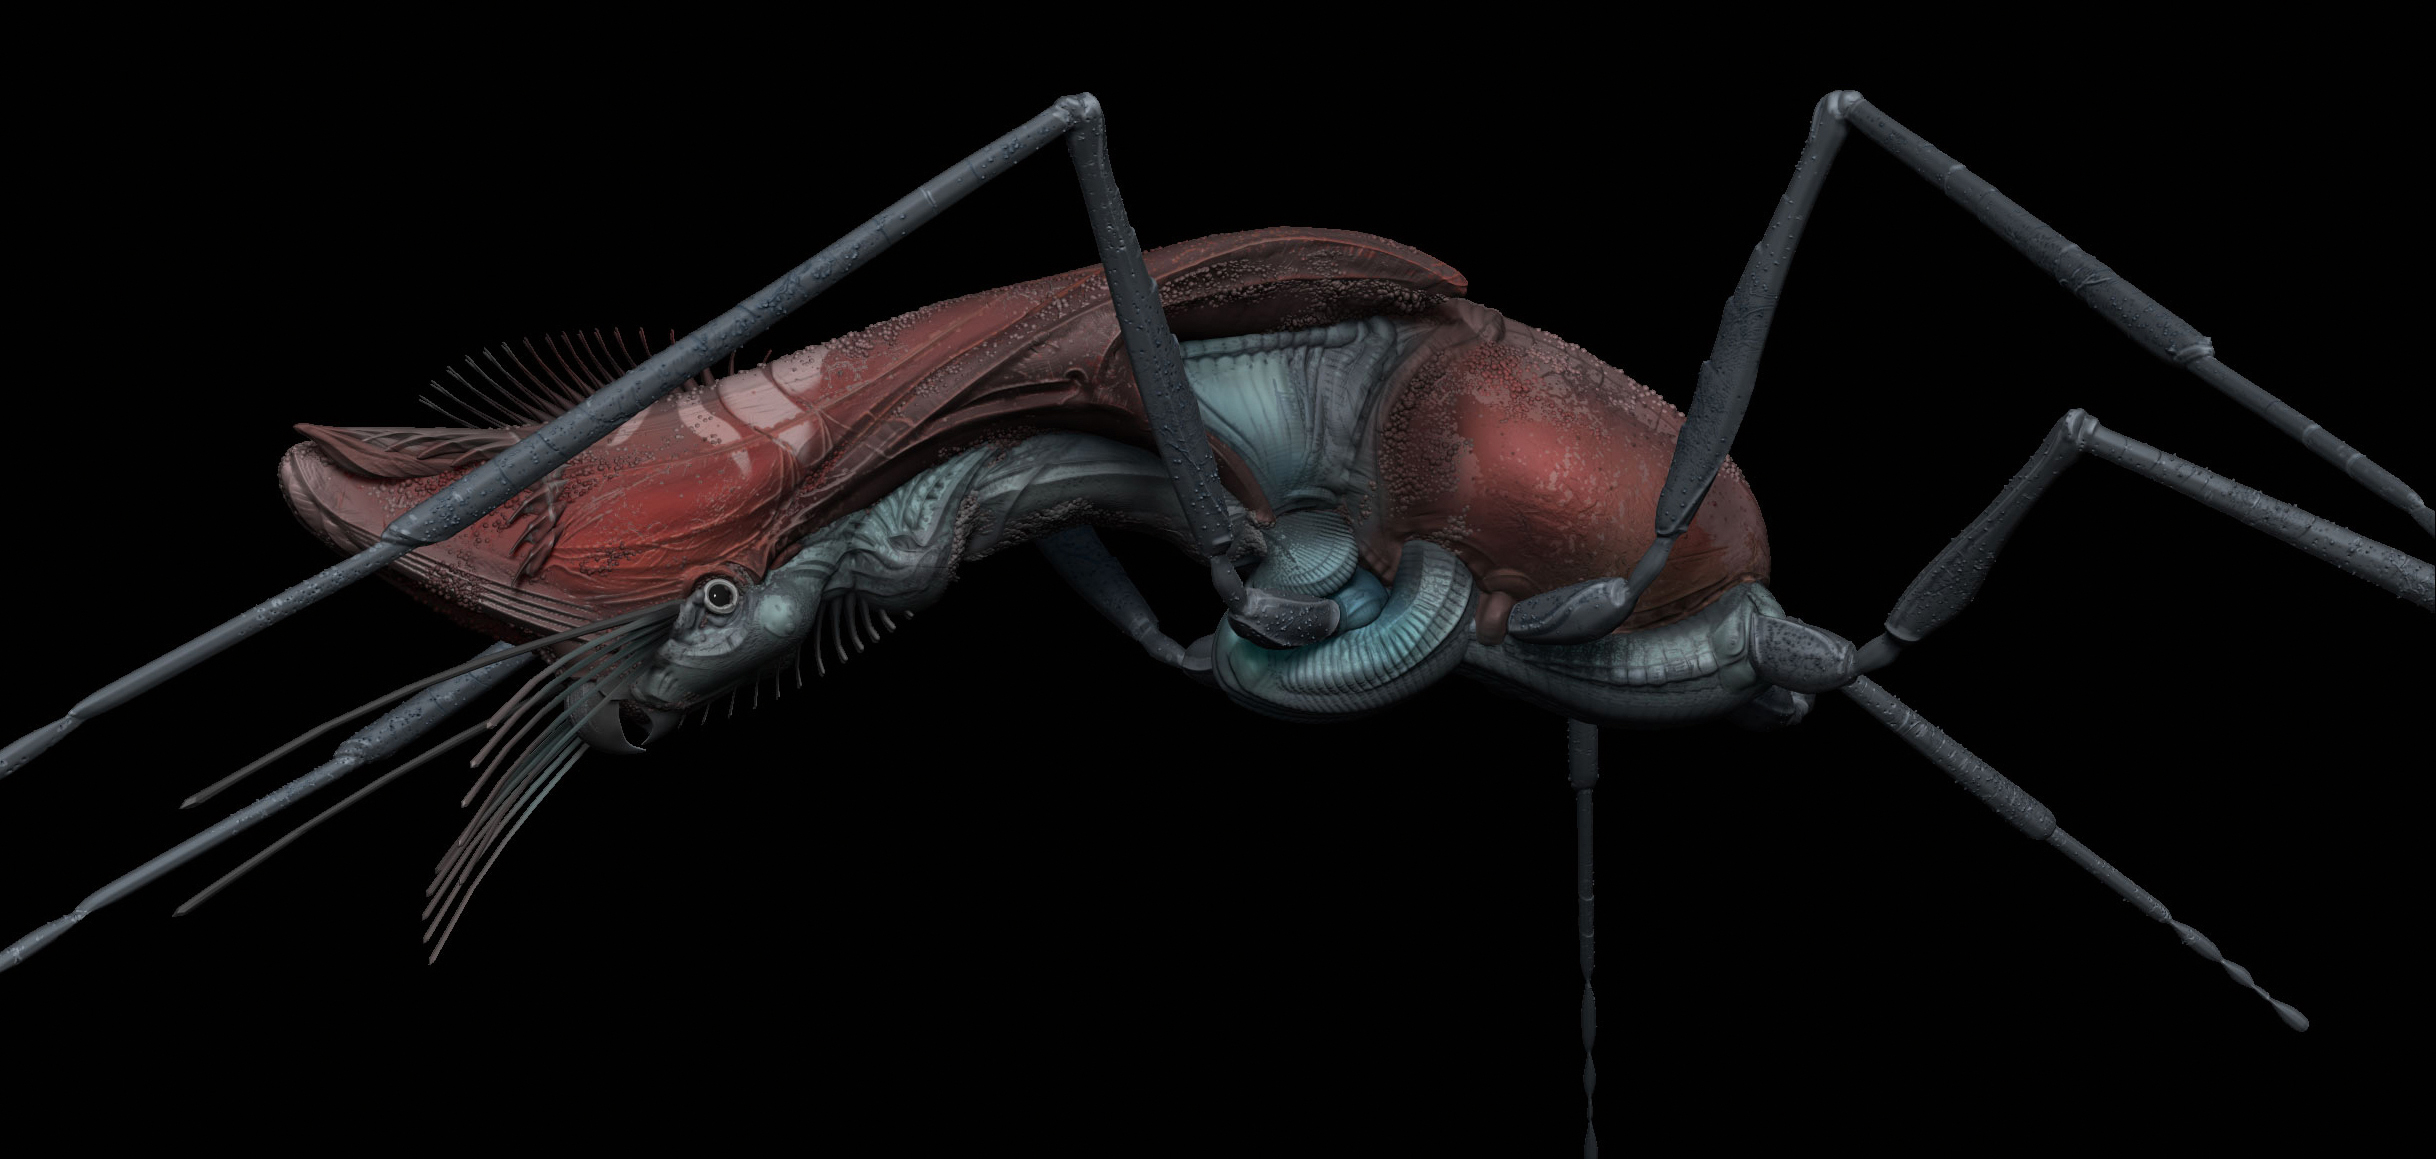
Colour should direct the eye to the points of interest as well as to any sculpted detail. I usually start by using broad strokes all over the model to get a basic colour composition. On most animals a good place to begin is the underbelly, which is usually a different value than the top part that is exposed to the sun.
After that, I try to figure out what kind of stripes or patterns could work with the design. Bear in mind that changing the colour temperature can create a nice effect – for example, going from a dark red to a bright orange, or a deep blue to a bright turquoise. This sort of change is a great way to build a vibrant colour scheme for a creature.
06. Bring out colours with Masks
![Masks help to bring out colours and shapes [click to enlarge]](https://cdn.mos.cms.futurecdn.net/erHXKf4z9qBjjH5BQE3dND.jpg)
After the base primary colour scheme has been painted in, use the Mask by Cavity, Mask by Smoothness and Mask PeaksAndValleys to start the value/colour push and pull with the sculpted detail. I always try to sharpen the mask with PeaksAndValley to avoid muddy values or colour changes. It's then a matter of deciding which details would look better with a lighter or darker colour value.
07. Retopologise
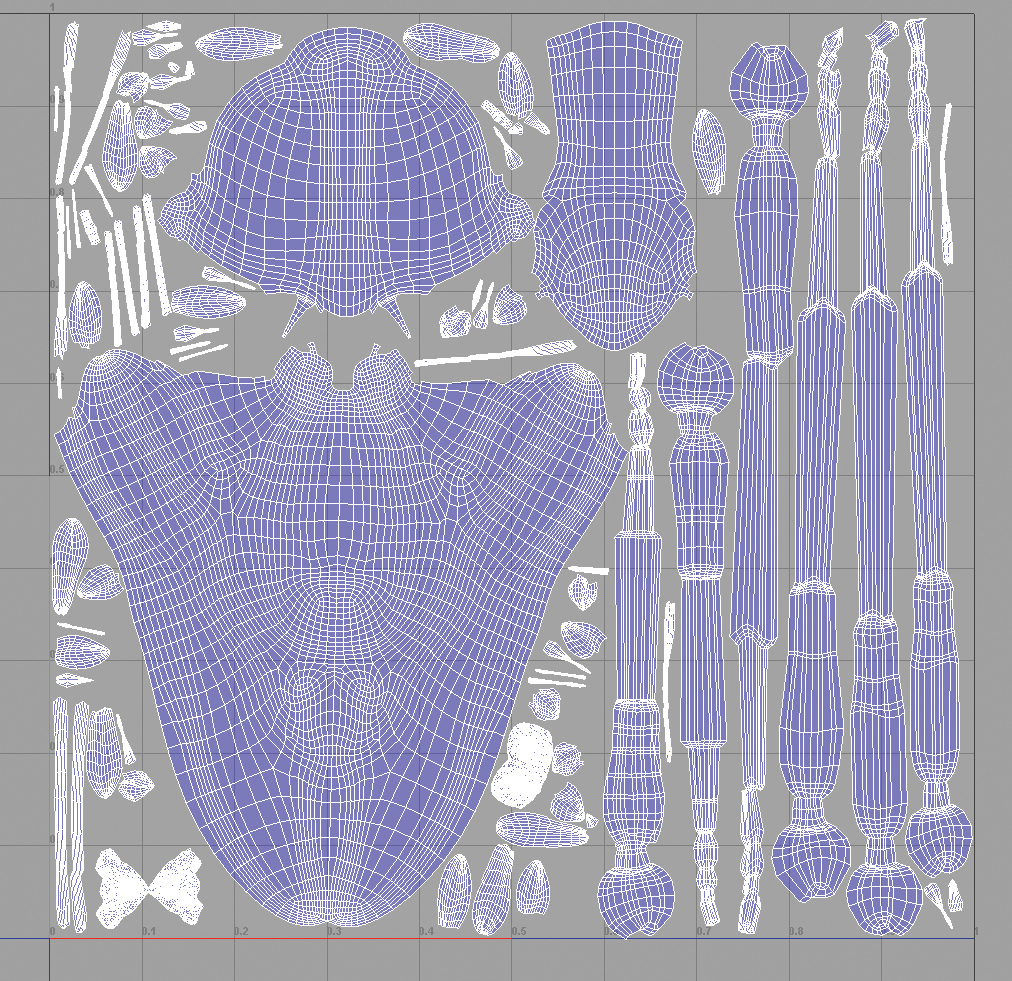
For retopology, I use a combination of ZBrush’s ZRemesher system and TopoGun’s retopology tools. For organic UV unwrapping, ZBrush’s UV master works pretty well for any shape. One way to help you place the UV seams where you want them is to use polygroups to create your UV islands. Alternatively, use the control painting to protect and attract the UV seams.
08. Work on the UV shells
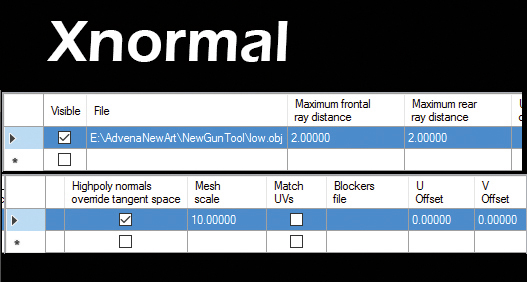
Next, I bring the mesh into Maya and pack the UV shells by hand. For texture map baking, I combine xNormal and TopoGun. I use xNormal for the colour painted in ZBrush, with Cavity to capture all the fine sculpted detail, and the Material ID map. For the xNormal ray distance, I use a simple value of 2 for the frontal and rear ray distance, and leave the default value for each map setting. To capture the colour map, be sure to uncheck the Ignore per-vertex-color box under the High definition meshes tab.
I then use TopoGun for the Normal and Ambient Occlusion (AO) maps. I keep the TopoGun cage distance at 10 on the low polymesh. This usually works to cover the entire high-resolution mesh, but doesn’t cause any clipping into the low-res mesh with the ray casting.
Next page: find out how to bring your 3D creature to life...
