Groom an irresistibly furry creature
How to make a cute furry 3D character that looks at home in his environment.
Sign up to Creative Bloq's daily newsletter, which brings you the latest news and inspiration from the worlds of art, design and technology.
You are now subscribed
Your newsletter sign-up was successful
Want to add more newsletters?
21. Retopology
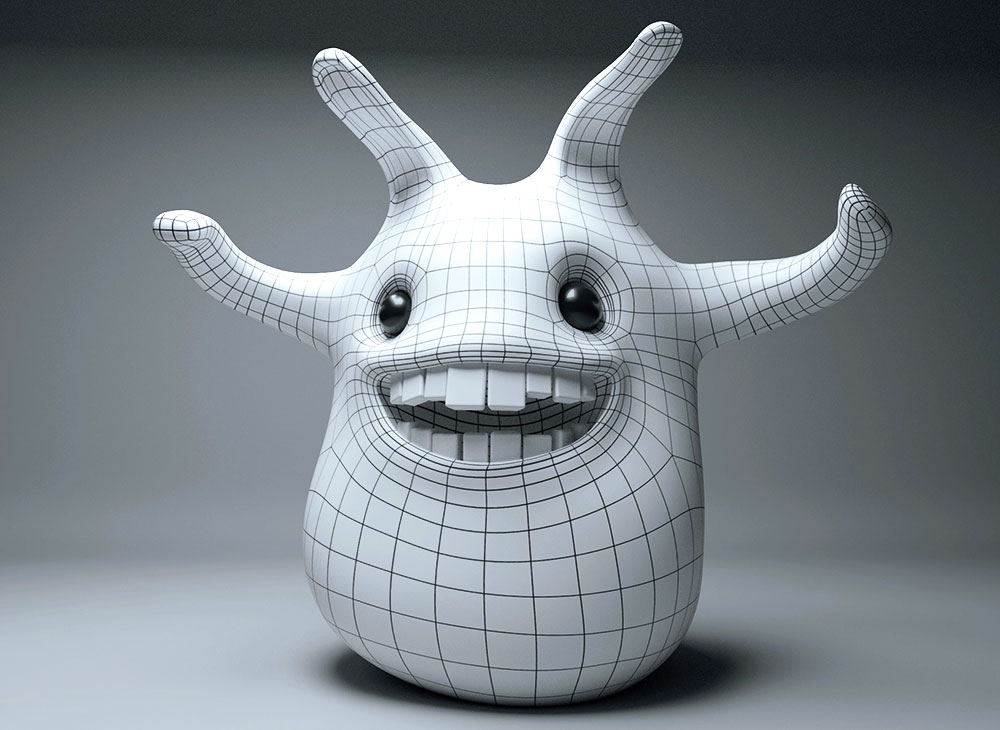
As he now has a mouth and bigger eyes, I'll need to make selections to adjust the shapes of the hair and where it should grow. I work the retopology of the character completely on Maya, as I want total control over the flow of the edges and loops, and the new tools in Maya 2017 make the character animation-ready.
22. Make the UV map
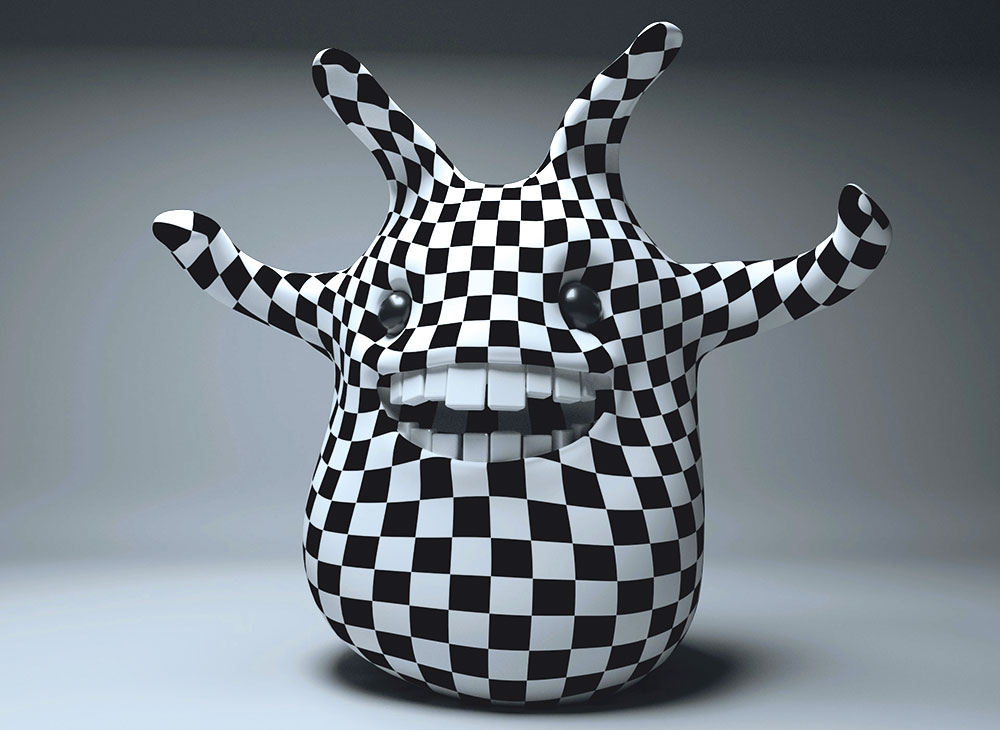
I need to paint the textures, and to do so, the UV will be useful – even if XGen uses Ptex it's still necessary to have a good UV map. Once more, I decide to test the new UV tools that come with the Maya 2017 update 3, which are now simpler, amazingly fast and really easy to use.
23. Re-groom
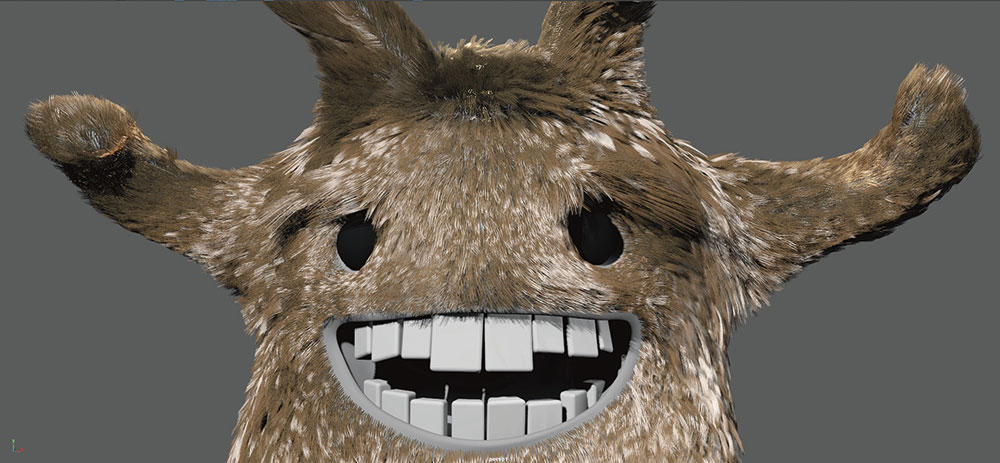
I re-groom the new character still using the groomable splines. I repeat most of the process from before but this time I spend more time on the basic groom. I select just the faces that I want to grow hair from, leaving the eyes and the mouth out of the selection. I work even more on the flow of the hair, add eyebrows by making the hair longer over the eyes, and add more noise into the actual groom, not just on modifiers.
Article continues belowFor the hair between the character's ears, I make the hair longer and use the Part Brush to give it shape. I also reduce the length of the hair around the eyes and the mouth, giving a gradient effect between the long and short hair.
24. Import the modifiers

I want to use all the old modifiers, so I go to the old XGen scene and right-click on each modifier, hit Save Modifier, and name each one in order as this will affect the result. To re-import them into the new scene, on the Modifiers tab I click on the folder icon and select Load User.
I import my saved modifiers one by one to build up the same result as before. This time I create masks over the clump modifiers to affect less of the face, producing a smoother result with fewer clumps there.
25. Create the moustache

I decide to reintroduce the moustache. For this kind of hair, the best way to work is using XGen's Guides as it's faster and the results are great. Working with guides is really easy – I draw just half of the moustache guides, repeating the same process of making the shape and adjusting the size with a rand expression as before. When I find a shape I like I just mirror the guides and the moustache shape is done.
Sign up to Creative Bloq's daily newsletter, which brings you the latest news and inspiration from the worlds of art, design and technology.
For the final detail, I use the Move Guide tool to make some irregularities on the groom. I follow the same pattern with two Clump Modifiers, a Noise Modifier and finally a Cut Modifier, with just a few strays.
26. Paint the colour
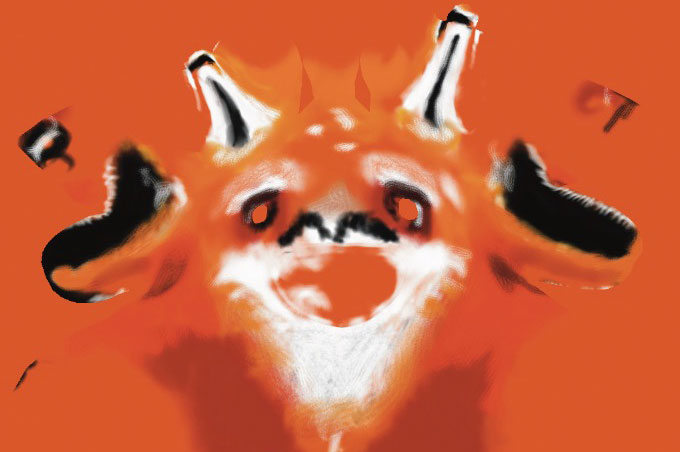
To add colour to the groom, I need to create a custom attribute for the render system to read the information. To do so, I go to Preview and Output and in Custom Shader Parameters I create a Custom Colour Attribute using the root_color convention.
Next I click on the option next to the Attribute to create a map. I click the brush icon and with the Maya 3D paint tool options I start painting my textures. I use a fox's colours as a reference for this guy. If you want to create a custom texture you can generate the Ptex map with Mudbox or 3DCoat – just remember to overwrite the map that Maya created for the custom texture.
27. Create material
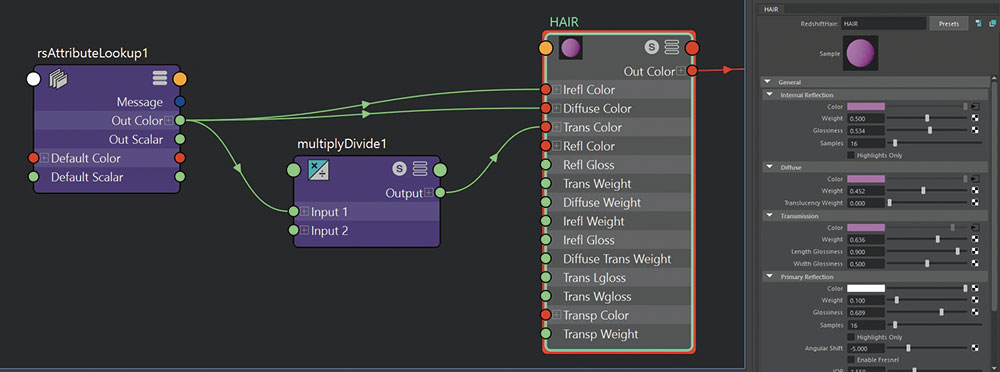
I use Redshift for this render. The basic material for hair is almost perfect, so I just make the reflection a bit glossier. I create an RS Attribute Lookup to call in the root_color info. I connect this to the internal reflection of the RShair, and with a multiply/divide node connect the Transmission colour and change the value of the multiplier to 1.5. I finally connect the RS Attribute Lookup to the diffuse slot of the RShair and change the weight of the diffuse value until I like the result.
28. Do the final render
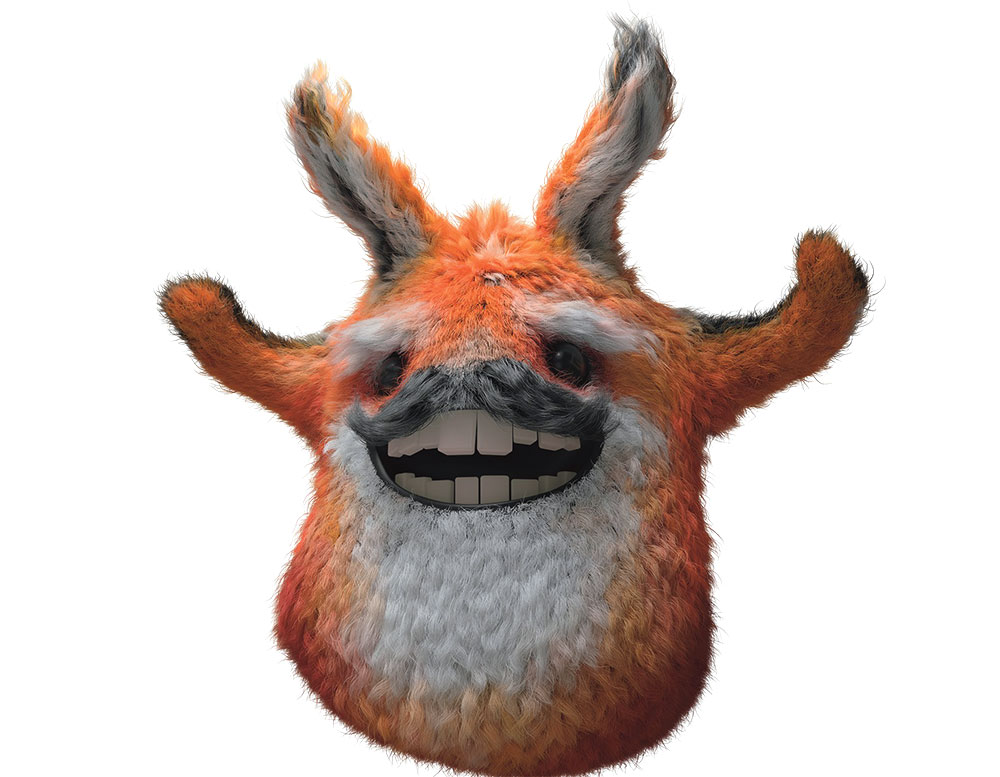
Now I set the render configuration. For smooth results with Redshift, activate Hair min pixel width under the OPT tab on render settings, to solve the transparency of the hair and fix the tessellation, making hair smoother and reducing the render time.
For the render settings, I use max samples of 512 and change the adaptive error threshold to 0.01 as I want almost no noise on the render. On the camera I set an exposure photographic lens and a bokeh lens to simulate the DOF on the photograph.
29. Blend the render and the backplate
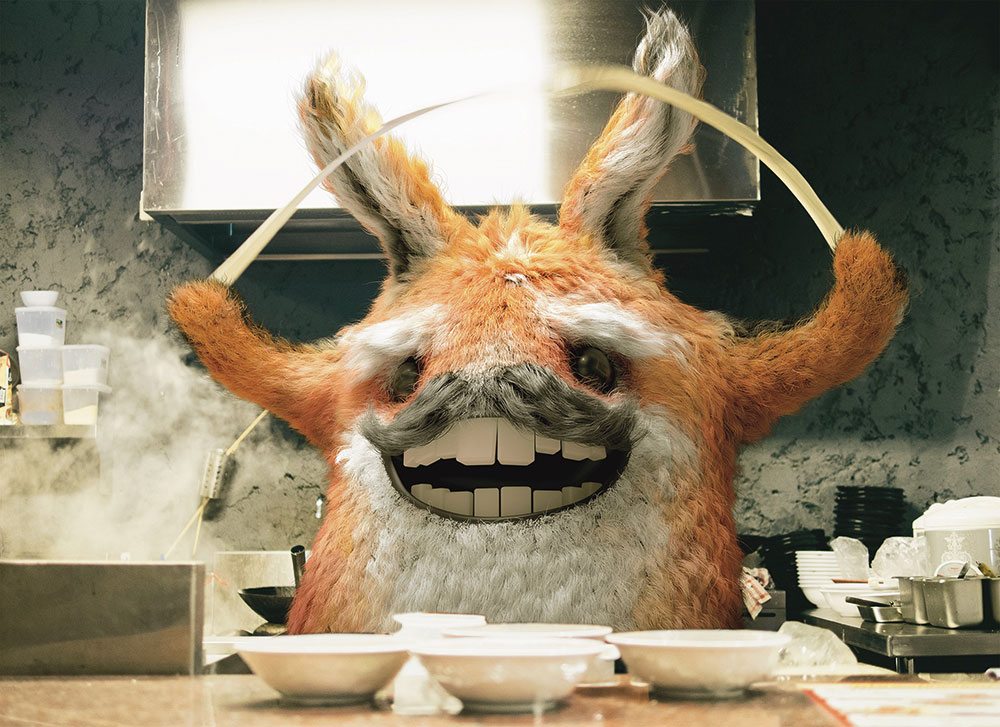
With the final render in place, it's time to begin the final assembly. First I remove the colour and try to leave the backplate as clean as possible to make the blend with the backplate. I always try to remove any colour information and use the backplate in its pristine state.
I mix the render and add a mask for the foreground to leave the table and the plates behind the render. Having the render on the scene means I'll need to colour-correct the render so that its colour intensity, saturation and white and black points are close to the backplate's from the image. I put a B&W adjustment on top of everything to help me to fix the values of the render from there.
30. Post-production and effects
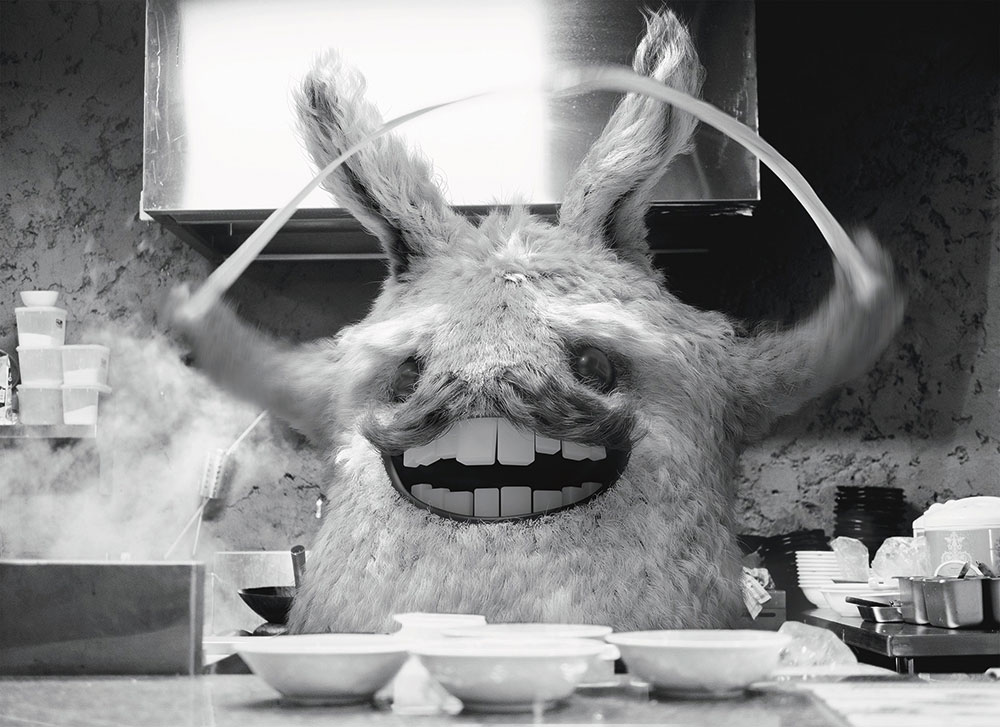
With both the render and the backplate under the same lighting conditions, it's now easier to work on the post-production elements. I normally use the Nik collection pack to help me with the process and with blending it better. At this stage, I can also add effects to the scene – I add more steam coming out from the stove behind the character. With a radial blur, I give a motion blur effect just to the arms.
31. Colour grading and cropping
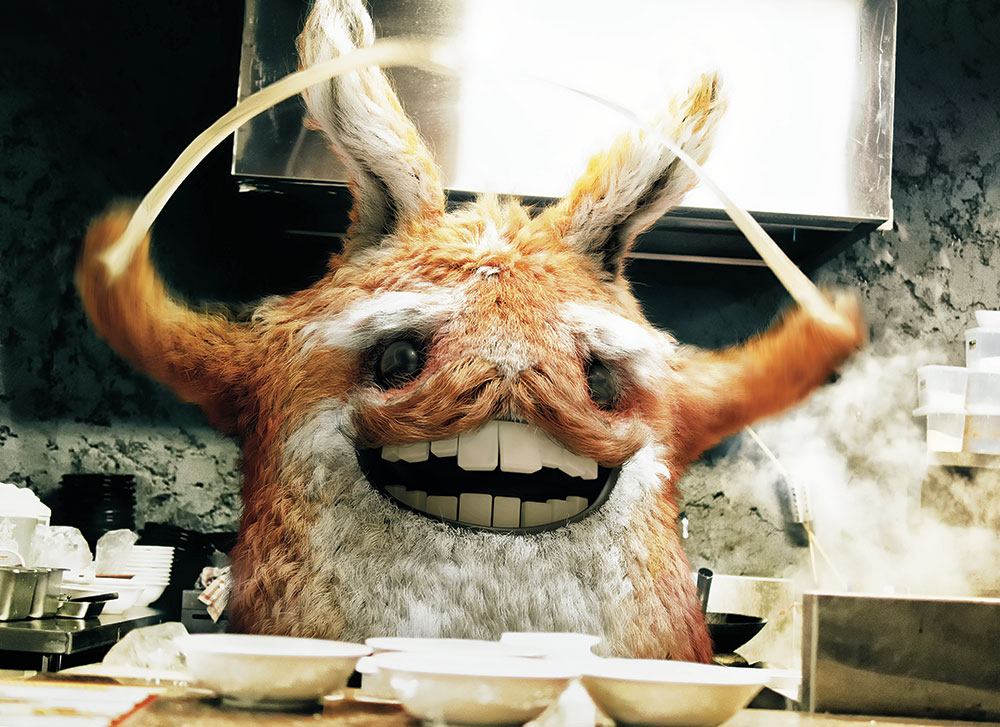
Finally at the end of the road, I can finalise the colour grading, fix the contrast and give more balance to the tones, including lightening the colour of his moustache. I am still not too sure about the look of the scene, but I flip it around horizontally and it creates the effect I was hoping for.
I work a little bit more on the contrast on the wall to make the character's silhouette more visible and striking. I finally do a crop with a little rotation of the composition to fix the tension points and the render is done!
This article originally appeared in 3D World issue 223; buy it here!
Related articles:
