How to create a 3D cartoon monster
Discover the design secrets behind Alex Ruiz's monstrous 3D creation, The Terrible Hulkenstein.
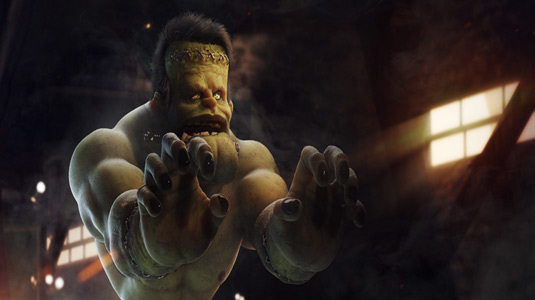
Having experimented with short 2D animations and modelling characters in motion graphics, Alex Ruiz created The Terrible Hulkenstein as a personal project to help him with a job interview for a gaming company.
“This was an old project that I had saved,” he explains. “It took me a few hours to sketch but I didn’t have time to work on it specifically, so I worked on it for a few hours a day and completed it in two weeks.”
Now working as an instructor and modeller at Autodesk, Alex shook up his working methods with this project. “I found several nice reference images to create a draft and I decided to mix things up a bit, just to try something different,” he says.
“Then I began blocking the torso and the head. I overdid the proportions because I really wanted a cartoony style. At no point did I consider doing it realistically.”
“I enjoyed the lighting and shading process in particular,” he adds. “This was a really good opportunity to test out different things and see what would make a difference to my illustrations.”
Blocking the figure
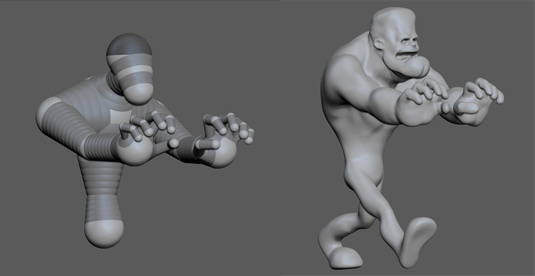
Alex loaded up reference images into ZBrush with Spotlight. The model was initially made with ZSphere, and then converted to Dynamesh.
Using the transpose tools with some brushes (Move, Smooth, ClayBuildup and Dam Standard), he then started to exaggerate the proportions and did several tests to get a good result.
Daily design news, reviews, how-tos and more, as picked by the editors.
Clothing detail
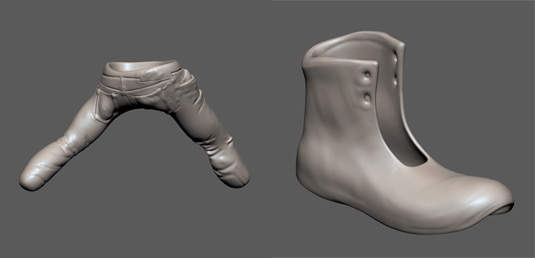
With the feature Paint Masks and Lasso Mask brush, Alex could select the areas in which the pants and boots would be. At first he worked on the pants by using the "Extract" tool, which allowed him to extract a geometric piece. He used the same process to extract the boot.
Using the Paint Mask and Lasso Mask brush in combination with other brushes such as Move, Dam Standard and Claybuild, he began to sculpt in the traditional way around the character and assets.
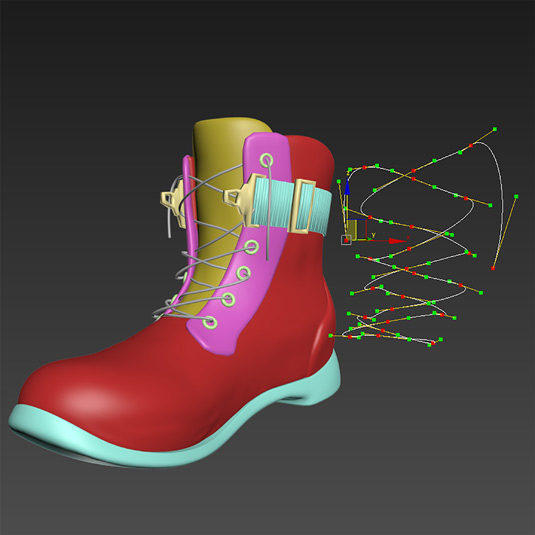
To make the laces, Alex exported the base of his model to 3ds max and created the spline that would become the shoelace. Once positioned, he applied the Sweep modifier and changed the shape of the geometry to "pipe".
Retopology
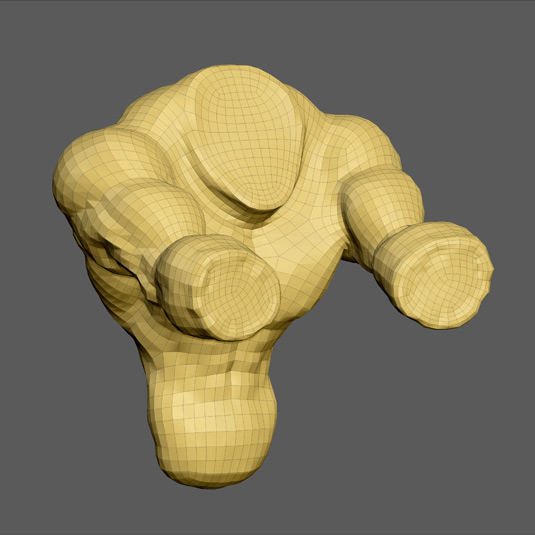
After finishing the whole sculpture, Alex relied on the ZRemesh feature. First he duplicated subtools for later use, then chose one of the copies and applied ZRemesh to make a quick retopology sculpture that reduced the number of polygons.
Adding texture

Starting with a base colour, Alex then marked the shadows on the surface of the sculpture. He then inverted the selection and filled the surface with a shade slightly darker than the base.
This makes it easy to view the texture with the "Flat Color" material . By creating layers for each painting he did in Subtool, Alex could disable the texture at any time if necessary.
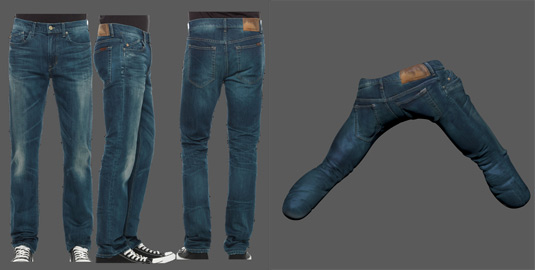
To texture the pants Alex used Spotlight, which allowed him to import textures into Zbrush and project them onto the surface of various objects. Depending on the amount of polygons the Subtool has, the texture will appear with a better resolution.
Creating the hair
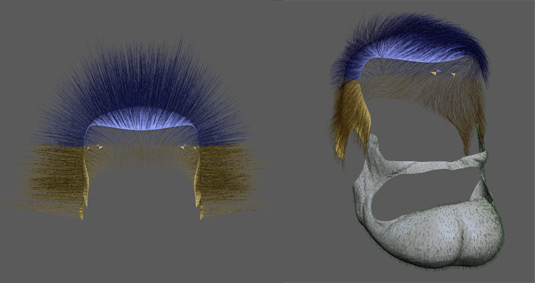
After selecting the area on the head where hair needed to appear, Alex used Paint mask and Lasso mask then used the extract feature.
In this new Subtool he created some selections with masks and converted them to Polygroup. The polygroups can also used as masks, then he just had to apply the Fibermesh.
Lighting and rendering
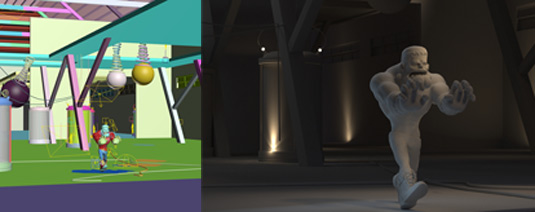
When creating the lights, Alex worked to the real scale of the objects and prepared some base lighting. He added a V-Ray light Dome and HDRI in environment, then adjusted camera values to compliment the lights.
As this is a static scene, Alex decided to use a V-Ray Displacement map modifier to bring the details back in the rendering by using Displacement map and Normal map.
Liked this? Read these!

Thank you for reading 5 articles this month* Join now for unlimited access
Enjoy your first month for just £1 / $1 / €1
*Read 5 free articles per month without a subscription

Join now for unlimited access
Try first month for just £1 / $1 / €1

Dom Carter is a freelance writer who specialises in art and design. Formerly a staff writer for Creative Bloq, his work has also appeared on Creative Boom and in the pages of ImagineFX, Computer Arts, 3D World, and .net. He has been a D&AD New Blood judge, and has a particular interest in picture books.
