Create a 3D custom map in Illustrator
Radio explains how to create isometric icons in Illustrator using a grid and the 3D Extrude tool.
Sign up to Creative Bloq's daily newsletter, which brings you the latest news and inspiration from the worlds of art, design and technology.
You are now subscribed
Your newsletter sign-up was successful
Want to add more newsletters?
- Software: Illustrator CS3 or later
- Project time: 1 hour
- Skills: Master grids, Use the 3D Extrude tool effectively, Shade 3D objects
We normally work to an unwritten formula when we do isometric work. We keep things as simple and accurate as possible by using a grid and working with colour guides to keep the icons in the same shade and tint.
Over the following steps, we’ll walk through how to create isometric icons that you can build up into a 3D custom map or cityscape image. Once you get the hang of drawing the simplest shapes in this isometric style, you can draw just about anything. See our guide to map illustration for more tips.
Step 01
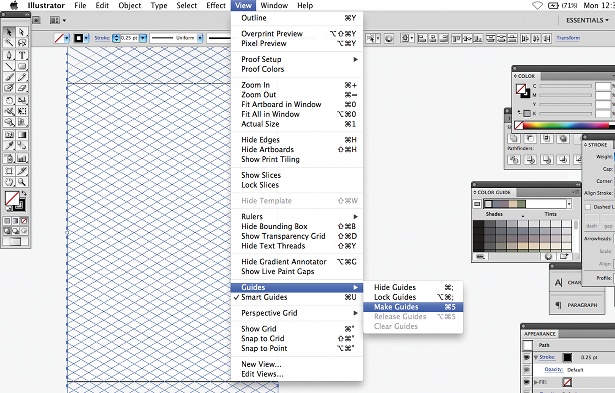
The first thing to do is find a good reference image of the element that you are trying to draw. Next, open Illustrator and make a grid: we use a blend of lines at 30° and -30° and then go to View>Make Guides. This helps to keep everything at the correct angles for your final scene.
Article continues belowStep 02
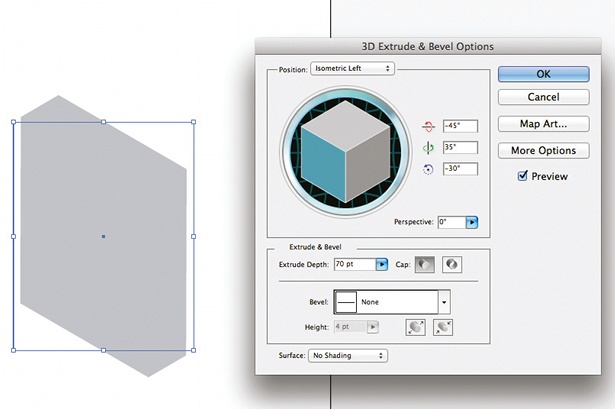
Next, draw a rectangle. Using the 3D Extrude tool is a quick and easy way to get your rectangle into an isometric shape. You can play with the settings like Extrude Depth to get it looking how you want. We turn Surface to No Shading, as we prefer to do this ourselves.
Step 03
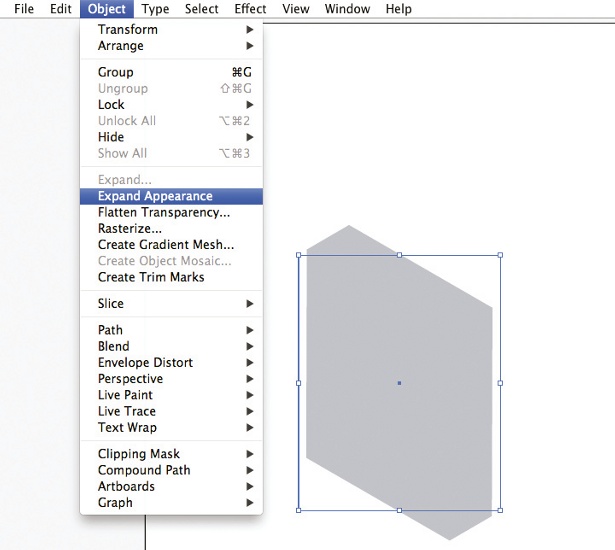
Now go to Object>Expand Appearance. This makes it easier to work with the shapes. Use your grid if you need make the shape longer or taller.
Step 04
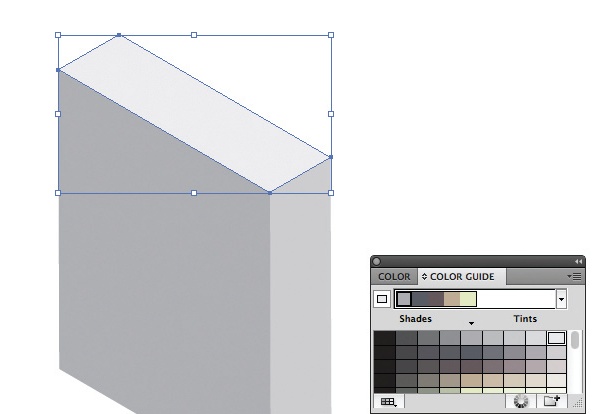
After selecting your colour palette, add colour. Make sure you consider where your light source is. As a rule, we normally make the top part of an element the lightest, with the right-hand side one shade darker.
Step 05
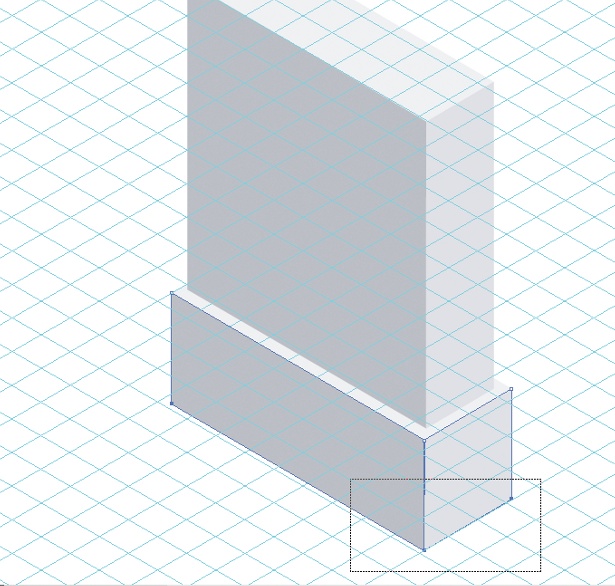
Use smart guides to be more accurate – this will particularly help when you draw the stroke around your objects. We normally do the darkest shade around the entire image and then a much lighter shade for the highlights. Keep your dark outside stroke on the top layer, otherwise the lighter highlights will overlap.
Sign up to Creative Bloq's daily newsletter, which brings you the latest news and inspiration from the worlds of art, design and technology.
Step 06
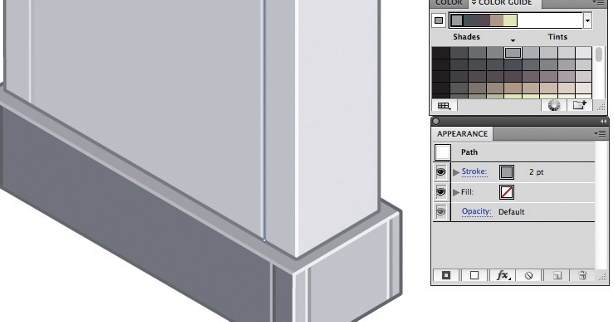
Now start to add the really tiny details, making sure you adhere to your colour guide. Duplicate your first stroke here and make it two or so shades lighter (although not lighter than your main highlights).
Step 07
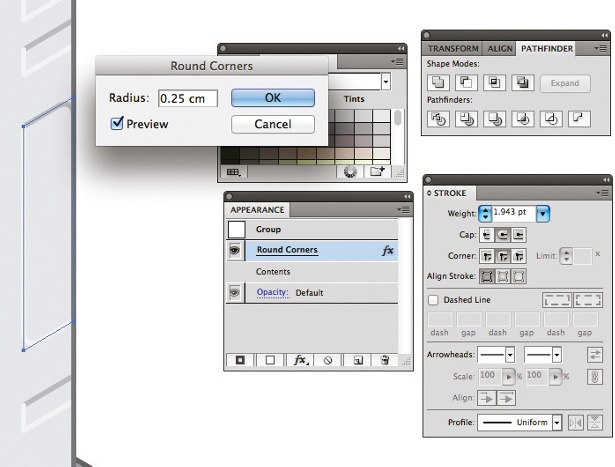
A tip for when you’re adding the details is that using Round Corners (Effects>Stylize) is a quick way to add curves while still keeping it isometric.
Step 08
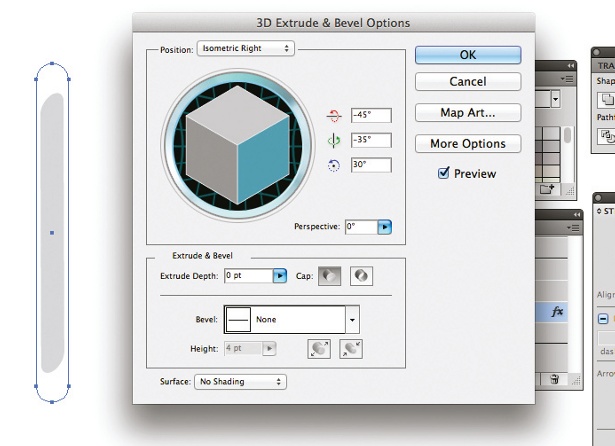
For the disc entrance, we drew a rounded rectangle and used the 3D Extrude tool. For a flat shape like this, turn the Extrude Depth to 0. Expand the shape, add colour and a stroke around the element as you did before.
Step 09
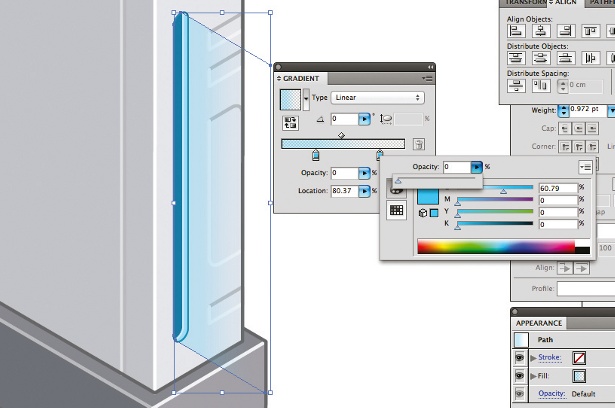
We created the blue light by adding a Linear gradient at 0°. Make both swatches the same shade of blue but drag the opacity of the right swatch down to 0.
Step 10
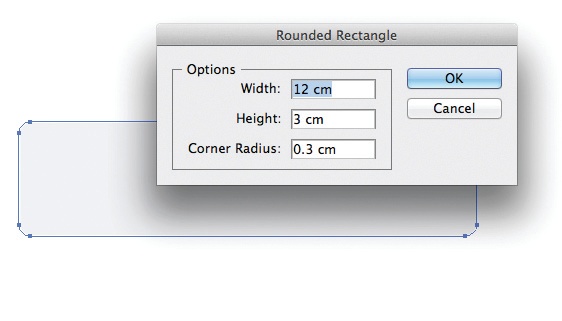
To draw the remote, make a rounded rectangle and play with the corner radius setting.
Step 11
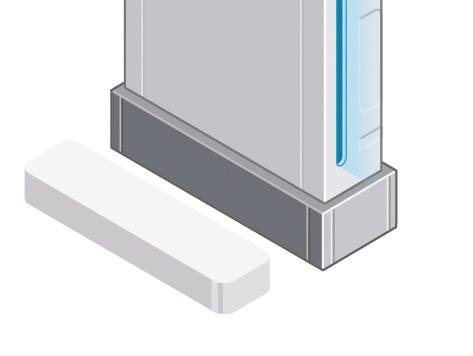
Once you have your rounded rectangle, use the 3D Extrude tool to extrude the shape. Again, expand and colour – as in the previous steps.
Step 12
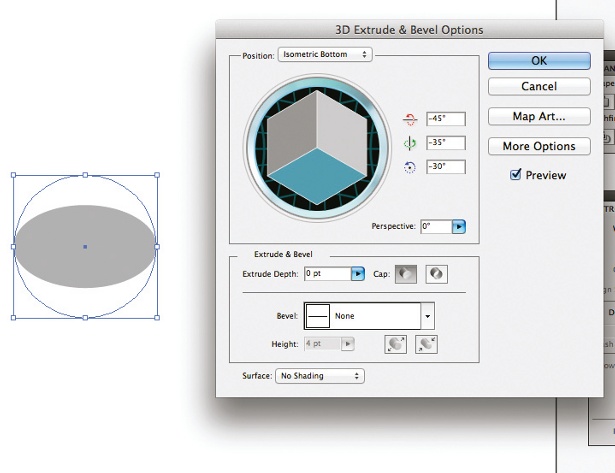
For smaller details like the circles here, repeat the process we already outlined, playing with the position options to get them at the right angle.
Step 13
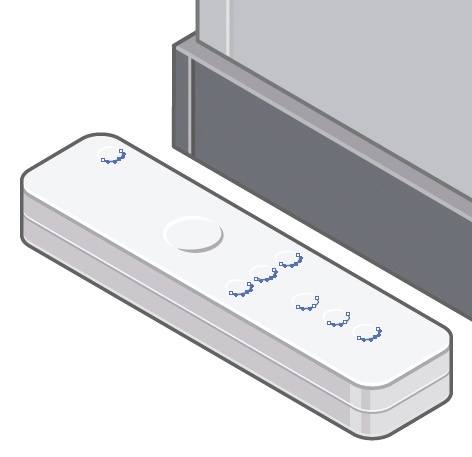
To add the button detail, use a stroke with a tapered edge. This makes the shape look a lot smoother.
Step 14

The last bit of detail on the remote is the cross button Draw it flat and extrude the shape then add colours and shading as before. Now you can create the rest of the elements in your city individually, pasting each icon into the final scene on a new layer.
Don't forget to check out our Adobe Illustrator CS6 review.
Liked this? Read these!
- Illustrator tutorials: amazing ideas to try today!
- Great examples of doodle art
- Brilliant Wordpress tutorial selection

The Creative Bloq team is made up of a group of art and design enthusiasts, and has changed and evolved since Creative Bloq began back in 2012. The current website team consists of eight full-time members of staff: Editor Georgia Coggan, Deputy Editor Rosie Hilder, Ecommerce Editor Beren Neale, Senior News Editor Daniel Piper, Editor, Digital Art and 3D Ian Dean, Tech Reviews Editor Erlingur Einarsson, Ecommerce Writer Beth Nicholls and Staff Writer Natalie Fear, as well as a roster of freelancers from around the world. The ImagineFX magazine team also pitch in, ensuring that content from leading digital art publication ImagineFX is represented on Creative Bloq.
