Create a realistic alien with ZBrush in 11 easy steps
It may be out of this world, but digital artist Caio César shows you how to make your alien anatomically believable.
Sign up to Creative Bloq's daily newsletter, which brings you the latest news and inspiration from the worlds of art, design and technology.
You are now subscribed
Your newsletter sign-up was successful
Want to add more newsletters?
The first thing I do before creating a character is to look for references to inspire me. This is a mental process: the more you look at pictures, things in nature, movies and the work of others, the greater your mental reference will be.
From there you should begin to gather ideas on how to start modelling your project. When making a character, it’s particularly important to collect anatomical references - both human and animal - so that you can make sure you’ve got the proportions correct. This is important even when designing an alien creature.
01. Start simply
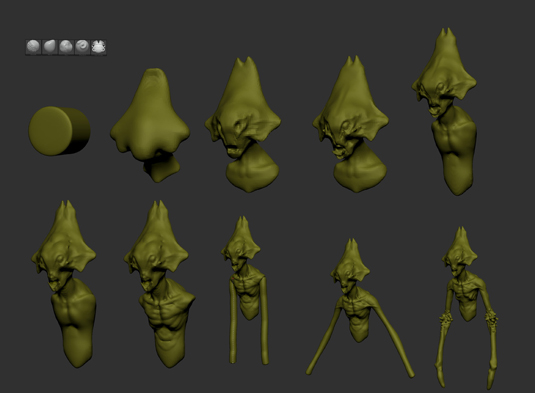
I start with any polygon shape that is symmetrical - in this case, it’s a cylinder. Thanks to my reference image sourcing, I have some idea of what I want the final image to be in general, mainly in terms of proportion and main forms.
Article continues belowI then begin to sculpt the head using DynaMesh. This is a tool in ZBrush that creates mobility and flexibility in your mesh by keeping the amount of polygons balanced, so you can move and stretch your mesh without losing definition.
02. Refine the sculpt
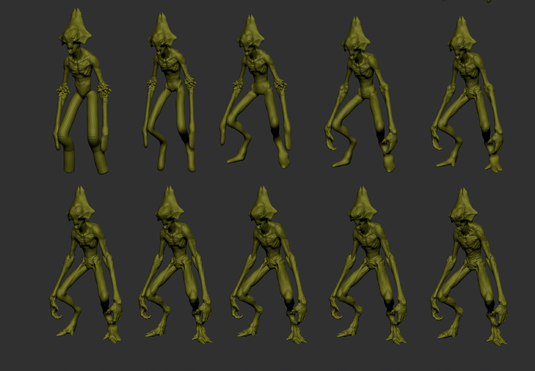
Now I select the Move brush to adjust the main shape, followed by
the Clay, Standard and Smooth brushes, which are used to build and adjust everything else along the way. When I’m satisfied with a stage, I use DynaMesh to redistribute the mesh and continue sculpting. I add two new SubTools to the model: one for the eyes and one for the upper teeth. I also define the alien’s chest.
Next I insert the arms and legs with the Curve Tubes brush. I’m not sure about putting horns in his arms; I think it’s best to remove them as they might not work when the arm bends. It is important to consider a creature’s functionality: it may not actually exist in reality, but it must look like it could.
03. Focus on the whole
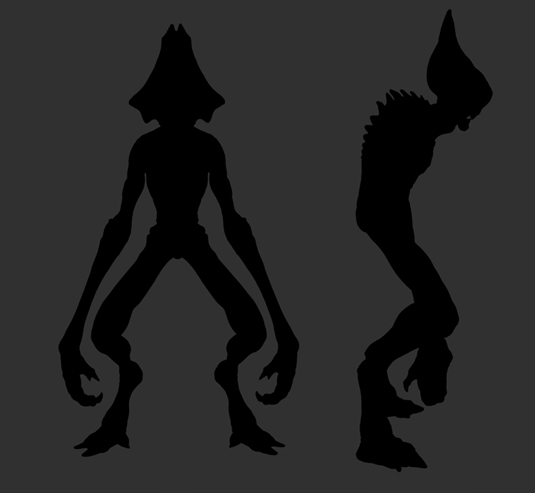
At each step of the process, I keep improving the anatomy by using the Clay and Standard brushes. Also throughout this process, I use the Flat Color material so I can see how the silhouette is working. Keep in mind while detailing the model that the main shape must always be interesting.
Sign up to Creative Bloq's daily newsletter, which brings you the latest news and inspiration from the worlds of art, design and technology.
04. Adding in the finer details
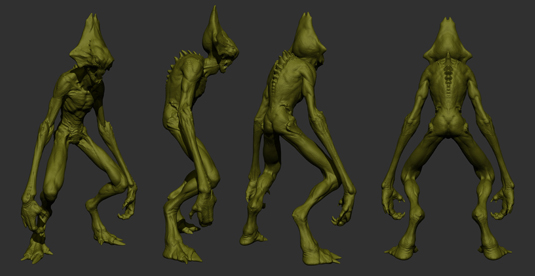
After I have finished modelling, I check the overall proportions and
sizing. Now I can add finer details such as veins, pores and scales. As the model will not be animated, I don’t need to retopologise the mesh, so I just use the mesh that DynaMesh generated.
05. Painting the skin
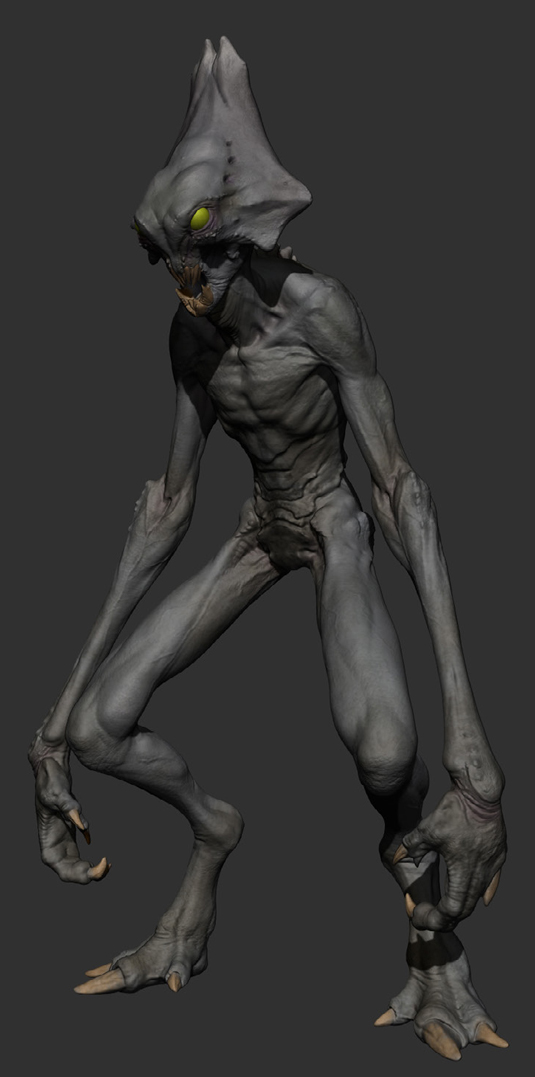
After finishing the model, I searched for some reference of fish and lizards to help me paint it. I thought he might live in an arid environment so he would always be exposed to the sun and his skin would be dark. I paint a basic skin tone in ZBrush so I can roughly define what I want as my final texture.
06. UV the model
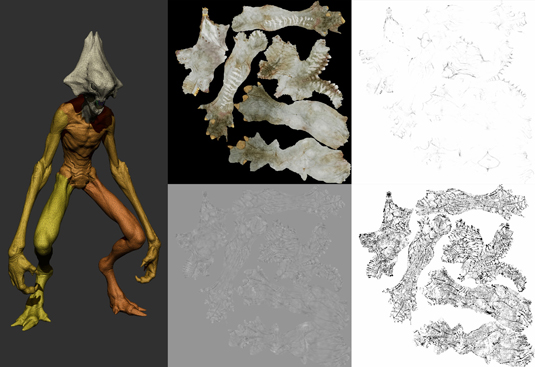
Once I am done with the main colour, I divide the model by polygroups then use the UV Master plug-in to lay out the UVs automatically. From there I generate Displacement, Ambient Occlusion and Cavity maps to add more volume to the painting.
07. Export and combine maps
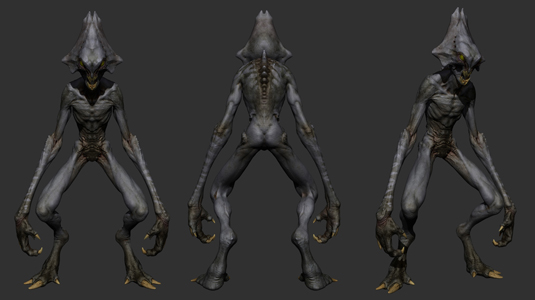
I import these maps into Photoshop, combine them and then do some colour correction. I also overlay a metal texture to add some more detail to the painting. Pictured here is the final painted model - the next step is to work on the pose.
08. Posing the model
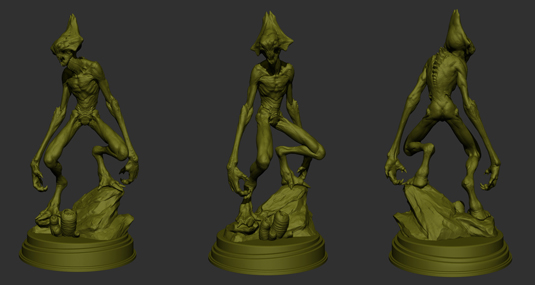
I’m inspired by the poses of collectible figures, so I try to make my model mimic them. The base is composed from a stone and few alien plants that help with the composition.
I use the Transpose Master plug-in in ZBrush and pose the model by putting smooth masks through the joints so that I can move it smoothly. There’s always a need to do some corrections after moving and posing the model. Adding wrinkles to areas of greatest contact, such as joints, will help the illusion.
09. Background modelling
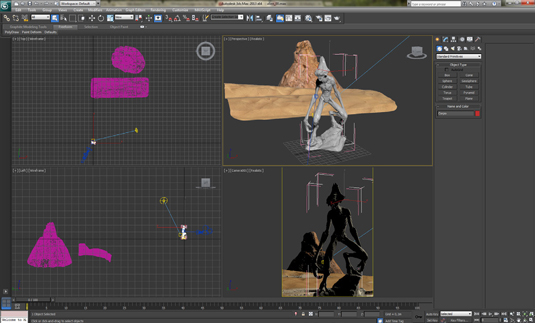
I also like to look at how the silhouette is working. I model some elements of the scenario: the stone, the mountain and the sand layer. All the background modelling is meant to work for the camera only, so I don’t worry too much about detail.
Then I create a decimated version of each object in order to manipulate them in 3ds Max. Once imported into Max, I use VRaySun to light the whole scene. I also add some lights around the alien to make him more distinguished.
10. Create render passes
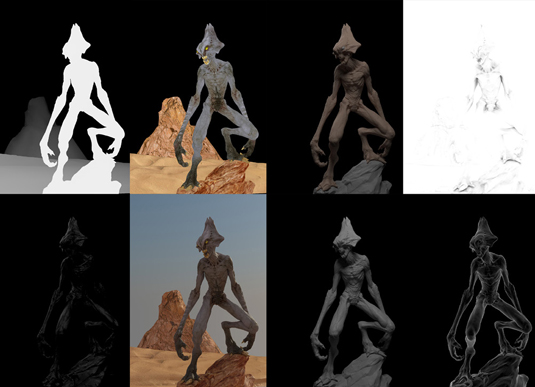
Next I create separate render passes to help me with the composition, by combining Photoshop with blend modes. For example, I create some specular, fall-off and light passes: for these I usually use Screen or Overlay blend mode. For the Shadow and Ambient Occlusion I use Multiply blend mode
11. Final detailing
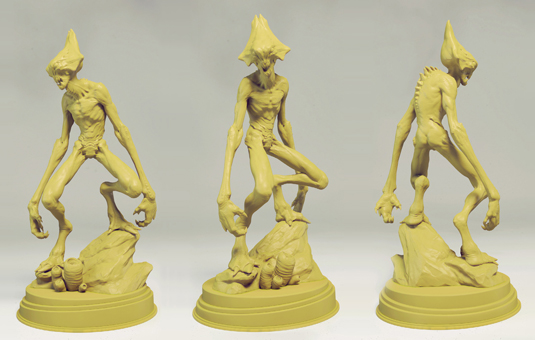
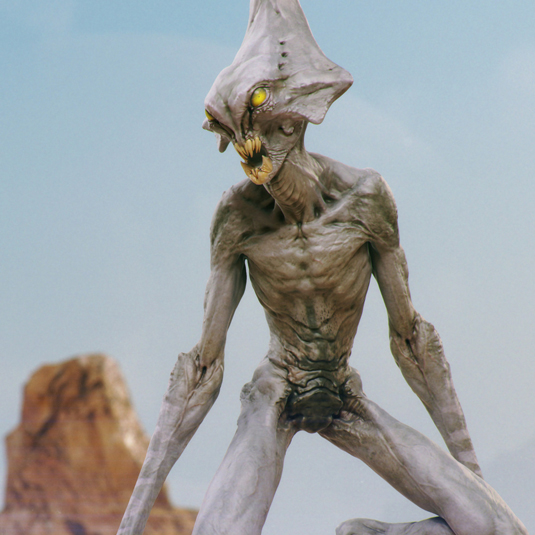
To finish, I then do some colour correction and contrast adjustments, and use a map for the lens blur. For the background, I used an image of the Grand Canyon, and also add smoke particles and dust. This image shows my model with a basic render and lighting setup.
If you compare this with my final image, you can see how those textures and background elements I have added really bring my alien to life
Caio César is a freelance artist from Brazil, specialising in characters, high-poly modelling and sculptures. Caio originally created this alien tutorial for 3DTotal.
This article originally appeared in 3D World issue 175.
Liked this? Read these!
- ZBrush tutorials: ways to paint and sculpt in 3D
- Top free 3D models
- Best 3D movies of 2013

The Creative Bloq team is made up of a group of art and design enthusiasts, and has changed and evolved since Creative Bloq began back in 2012. The current website team consists of eight full-time members of staff: Editor Georgia Coggan, Deputy Editor Rosie Hilder, Ecommerce Editor Beren Neale, Senior News Editor Daniel Piper, Editor, Digital Art and 3D Ian Dean, Tech Reviews Editor Erlingur Einarsson, Ecommerce Writer Beth Nicholls and Staff Writer Natalie Fear, as well as a roster of freelancers from around the world. The ImagineFX magazine team also pitch in, ensuring that content from leading digital art publication ImagineFX is represented on Creative Bloq.
