How to paint retro game characters
Remko Troost's tips for creating video game characters from the fabulous, taste-free world of the '80s.
Daily design news, reviews, how-tos and more, as picked by the editors.
You are now subscribed
Your newsletter sign-up was successful
Want to add more newsletters?

Five times a week
CreativeBloq
Your daily dose of creative inspiration: unmissable art, design and tech news, reviews, expert commentary and buying advice.

Once a week
By Design
The design newsletter from Creative Bloq, bringing you the latest news and inspiration from the worlds of graphic design, branding, typography and more.

Once a week
State of the Art
Our digital art newsletter is your go-to source for the latest news, trends, and inspiration from the worlds of art, illustration, 3D modelling, game design, animation, and beyond.

Seasonal (around events)
Brand Impact Awards
Make an impression. Sign up to learn more about this prestigious award scheme, which celebrates the best of branding.
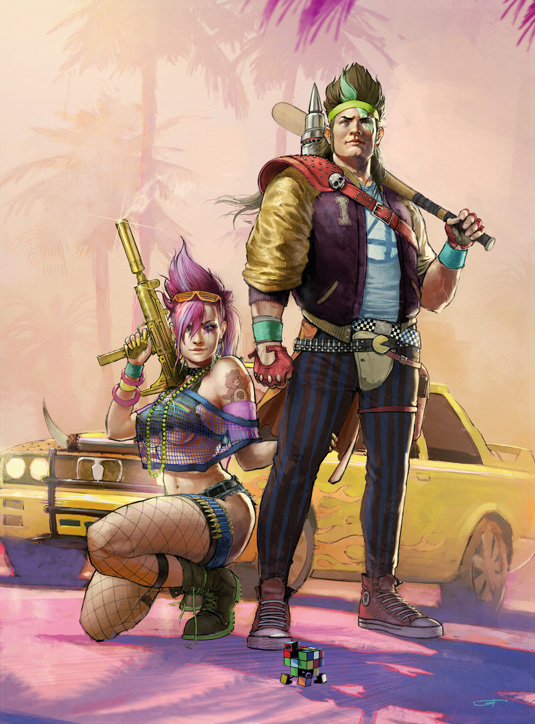
When designing a character for a video game, it's not just about painting some cool-looking dude. A lot of things have to be considered before settling on their final look, and changes are often made while the title is in development. Possible reasons can include a new take on the scenario, animation conflicts or parts of the game being cut.
You'll have to deal with all of these situations as a concept artist. Your job is to adapt, learn, react, interact and find visual solutions for not only a character's appearance, but also their animation cycles, attitude and so on. Concept art is a language through which you express your ideas – and the more fluent you are, the clearer things will be for your colleagues who are modelling, animating and giving life to the characters you've created.
Your knowledge about the universe that the characters inhabit is key
I think it's not just about drawing or painting skills, but also about imagination and creativity, visual problem solving and understanding the needs of the production environment. Your knowledge about the universe that the characters inhabit is key.
Watch the full tutorial
For this workshop I'll share some tips on developing concept art for video games by creating two characters who are straight out of the 80s. I'll try to explain a few things about the character development process, key parts of the creative process and what mediums I use. Okay girls and boys, let's rock!
01. Research and development
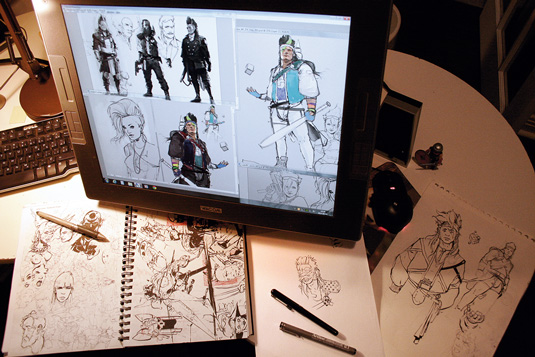
Concept art is a language through which ideas are explored and the artist's creativity is expressed. Indeed, channelling your imagination and creativity are as important as your drawing and painting skills.
Drawing, painting, sculpting… when trying to develop a new idea it's not important how you do it. You're solving a problem visually, and so the key to getting the right answers is to ensure your idea is easily understood by the viewer.
02. The medium
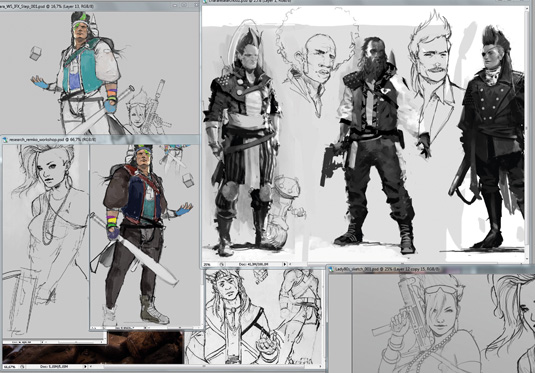
I like to use different mediums when creating a new character. Each medium has its own characteristic and forces you to approach your subject in a different way, which in turn can lead to new ideas.
Daily design news, reviews, how-tos and more, as picked by the editors.
Having said this, sometimes ideas can pop into my head when I'm not at my drawing table: on my way home from work, out while having a drink, walking in the park, listening to music, or observing people and my surroundings. When I'm back at my desk I'll get my ideas into Photoshop as soon as possible.
03. Pen and paper
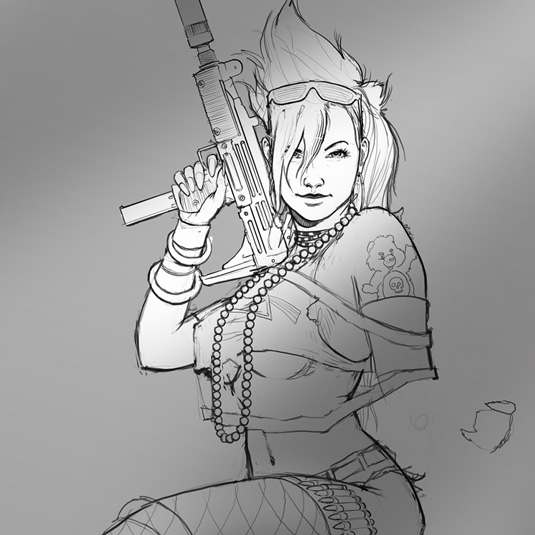
For my retro characters I start with paper and pencil, or rather a Pentel FP10. I like the line work approach because you're talking shapes and forms directly. Once I find an idea that I think will work, I'll do some more sketches in Photoshop.
From now on I'll keep the creative process in Photoshop, which makes it easy to carry out tweaks and edits to my concepts.
04. First values
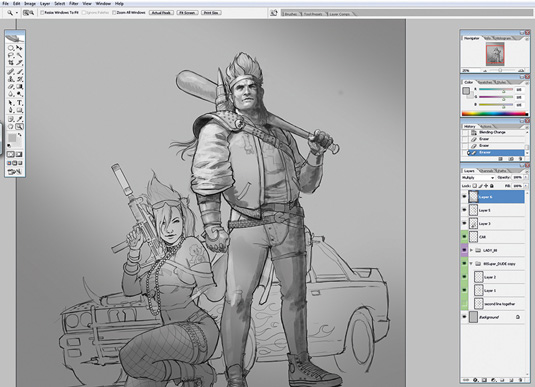
Now let's go back to the '80s! Although I'm a product of that era myself, I do some research. I like tracking down my references, but prefer to not have them beside when I start drawing, so I can develop my own ideas. Once my characters are blocked in I start painting in black and white, which enables me to focus on volume, values, light, shadows and bounce light.
05. Folded cloth
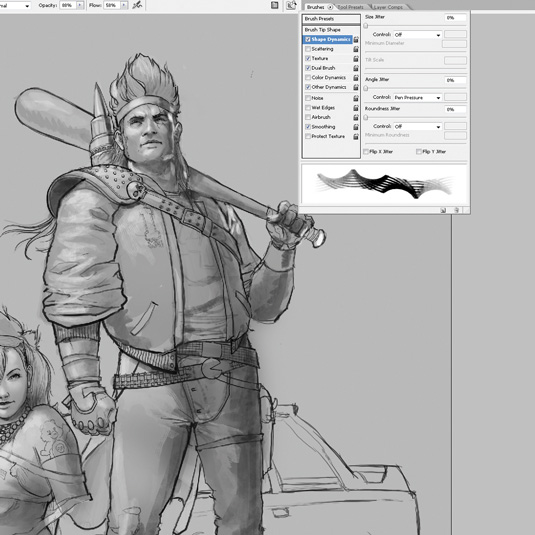
Here's my little trick for depicting folded cloth. I create a flat or rack brush first with some texture in it to make it look less digital, and in the Natural Brush Media window on the shape Dynamics tab I set Angle Jitter to Pen Pressure.
This makes my brush react a little strangely and it takes a while to get used to, but it does help me paint cloth realistically.
06. First colours
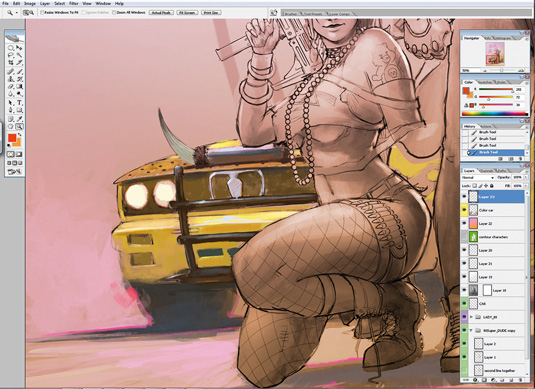
I place a new Overlay, Multiply or Hard Light layer above my art and start painting in colour. Sometimes I select the area I want to colour using the Lasso tool, copy it on to a new layer and try different colours using the Hue/Saturation tool.
I often start colouring the background because this will determine the colours of my bounce lights and shadows in the foreground.
07. A flattened canvas
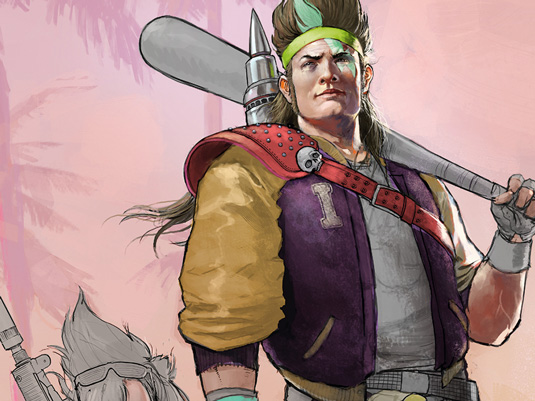
I like to use layers for organising my work, but prefer to drop all my layers once I'm happy with my progress and simply paint on a flat canvas.
It feels a lot closer to painting traditionally, because I become more impulsive and instinctive in my approach. If changes or corrections are needed then I'll do them directly on the canvas using the Lasso or Pen tool.
Next page: the remaining tips…

The Creative Bloq team is made up of a group of art and design enthusiasts, and has changed and evolved since Creative Bloq began back in 2012. The current website team consists of eight full-time members of staff: Editor Georgia Coggan, Deputy Editor Rosie Hilder, Ecommerce Editor Beren Neale, Senior News Editor Daniel Piper, Editor, Digital Art and 3D Ian Dean, Tech Reviews Editor Erlingur Einarsson, Ecommerce Writer Beth Nicholls and Staff Writer Natalie Fear, as well as a roster of freelancers from around the world. The ImagineFX magazine team also pitch in, ensuring that content from leading digital art publication ImagineFX is represented on Creative Bloq.
