How to combine 3D and comic art in ZBrush
Capture a cel-shaded comic aesthetic using ZBrush and VR.
Sign up to Creative Bloq's daily newsletter, which brings you the latest news and inspiration from the worlds of art, design and technology.
You are now subscribed
Your newsletter sign-up was successful
Want to add more newsletters?
3D specialist Glen Southern will be joining us on 8 March at Vertex – the ultimate event for 3D and 2D artists. He'll share some insights into the evolution of VR creation tools and prove just how useful they can be by rapidly building high-quality creatures and environments in Oculus Medium.
Find out more about Vertex speakers or sign up for a free Vertex pass here.
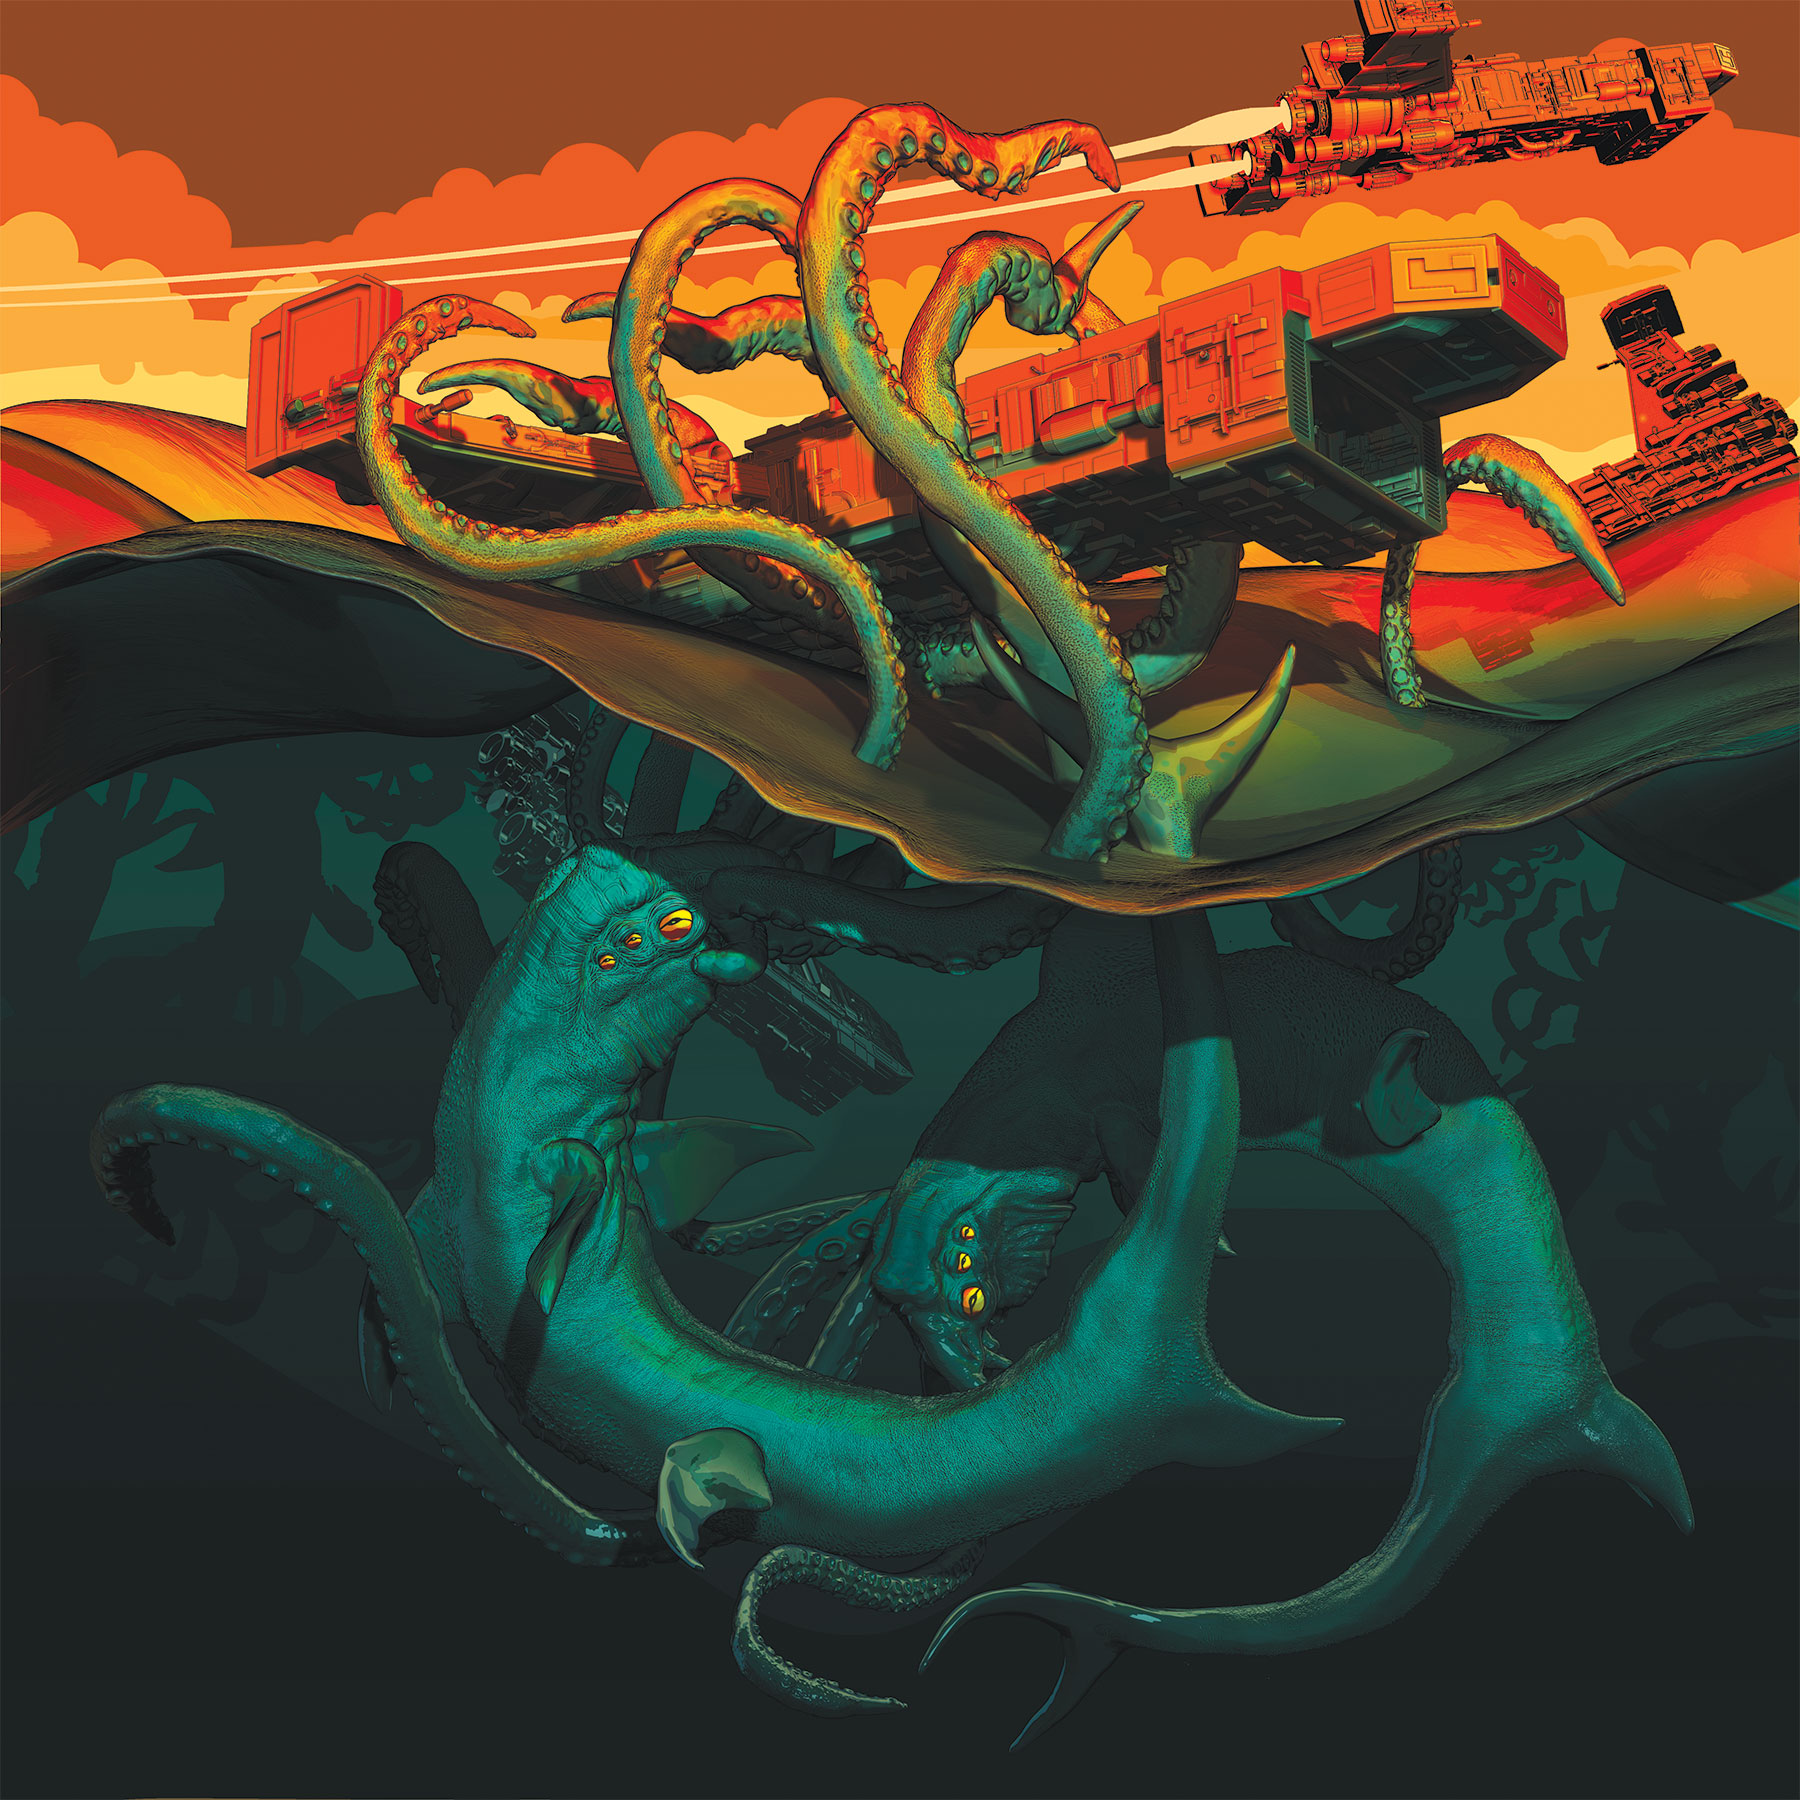
The planet Varsi Prime has vast oceans teeming with life. We’ve been using this fictional planet to do creature design workshops for years now. What better story to tell in comic panels than how a survey team was brought down by giant squid-like creatures as they surveyed the planet?
Article continues below3D models have been used in comic work for years now. This tutorial gives a little introduction on how to create basic 3D models in either VR (Oculus Medium) or inside ZBrush and then render them in a cel-shader style to create unique 3D art. Below is our final design.
I often start my design process inside a VR headset these days. I can block out a creature or vehicle design in no time at all, and even if it is very rough looking, I can work out lots of design problems before committing any real time to detailed modelling.
I will work through how to create the whole scene in VR, how to use that inside ZBrush as a guide, how to make a low-polygon ship with ZModeler and then sculpt the main squid creature. At the end, I will explore how to create materials that render out your creations as cel-shaded, comic-style pages. If you want to push your skills further, take a look at our roundup of great ZBrush tutorials.
Click the icon in the top right of each image to enlarge it
Sign up to Creative Bloq's daily newsletter, which brings you the latest news and inspiration from the worlds of art, design and technology.
01. Find the story behind the project
This project and accompanying cover is about telling a story using a comic-style render in ZBrush. I find that it really helps to establish the story that is driving the action in the scene before you even start to build any models. I wanted to do a comic panel that had a survey team spaceship (or fleet!) being destroyed by large sea creatures. I love showing split-screen images in my work, half underwater, half above the waves, and this was a great opportunity to try that on a bigger scale.
02. Draft up an idea
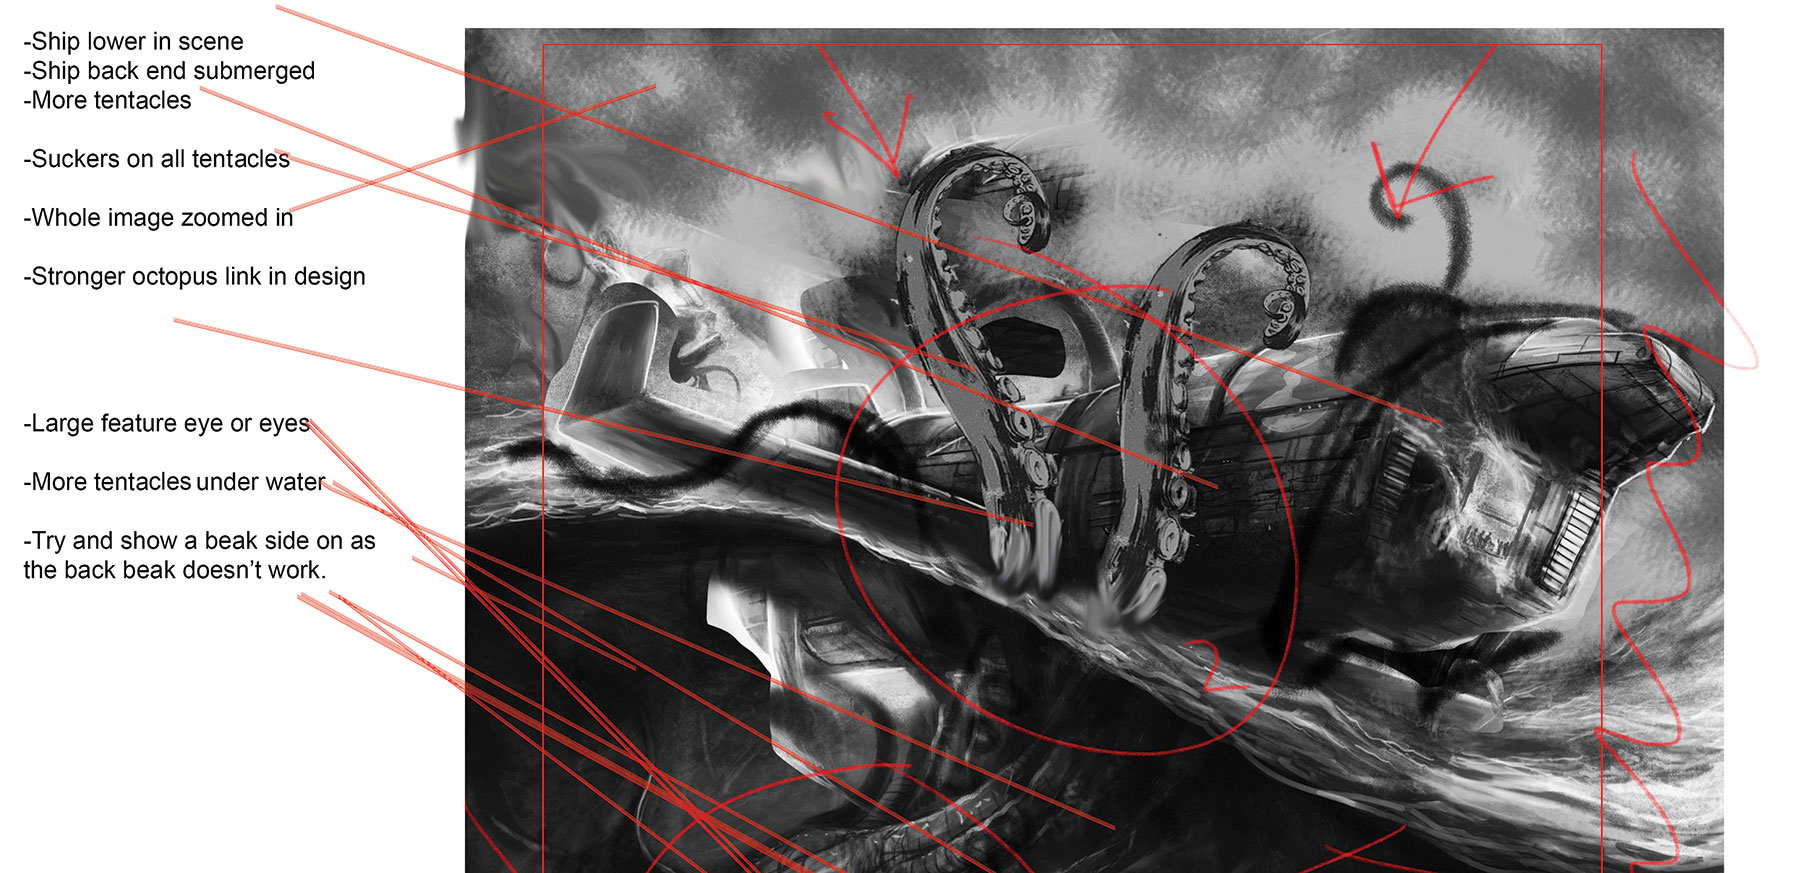
Sometimes I do go straight into concept modelling to get my ideas out, but very often I will sit and sketch either with Photoshop and my Wacom, with the iPad and Procreate, or more often than not just in a notebook. For this panel idea, I wanted the foreground to be dominated by a large squid-like alien grabbing a spaceship as it skimmed over the surface of the sea. I put the feature area in the bottom left and top right, which is where the eyes of the squid and the front of the ship are located.
03. Use VR to sketch out the plan
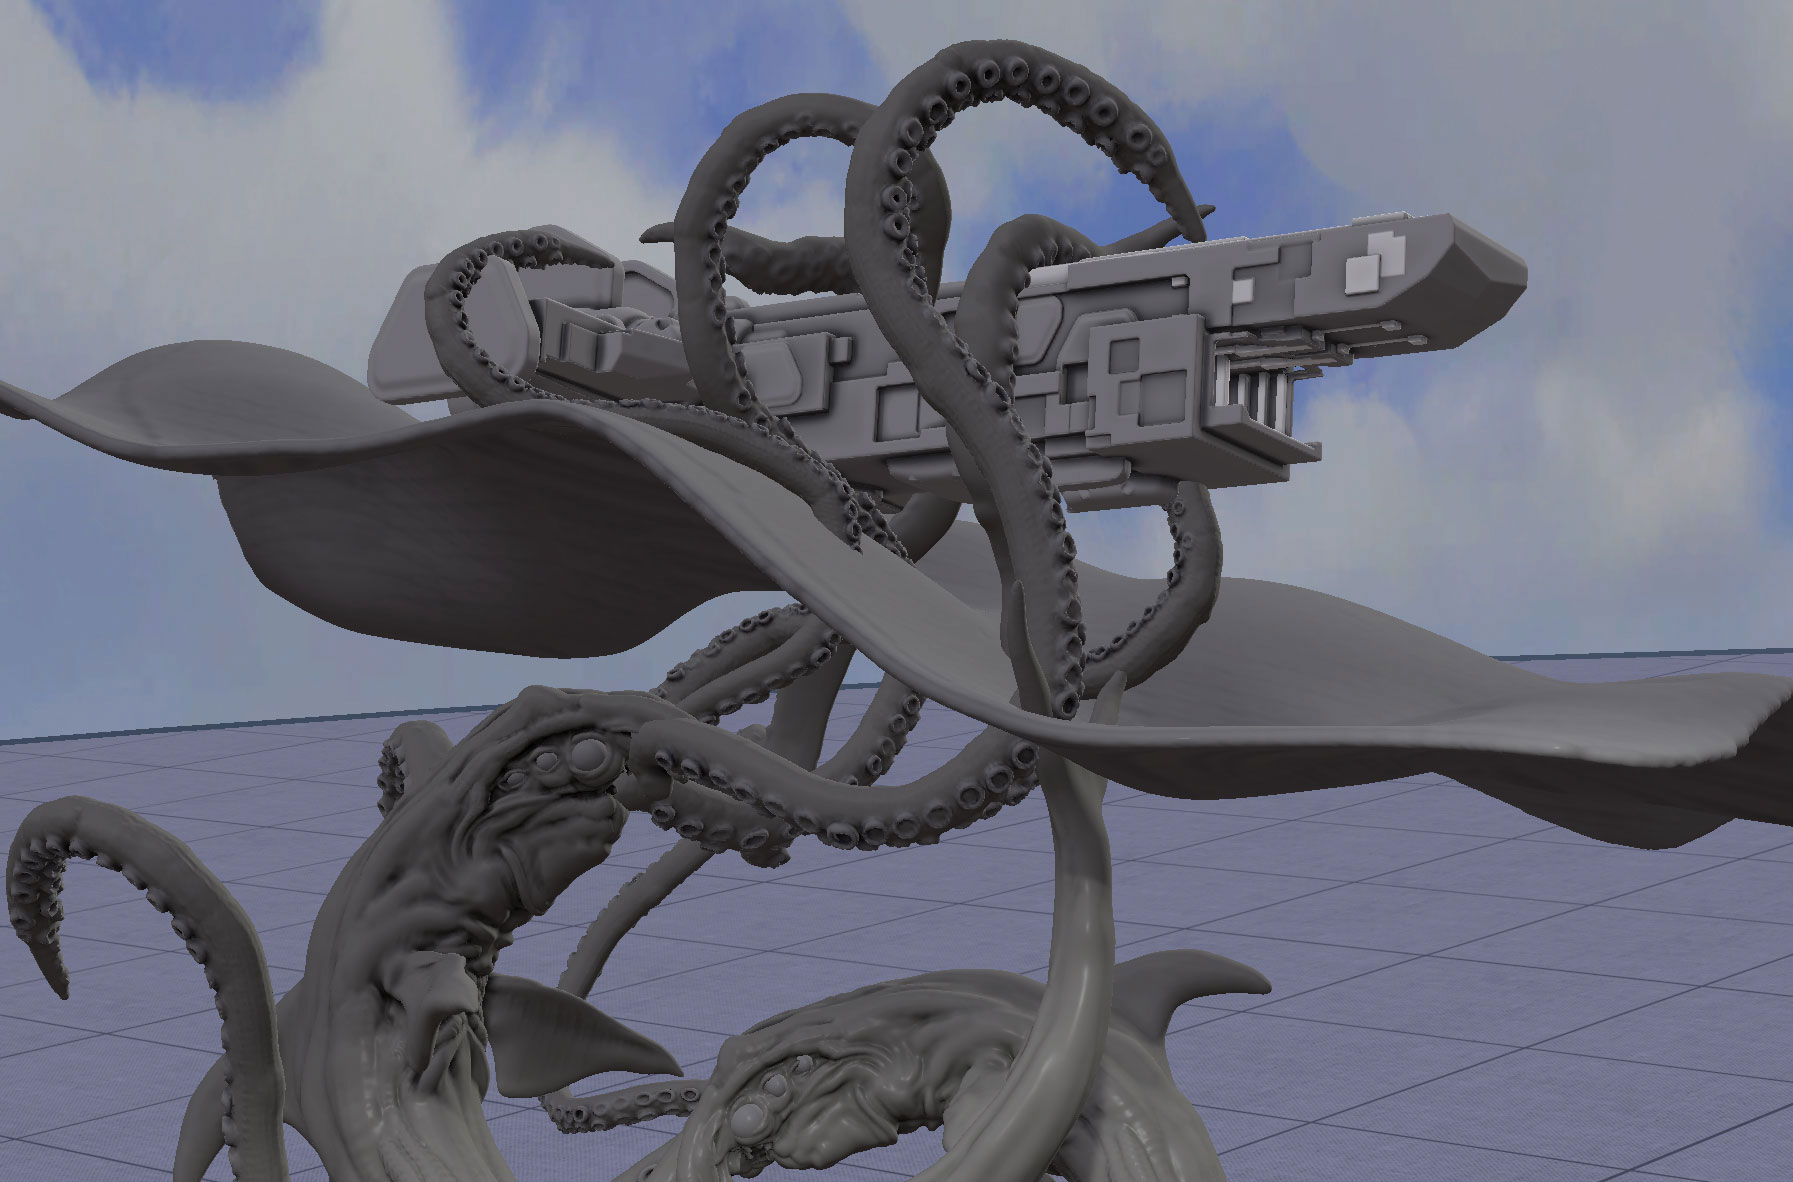
More and more now I am using VR in my design workflow. If you wish to follow along and you have an Oculus Rift, download Oculus Medium, which is a Voxel-based sculpting program. Use the basic tools to block out the whole scene before we ever get to ZBrush. This is one of the faster ways I know to create a whole scene in a really short amount of time and answer lots of layout and scale questions.
04. Move into ZBrush
One of the great things about Oculus Medium is that it can export out your models and any paint work you have done into a number of usable formats. As we want to use the models as a reference in ZBrush, we can use the FBX or OBJ formats.
Use the File > Export function in Medium to send the models out as described. In ZBrush, the OBJ import is in the Tool panel and the FBX import can be found in the ZPlugin panel. The models come in as separate SubTools as they are laid out in Medium.
05. Lay out the scene in sections
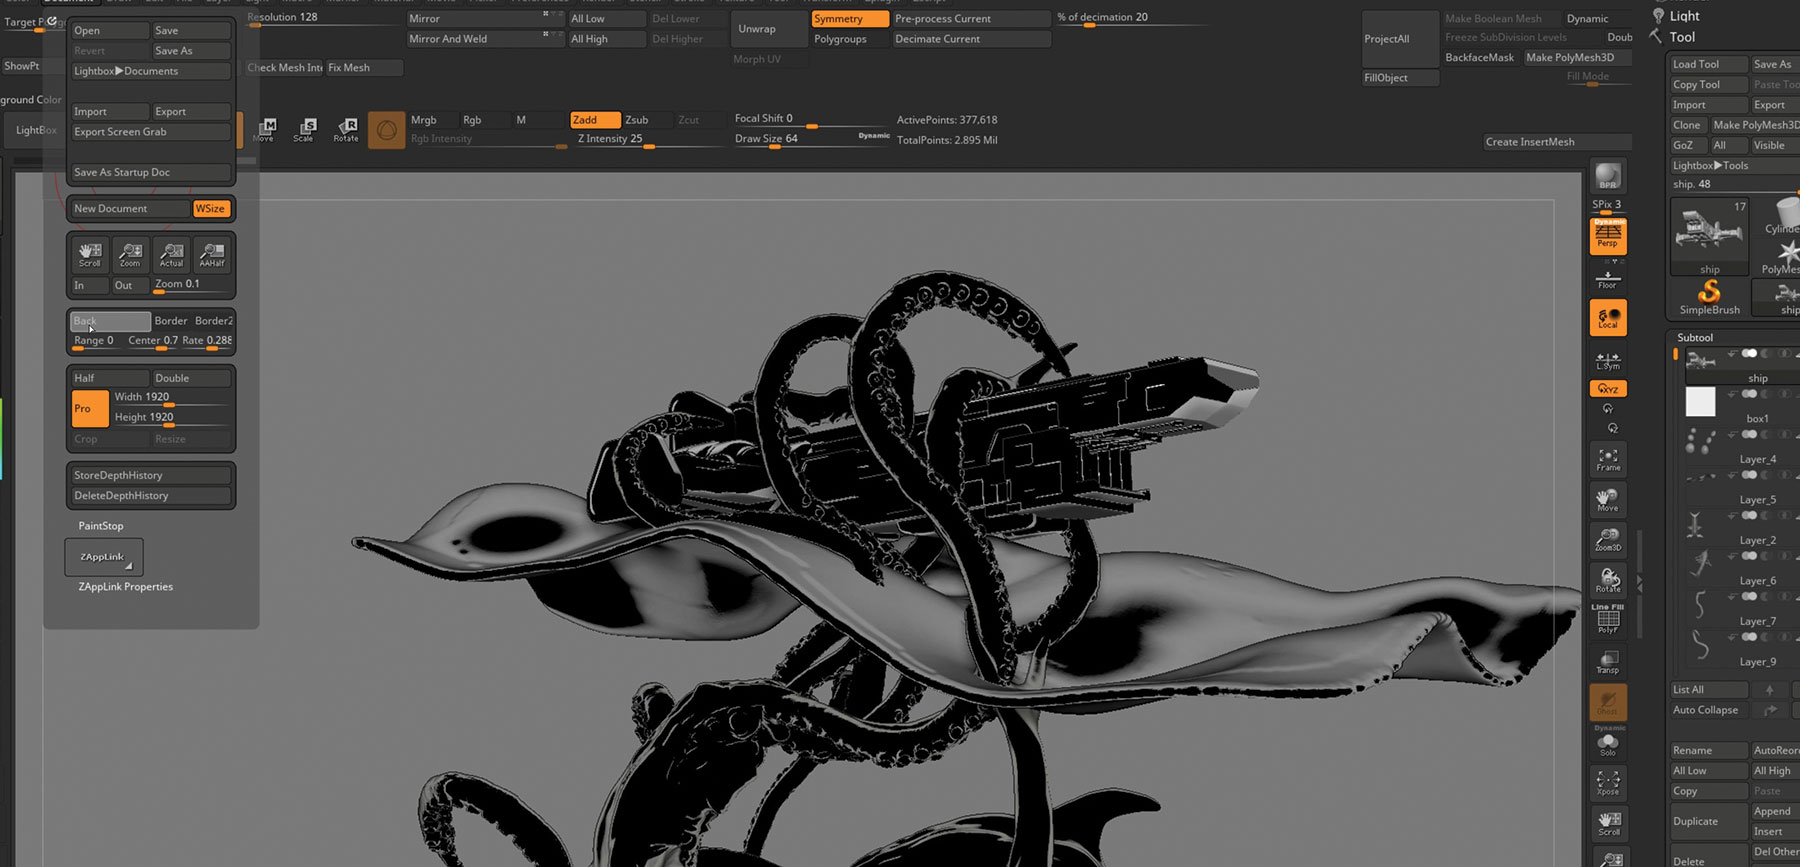
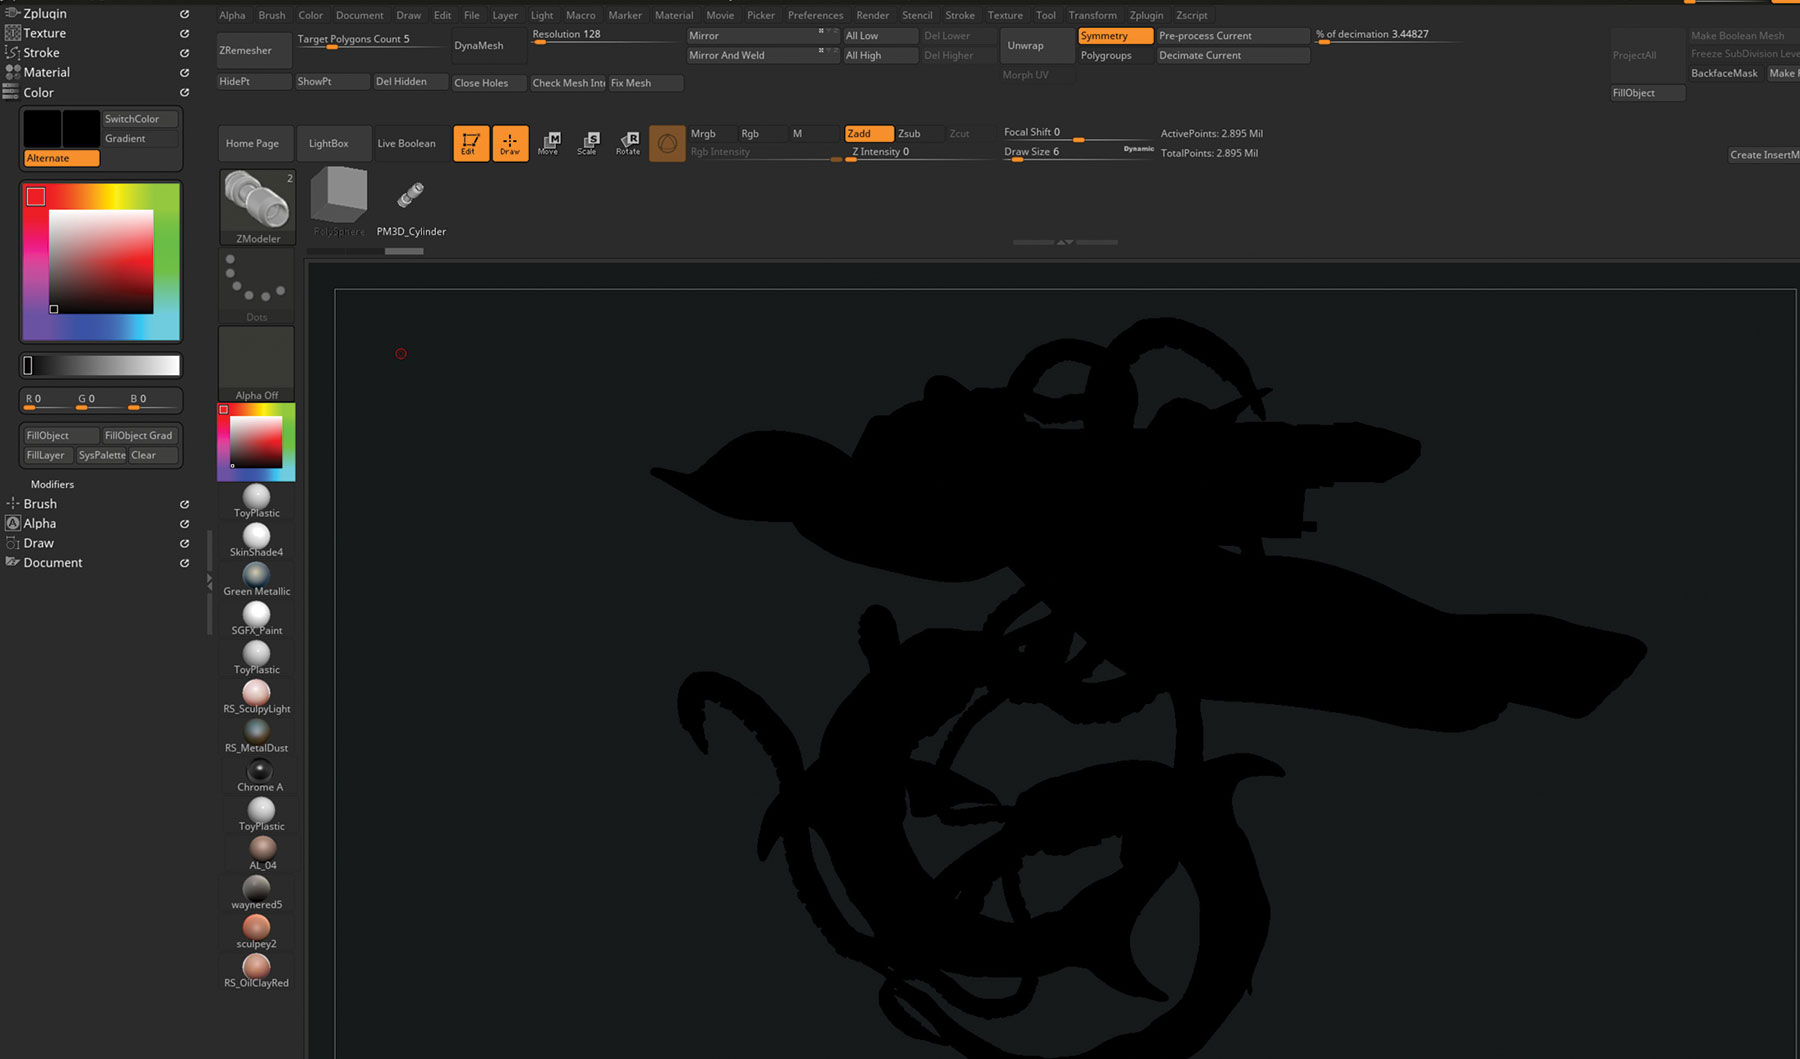
Break the scene down into sections. Start with the ship, then the body, and then onto the tentacles and finally the waves. As we have a rough model to work with it is easy to remake or edit the individual section and then replace that SubTool with the new one (if you didn’t do the VR section, just use the 2D reference as a guide). Switch to a black colour in ZBrush and see what the layout looks like with a flat material. Next, build the ship from scratch.
06. Start on the ship
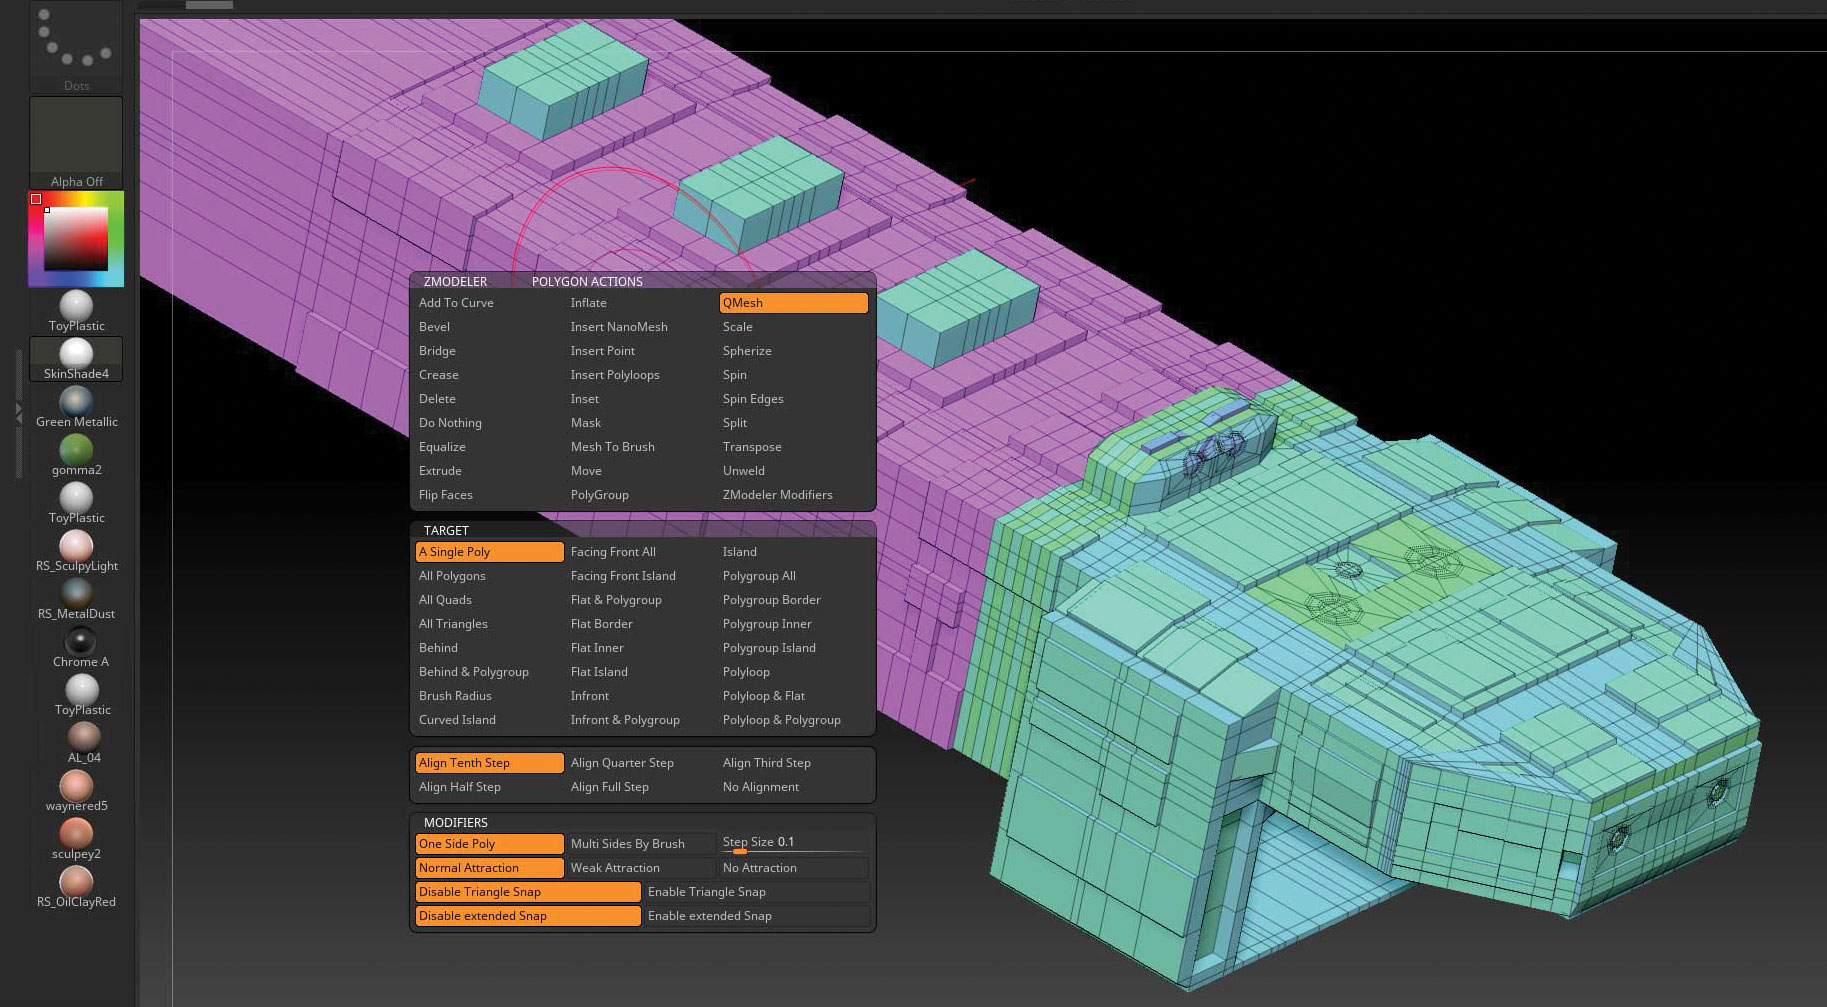
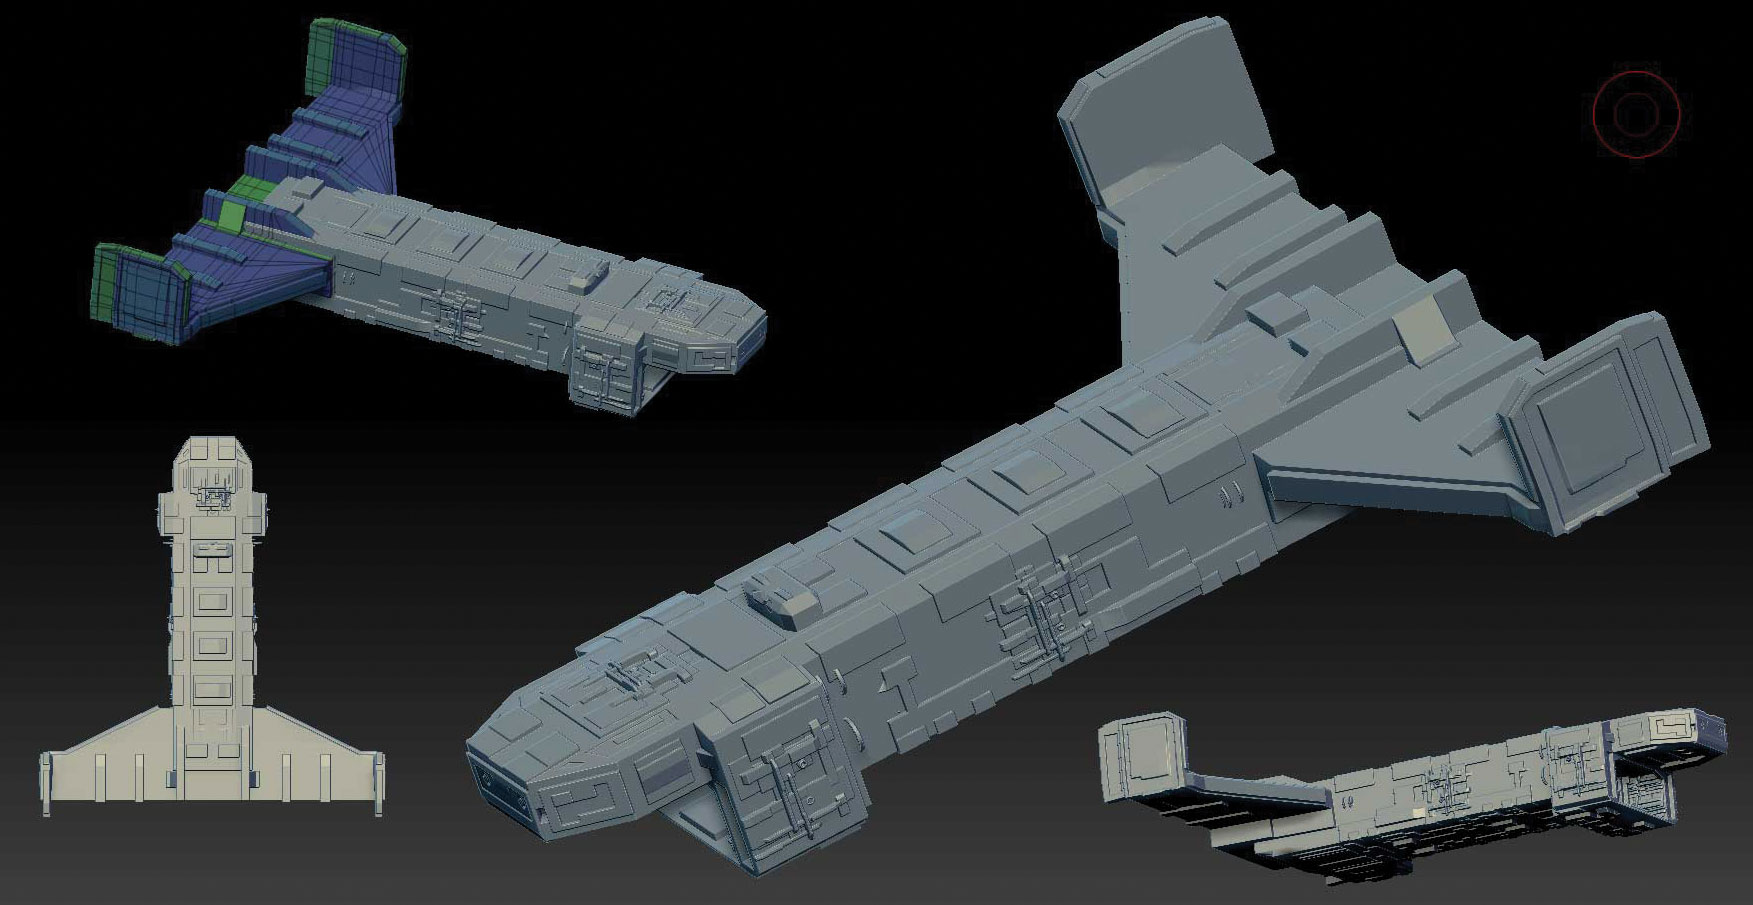
The ship is best built using the ZModeler brush (BZM on the keyboard). This is a great low-polygon modelling tool and it makes it easy to create hard-edged models with some speed. You can start with any shape and use MakePolymesh3D in the Tool panel. Then look for Initialize and hit QCube. Hit X to use symmetry. With B, Z, M keystrokes you are using the ZModeler brush.
The core tool we will use is the QMesh feature to pull out new shapes polygon by polygon. You can use the Alt key to make temporary selections.
07. Use ZModeler to create the core model
It is worth spending the time to learn all the ZModeler tools (head to Pixologic's ZClassroom for free tutorials). Add detail using the three modes (Faces, Edges and Points) based on what you are hovering over when you press the spacebar. The main actions you will use are QMesh, insert line (edges) and Split (points). These three actions will get you most of the detail you need for the core of the model. Keep adding detail to the body.
08. Block out the body
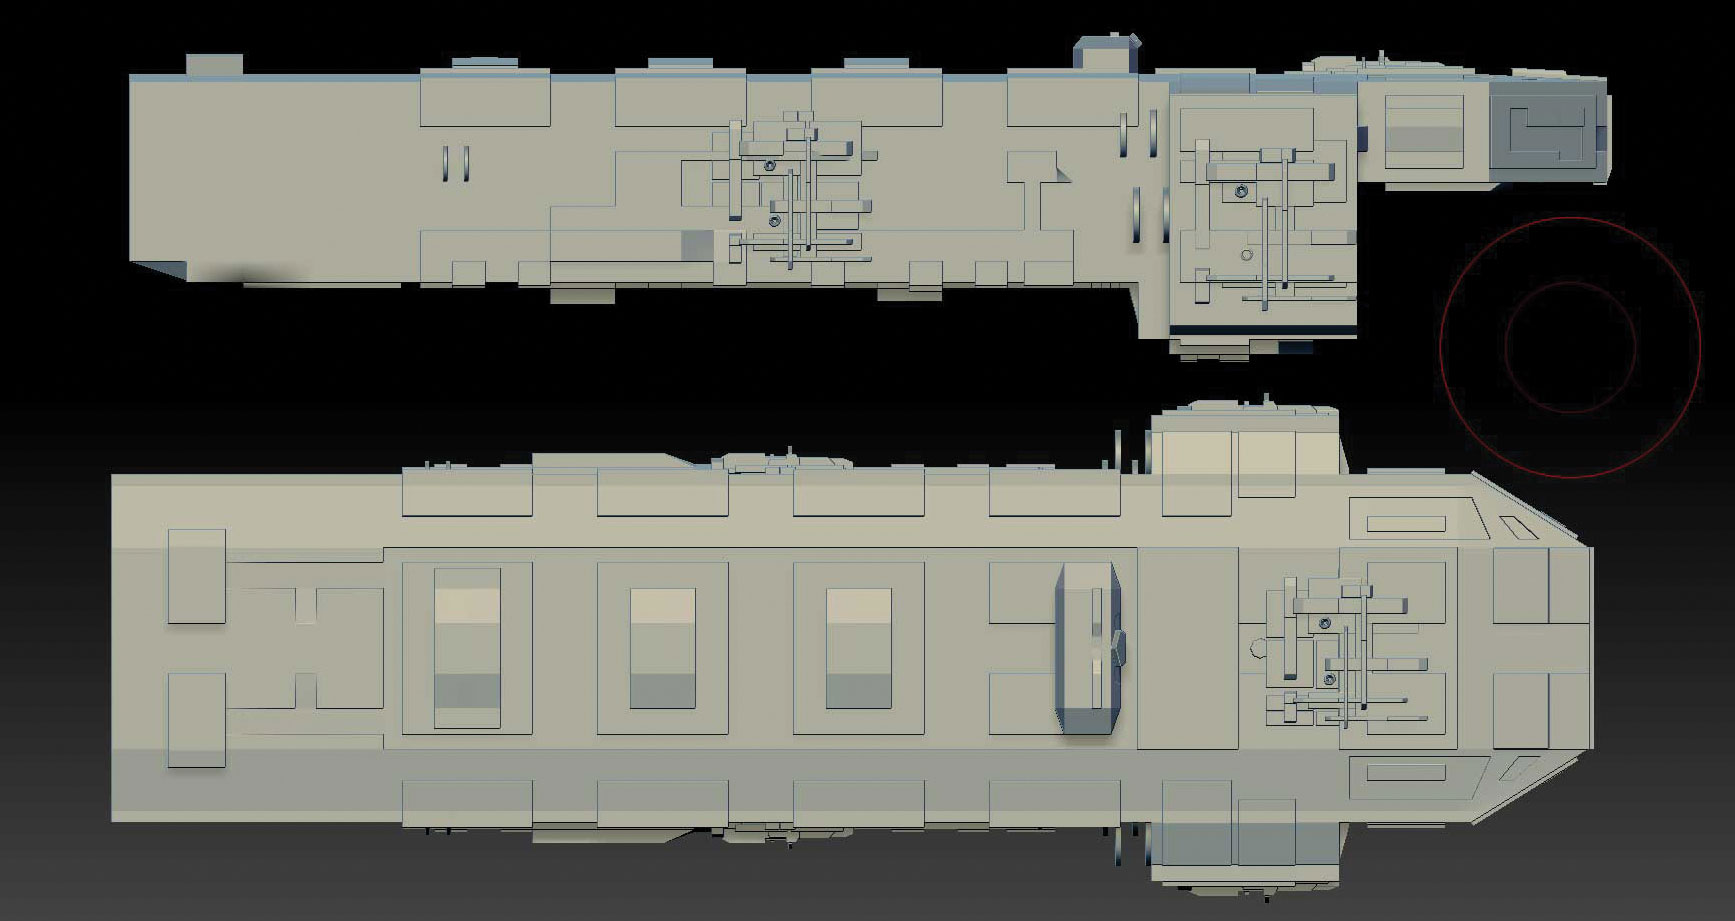
The idea with this kind of modelling is to add visual interest and make an interesting shape rather than creating a perfect model. With the type of render we are going to use we need to add lots of surface detail (aka greeble). Work on the panelling, windows, vents, fins, towers etc, anything that will give some detail when we render it without getting too complex.
With QMesh you can pull out slanted surfaces in steps. There are lots of different settings to play with in ZModeler if you want to spend time on this sort of detail.
09. Block out the wings
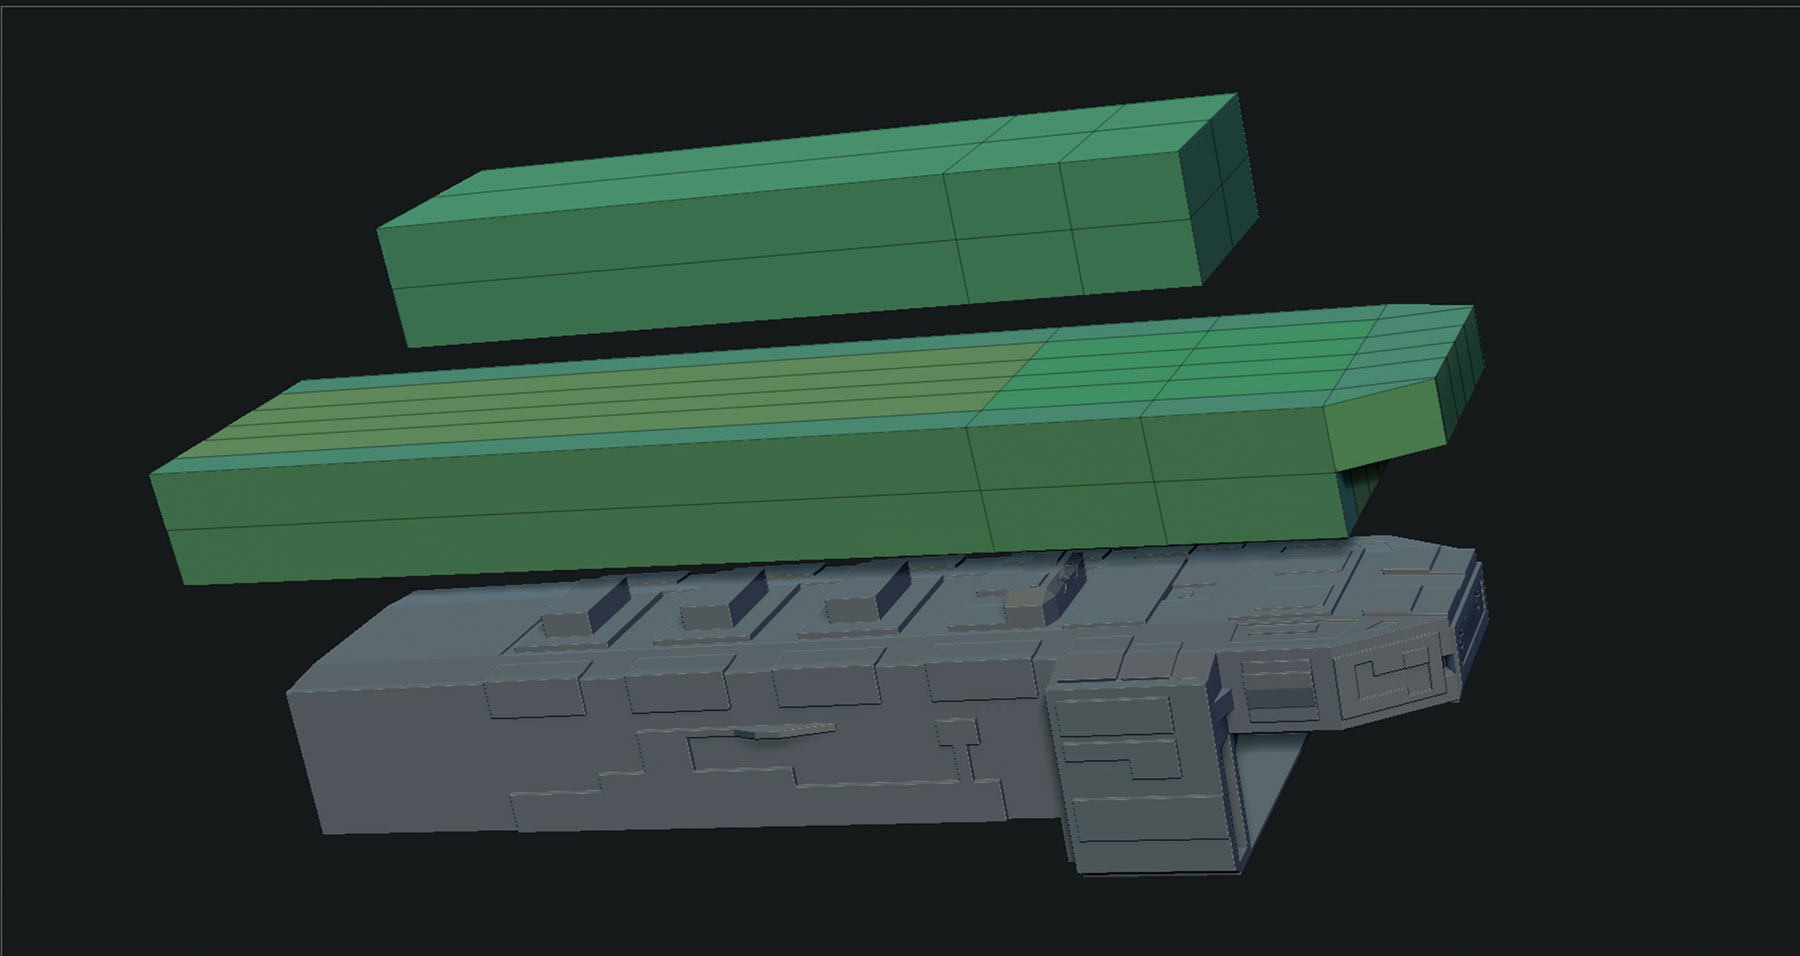
Start another QCube as a new model in the Tool panel: Tool > Initialise > QCube. Append that into the Ship ZTool as a new SubTool. Using the same ZModeler tools, shape the wing as per the reference or your VR layout model. Look at the model from all angles and get a really strong outline worked out.
Put some vertical fins in using the QMesh action and then add detail to those uprights. You can have as many additional SubTools as you like to make this ship; we are going to be keeping it very low polygon to give us nice, crisp, comic-style shapes.
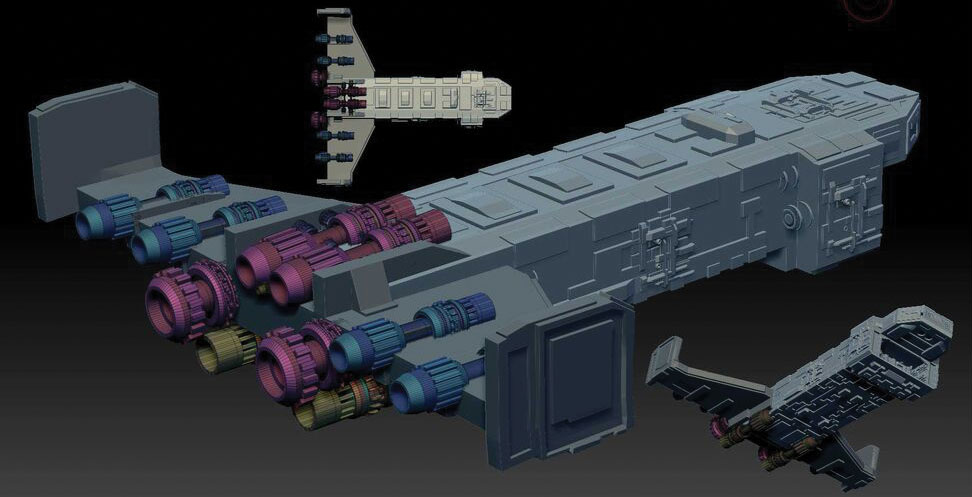
10. Create the engines and jets
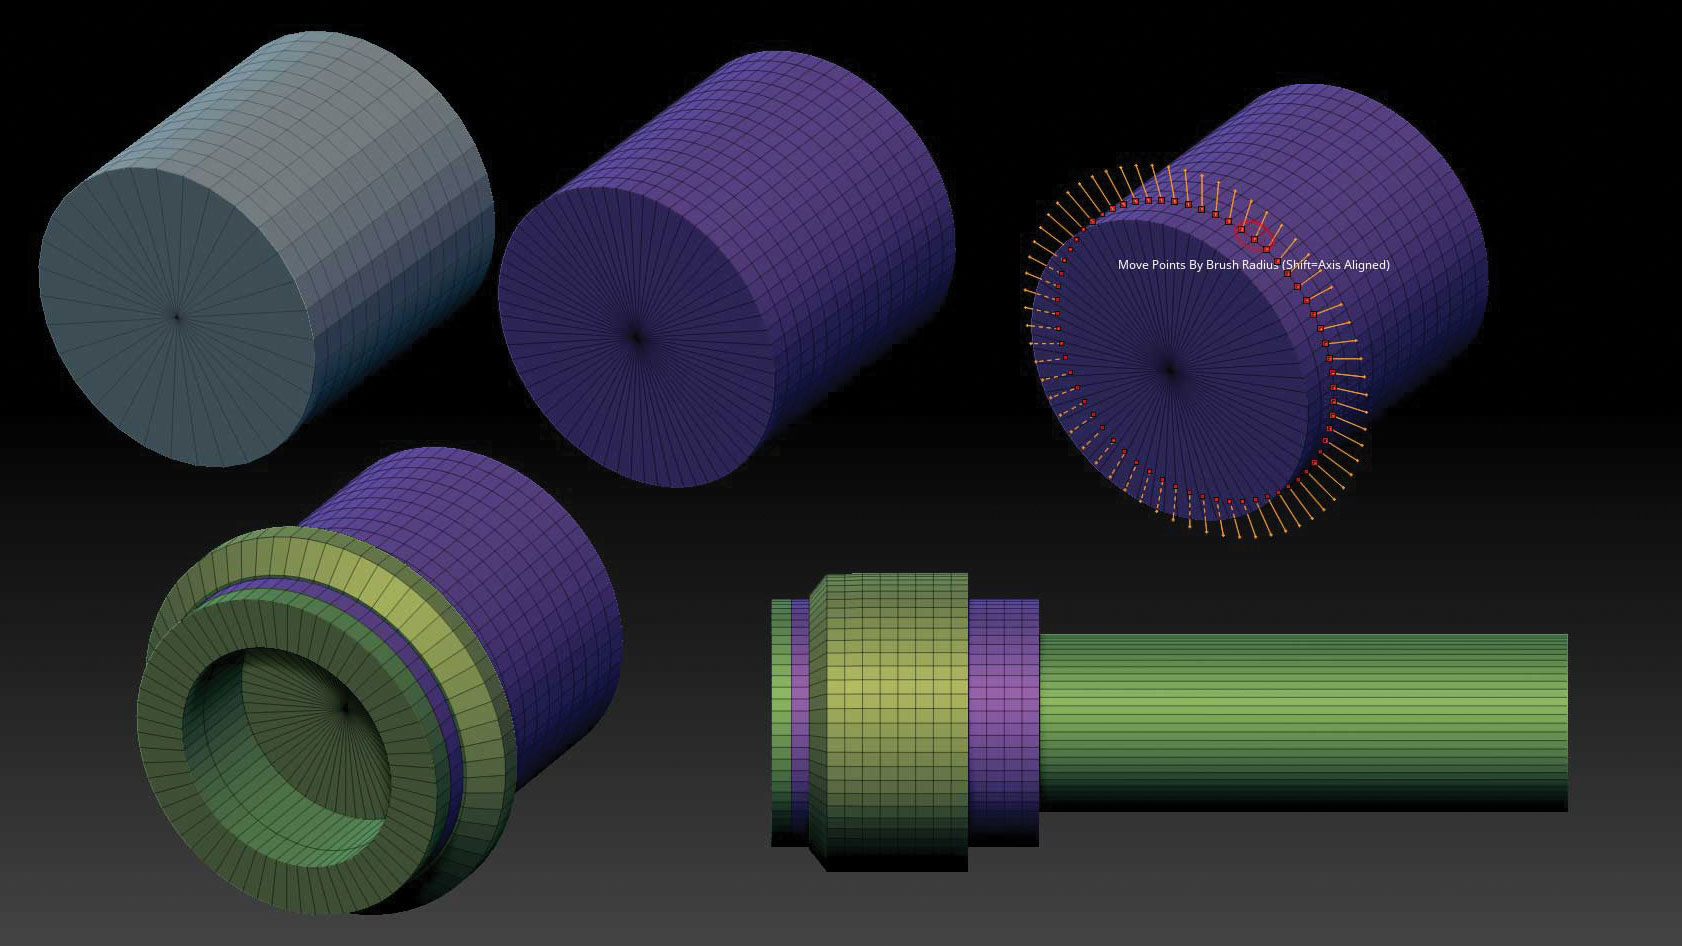
To make the jets and more cylindrical parts use a Cylinder3D from the Tool panel. In the Initialize panel set the HDivide to 64, which will give you a detailed cylinder. Use MakePolymesh3D to make that editable. Turn on symmetry with settings of Radial (Little R), 64, on Y. Now you can go to ZModeler (B, Z, M) and edit the cylinders like a lathe with all the same tools as before. This method will be used whenever we need pipes, jets, tubes etc. Make a few engines and append them into the main ZTool.
11. Add visual interest
Keep in mind that we want to make a pleasing image rather than an accurate model. A lot of the model will be in darkness, and as it is like a comic that will be a solid colour. Break those areas up with something visually eye-catching. Add jets and weapons when you think they will catch the viewer's eye or make the silhouette more appealing. Try to add different-sized engines and layer them onto each other. Remember to look from all angles and especially from the angle that we want to render from.
12. Greeble using Insert mesh brush
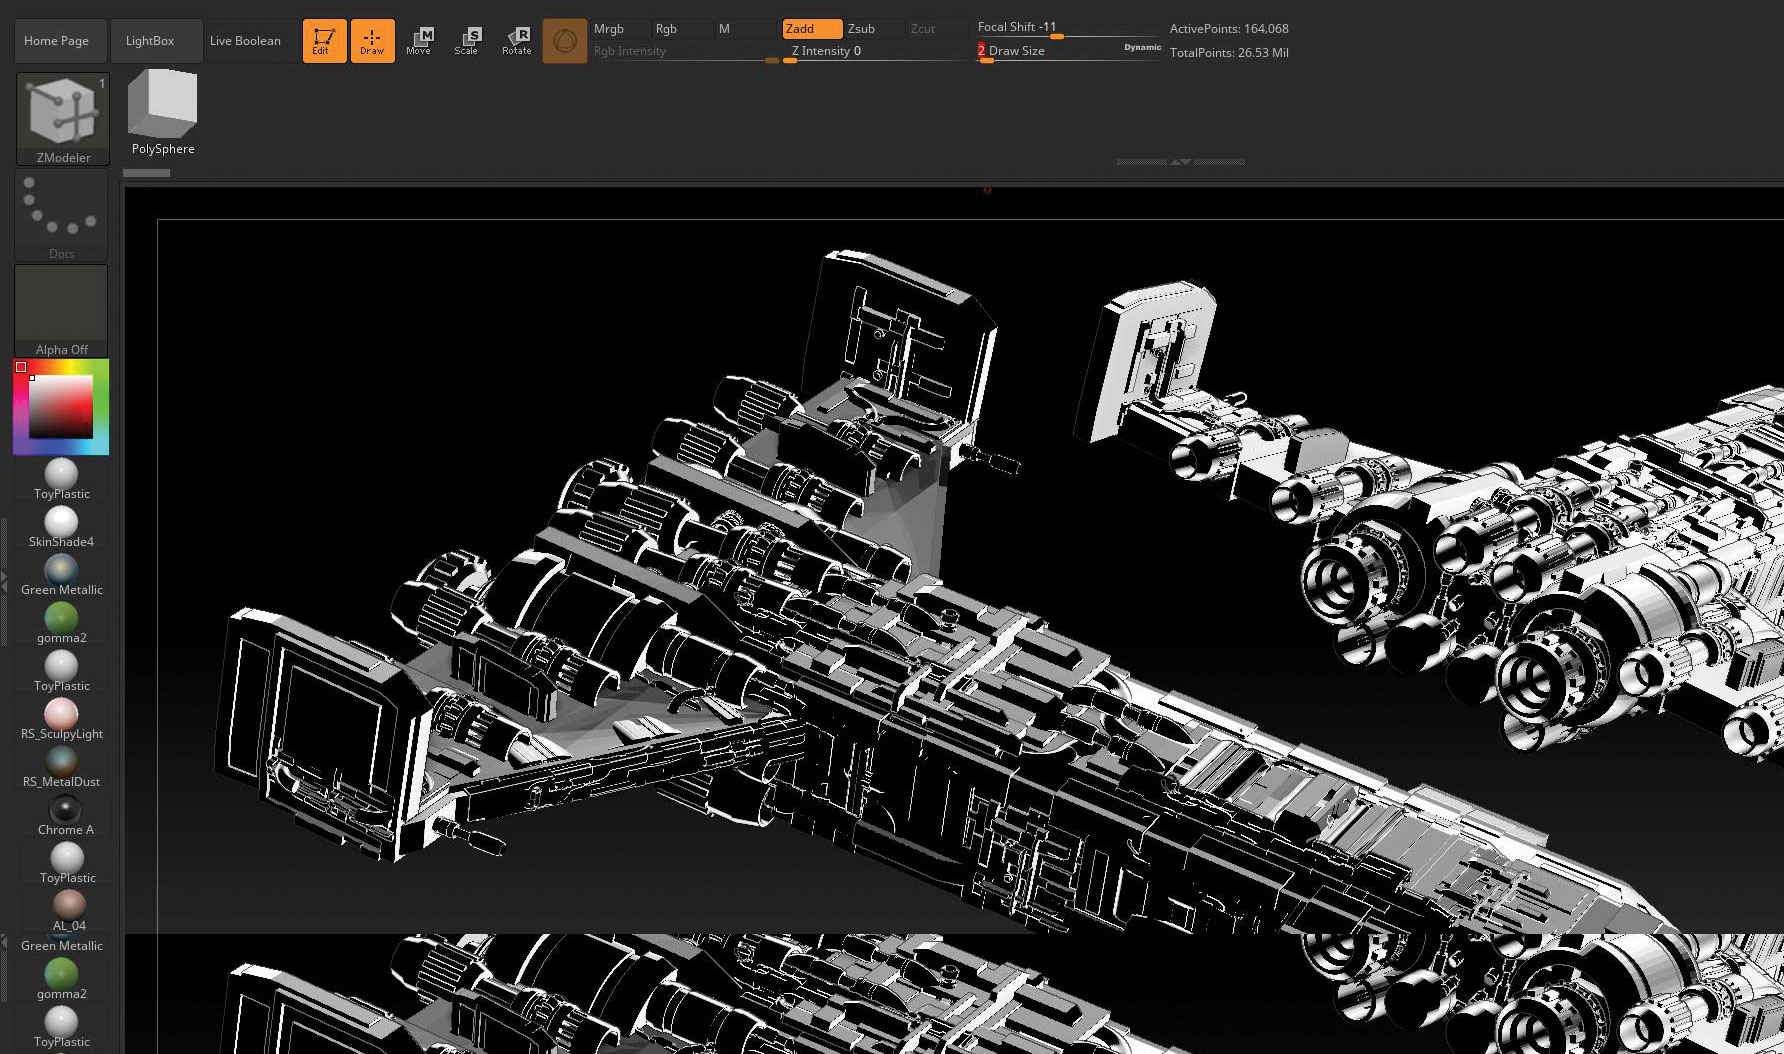
Any little ZTools you make can be added to an Insert Mesh brush and used to add more detail. For example, make another cylinder item. Go to Brush > Create > CreateInsertMesh. Do it again with another one but use Append rather than New.
If you hit M now you will see you have made a little set of greeble items. You can now add these to your model as needed. Go to Material and select the Outline material to see how the ship is looking in a basic comic style.
13. Make the alien’s main body
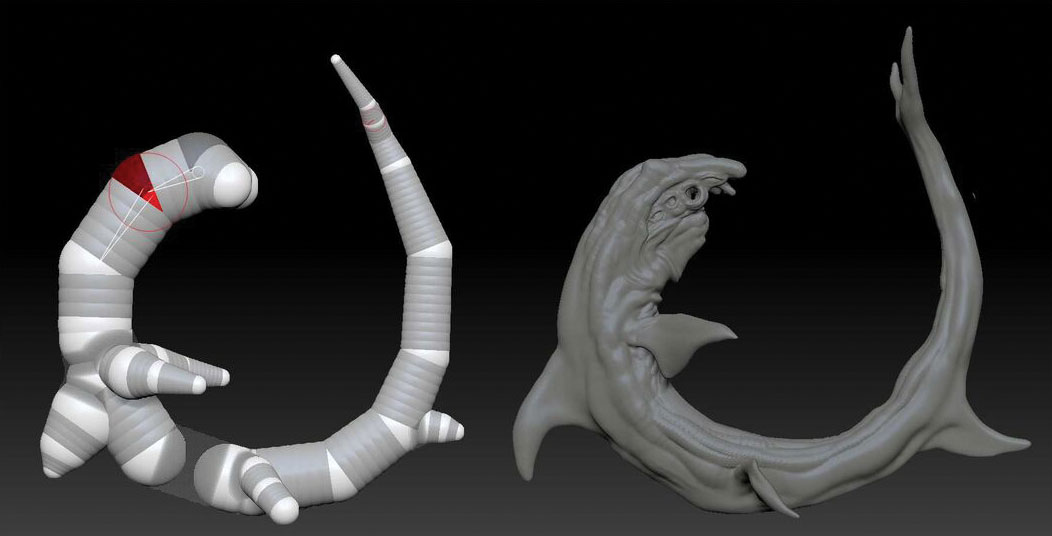
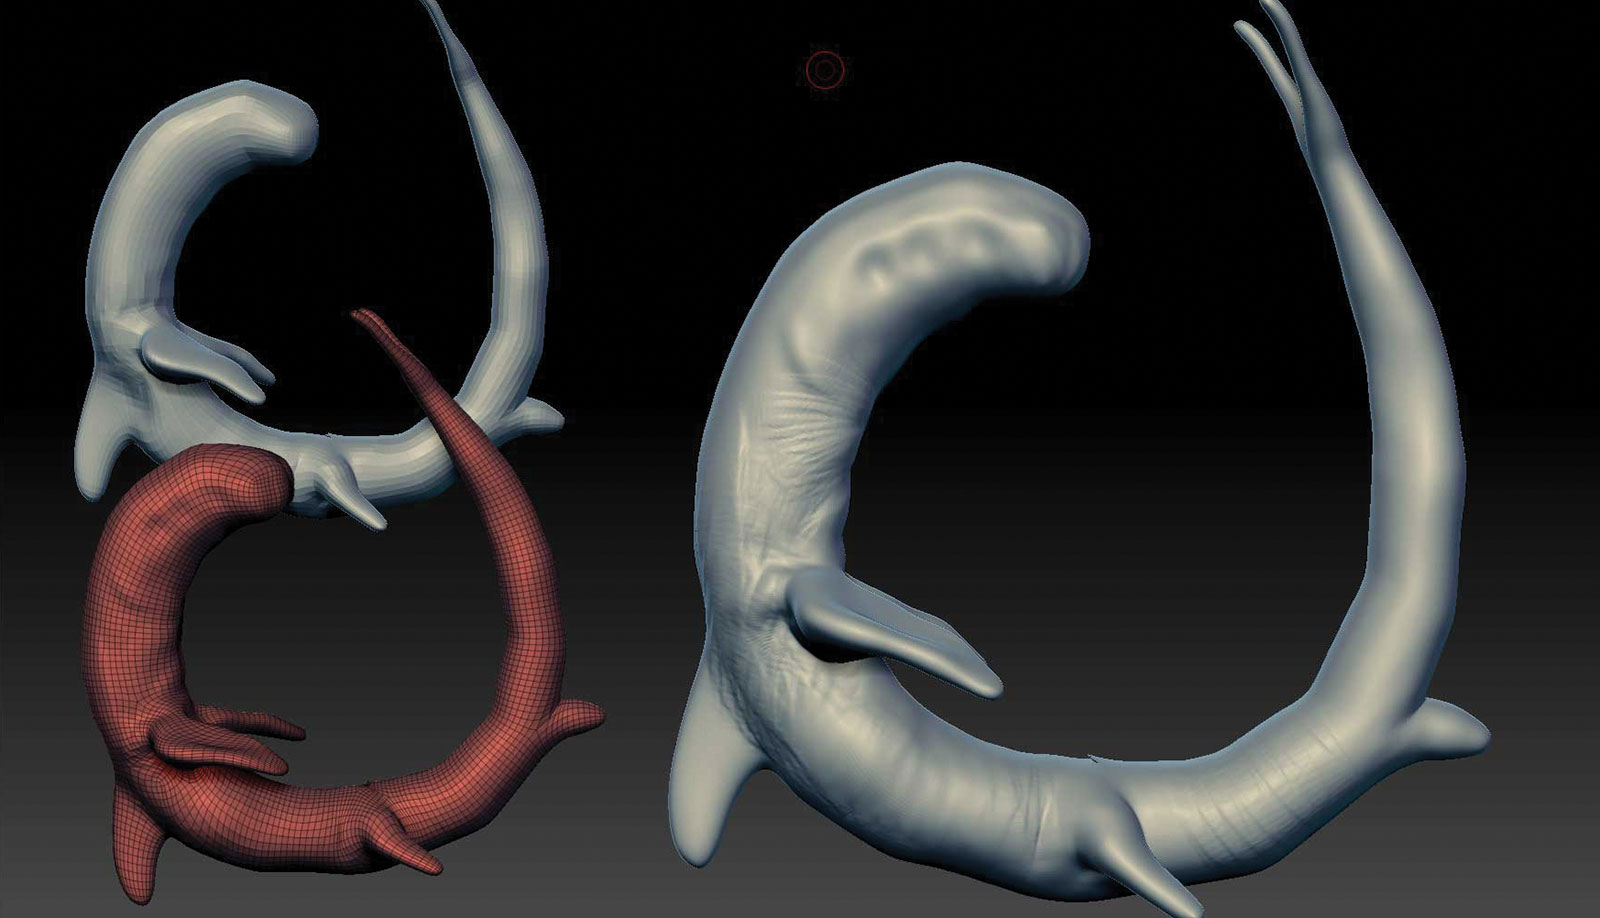
If you have a base model from VR simply use ZRemesher in the Tool panel to create a new base for the squid alien body. If you want to make the base from scratch then use the ZSphere method. Draw out a ZSphere with symmetry turned on and add more one by one to make the curved body. Add the fins and fluke tail. You can scale, rotate and move each sphere.
Once you have the volume correct go to Adaptive Skin in the Tool panel and make a geometry version. You can now sculpt on this version and begin the detailing.
14. Detail the body
Use ZRemesher in the Tool panel to bring the polygon count down to a lower level and to give the model an even covering of polygons. Subdivide the model (Ctrl+D) and start sculpting using the Clay Buildup tool and the Move tool. By switching between these two you can get most of the shape detailed. Use Shift to use the Smooth brush as you go. Shape the overall body first, and flatten the fins. Add some detail around the chest and rib cage (it’s an alien squid, so take some liberties here).
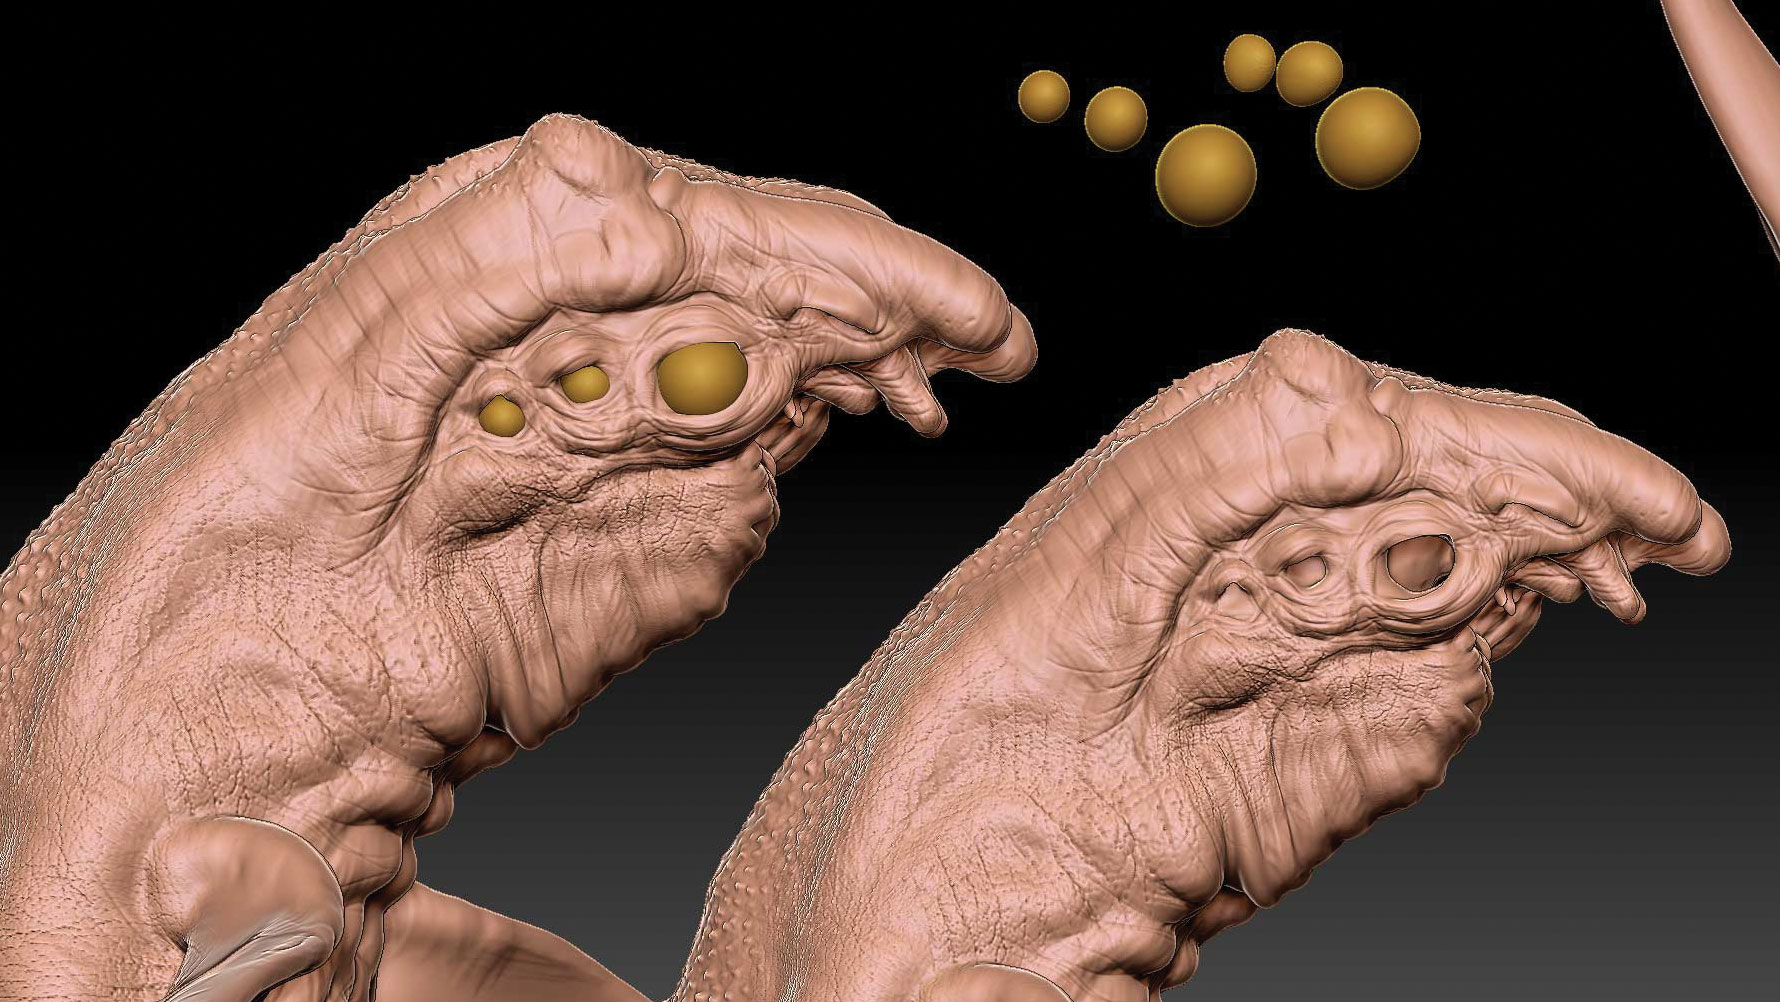
15. Create squid eyes
Add eyes as separate SubTools. Create a sphere, and use MakePolymesh3D. Append it into the Squid SubTool. Duplicate it twice with symmetry on so you have all six eyes. Place them into the head and re-sculpt the head area of the body to add wrinkles and eyelids as needed. The shape of the area that the eye sits into is as important as the eye itself. Make sure it suits the look of the creature. Use the Move tool on the body and the eyes to make sure they look correct.
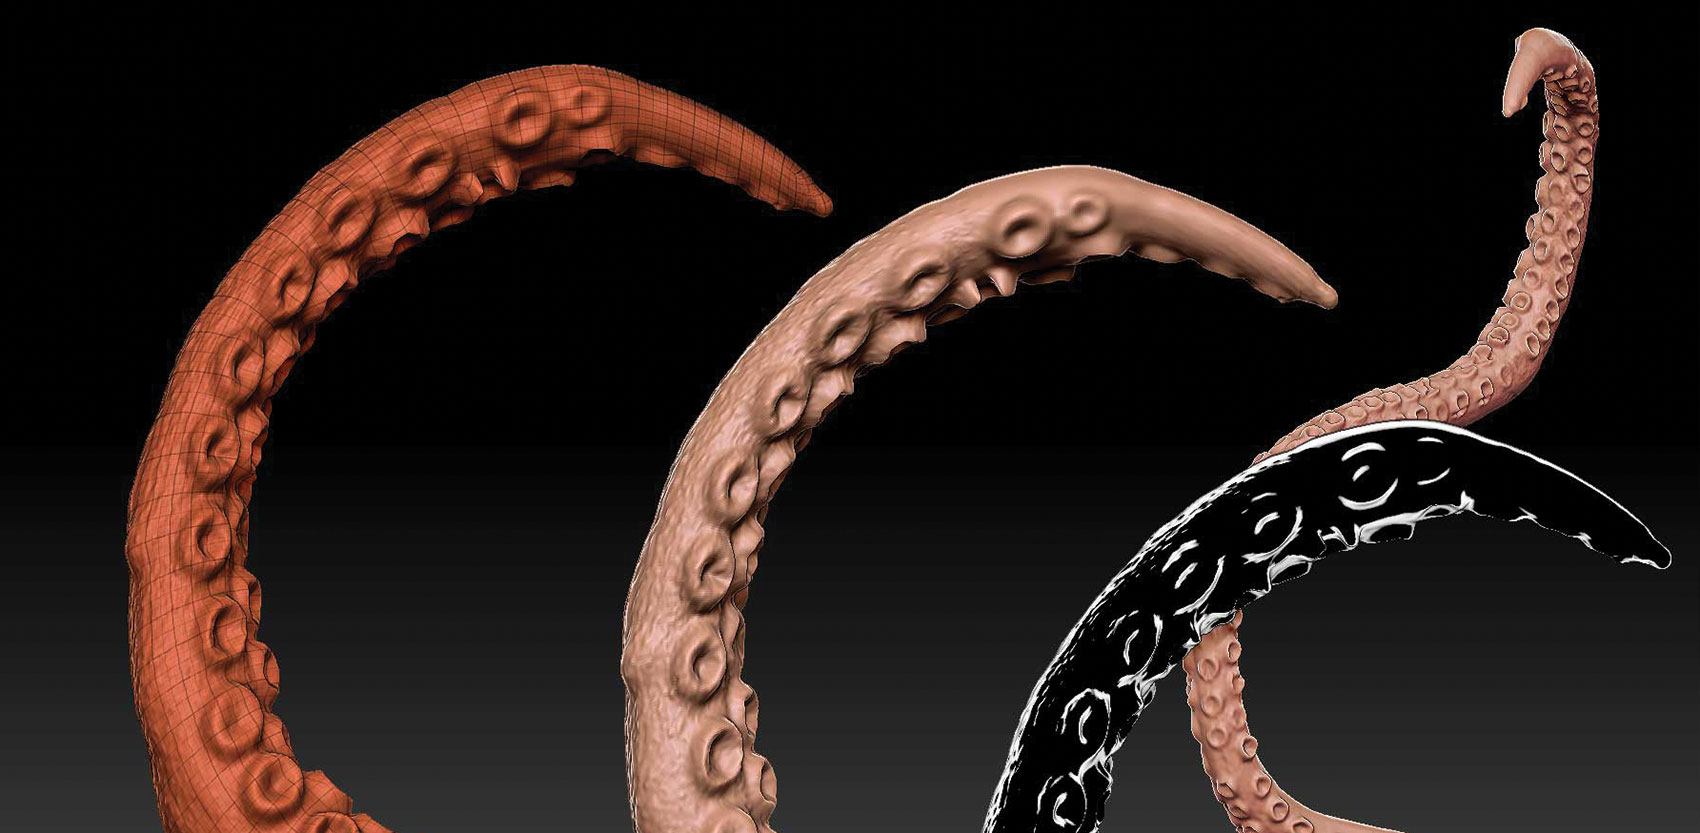
16. Add tentacles
As with the body, if you roughed some tentacles up in VR use those with DynaMesh or ZRemesher. If you are making them from scratch use spheres again. Block out the length of the tentacle, getting smaller at the end. Use Adaptive Skin again and then sculpt on that new ZTool. Take your time and sculpt the suckers on the underside of the tentacle using the Clay Buildup tool.
You can use a Torus shape and make it into an Insert brush if that method suits you better. You will have to DynaMesh the finished tentacle together.
Next page: Make final tweaks and render your scene

Glen runs SouthernGFX, a small Cheshire-based studio specialising in character and creature design, which creates assets for TV and film. Clients include SKY, Wacom and Oculus Medium and the studio has an impressive project list that features 3D models for Game of Thrones' house sigils. He's been using and training ZBrush for over 15 years and is a Wacom Ambassador for the UK and Ireland.
