
This workshop is an opportunity to take you through my painting process, and give you some tips that will make your workflow more efficient and easier to manage. As I develop this illustration I'll talk about taking an instinctive approach to producing a painting.
I think following art rules can help you develop your skills, but sometimes they conspire to restrict you. Trying to meet a range of artistic criteria, such as engaging character designs, compelling compositions and effective colour schemes, can slow you down.
The best way forward, I think, is to learn how to do things instinctively. With practice, it becomes second nature to see the things that are working in an image, and identify those elements that still need tweaking.

The only thing I do before starting to paint this image is flick through a lot of illustrations and photographs, just to kick-start my subconscious so that it begins to generate ideas. After that I launch straight into the painting.
It's always a real pleasure to enter the world of fantasy art, because it's how I started out in digital painting about nine years ago. At around the same time I was working on a personal project about a dark faerie...
Watch the tutorial
01. Initial sketches

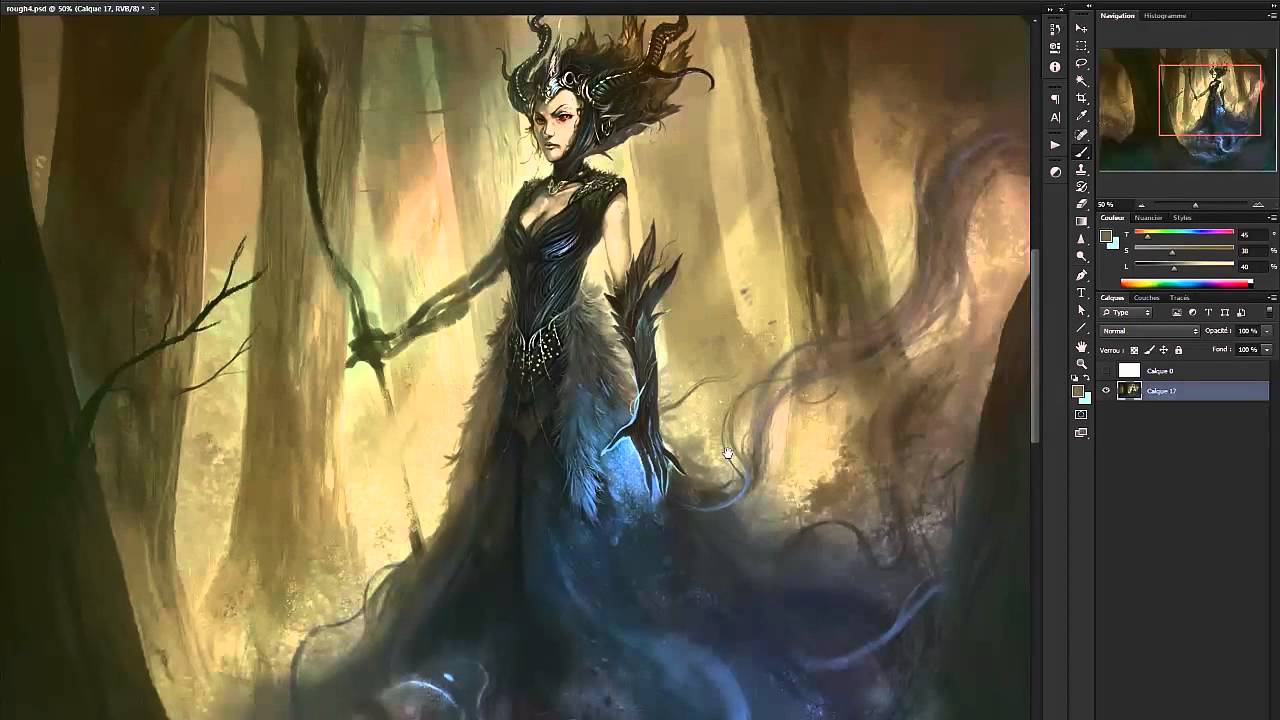
I don't know where I'm going with this illustration. I just know that I want the main character to be a kind of queen – someone who gives you the feeling of fear when you look her in the eyes.
So I start with a rough sketch, just to give me a composition. She's walking in the woods and sees you. Well, let's draw something that'll give you a sense of dread!
02. Fifty shades of grey

It's important to consider the depth of an image and define the planes: the background, with two or three levels of depth; the main plane with your character; and the foreground.
I start in mono – it's quicker, and easier to modify. I put in large grey values and start defining the character, giving her horns and a full-length dress. At this stage I just want to capture a feeling.
03. Starting point

We all have little foibles, and one of mine is that at an early stage I can't resist painting the face of a character. It's often said that detailing elements in isolation isn't good, because you end up not seeing the bigger picture.
Useful advice, I won't deny it. But I can't go on if the face doesn't have just a bit of detail. So I spend a little time on her face, crown, horns and hair.
04. Colour advice

Sometimes it's difficult to decide on what colours to add to an illustration. So here's a little tip. Take an old painting or even a photograph – no matter what the subject. Duplicate the image layer, and apply Gaussian Blur to the duplicate. Then change the Layer Blending mode to Color, Overlay or Hue, and see if the results inspire you for your current painting.
05. Finding the colour theme

After doing this, I adjust the Hue/Saturation, and paint with a brush set to Color mode to find what I'm looking for. One other tip is to apply Auto Levels or Auto Contrast, and then play around with the layer's blending modes. Sometimes, happy accidents will inspire you to take things further when you've run into a creative brick wall.
06. Adding details

I start to apply details to my character, starting with the head and bust, before moving on to the dress design.
I'm not using any specific references for the dress but, as I said, simply flick through a large set of images to get my creative juices flowing so that I can come up with an original design.
07. Contrast

It's good to have contrast in an image. More specifically, contrasting shapes, luminosity and colours. A little blue light will be my choice for this image, which will indicate my faerie's magical power and control over the creatures in the scene.
08. More details

Now that I'm happy with my choice of colours, I can complete the design of her costume, adding details such as jewellery and depicting a range of materials – shiny ones, furs, leather, metals – which together will make the design more interesting. I also tackle the look of the arms. I want something that hints at vegetation. After all, she's not a human character.
Next page: 8 more steps to streamlining your painting process...

