Our Verdict
Given that this is still a pre-release version, the tool is off to a great start. It offers a lot of potential for mockups, presentation work, and other low- to mid-level 3D needs.
For
- Faster workflow than many other 3D tools
- Streamlined design controls
- Straightforward rendering toolset
- Prefab lighting scenes for sophisticated lighting setups
Against
- Processor hog
- Choice of prefab 3D models is limited
- Some ergonomic issues
Why you can trust Creative Bloq
You’ve designing things for a while now, doing print work when it’s around, and lots of stuff for the web. Along the way you’ve become pretty good at creating art with Photoshop and Illustrator. But there are some projects that just call out for 3D. And while you were excited to find the 3D toolsets inside Photoshop, the workflow was confusing and slow-moving.
Enter Adobe’s new Project Felix, a 3D application aimed at designers. Not yet a fully fledged member of the Creative Cloud, this app is currently on offer as a preview release. Felix’s goal is to make easy-peasy work of much of your most common 3D design needs. Its learning curve is fast and furious, and its workflow much more direct than alternatives such as Photoshop 3D, or higher-end 3D programs.
The interface
Few companies understand interface design as well as Adobe does. But still, as capabilities rise, so does interface complexity. So the question is always where to draw the line on that continuum between ease-of-use on one side, and complexity on the other.
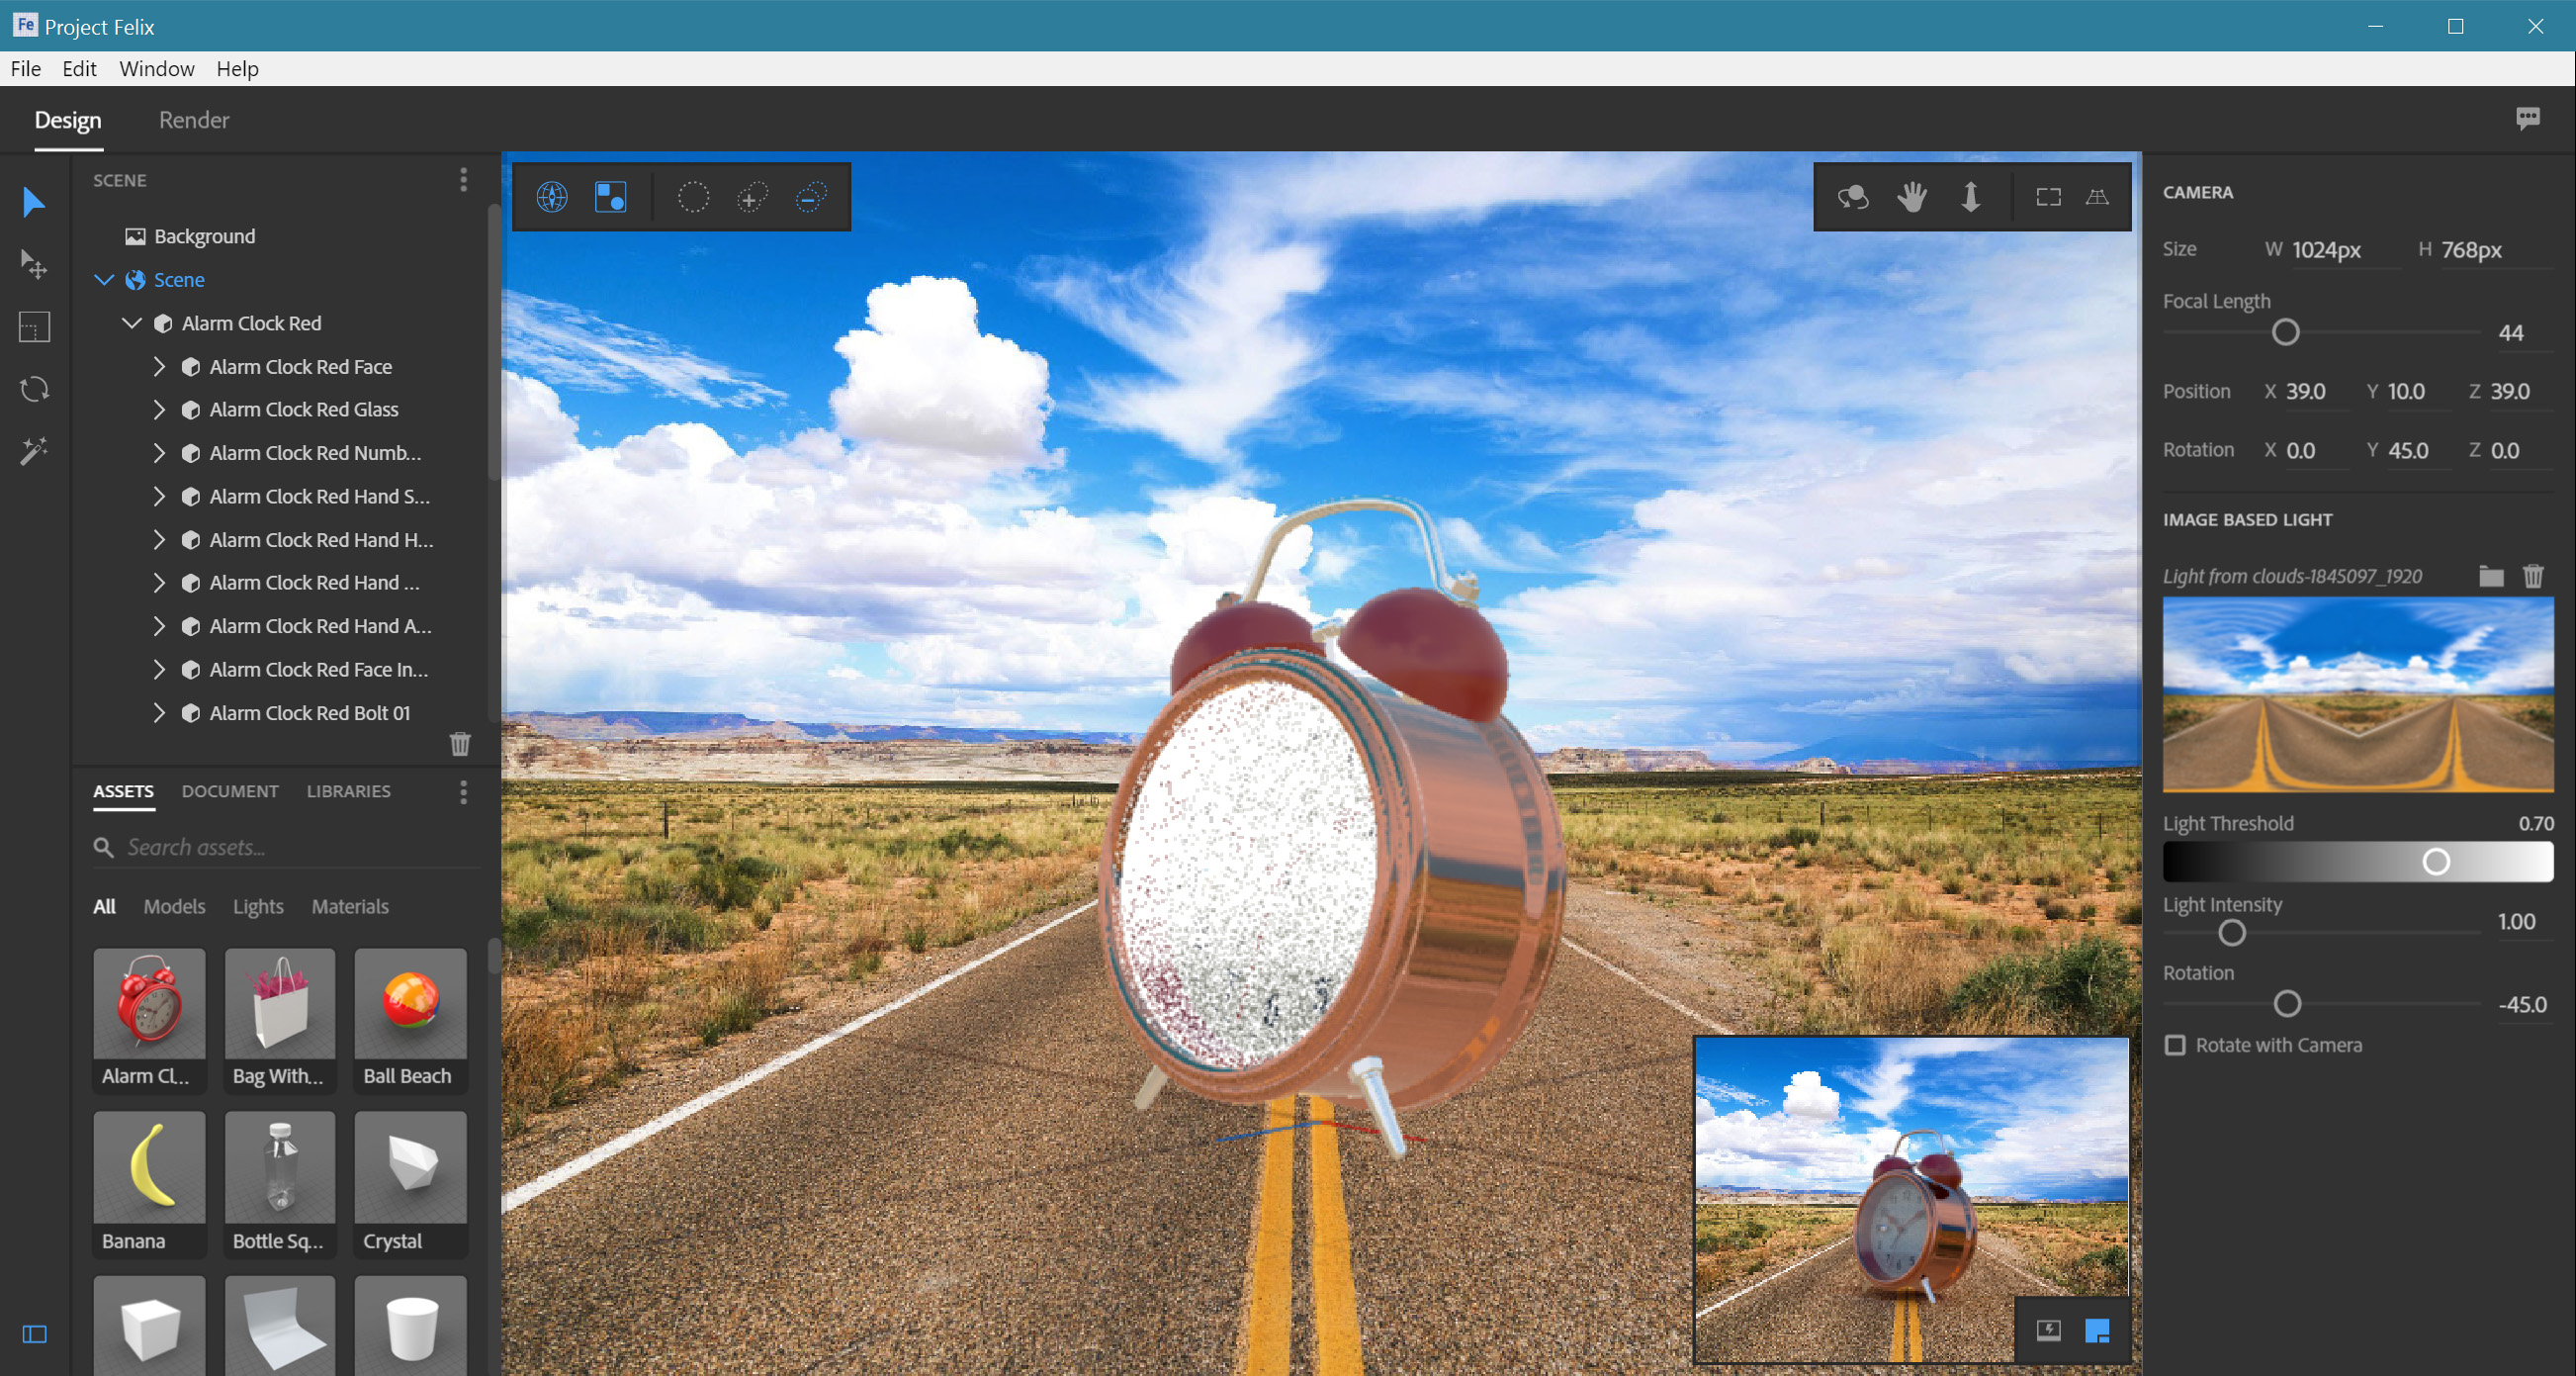
Felix breaks the interface down into two basic screens, represented as tabs along the top of the monitor. They are entitled Design and Render. The Design interface is where the scene you are creating is put together, and the Render screen contains the tools for generating a final rendering. (For those unfamiliar with how 3D programs work, the user works in a preview mode and it is not until a full rendering is made that the final image can be seen, and used.)
The design screen
Since the goal is to keep things simple, Felix has kept controls to a minimum in the Design tab. So as expected, capabilities found in other 3D programs are not available here. The most significant toolset omission is the ability to do 3D modelling. Modelling tools are usually quite complex and could easily send the casual user off the deep end.
Felix takes the smart alternative of including a (currently small) range of pre-made 3D models that it hopes will best serve a design shop’s needs. You will find standard geometric shapes like cubes, planes and spheres. You will also find very useful staging models like a cyclorama.
Beyond that, the choice of models in this preview edition of Felix is very limited. A soda bottle, with two liquid-splash models to go with it, and a mish-mash of others. Perhaps future versions of Felix will come with a wider range of useful models to choose from.
Daily design news, reviews, how-tos and more, as picked by the editors.
Even then, expect that for most projects the designer will need to import models from other sources. Felix currently supports importing five different 3D model formats, including the two most popular, 3DS and OBJ. It also supports the Collada/.dae format which offers an enhanced amount of scene data, presumably enabling a 3D artist to hand off a complete scene. We expect that Adobe will offer an expanded line of prefab 3D models for purchase, specifically designed for use with Felix.
Okay, enough of what’s not there. Here's what you do get in the Design tab:
- TOOLBAR: On the far left we find the toolbar, which at this point is rather simple with only five basic tools – Selection, Move, Scale, Rotate and Magic Wand.
- SCENE ITEM LIST: Towards the top of the left panel, towards the top, is a scene list of all the items and model parts in the project. For those not familiar with 3D work, you can think of it like the Layers pallet in any program you use for graphics. It allows for easy selection of items that might otherwise be harder to reach. This tab can be collapsed to save space.
- ASSETS/DOCUMENT/LIBRARIES: This is found on the left panel, but towards the bottom of the screen. It consists of three tabs, each representing one of the three categories. The Assets section is further divided into Models, Lights and Materials, all important aspects of building a 3D scene. We will come back to this shortly. These tabs are also collapsable.
- RIGHT PANEL: The panel along the right side of the screen holds the contextual controls, which will vary depending on the tools and items already selected. These controls tend towards basic, and offer the necessary modifications for image creation, without being so overwhelming that you end up hunting through a manual every 15 minutes.
- CENTRAL WORK AREA: As with most applications you are familiar with, Felix leaves the bulk of the central area of your screen free to work in (the canvas). In this area you can select a model or model part to move, scale or rotate, or to apply other controls.
The work area also has two floating pallets. One on the left that includes Align to World, Select Group and selection controls – this interface needs work. The other floater contains camera positioning tools (in 3D work you always have the option to move either the model or the – each offers different advantages).
The last item in the work area is the tiny Preview window that floats in the lower right hand corner. This is an important feedback element as it is always rendering the actual image, using Felix’s raytracing render engine. By comparison the larger work area presents a rough approximation of what your scene will look like (raytracing the larger screen would bring most machines to a standstill, and kill your workflow).
The design workflow
Working in Design mode with Felix is rather easy:
- Add a model: This is done by either clicking on the model you want in the 'Assets > Models tab, or by importing an external model.
- Texture Map Model: This adds the colours, material qualities (i.e. shiny, dull) and any patterns to the model. These can be added across an entire model, or different parts can have different materials applied to them.
- Add lighting: Most 3D programs require you to add individual lighting fixtures, and position/angle them in the scene. Instead, Felix uses an image-based system, which means it uses the brightness and colouration of an image to illuminate the scene. The tool offers a library of 17 prefab lighting scenes. While it lacks ultimate controls, it does offer an effective and wicked-fast way to attain sophisticated lighting setups.
- Modifications: Once the scene is built, it’s time to start tweaking. This is done via the context controls found in the right side panel. Enable them by clicking on the various items listed in the scene’s Items List, in the upper part of the left side panel.
The scene’s Items List includes Background, which brings up options for background colour or image import on the right panel. Click on Scene and the right panel offers Camera controls such as render resolution. It also offers controls for the image-based lighting system, including the option to import your own images to use for the lighting.
Finally, if you highlight a model or model part you can control its position, rotation and scale, as well as a range of material aspects.
The render interface
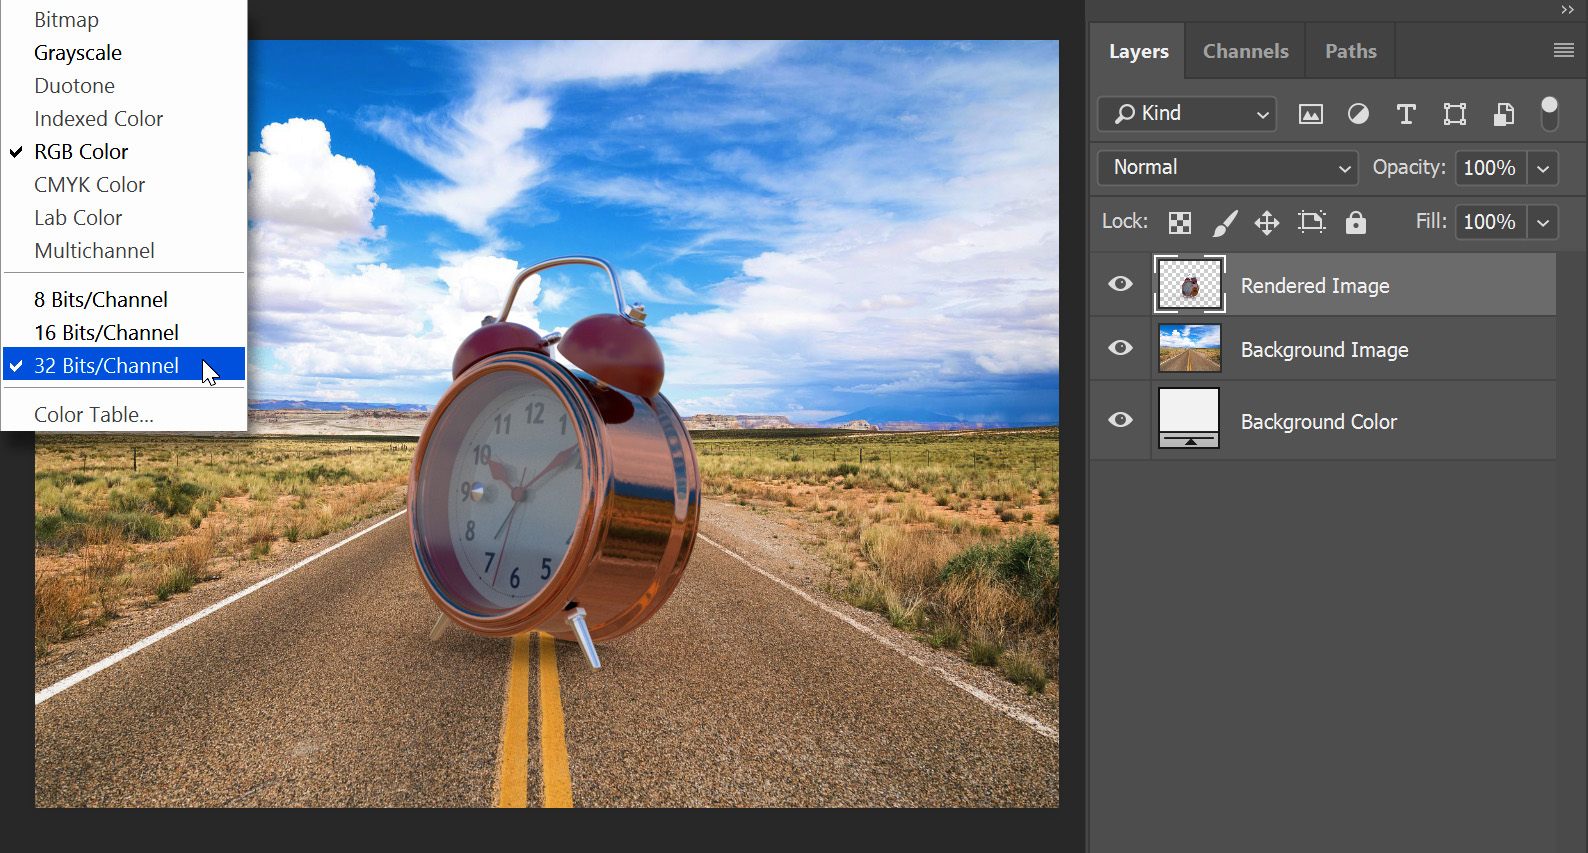
Click on the Render tab at the top to reach the Render interface. This is where you generate the final image that gets exported for actual use (or at least for any final tweaks in Photoshop).
The toolset here is really quite simple and straightforward. Name the image, and set the directory you wish to save it into, the file format (it defaults to Photoshop), and the quality. Then just let the pixels render and do their things for a while.
The bottom line
This is a first look at Felix. This isn’t even a first release, it's still in pre-release. That taken into account, the tools is off to a great start. There are some ergonomic issues and a few small grumbles about clunkiness that I could muster up, but nothing I couldn’t figure out and work around. However, in truth Adobe isn’t designing this tool for me, so I do hope they streamline a few things so that they can achieve their ultimate goal of a tool a 3D newbie can use without ever needing a manual.
I will also add I had trouble reopening a couple of previously saved projects. Felix would hang, and I had to resort to killing the application. However, this may be related to one or two specific models, as projects with other models did not have issues re-opening.
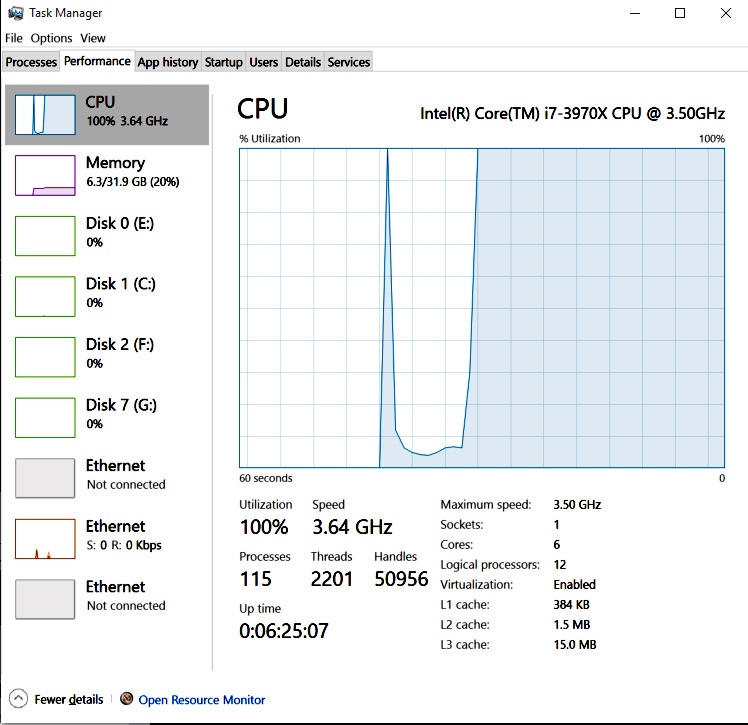
One other downside that I hope gets addressed is that Felix is a processor hog. All 3D applications are, and raytrace engines in particular. But it brought our 12 hyper-threaded core workstation to its knees, which doesn't bode well for those designers working on mid-powered laptops. Hopefully this will be addressed.
Overall this is a great new application with a lot of potential for mockups, presentation work, and other low- to mid-level 3D needs. I am especially curious to see how it may someday be live-linked to other Adobe apps, like Photoshop and After Effects.
Related articles:
- How to design and model a fantasy creature
- 9 great new tools for 3D artists in March
- 37 must-see examples of kinetic typography
out of 10
Given that this is still a pre-release version, the tool is off to a great start. It offers a lot of potential for mockups, presentation work, and other low- to mid-level 3D needs.

Lance Evans is creative director of Graphlink Media (graphlink.com), a boutique creative marketing agency in NYC, with clients like Olive Garden, Miller Beer and AMEX. Lance recently launched "OPEN STUDIO | NY", a YouTube channel looking at production techniques for advertising and publishing shops. Visit it at youtube.com/@OpenStudioNY


