






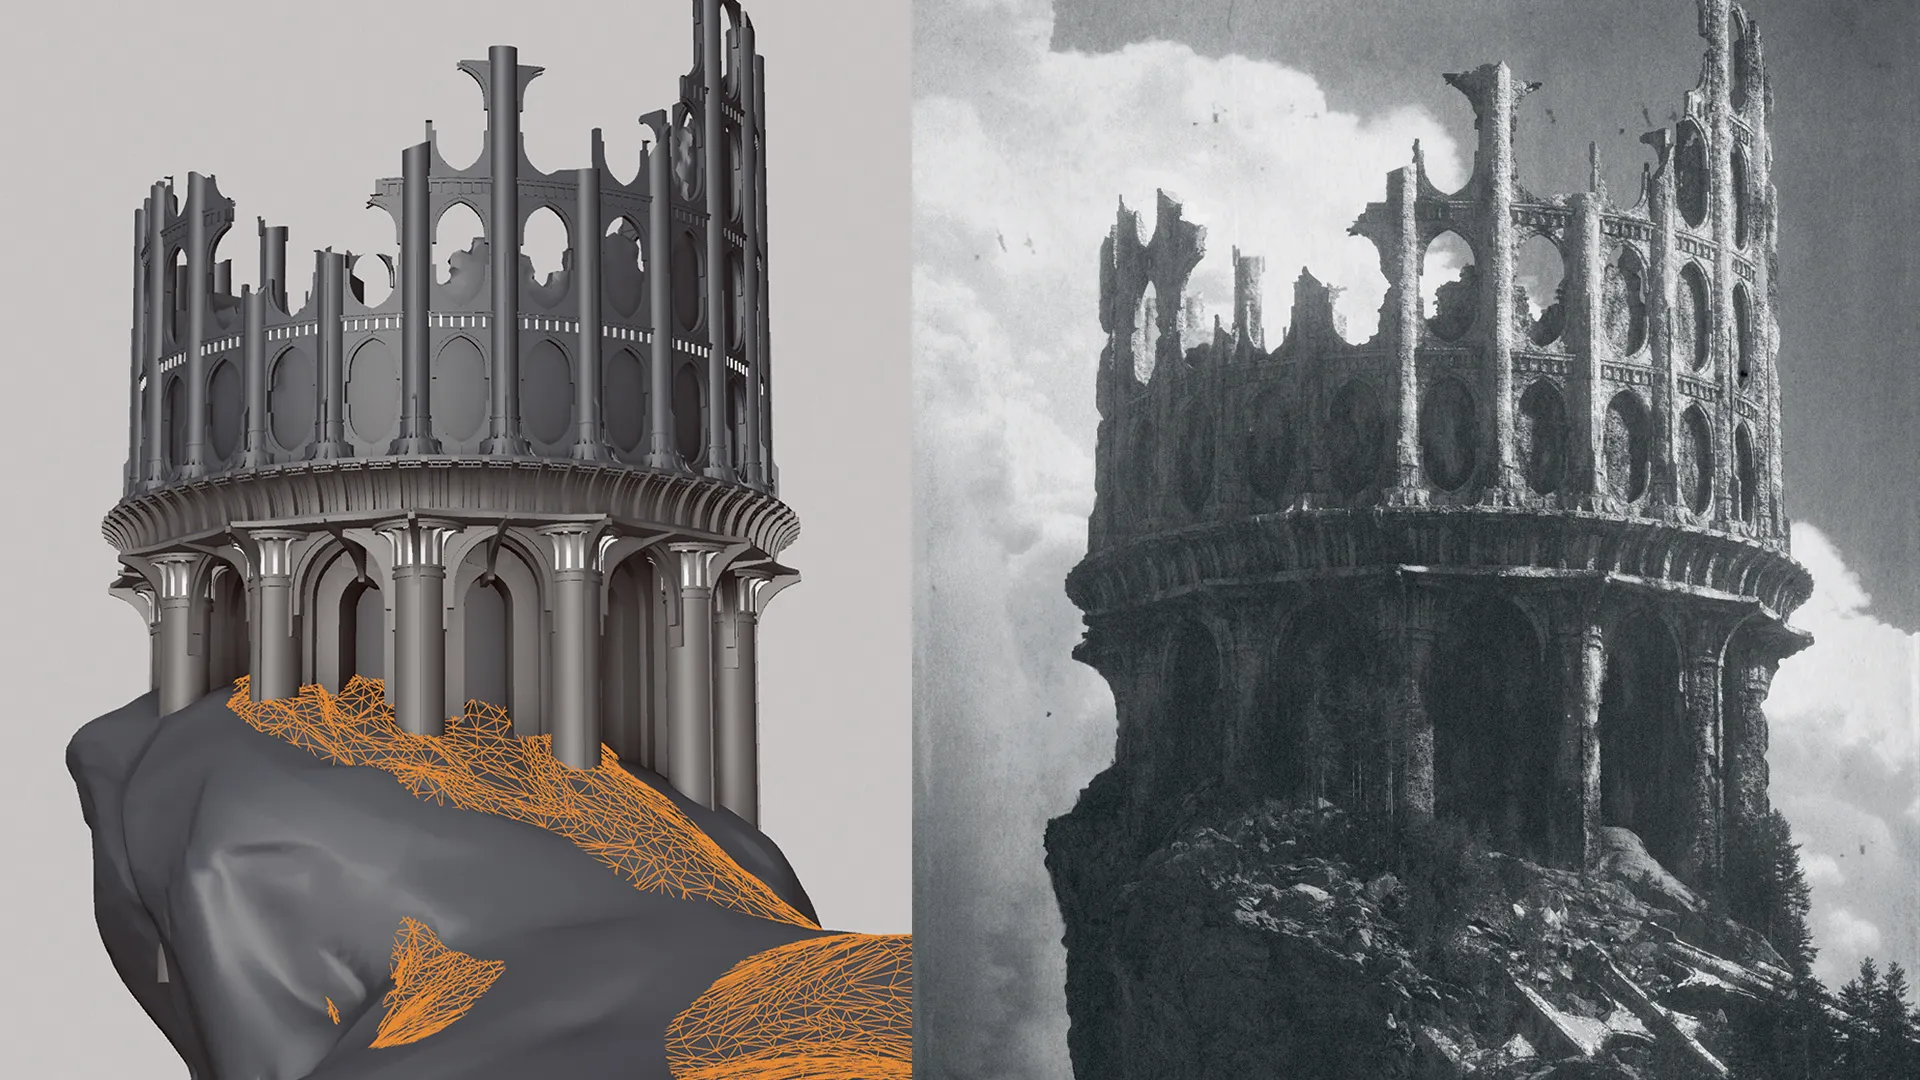
In this tutorial, I’ll be doing an overview of the basic steps I take to create a compelling and highly detailed scene, from the basic sketch to rendering and adding post effects. I’ll also go over using basic geometry with displacement to really push the scene’s details and interest efficiently and quickly. I'll be using Cinema 4D, ZBrush, Octane Render and Photoshop (see our guide to the best 3D modelling software, and you might want one of the best laptops for 3D modelling).
Before diving into complex scenes like this, it’s a good idea to grab some inspirational images to build your visual palette; things like the architecture, environment, lighting, composition and mood. For these types of scenes, I like to pre-prep in 3D a bit, building up a library of foliage scatter systems and materials.
This allows me to create these complex scenes much faster and focus on the art, rather than get sidetracked with technical stuff. A fun fact for this scene: it wasn’t originally going to be greyscale. I turned down the saturation during the lighting phase to check values, and immediately got inspired to keep it that way, as it helped push that video was looking for!
Lastly, these scenes can seem extremely daunting to make. I find that the best approach is to write down all your tasks that you need to do to make it: make tower, break tower, make ground, detail ground, etc, so instead of seeing a big task, you see 20 very manageable tasks.
01. Making a thumbnail
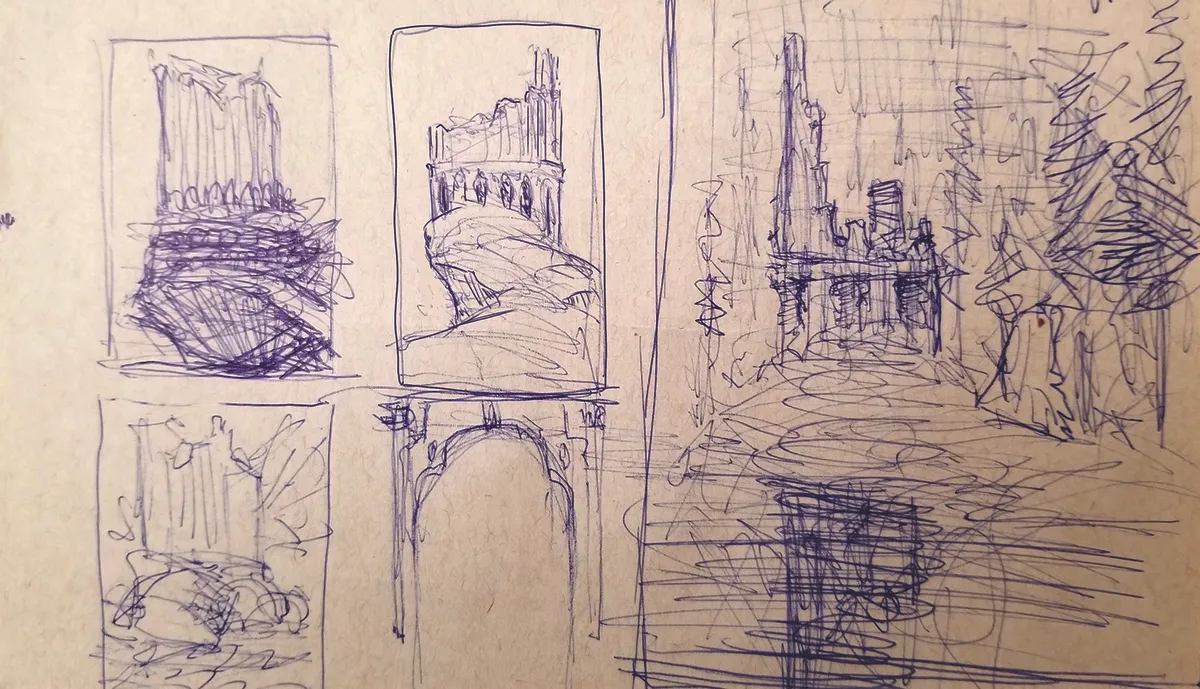
I’ll almost always start with a small sketch, as this allows me to quickly iterate on a few different compositions to see if any work for the kind of vibe I want to have, and also figure out the flow of the scene in general. In this case, I wanted to have an epic tower with that feeling of lonely, forgotten ancient power.
02. Blocking the 3D scene
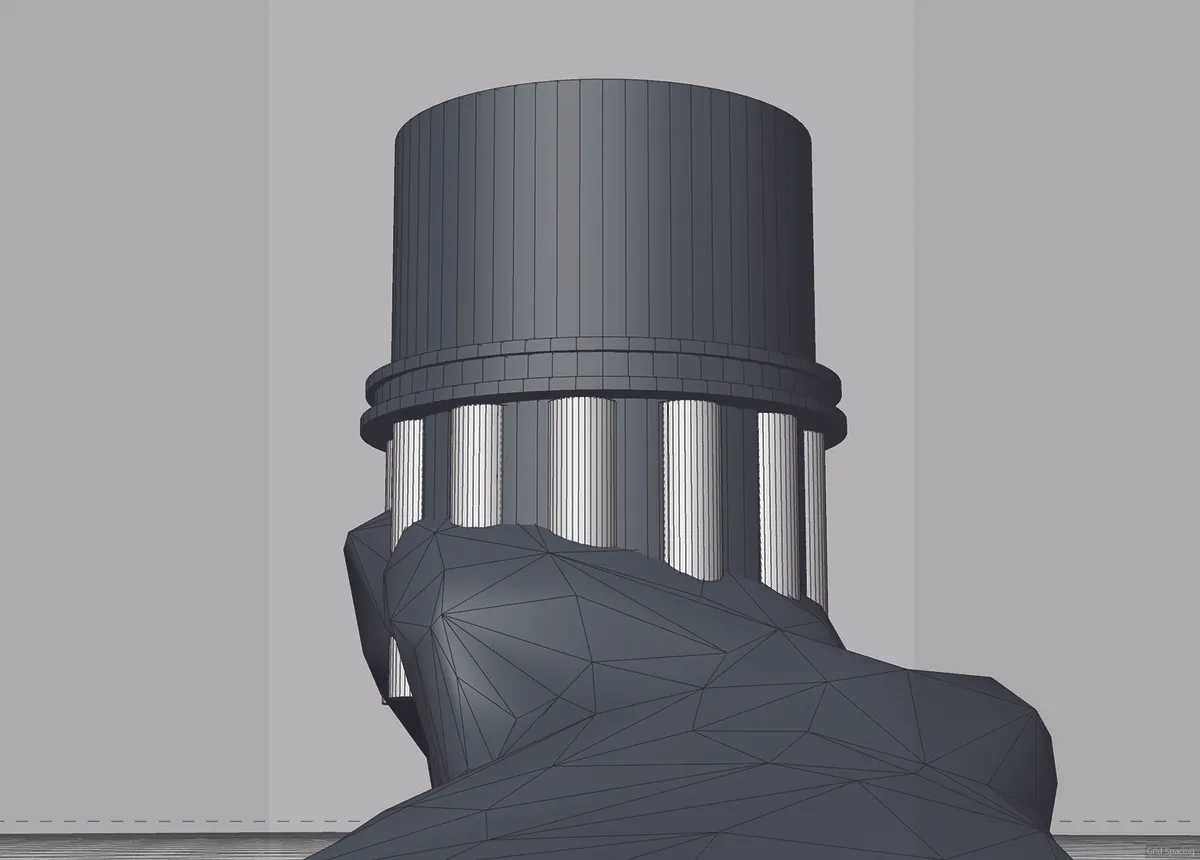
Once I have a sketch figured out for the direction, I go into Cinema 4D to establish the scene. Using basic geometry and sculpting tools, I build out the basic forms for the landscape and the silhouette for the tower.
During this process, I will also quickly establish the camera position. Locking it in early is key, and lets you refine the scene to that shot.
03. Building the tower
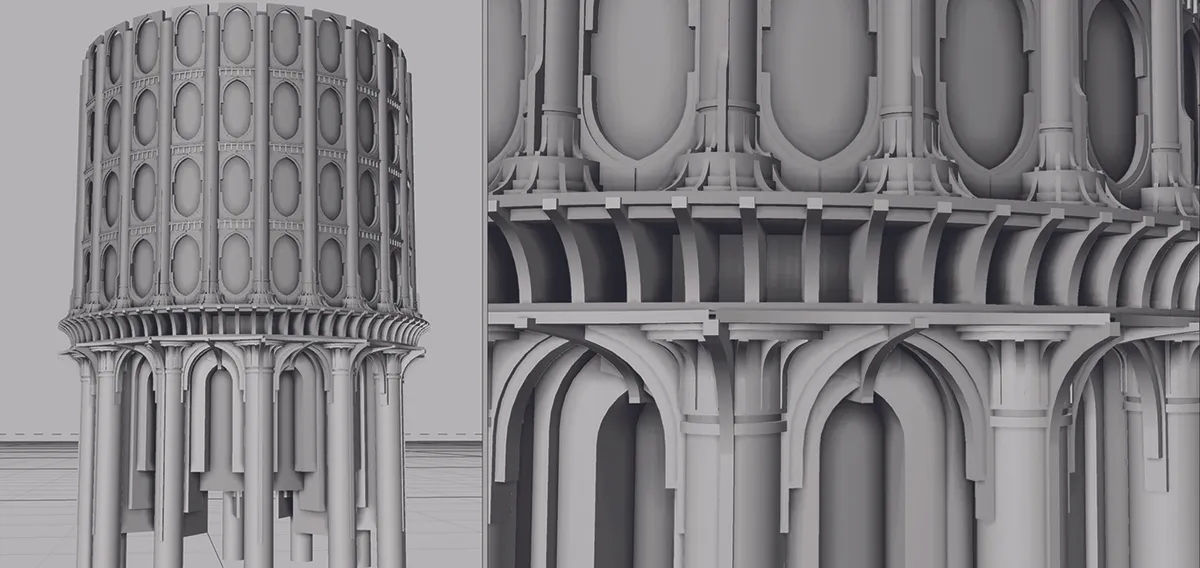
Now that the scene is blocked in, I can refine elements of it. For the tower, I’ll use displacement textures so I can stick to basic geometry. Using symmetry for archways and radial cloners for pillars, I build up the details for the tower elements, then use radial cloning to create the tower.
04. Destroying the tower
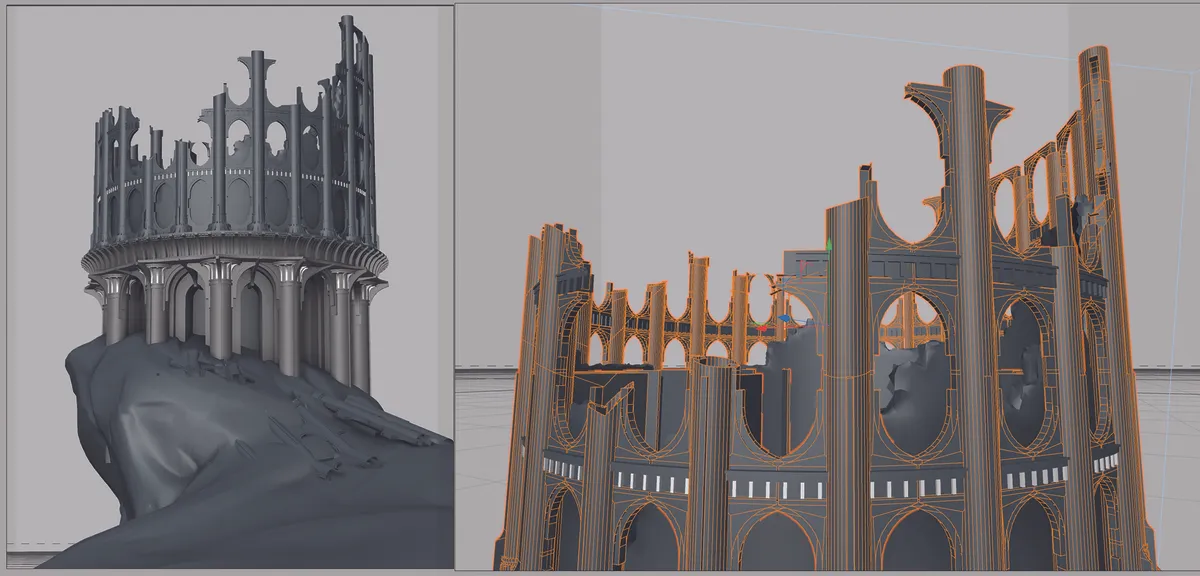
Now that we’ve built the tower, we can destroy it! Using various tools like the knife tool and voronoi fracture, I add cuts into the geometry. Loosely following the sketch, I then lasso-select portions of it and delete to remove the unwanted portions, making it look like it collapsed.
It’s good to spend a little bit of time on this step to make sure the damage feels natural.
05. Sculpting the terrain
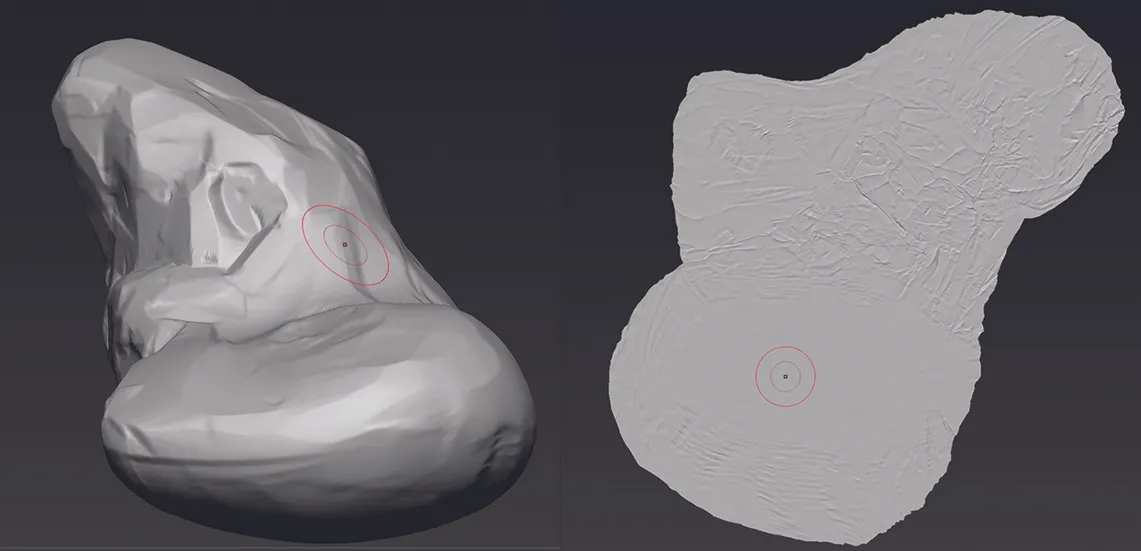
Next, I’ll dive into the terrain element. Exporting that basic geo and bringing it into ZBrush, I’ll then sculpt more of the basic forms, refining the big shapes more. Using displacement texture on this terrain piece, I’ll keep the details light, as that will add a ton later.
I then create some quick UVs for it so the materials’ displacement doesn’t cause too much artifacting, then export back to C4D.
06. Texturing the terrain
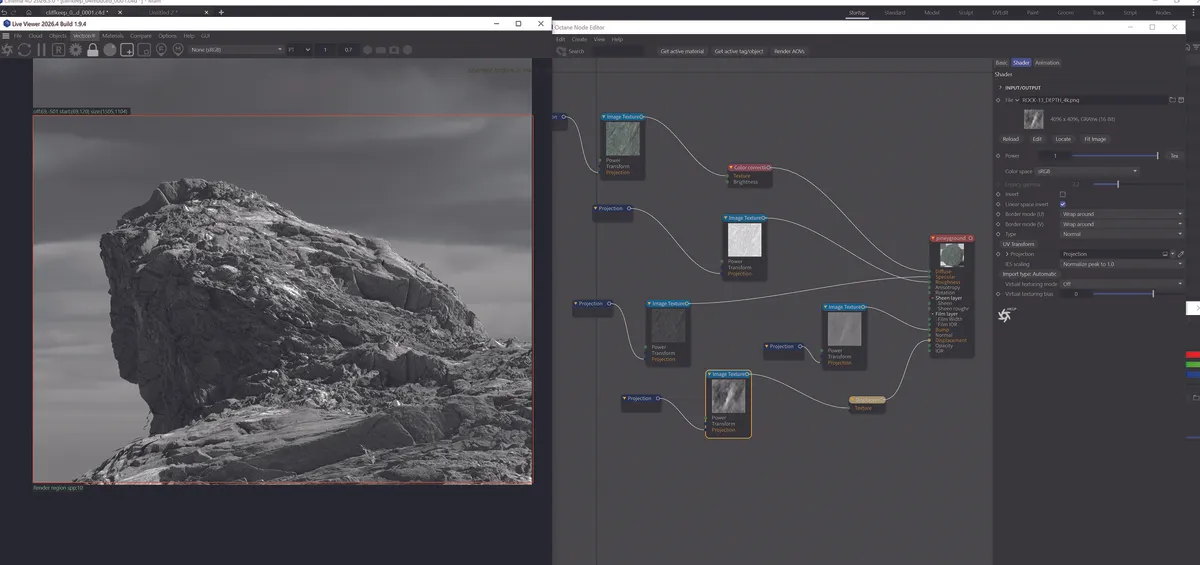
Now that we have our sculpt back in C4D, I’ll start building up the shader for it. Using a tileable photoscanned rock material, from RD Textures (now in Megascans), I build up a basic shader.
Cranking up the displacement scale for it, I’m able to add a ton of complexity and depth to that basic sculpt. Playing with the scale and UV offset settings, I can then find an interesting silhouette.
07. Adding terrain layers
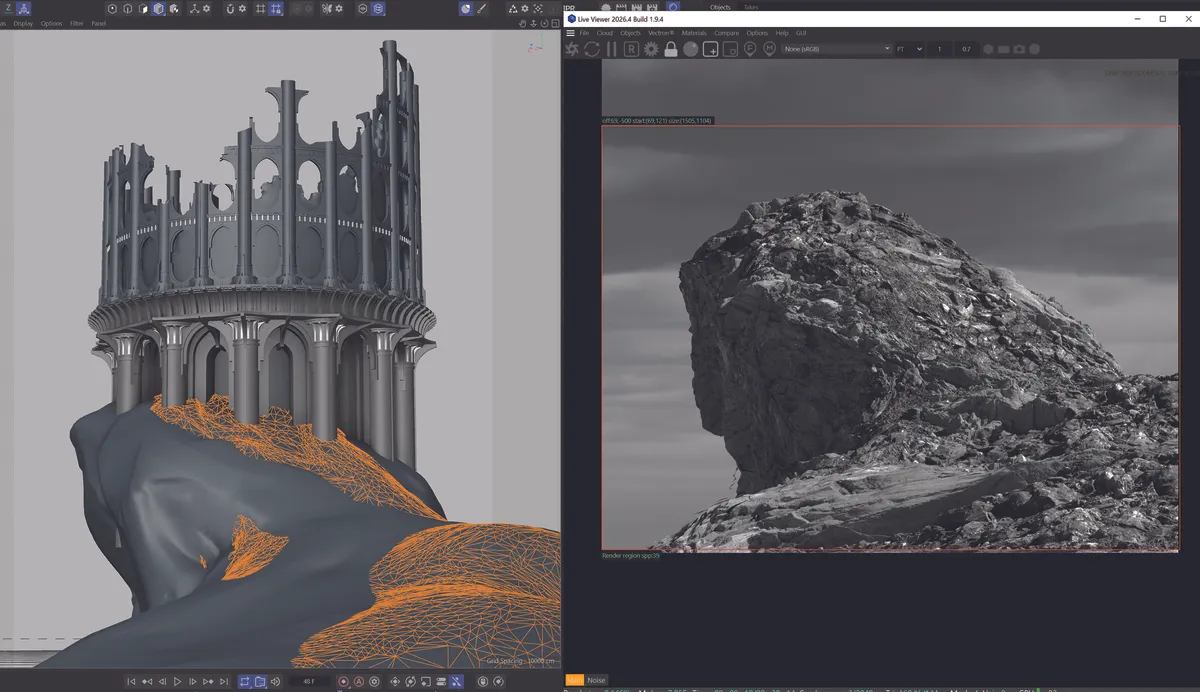
We have a basic terrain now, but the ground doesn’t quite feel natural, and this is where the power of displacement textures shine. I’ll duplicate the terrain geo and bring it up in Y a bit and sculpt some areas back down, then assign it more of a rocky ground/ photoscanned material instead of a cliff material.
In the render, you can see how we start to get a nice blend between the materials!
08. Texturing the tower
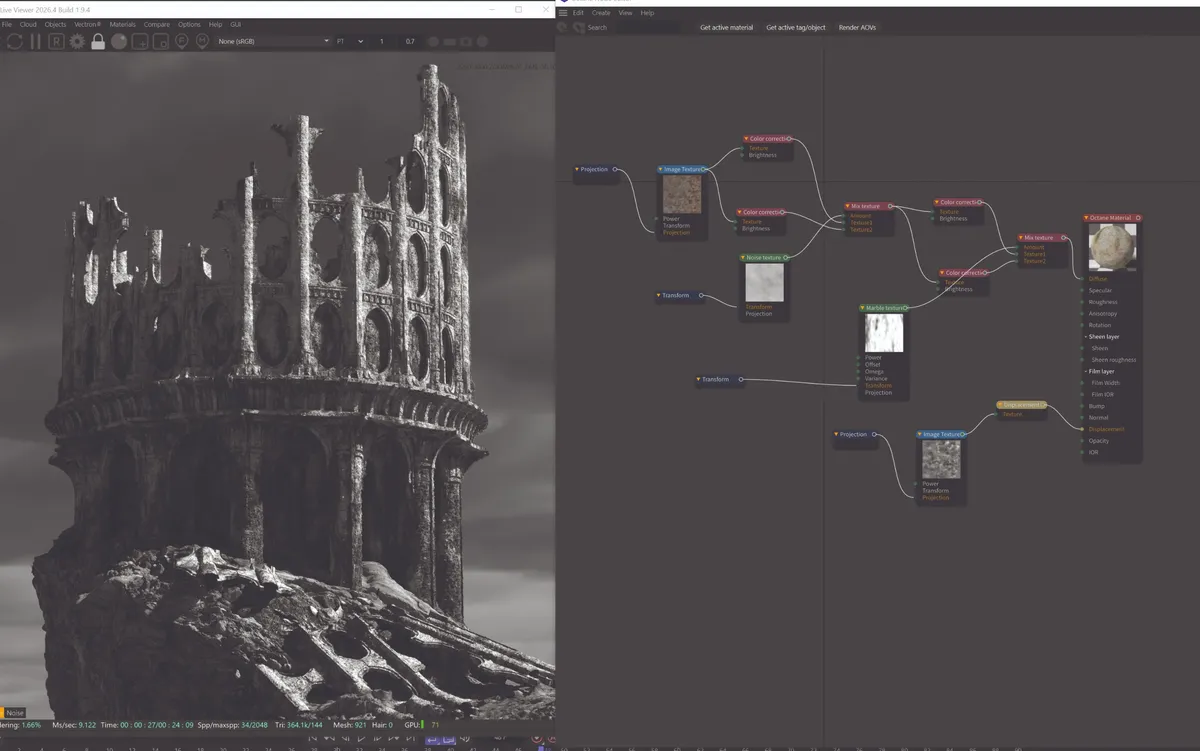
For the tower, I’ll start by creating a basic stone wall material – also with displacement – which helps a ton to add the details that the basic geometry lacked. To help break up that tiled stone material, I’ll then use a noise material that darkens areas to create some grime, and blend it into the material using the gradient marble texture so there’s more grime near the bottom of the tower.
09. Including lighting and sky
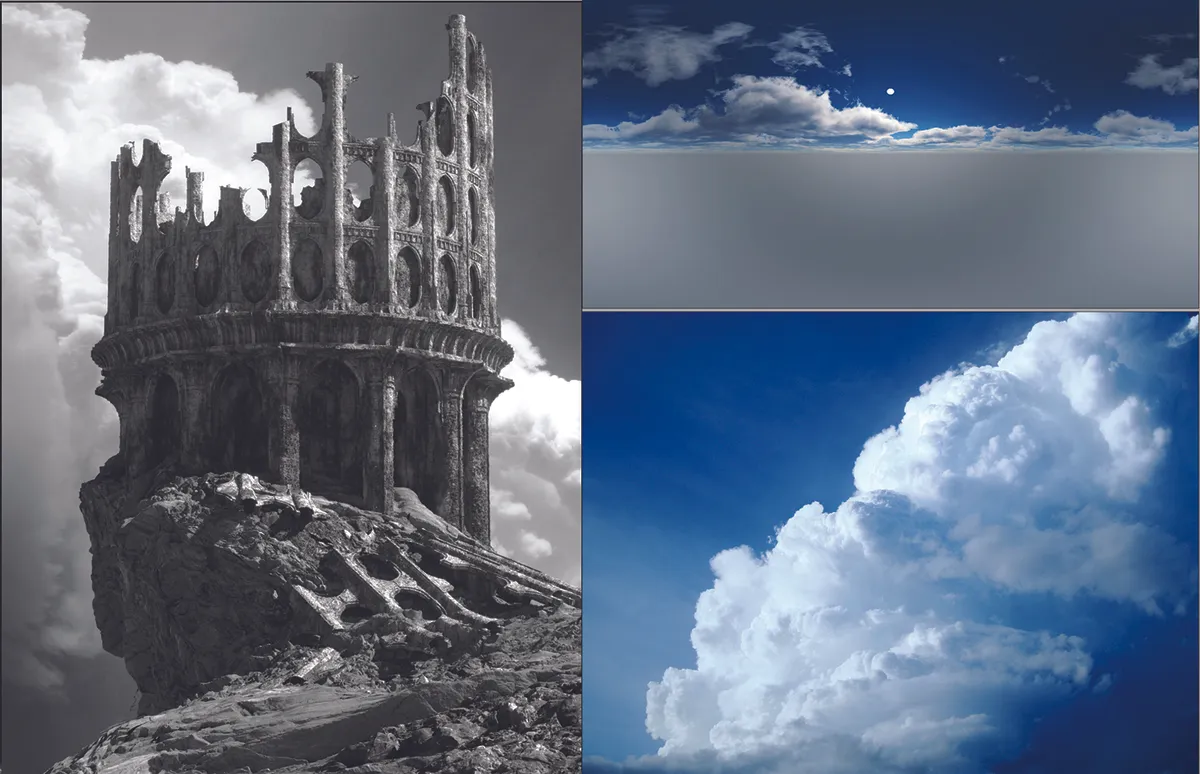
This step is actually done in tandem with steps 7 and 8. For the lighting, I brought in a few HDRs to find a lighting scheme that I felt fit the vibe, and pushed the composition to be stronger, playing with light and shadow in the scene to create a stronger contrast, readability and visual interest.
Lastly, I added a cloud plane with intent to help the scene’s compositional flow.
10. Adding foliage to scene
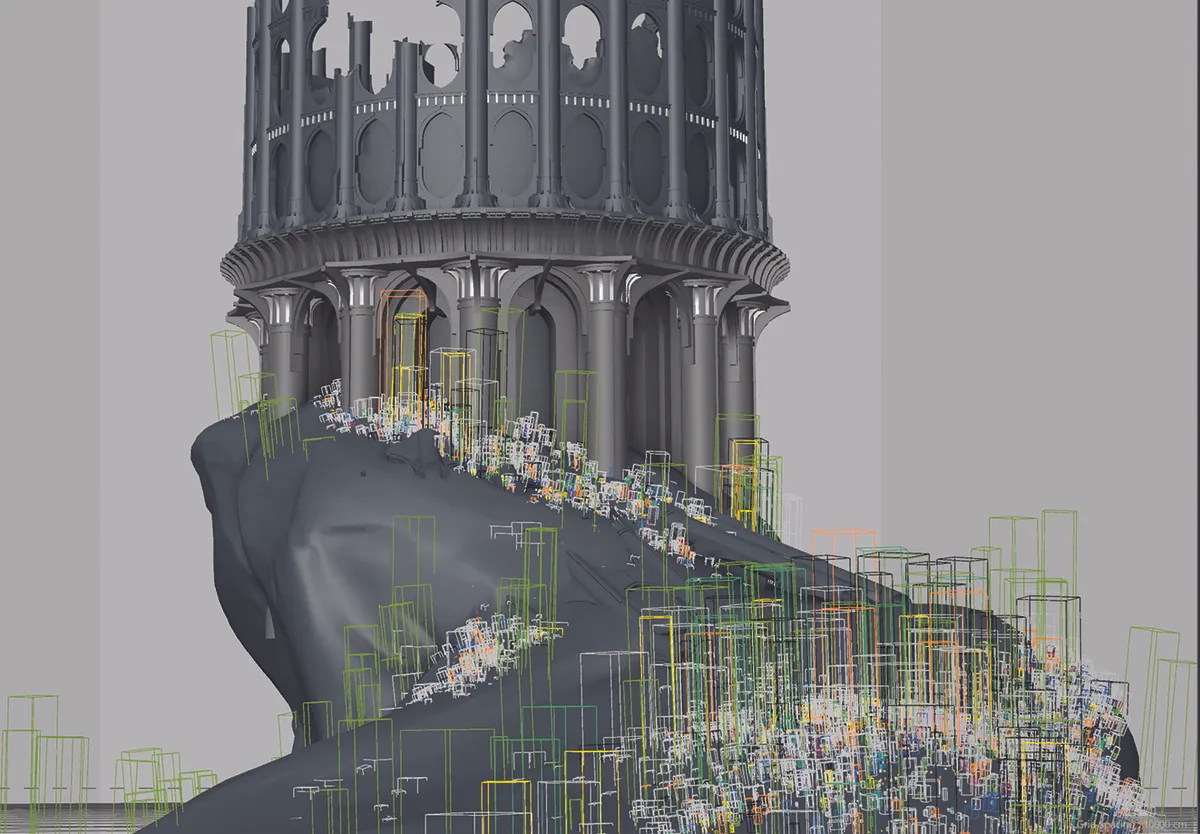
Making many of these scenes I have a bunch of Octane Scatter systems set up with different trees, shrubs, grasses and plants. With these, I’ll take the terrain, and paint a vertex map to tell the scatter systems where to generate the foliage. In this case, I used my pine trees, shrubs and grass.
11. Rendering the scene
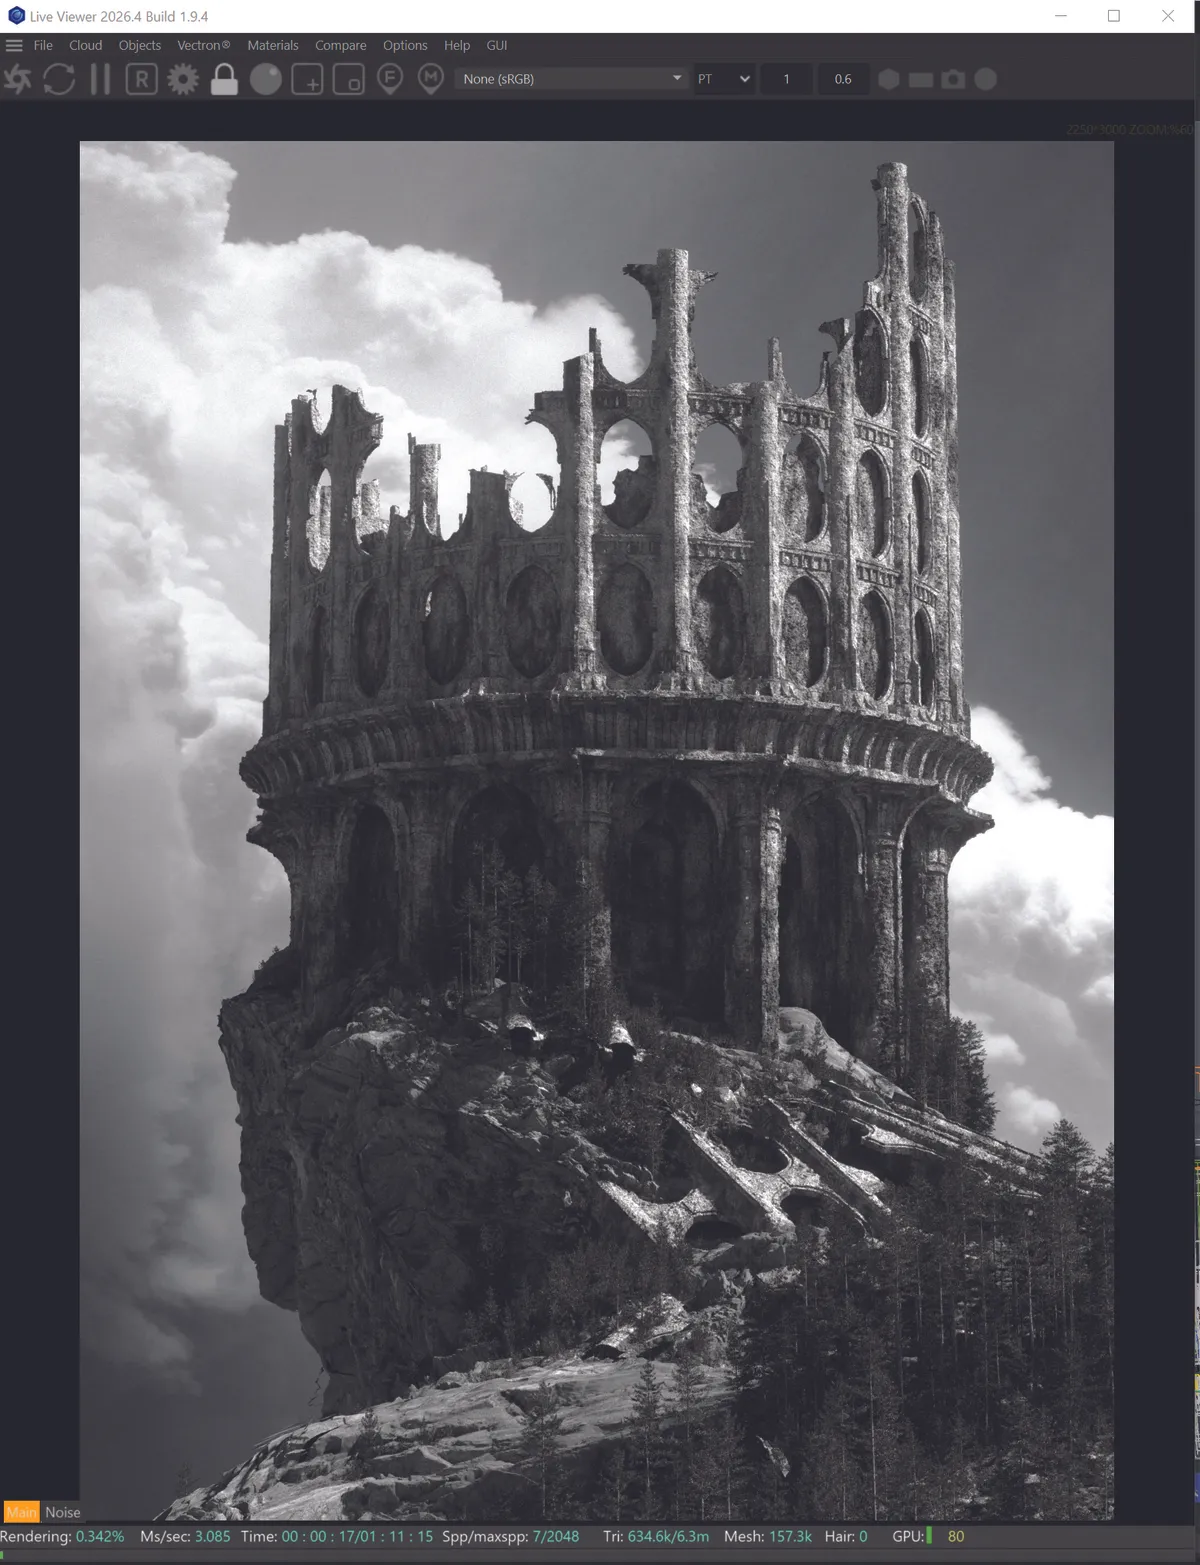
The last step in C4D is rendering out the final scene. With these heavy nature scenes, I usually work in portions so that I can see the results faster. During this step, I focus on adjusting the render settings and scene optimisation so I can get a big render fast.
Along with some last-minute scene tweaks, I’ll also render out some passes. These include a Z Depth pass, a Bloom pass and an object ID pass.
12. Making adjustments in Photoshop
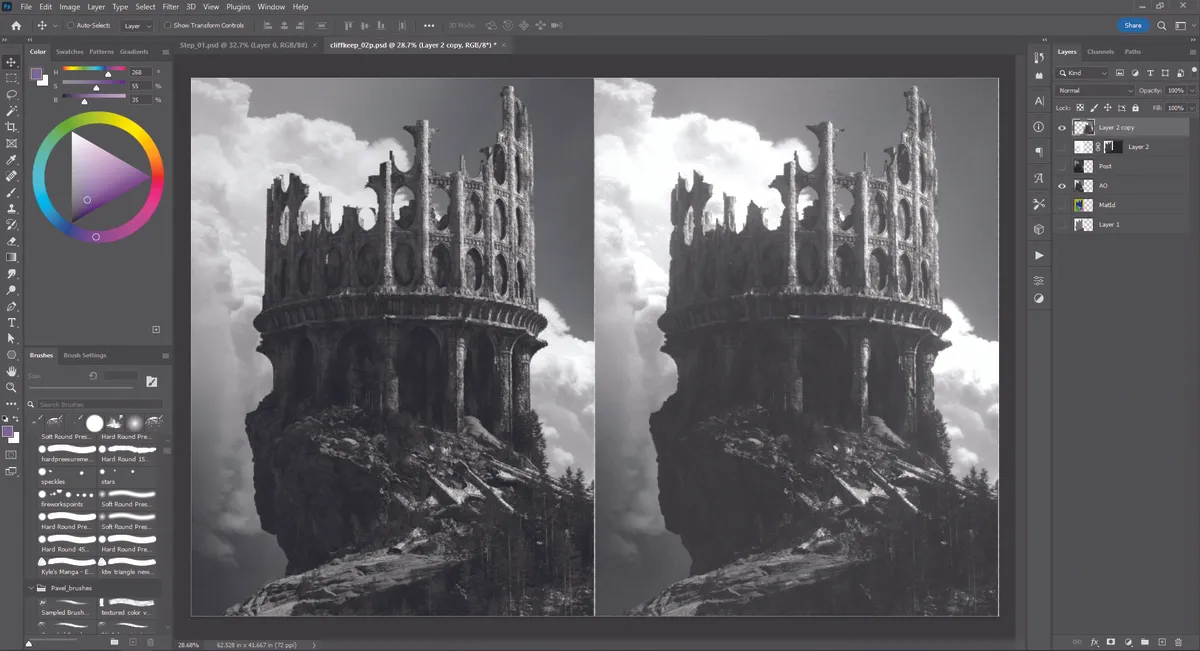
With everything rendered, I bring it all into Photoshop. First, I’ll go through the scene, and using basic brushes, paint over the artifacts from displacement and weird areas that don’t read nicely.
For this scene, I wanted to make that ‘old photo’ look, so I played with the levels and exposure to bring up the blacks, adjust the BG values and add that bloom pass.
13. Painting over details
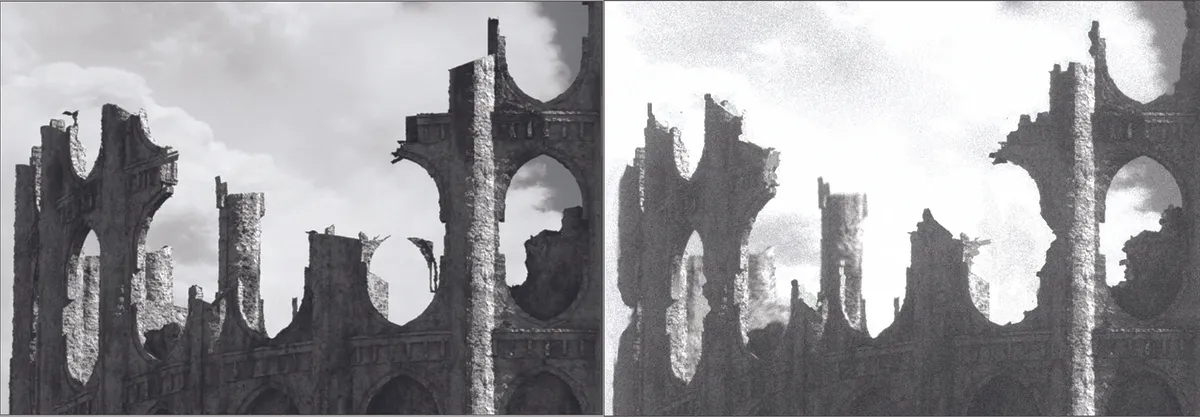
Here’s a close-up of how I took the base rendered geometry and painted over it, removing those geometry artifacts, smoothing out some visual noise and adding brick details in the silhouette. You can also notice that I added a bit of blur to the BG parts of the tower. This helps the FG ones read a bit better and feel less flat.
14. Adding last effects
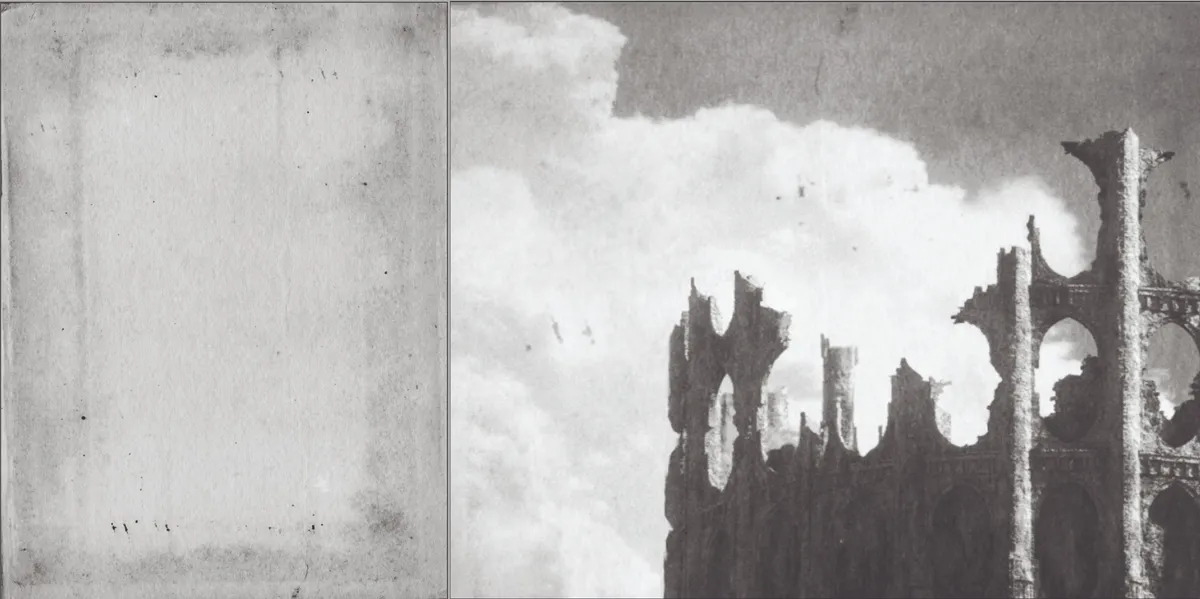
Lastly, I added a couple old photo and paper textures on vivid light and multiply (though I played with the layer styles to find a good look), and on top of everything, did some last-minute levels adjustments to balance the scene with those textures layered on.
I also like to duplicate and merge everything down, then add a grain effect. This help get rid of that 3D look.
For more inspiration, see our Blender tutorials.
Gear up
See below for today's best deals on drawing tablets.



This article originally appeared in ImagineFX. Subscribe to ImagineFX to never miss an issue. Print and digital subscriptions are available.
Creative Bloq is now easier to access than ever before with our on-the-go app, which brings you all the content you know and love from our website, but in a super-streamlined design.
Download the Creative Bloq app for iOS
Download the Creative Bloq app for Android

