Making art with charcoal lit my imagination on fire – here's how
Rediscover your artistic spontaneity with this process for creating a character from a charcoal abstract.
PAPER
Arches hot press watercolour paper
BRUSHES
Filbert 5000, sizes 2 and 6
Scrubber, size 6
Filbert, size 4
397 Round, size 1
Filbert 383FI, size 2
504 Round, size 3
Wash, size 1.5
CHARCOAL PENCILS
Hard Medium Soft White Charcoal
OTHER
Kneaded eraser
Powder charcoal
String charcoal
0.5-inch art tape
PanPastel, any colour
Dust off your charcoal and grab your sense of fun, because we’re about to go on an adventure to reclaim your artistic spontaneity and intuitive creativity!
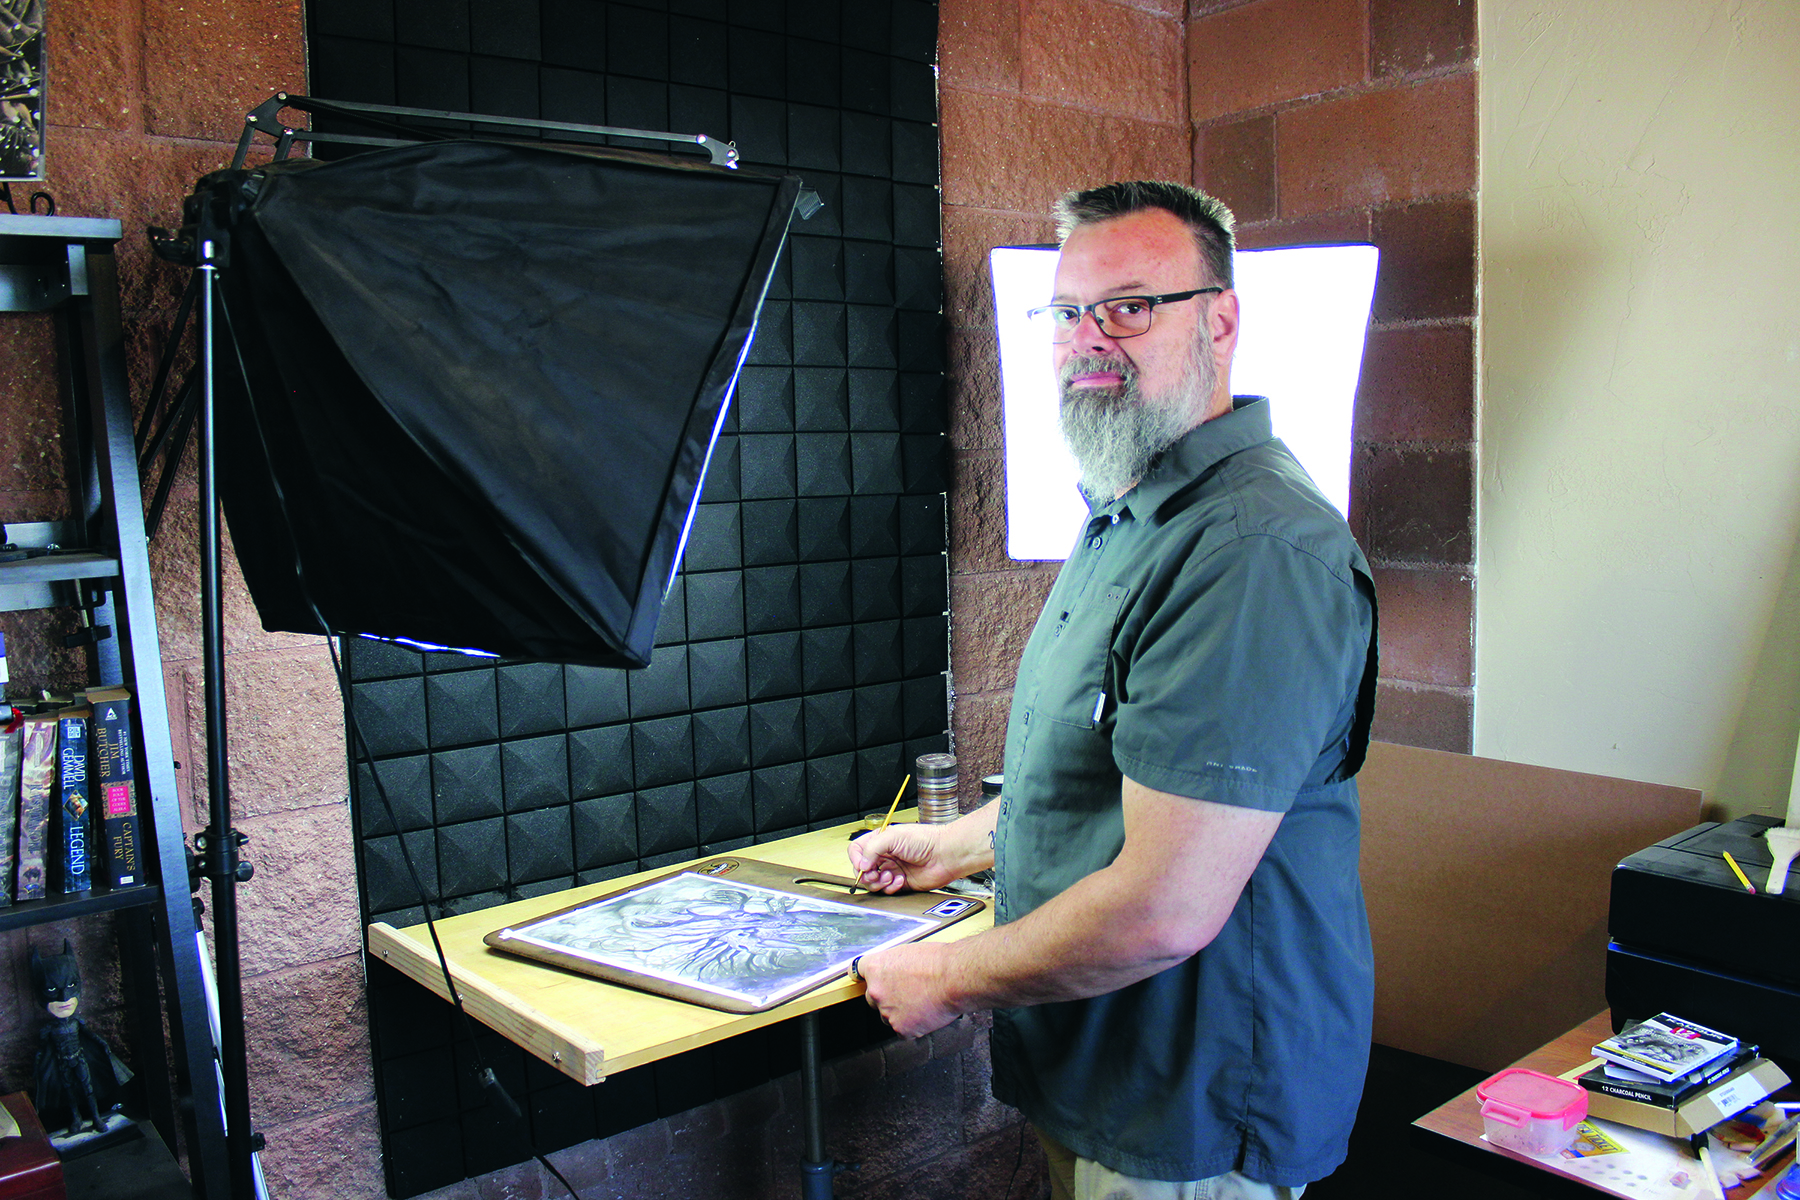
I’ve been a passionate creator of monsters and otherworldly beings since I was old enough to pick up a crayon. While I’m a mild-mannered graphic designer by day, I explore the worlds of darker creatures by night. For many years, I thought my art had to look like everyone else’s to be successful. I started by colouring at Image Comics in the 1990s and went almost exclusively into comic-based digital work for many years after.
When I hit a low point in my artistic career, I returned to the traditional mediums I knew best: pencil and charcoal. In charcoal powder, I discovered the power of starting with an abstract, and it lit my imagination on fire. This built up my ability and confidence to solve problems on the fly.
With my artistic intuition now rebooted, the creatures from the other side began to line up and knock on my brain. Each of them starts with a charcoal abstract to form a bridge between their dark universe and our own.
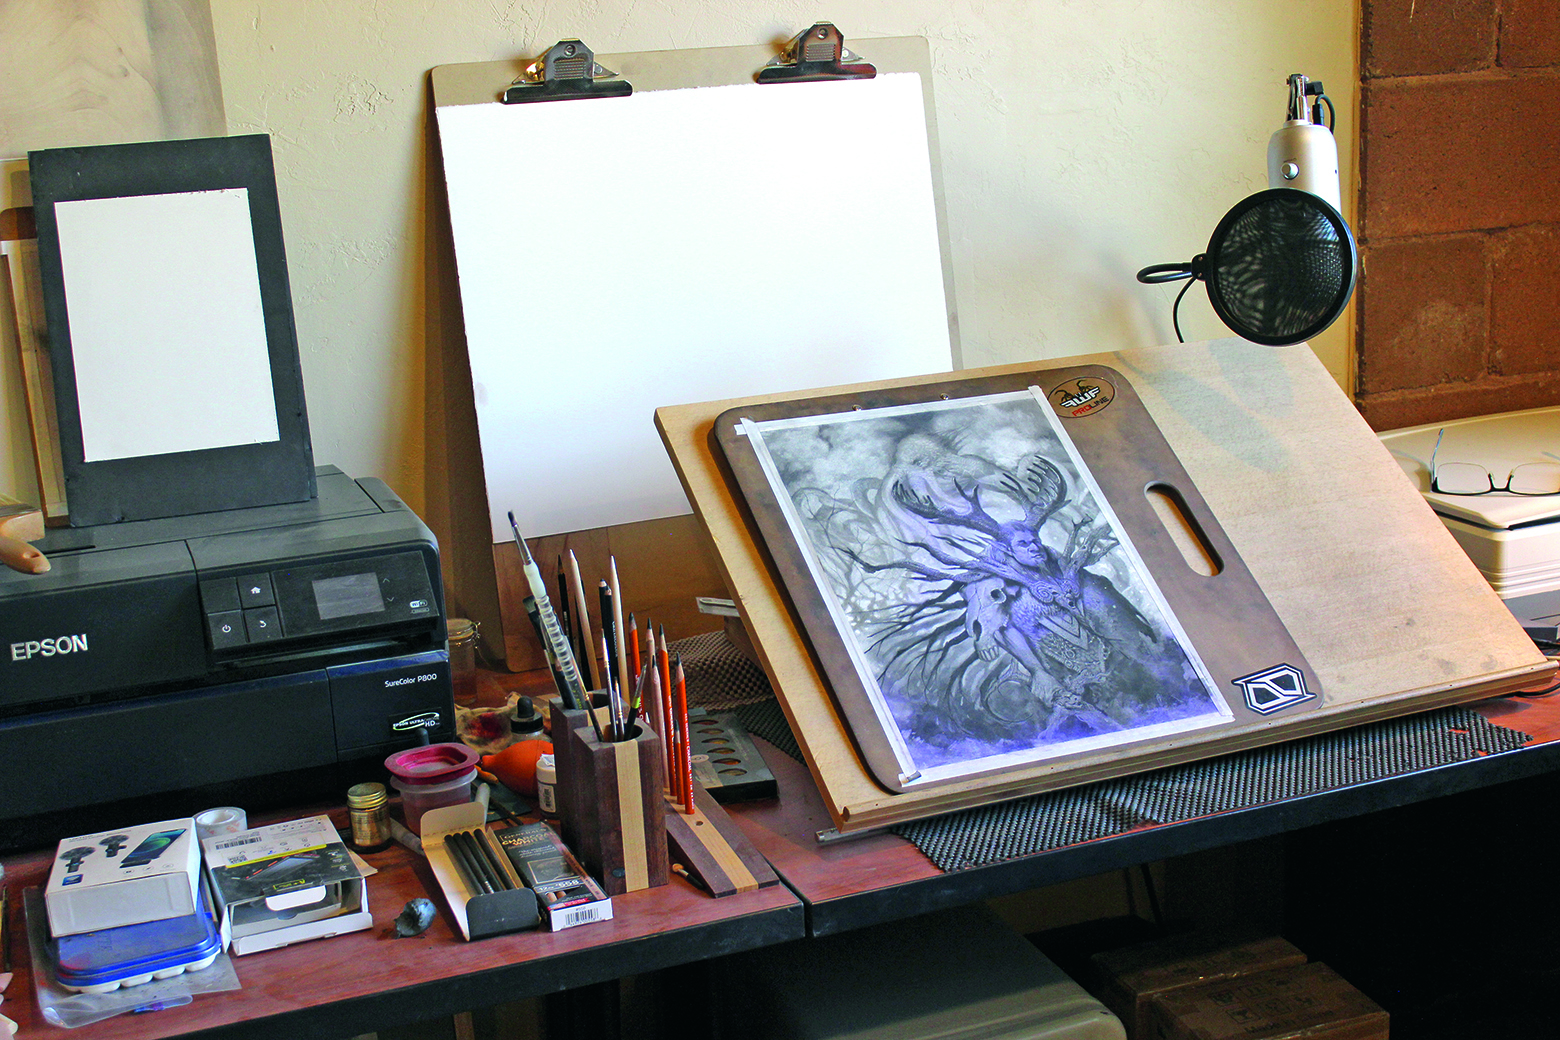
This workshop can be used to find or clarify your artistic voice, help remove creative blocks, discover and develop new characters, and create finished pieces. Based on questions I’ve received from my YouTube videos, this process will require less effort with a solid foundation in anatomy and knowledge of how to use value to create shape and composition.
I’ll take you through the process step by step, from how to mount your paper onto a board to creating your abstract, what to look for within it, how to use brushes and erasers to pull out what you see, and using value and composition to create a focal point.
Please note that charcoal powder can be messy, so make sure that you have a clear space to work in! This will allow your brush to dance across the paper, and you won’t have to worry about where the powder goes (also see our general tips for charcoal drawing).
Daily design news, reviews, how-tos and more, as picked by the editors.
01. Get set up
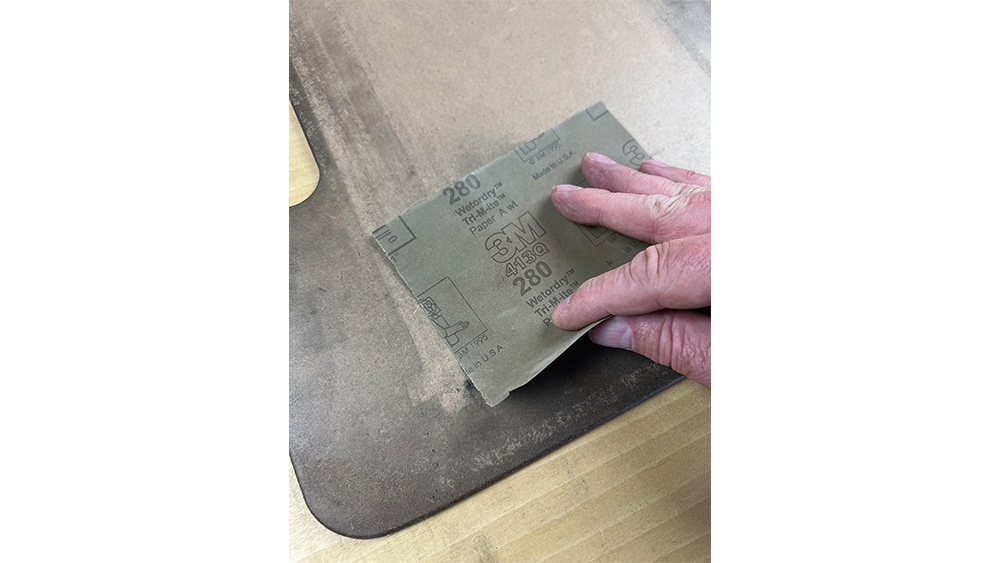
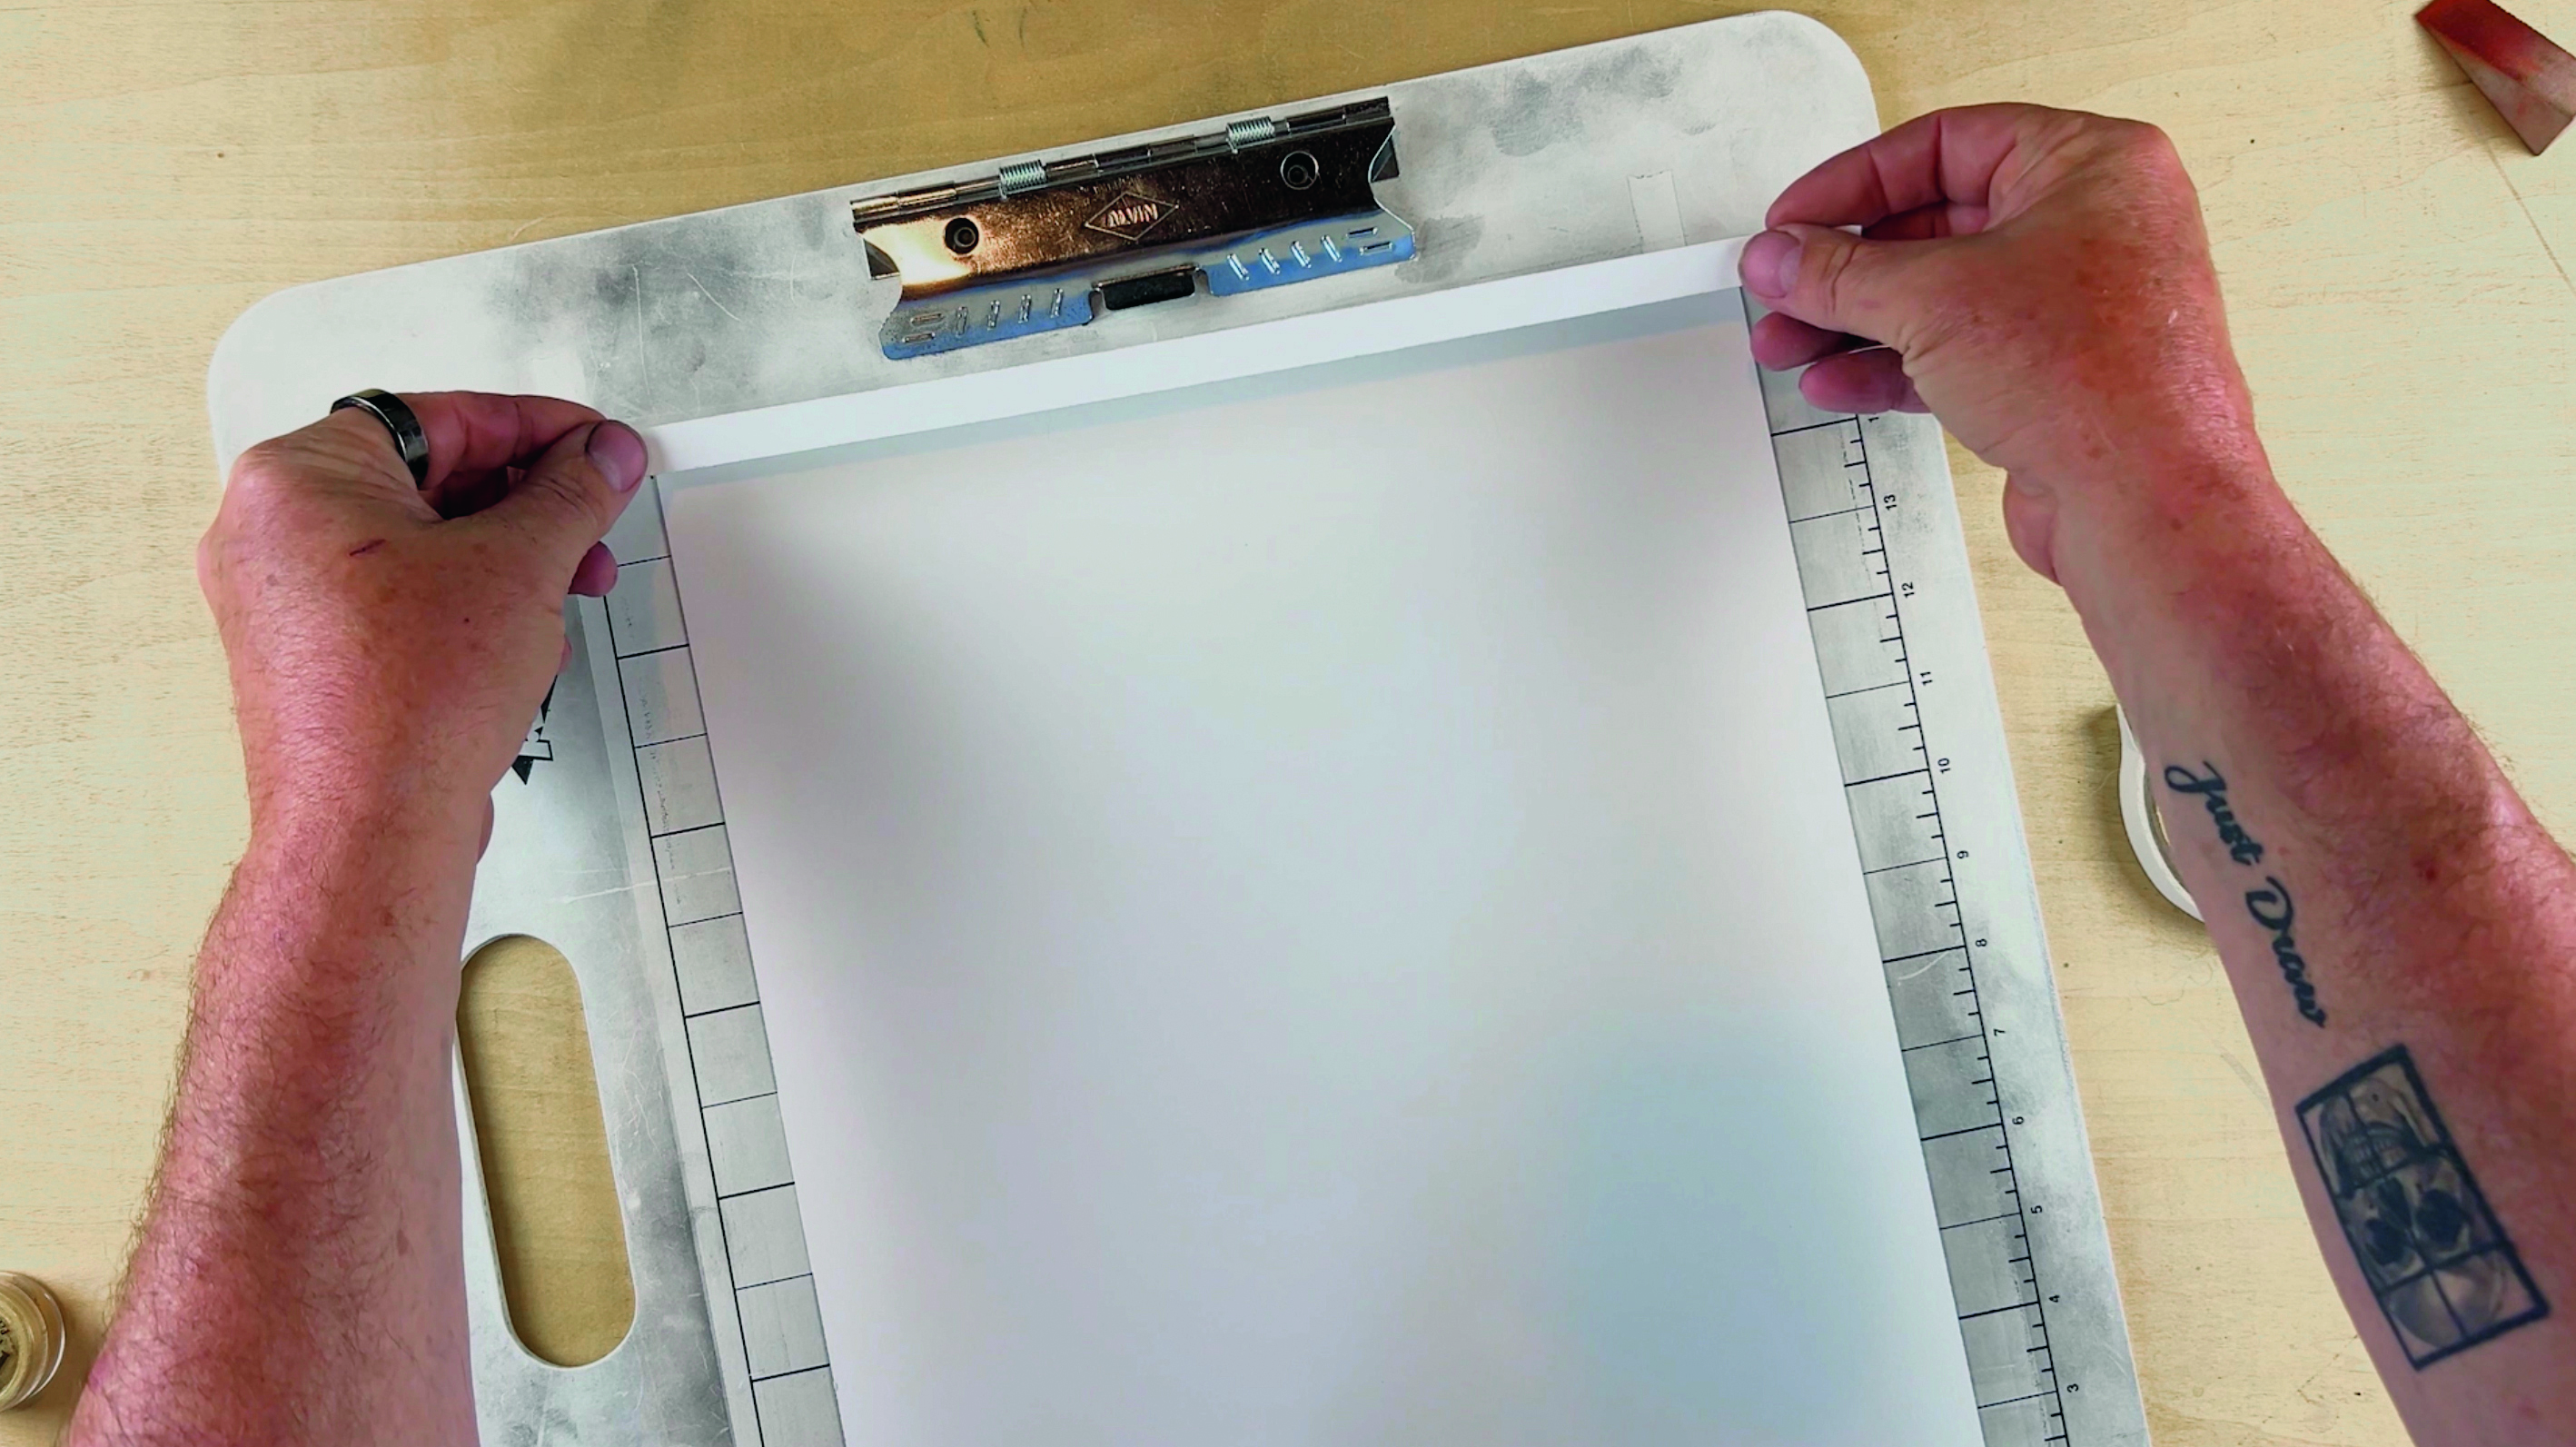
I mostly use hot-press watercolour paper because I like the subtle texture and grit. My first step is to lightly sand my Masonite backing board using a piece of 280 grit sandpaper. Sanding helps ensure that there won’t be any imperfections in the board that could become visible during the process. After dusting off the surface, I stick the paper down using drafting tape.
02. Begin with the colour
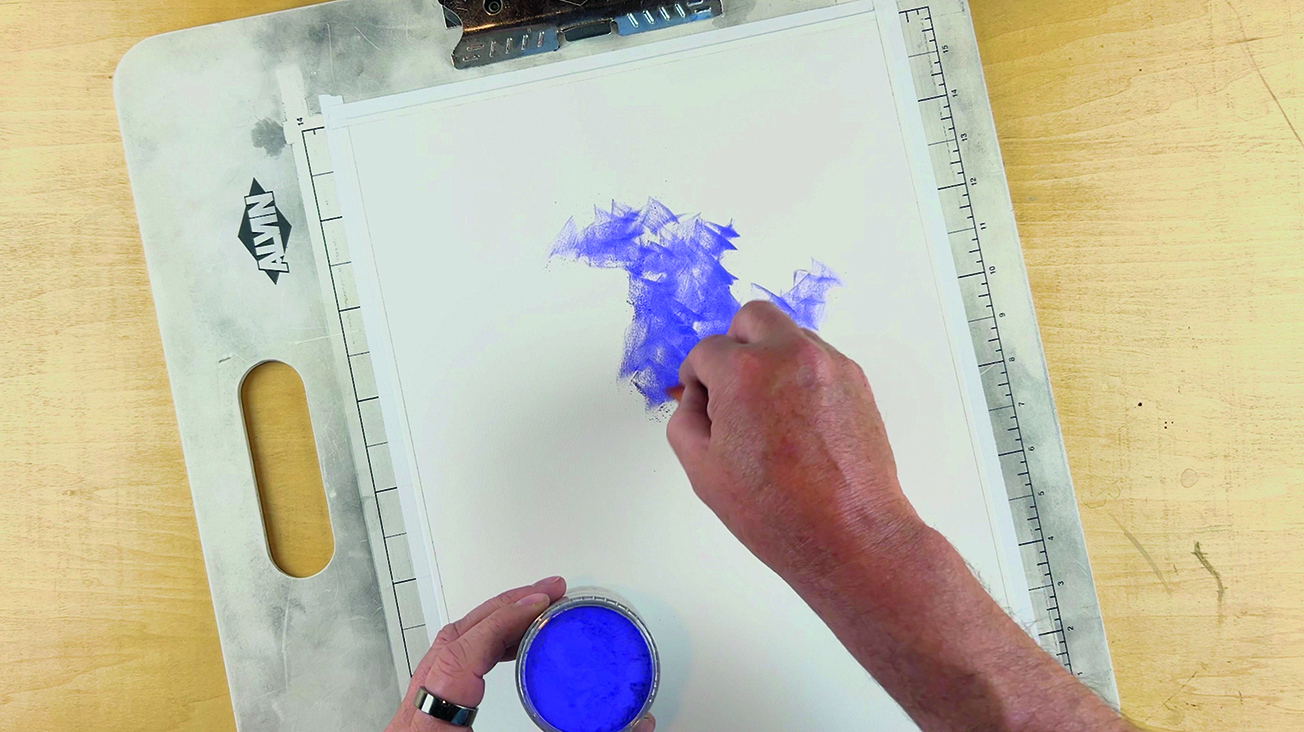
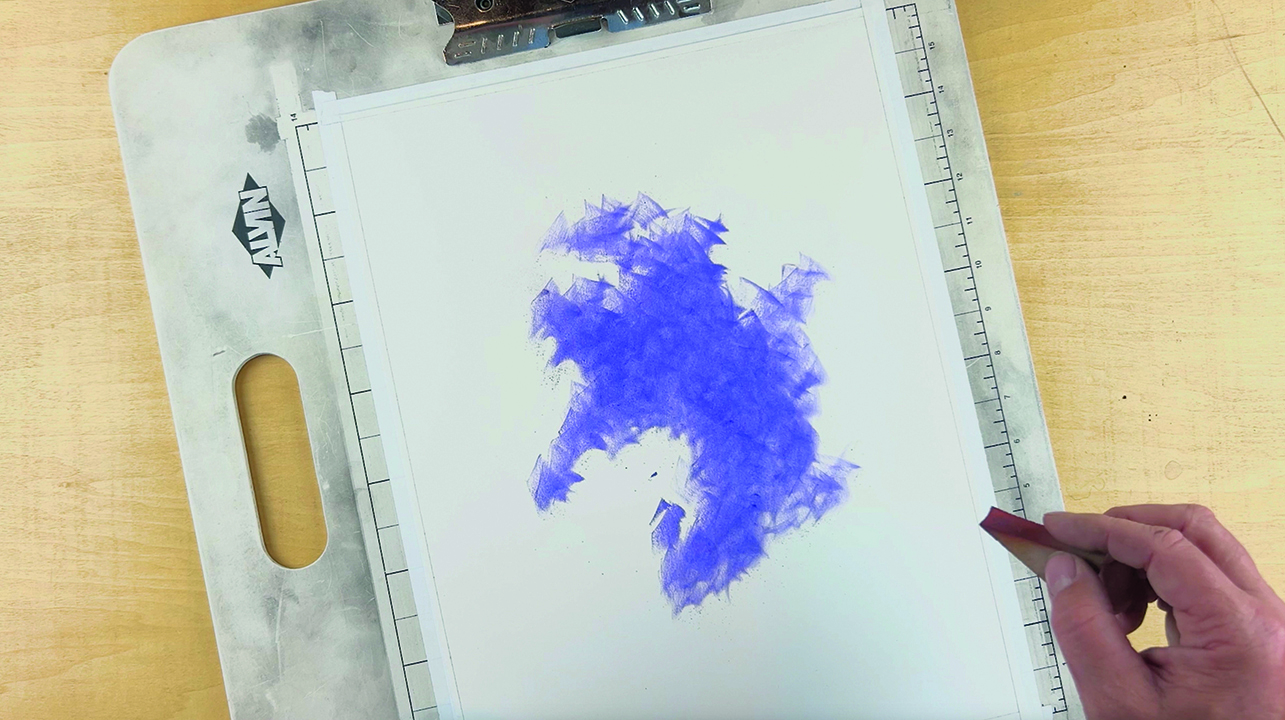
If you’re using colour, layer it in first. While I prefer PanPastel, you can use any soft pastel stick. Apply medium pressure when creating the abstract. If you use a sponge to help move the colour around the page, it will create an interesting texture that you can use to develop and define your abstract shape
03. Apply the charcoal
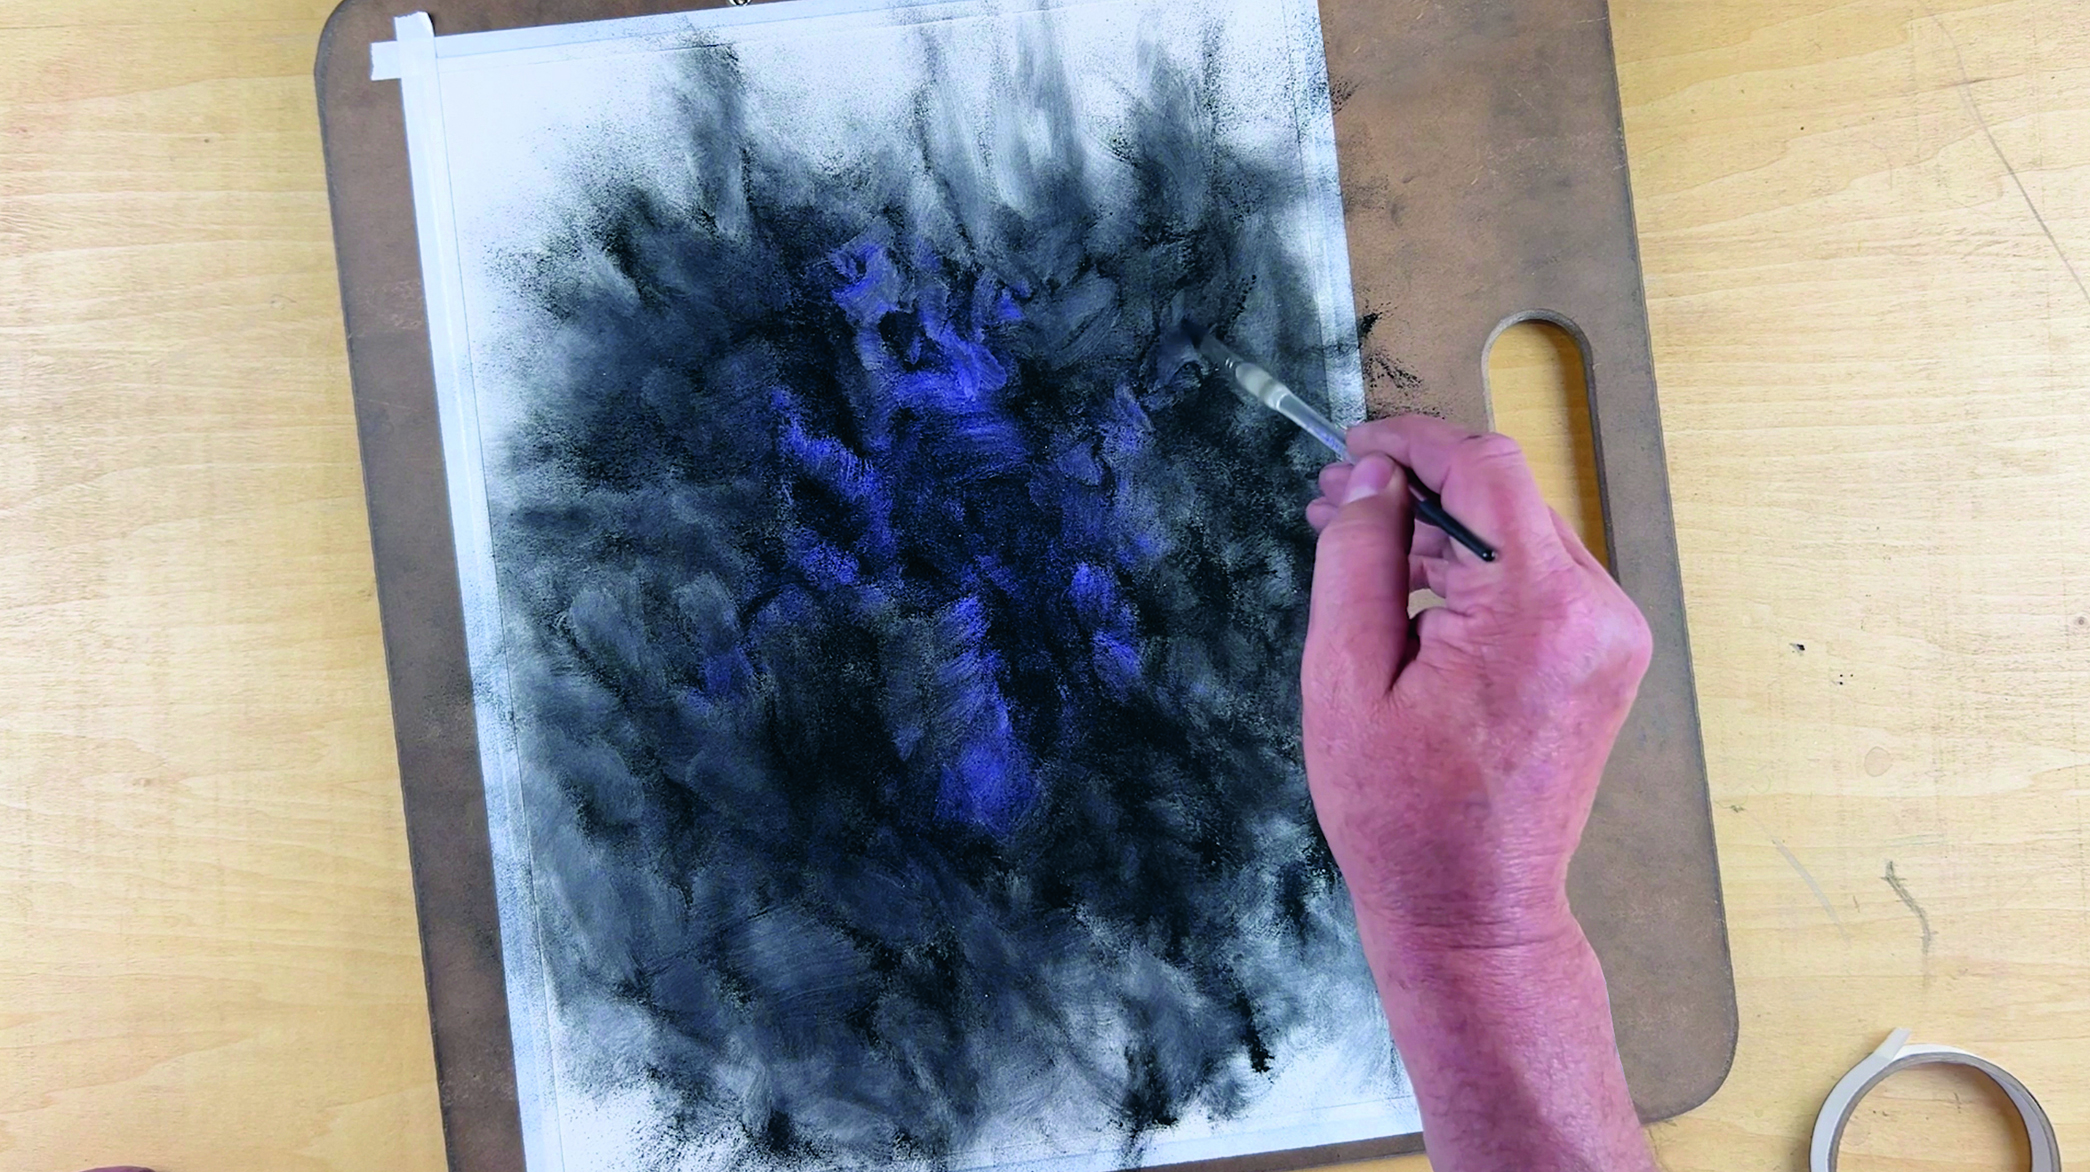
Using a light touch, I start with a 2.5-inch soft brush to move the charcoal powder around the page and layer it over the colour. Work from a large to a small brush to create an interesting shape that appeals to you. Be creative in the tools you use; bird feathers can create a wonderful texture.
04. Do multiple abstracts
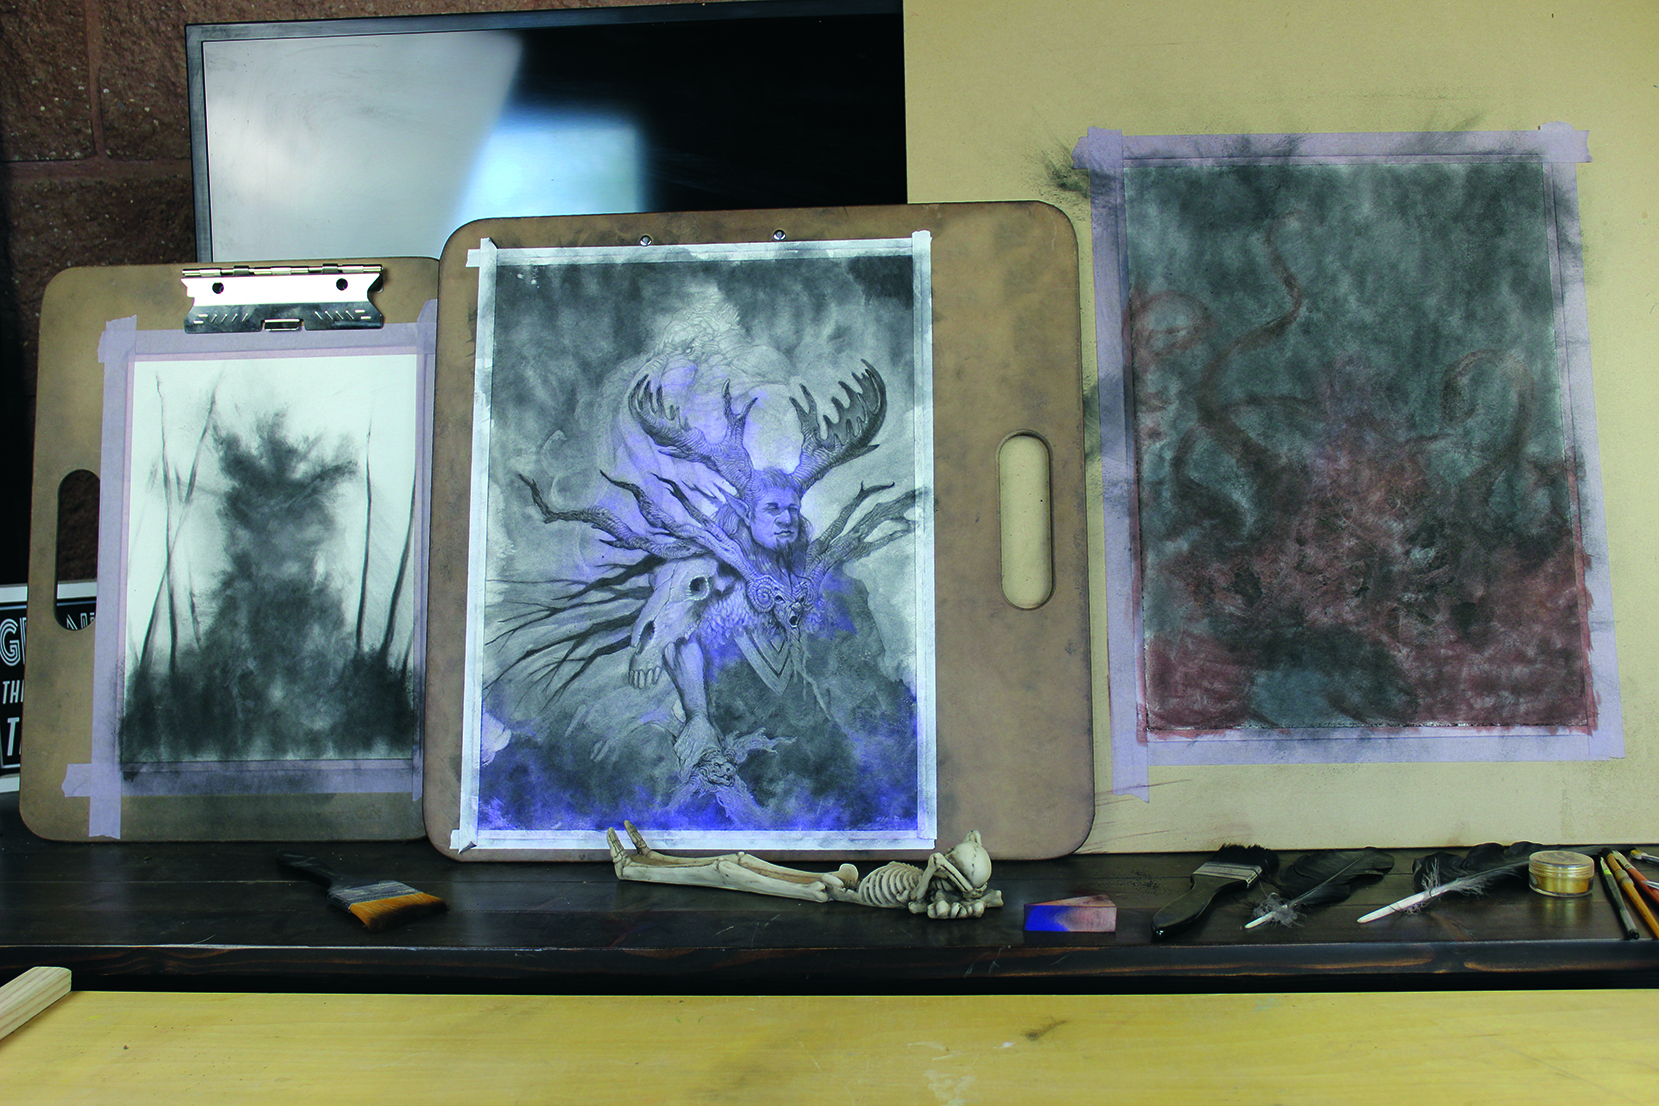
I like to create three to five abstracts at a time that I then place around the house, where I get to view them regularly. Waiting for one of them to speak to you may take a day, a week, or more. Be patient! I rarely move forward on the first thing I see in the abstract.
05. Carve out shapes from the abstract
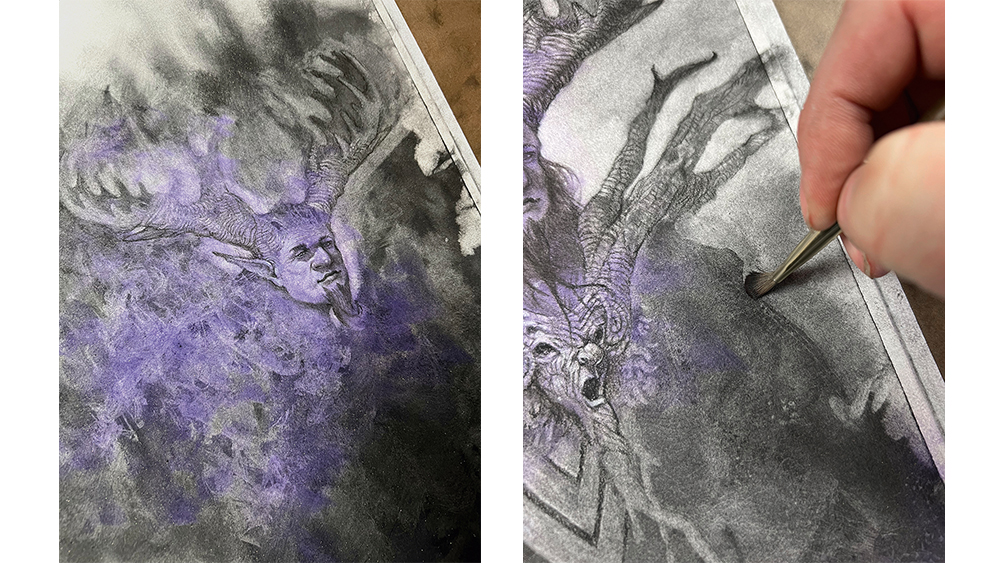
Once you see a face, arm, or other defining characteristic, start with a 0.25-inch soft brush to carve out what you see. The first brushstroke removes the most powder, and each subsequent stroke will remove less. I always keep a soft, dry cloth beside me so I can wipe the powder off the brush when I need a lighter value.
06. Pause and look
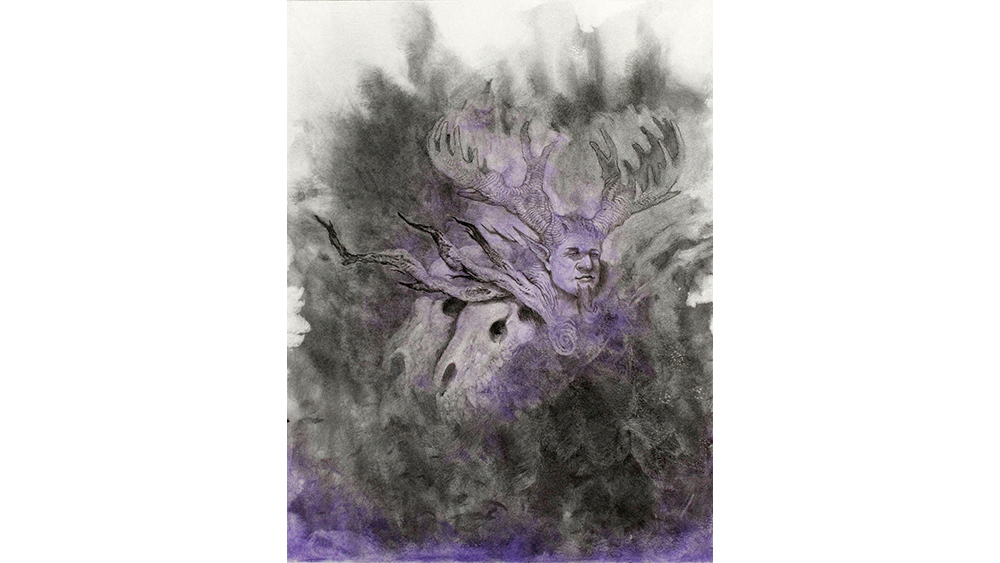
After I define what I first see with my brush, I’ll again put the piece up where I can view it. I imagine what the piece will look like as a whole composition while still maintaining the spontaneity and flow that got me to this point. I lightly use my brush to experiment with shapes.
07. Erase with a brush
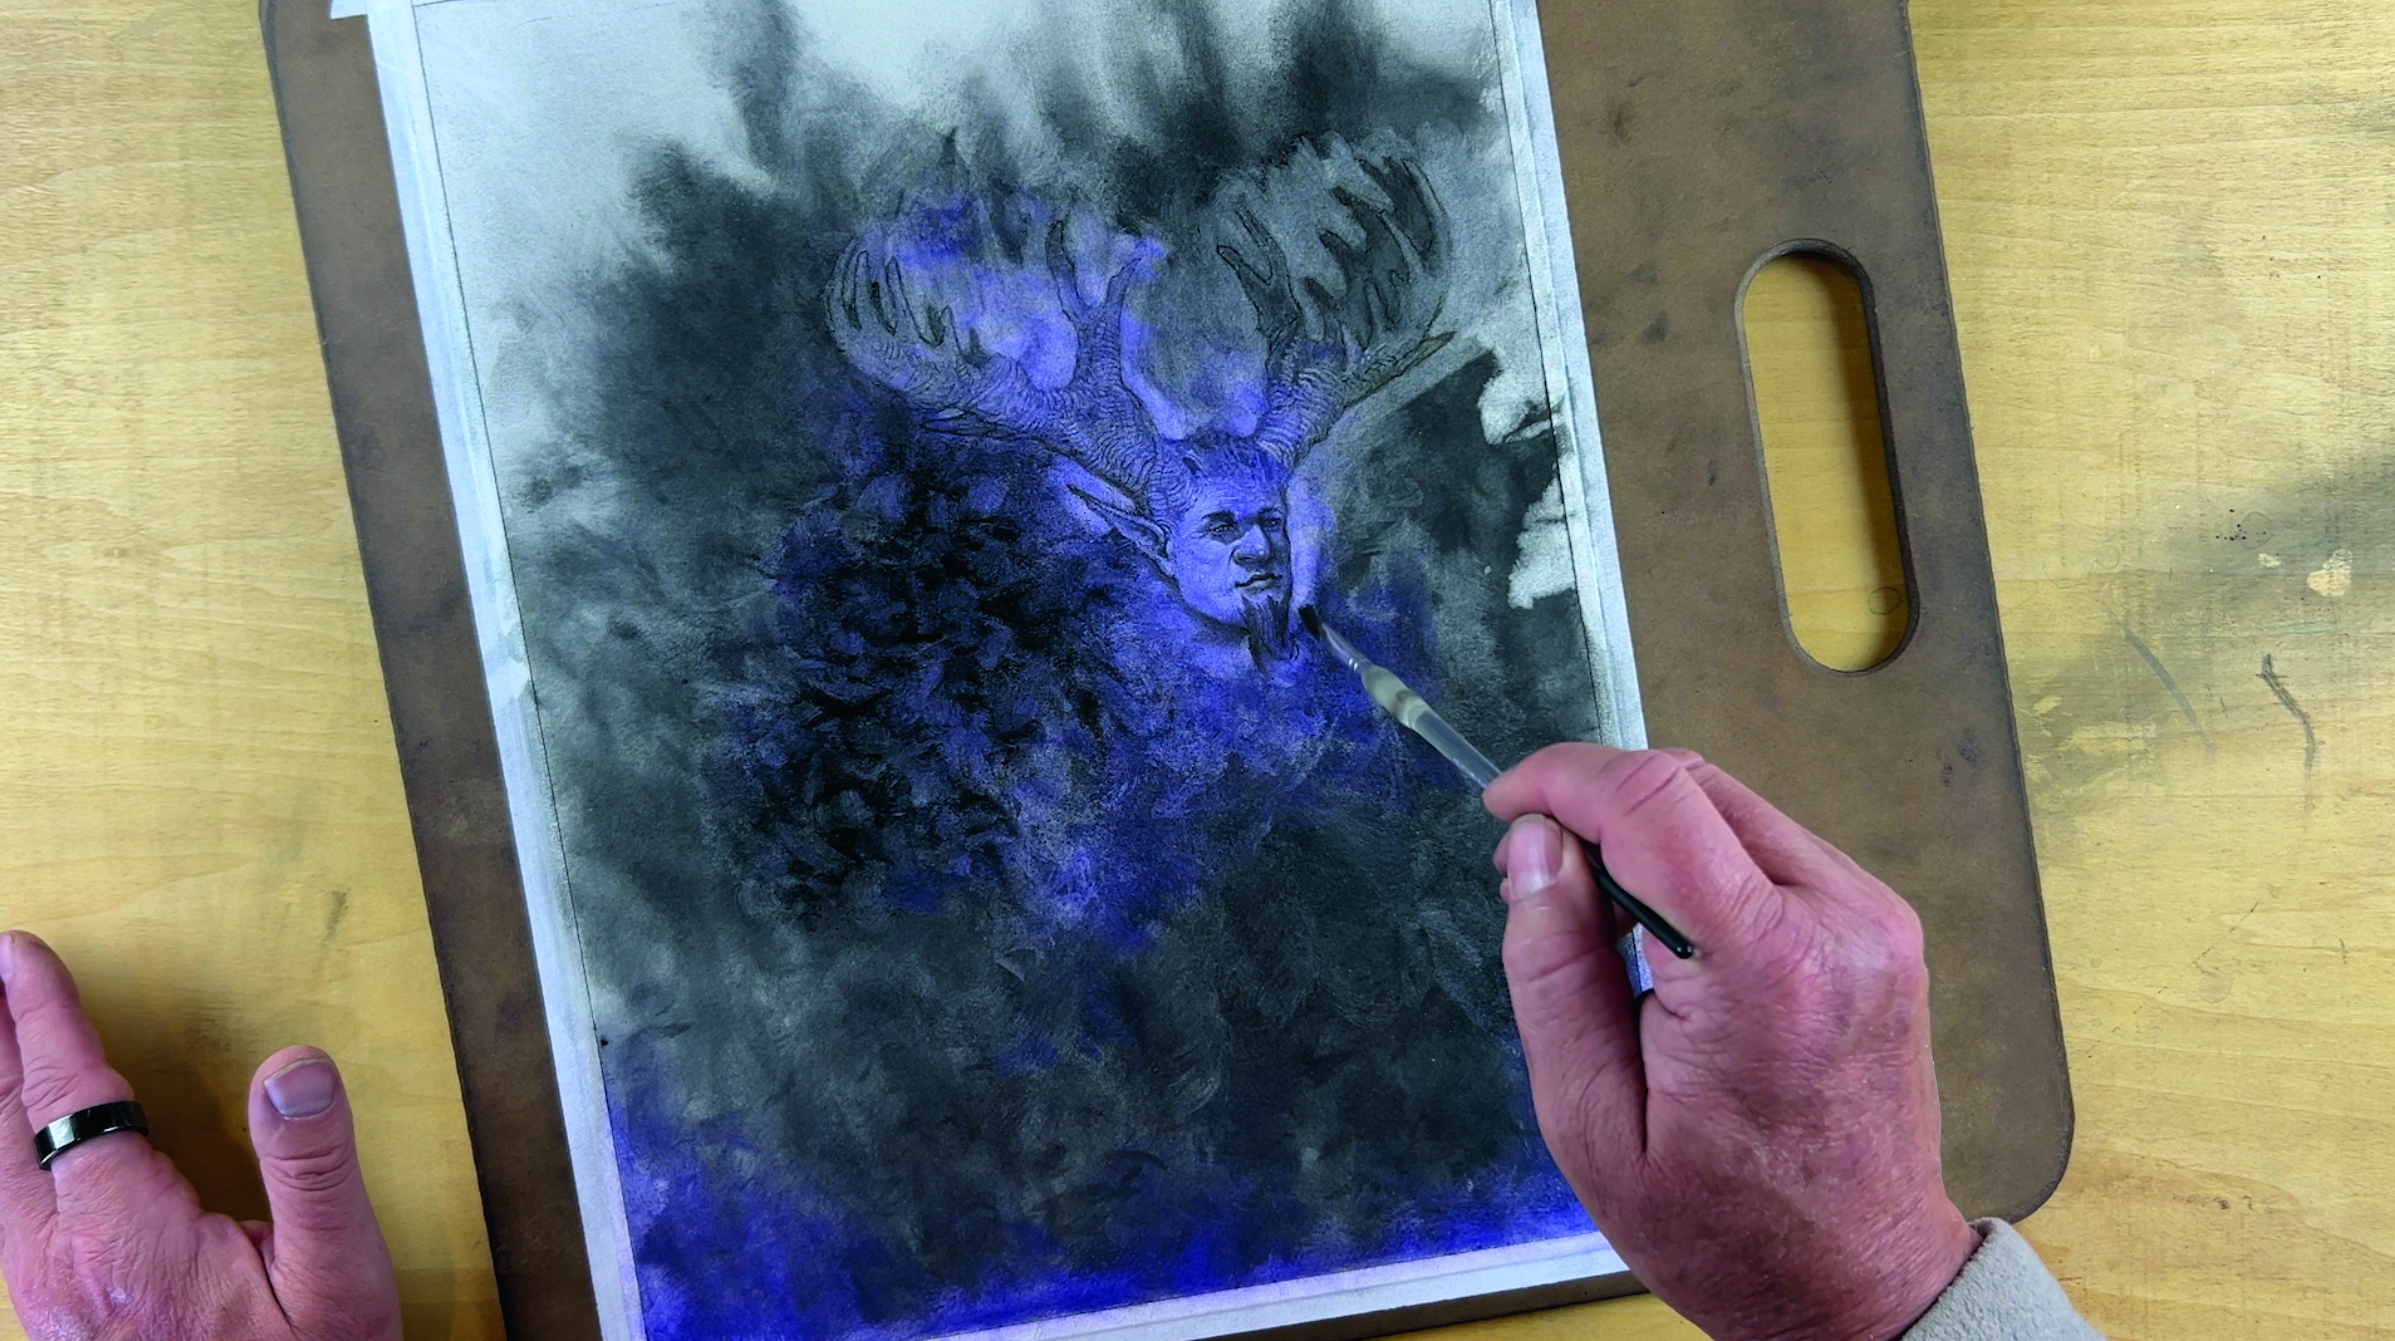
Most people think that erasing needs to be done with a specific type of eraser. In this technique, during Steps 5 and 6, the erasing is done with a brush. If you want to remove something or change the composition, use a larger brush with charcoal powder to gently brush over what you want to change.
08. Flesh out the creature
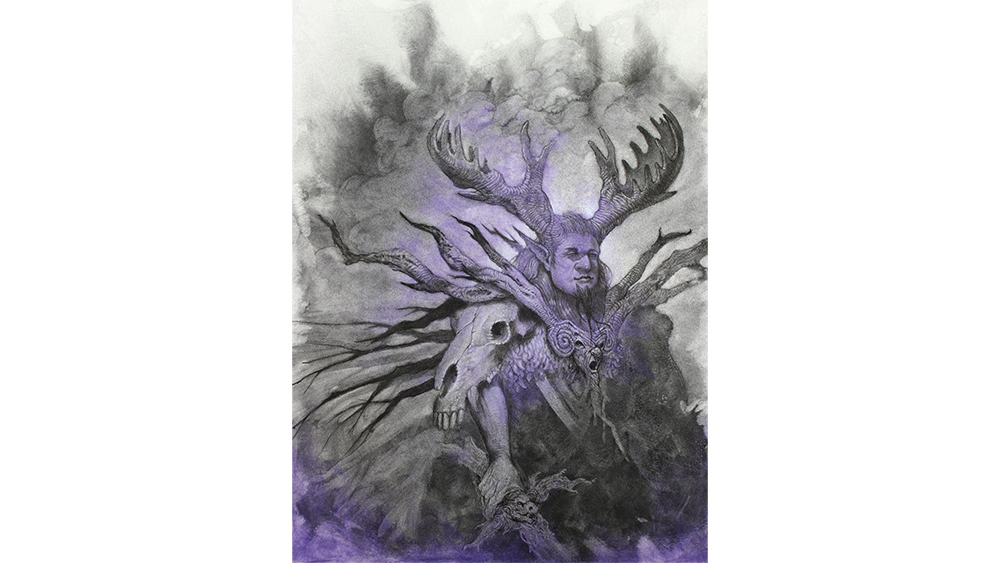
When you have a better idea of what you want in the composition, work from the focal point to the other parts of the painting that will frame it and support the composition. Stay within a range of lights and mid-values. Working within these allows for the most flexibility in case of any changes
09. Keep an eye out for more possibilities
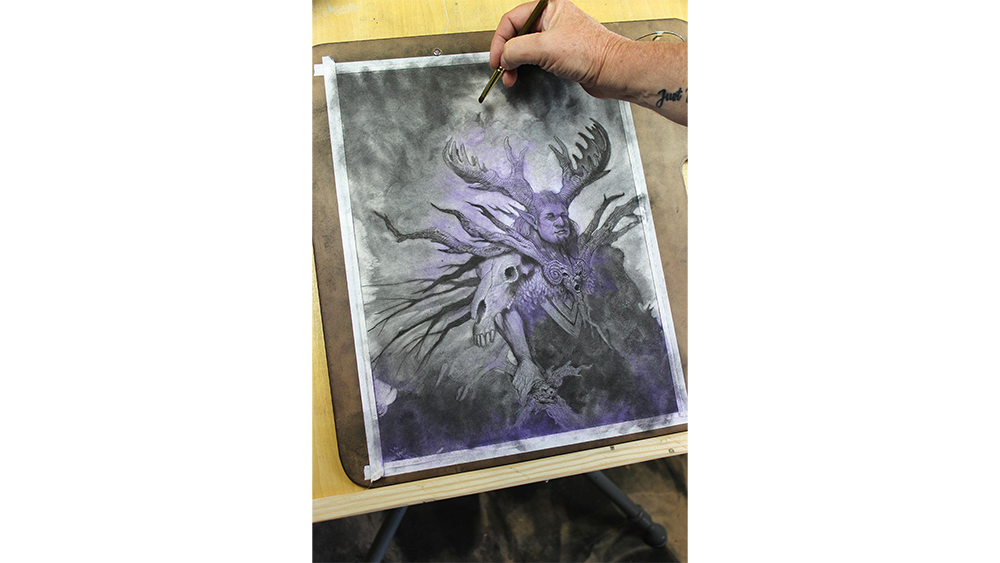
At this point, take a pause again. Turn the piece upside down or sideways to ensure you don’t miss out on any other creatures or supporting elements of the painting. The agony and ecstasy of this type of technique is that a new visitor can appear at any time, as it did in this piece. Allow your intuition to guide you.
10. Handy reference sources
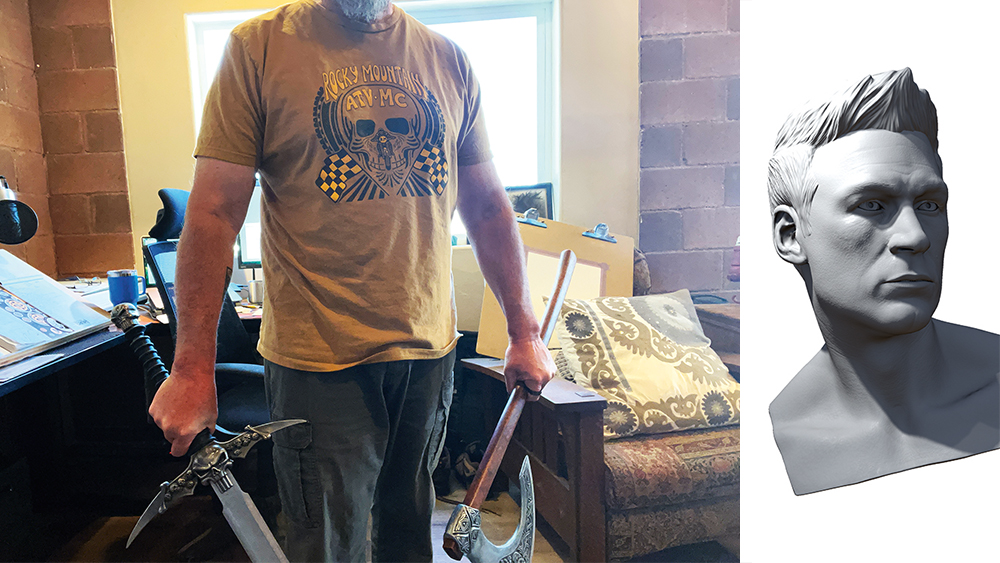
To ensure that my character’s face is structurally correct, I open my two favourite apps. Head Model Studio offers a wide variety of facial structures and lighting options, while the Handy app is my go-to for hands. When needed, I’ll use myself as a model and shoot images of what I need for correct lighting and poses.
11. Develop extra characters
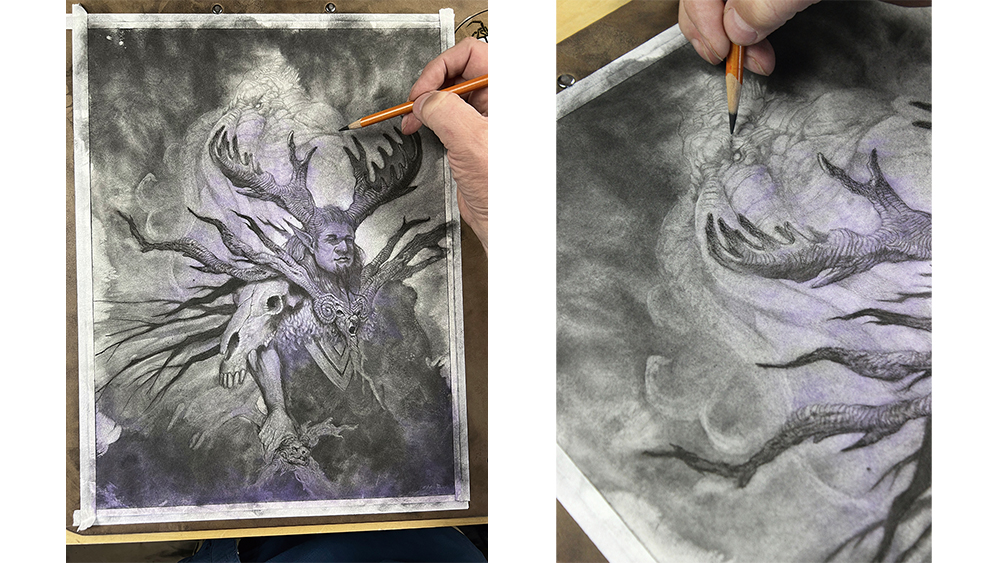
Work any new visitors that appeared in Step 9 into your composition. Pay close attention to your values, as it can be easy to disrupt the value range you’ve been building up to this point. Be patient when fleshing them out and integrating them into the composition. I gently use a hard charcoal pencil and a soft brush for this stage.
12. Bring out the details and add textures
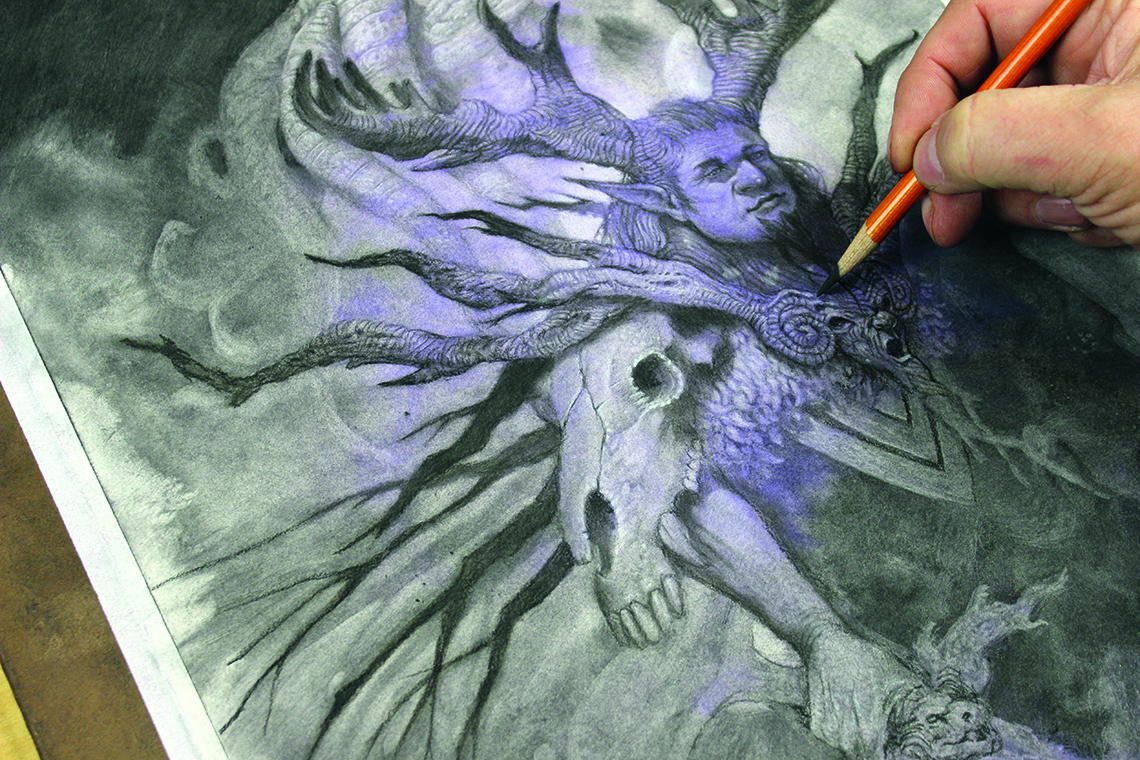
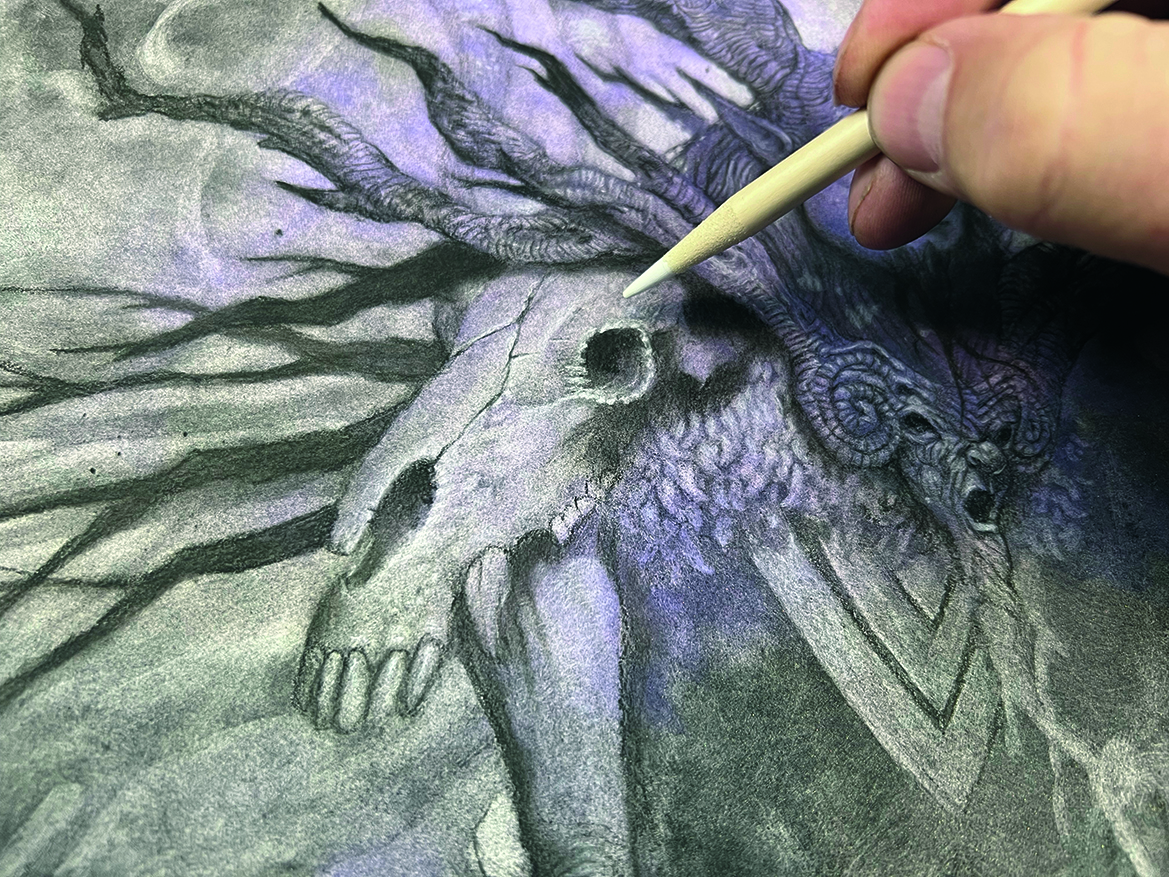
Using detail is one of my favourite ways to build the story of the piece and bring each character to life. Focus on the textures within the character’s clothing and armour, as well as their design. You can create a fine point on your kneaded eraser to lighten and add shape, and use a charcoal pencil to enhance depth.
13. Place the darks
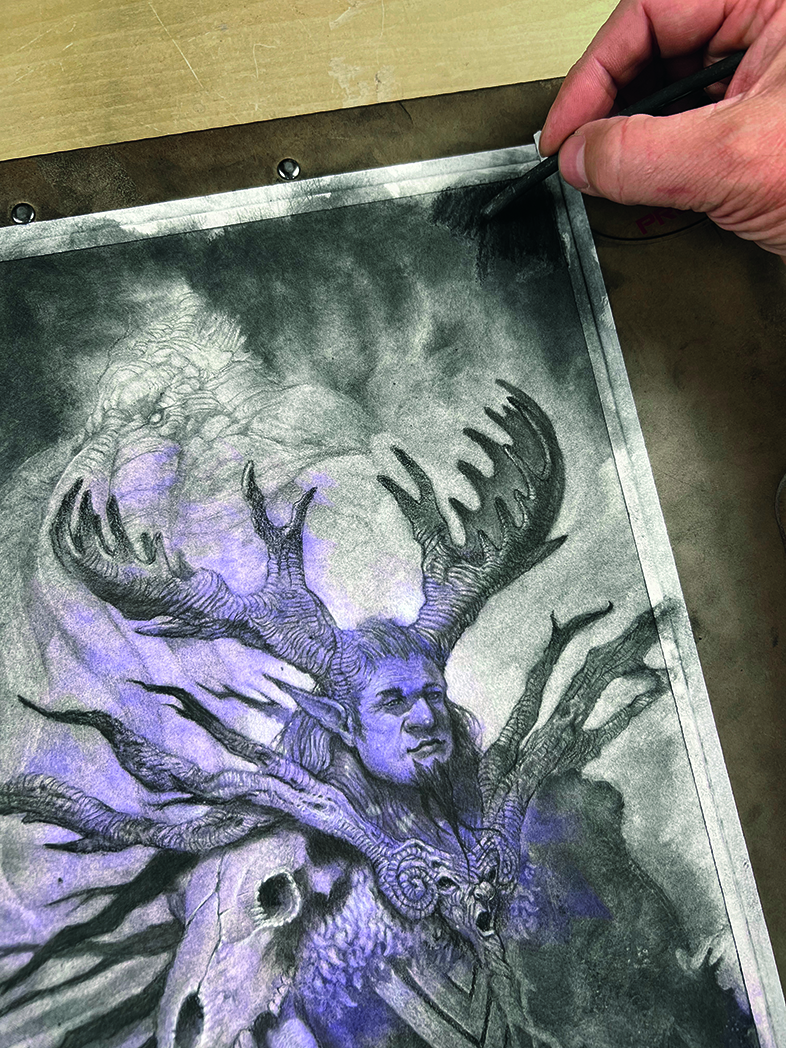
Now it’s time to add the dark values! I use vine charcoal and soft charcoal pencil. If you’re using General’s pencils, use numbers 2, 4, and 6 to layer in darker layers. Scrub these with a firm bristled brush, but don’t scrub in your darks until you know where you want them as these layers won’t erase easily.
14. Push and pull values
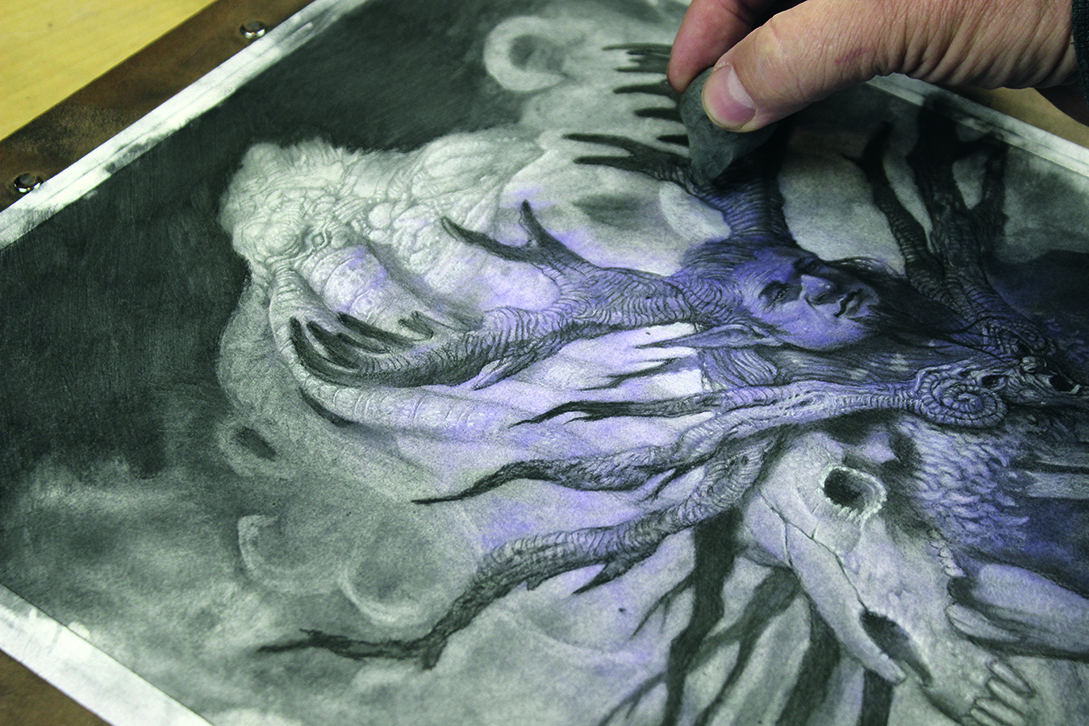
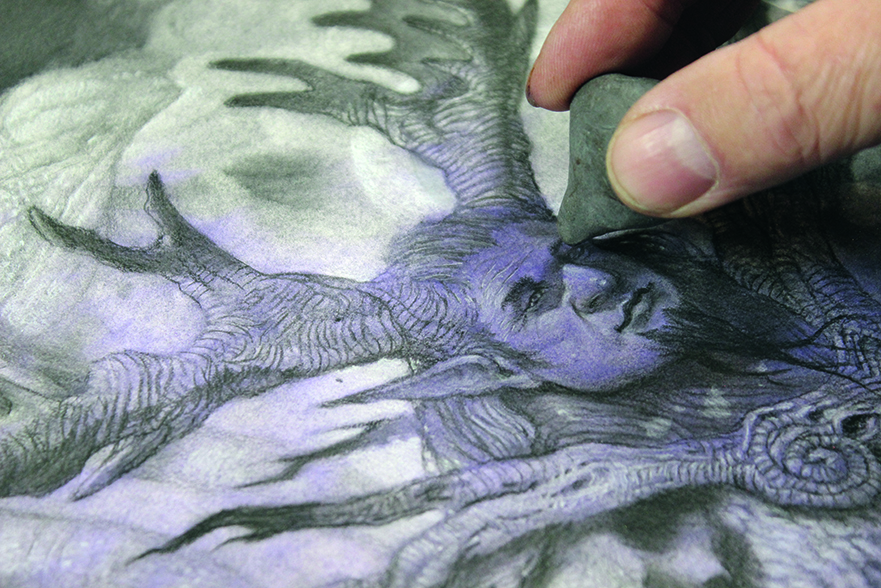
While I use my kneaded eraser throughout the painting process, it’s my go-to during this phase. Push and pull your values to help maximise the depth of the composition. Keep in mind that if you’ve added too many darks too quickly, a very light touch with an electric eraser can pull you out of your black hole
15. Final details and highlights
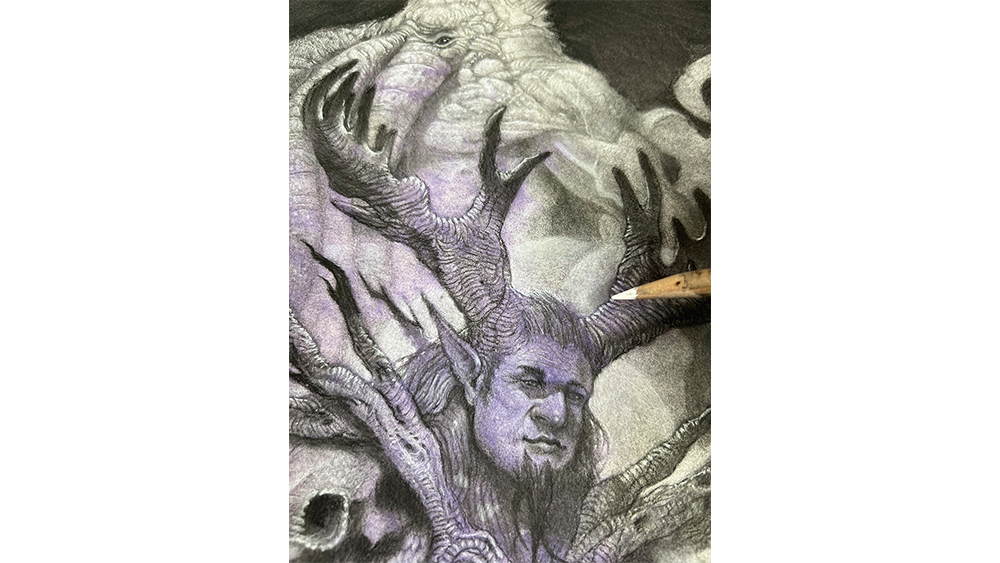
Now is the time to add an extra touch of atmosphere. Look for areas to accentuate with a soft glow, specular highlights, dust, and sometimes little critters to give the painting extra dimensionality and punch. When the first pass is complete, refine and adjust your values to ensure you can create the maximum energy needed for the piece.
16. Last reflections
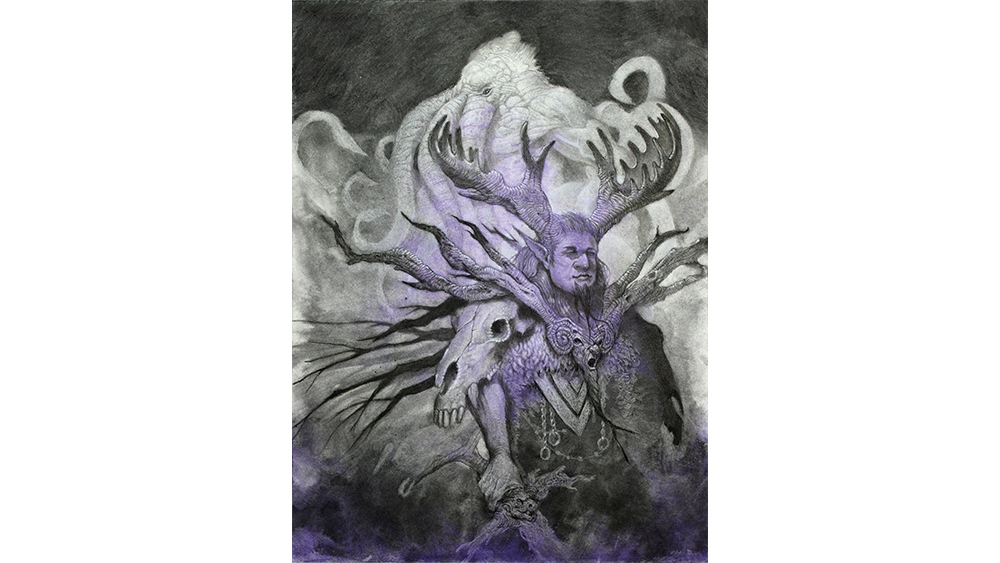
Remember that this is a fluid technique. When I discovered the second creature during Step 9, I wasn’t satisfied with the result in terms of values and building depth. To rebalance the composition, I had to readjust my values, revisit earlier steps, and make significant changes so the new composition would work. That’s one of the keys: remember to use this process intuitively.
This article originally appeared in ImagineFX. Subscribe to ImagineFX to never miss an issue. Print and digital subscriptions available.
For more inspiration, see our rounds ups of comic art resources and line art exercises.
You might also want to see our feature on what is concept art?
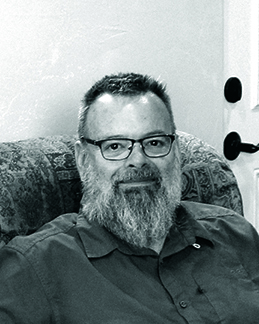
By day, Eric Messinger owns Think Horse Studios, a design and marketing firm. By night, he creates creatures from beyond the veil using charcoal abstracts.
You must confirm your public display name before commenting
Please logout and then login again, you will then be prompted to enter your display name.
