How to stabilize shaky footage in After Effects
The latest release of Adobe Creative Cloud offers a wide range of tools to help you stabilize your footage from any source. Mike Griggs offers some tips.
Sign up to Creative Bloq's daily newsletter, which brings you the latest news and inspiration from the worlds of art, design and technology.
You are now subscribed
Your newsletter sign-up was successful
Want to add more newsletters?
Video content is increasingly in demand; with the explosion of web content, nearly every product needs its own mini-documentary or web clip. Getting smooth footage used to be the purview of professional videographers and VFX artists only. But those days are at an end.
With the tools available with After Effects CC and Premiere CC, both of which come with Adobe's Creative Cloud, there is now a range of tools that can stabilize your footage and give you professional results really quickly. Even if you've never shot video before, it's worth checking out these tools, which can open up a range of new creative possibilities.
01. Preparation
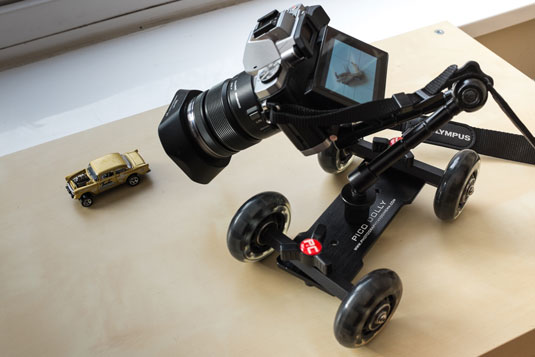
Naturally the easiest way to remove footage is to not have any in the first place. This does not mean you need to go and spend thousands on a steadicam. You just need a bit of preparation.
Article continues belowDoes the camera need to be moving in the shot? One of the biggest tells between amateur and pro footage is a wavy camera. If you have a lot going on in your shot, maybe the camera does not need to be moved at all?
If you're only shooting work that doesn't need any visual effects integrated into it, many cameras (including smartphones) have anti-shake systems. Optical anti-systems, which stabilize the lens or sensor, are better than digital anti-shake, which is software based only.
Most camera stabilization systems are optimised for stills but an increasing number work well for video, so check to see if your camera is equipped. If you need to go handheld, mount your camera on a tripod with a weight hanging from the bottom; this will counteract any movement. Also don't be afraid to improvise. Wheelbarrows make excellent camera rigs!
02. Warp Stabilizer
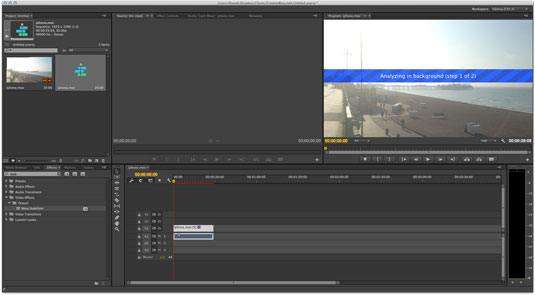
If you're working on a piece for editing only, the latest release of Adobe Creative Cloud has taken a lot of the 'magic' shake removal tools that appeared originally in After Effects, such as Warp Stabilizer, and moved them into Premiere. This saves a lot of hassle moving between these two applications.
Sign up to Creative Bloq's daily newsletter, which brings you the latest news and inspiration from the worlds of art, design and technology.
To apply the stabilize effect, just select your clip in the main timeline, go to the effects palette, use the handy search function to look for the Stabilize Motion effect and drag it onto your clip in the timeline.
A bar will appear over your clip, which will tell you which part of the stabilization process is occurring. All being well, your footage should appear stabilized once the bar disappears.
03. Tracking tools
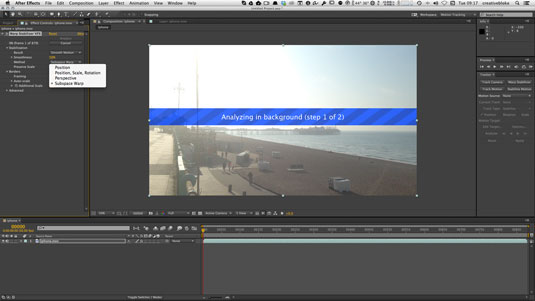
Of course magic tricks do not always work the way you want, and so After Effects has a range of options to help. The quickest way to access the tracking tools is to go to Window>Workspace>Motion Tracking, where the tracking palette will appear. I usually start with the Warp Stabilizer.
While the Warp Stabilizer tools usually do a pretty good job, especially over shorter clips, one of the drawbacks of the stabilizing tools if they're run automatically is that they can crop into your footage quite drastically.
To mitigate this, whether you're using After Effects or Premiere there is a range of options to help you get the result you want.
First of all, you can tell After Effects not to crop your image. If this does not work you can adjust the way that the Stabilizer works, by choosing a range of options from Warp Stabilizer through to Position Only.
04. Stabilize Motion
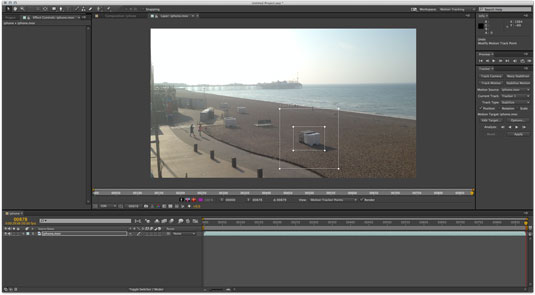
Sometimes it's better to use the other stabilize options, other than the Warp Stabilizer option, especially if you're going to be integrating VFX into a shot. This is because the Warp Stabilizer literally warps the footage, and while this does not matter for non-VFX shots, it can make work like tracking objects into your footage much harder, as the tracking software cannot anticipate Warp Stabilized footage in the same way it can if the footage is direct from the camera.
You can either use the Warp Stabilizer set to 'position, scale etc,' or use the traditional 2D 'Stabilize Motion' tracking software in After Effects to apply stabilization, as well as give tracking data to help you integrate elements into your shots.
05. Mocha AE
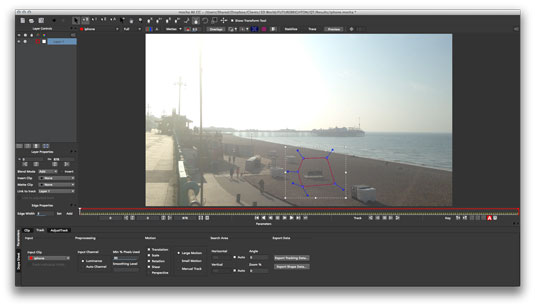
While there is a range of excellent tracking tools within After Effects itself, you get another piece of tracking software with Adobe Creative Cloud. Mocha AE is available from the After Effects menu: just choose Animation>Track in Mocha AE.
Mocha differs from the other trackers available from After Effects in that is a Planar tracker, which means it's much better for tracking shapes - for example, if you're doing screen replacements.
Mocha AE can also be used to stabilize footage, by copying the data back as transform data, rather than the more normal corner pin method, which you'd use if you were tracking elements within a shot.
While slightly more convoluted than the Warp Stabilizer tool, Mocha AE is an excellent tool and there are some excellent tutorials available through the After Effects help section.
Words: Mike Griggs
Mike Griggs is a freelance concept 3D, VFX and Mograph artist working across TV, exhibition and digital design. Follow him on Twitter @creativebloke
Delivered in conjunction with ZED!
This content was produced in collaboration with HP & Intel as part of ZED - a Pop-Up Studio for the Creative Community held in Soho, London. For more information about ZED and any future events see here.

The Creative Bloq team is made up of a group of art and design enthusiasts, and has changed and evolved since Creative Bloq began back in 2012. The current website team consists of eight full-time members of staff: Editor Georgia Coggan, Deputy Editor Rosie Hilder, Ecommerce Editor Beren Neale, Senior News Editor Daniel Piper, Editor, Digital Art and 3D Ian Dean, Tech Reviews Editor Erlingur Einarsson, Ecommerce Writer Beth Nicholls and Staff Writer Natalie Fear, as well as a roster of freelancers from around the world. The ImagineFX magazine team also pitch in, ensuring that content from leading digital art publication ImagineFX is represented on Creative Bloq.
