How to use 3D models in concept art
Misa Steinmetz explains how she incorporates 3D techniques into her 2D workflow.
Sign up to Creative Bloq's daily newsletter, which brings you the latest news and inspiration from the worlds of art, design and technology.
You are now subscribed
Your newsletter sign-up was successful
Want to add more newsletters?
I started my career just with digital painting, but over the years I began to incorporate more and more 3D techniques to speed up my process. Having a solid understanding of the art fundamentals and 2D skills is essential, but learning how to use 3D – even in a basic way – is very useful for producing quick iterations and making amendments when working with clients.
3D has been incredibly useful in all of my concept art and matte painting work in animation, games and movies. Knowing how to use 3D helps with passing your work on to other departments, creating more images in a shorter amount of time, and working in a non-destructive manner for potential changes.
Blender has been my 3D tool of choice because it’s free and there are so many tutorials and resources and Blender tutorials online. There are many more 3D tools to learn such as Unreal Engine and 3DCoat, but I always recommend Blender as a starting place for your 3D journey (see our guide to the best 3D modelling software for more options).
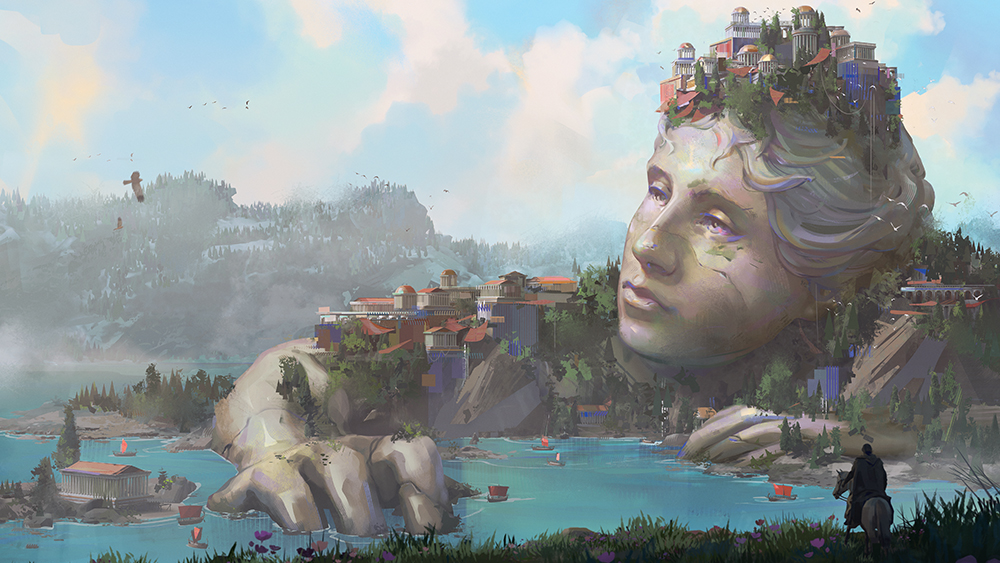
Article continues belowIt can be easy to get sucked into spending too much time in 3D and not progressing on your piece, but I’ve found that going between your 3D scene and painting over in 2D helps a lot, and for this workshop I’ll be sharing my process of creating a simple 3D blockout to push to a final painting in Photoshop.
How to use 3D models for 2D concept art
01. Create thumbnail sketches
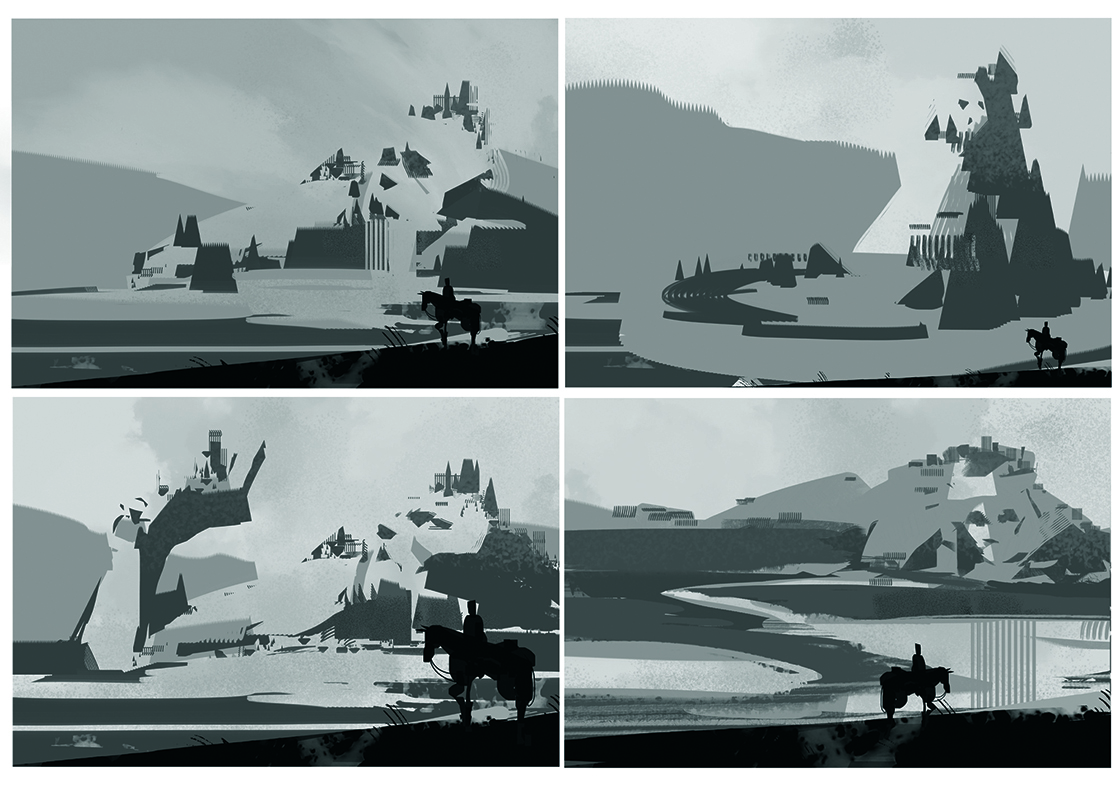
Once I have a couple of references for my painting organised in PureRef, I start sketching some thumbnails. I draw rough lines first to indicate the fore-, mid- and background, and then paint a quick value pass on top.
For this piece I need the focal point to be on the right-hand side of the image, so I focus more on producing variations with secondary shapes throughout the left-hand side and the midground.
02. Build and light a rough 3D blockout
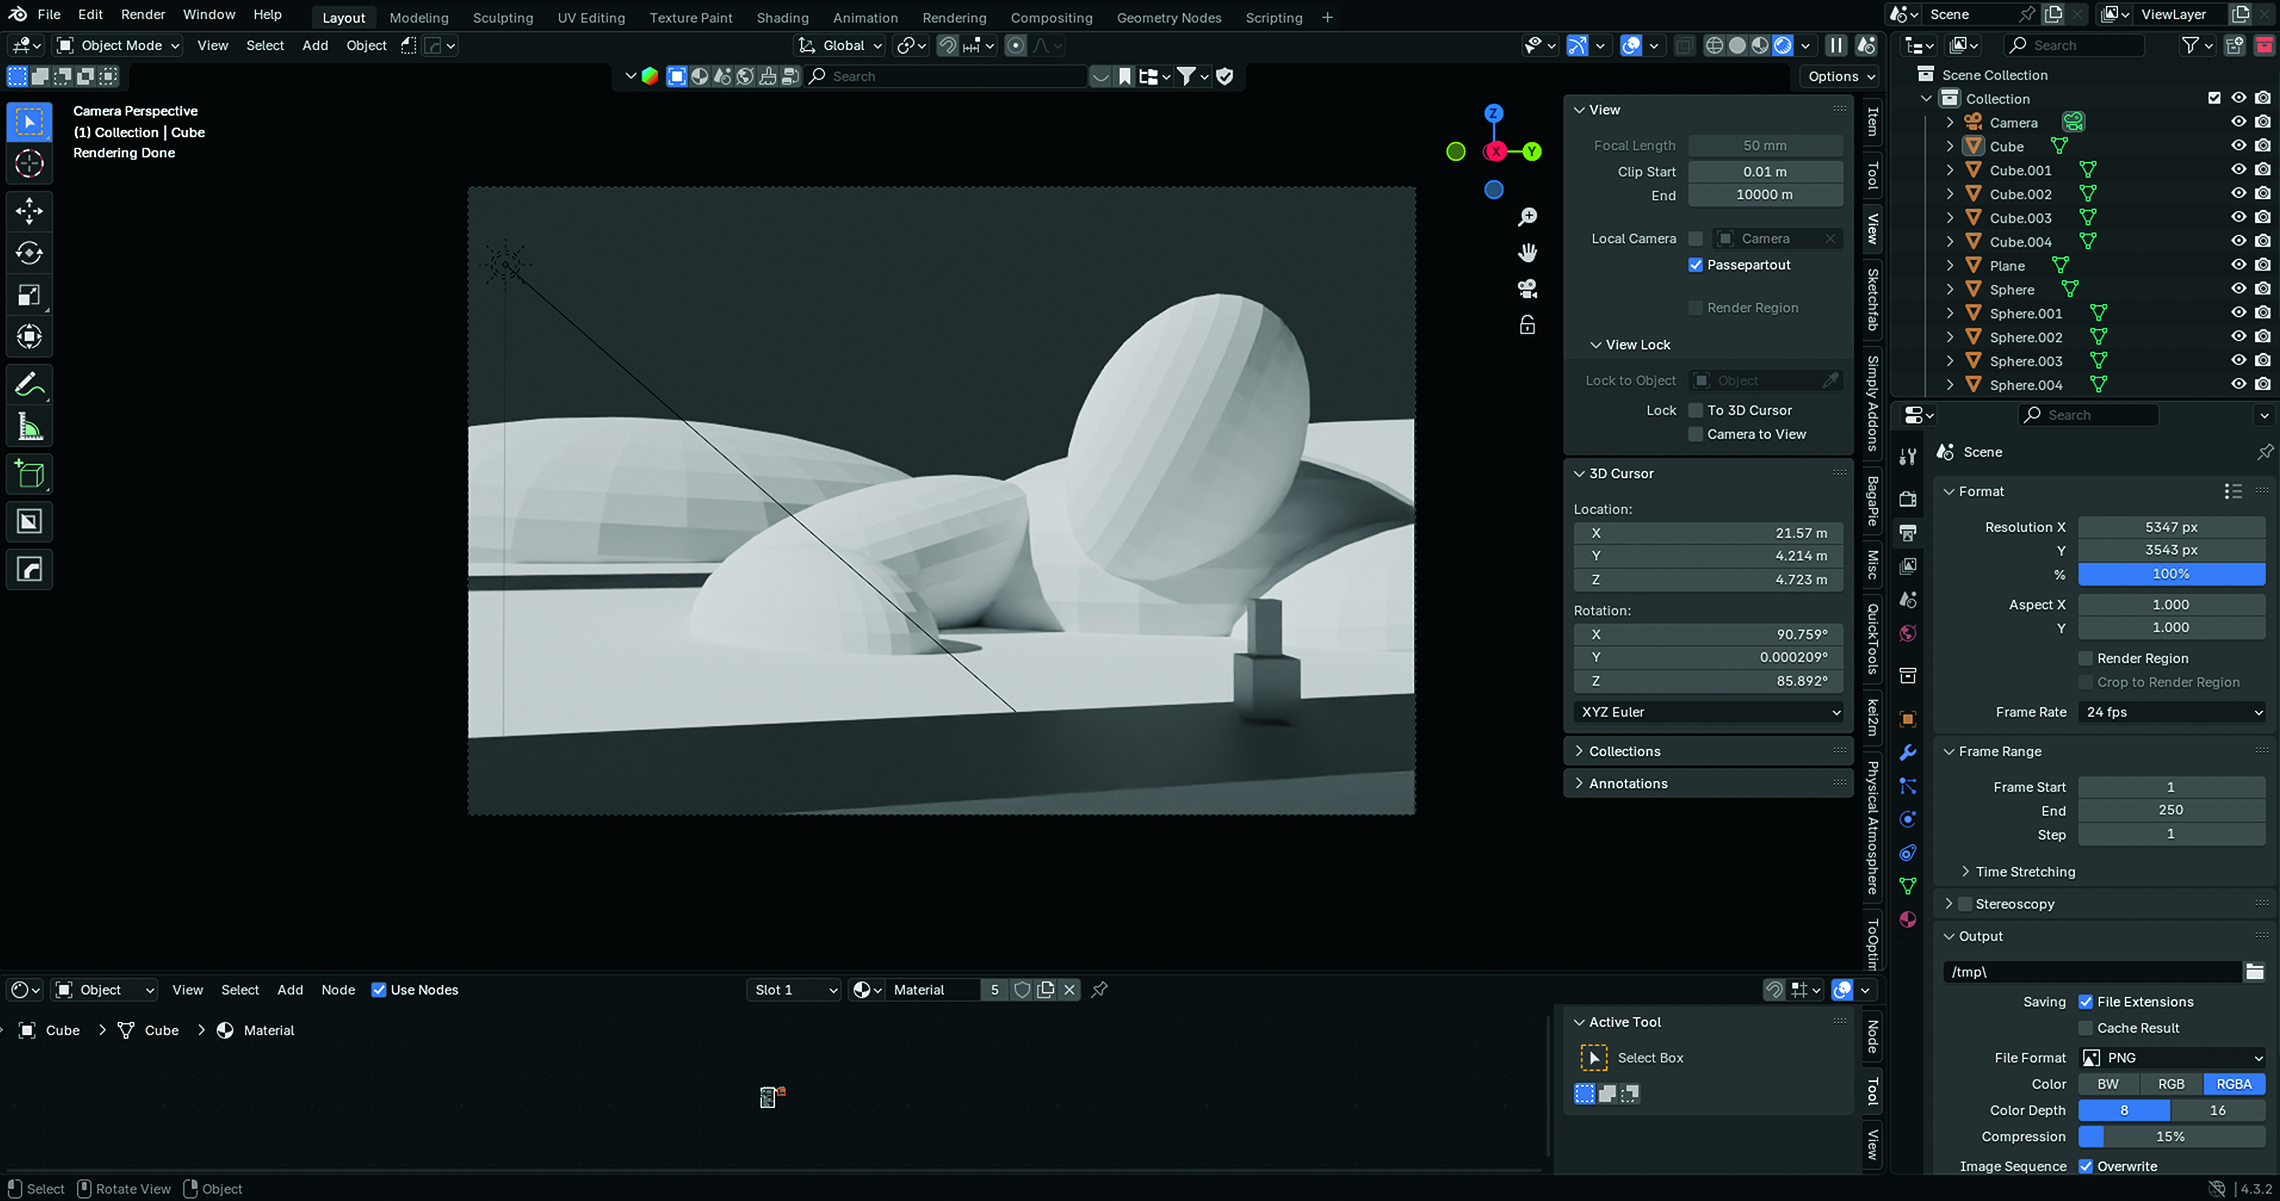
After the composition is chosen, I set up my Blender scene with the camera angle, base shapes and lighting. I use simple geometry to block out the scene and place the sun in the correct position to match my value sketch. I set the focal length for the camera in this scene at 50mm.
03. Introduce 3D assets to the composition
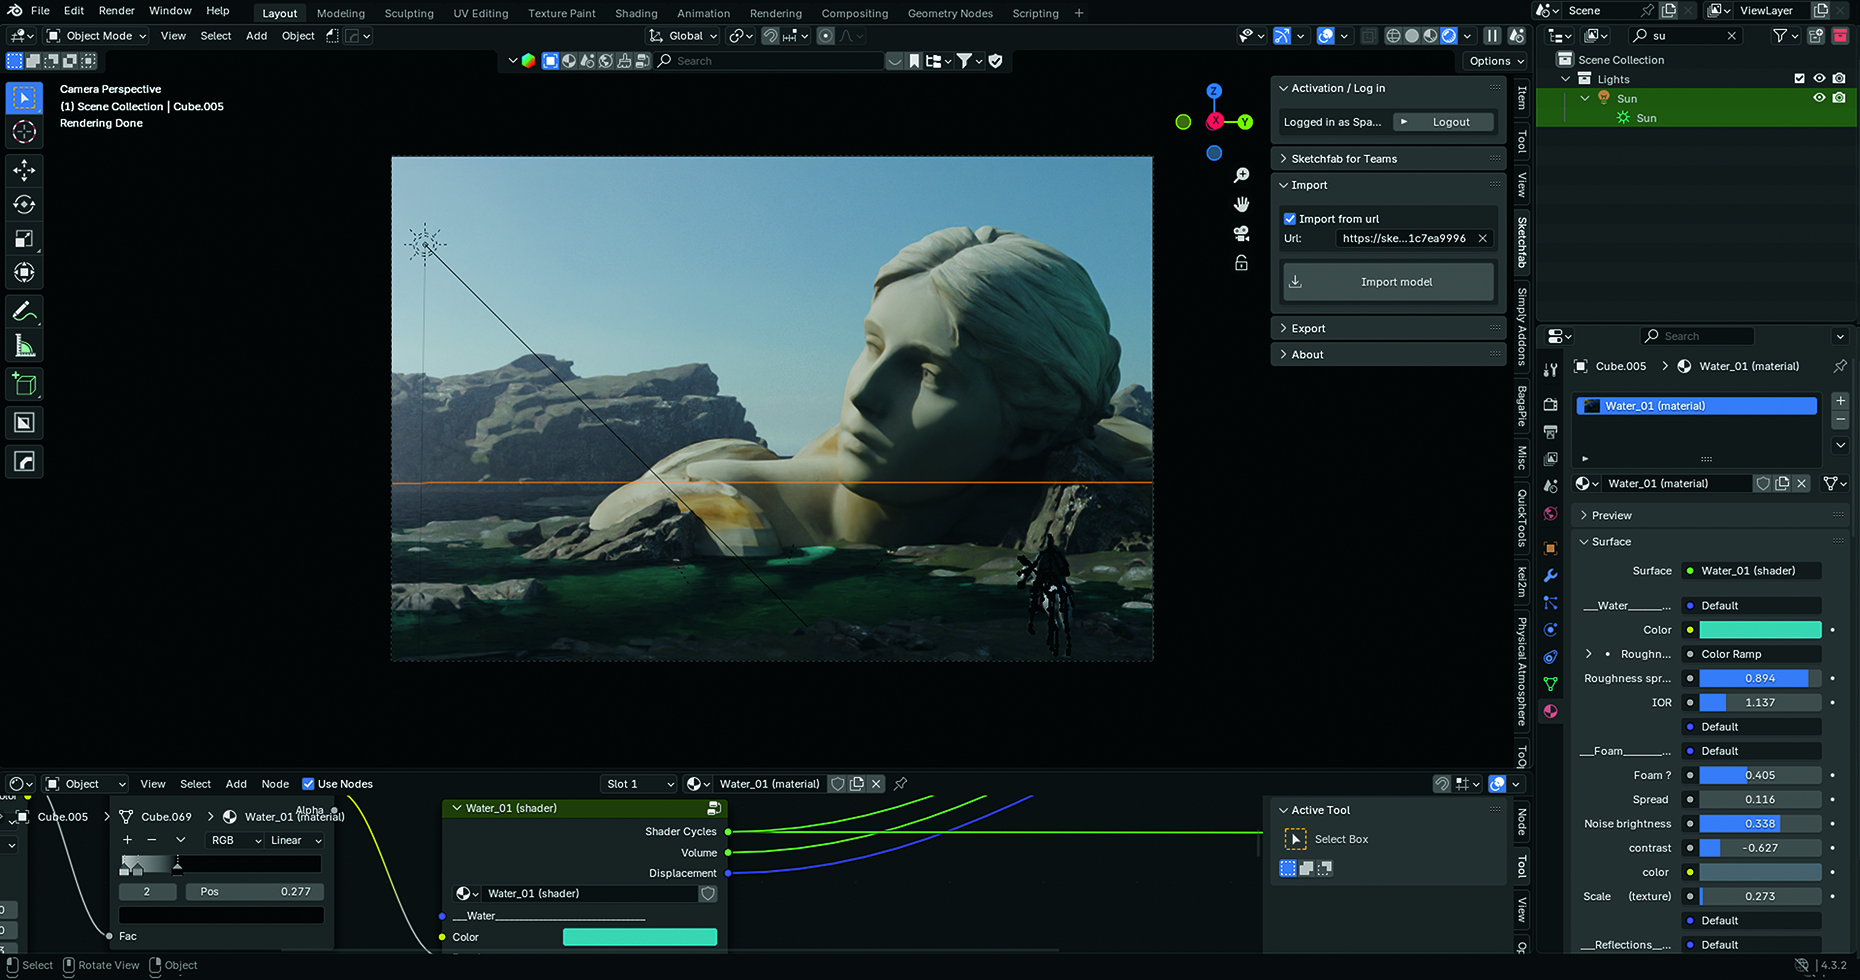
I use Quixel’s Megascans to download and add environmental pieces to my scene, such as rocks and foliage. I also set up an HDRI for ambient lighting, and make use of other assets that I’ve previously purchased or found free to use from Sketchfab.
I’ve collected many assets over the years that I can reuse for different projects
04. Cleaning up the scene
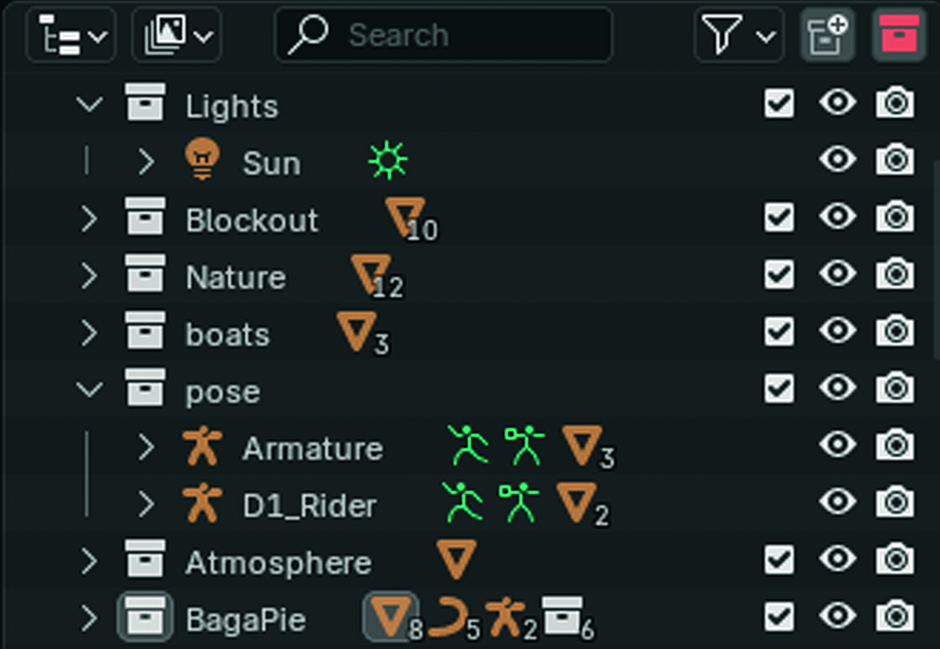
Once the blockout is finished, I like to start cleaning up my collections. I can add my blockout to a separate collection by pressing the shortcut M. Next, I create folders for lighting, nature and atmosphere.
As I continue my illustration, I make sure to keep my 3D scene clean and in the folders so I can easily turn elements on and off if required.
05. Constructing 3D set pieces
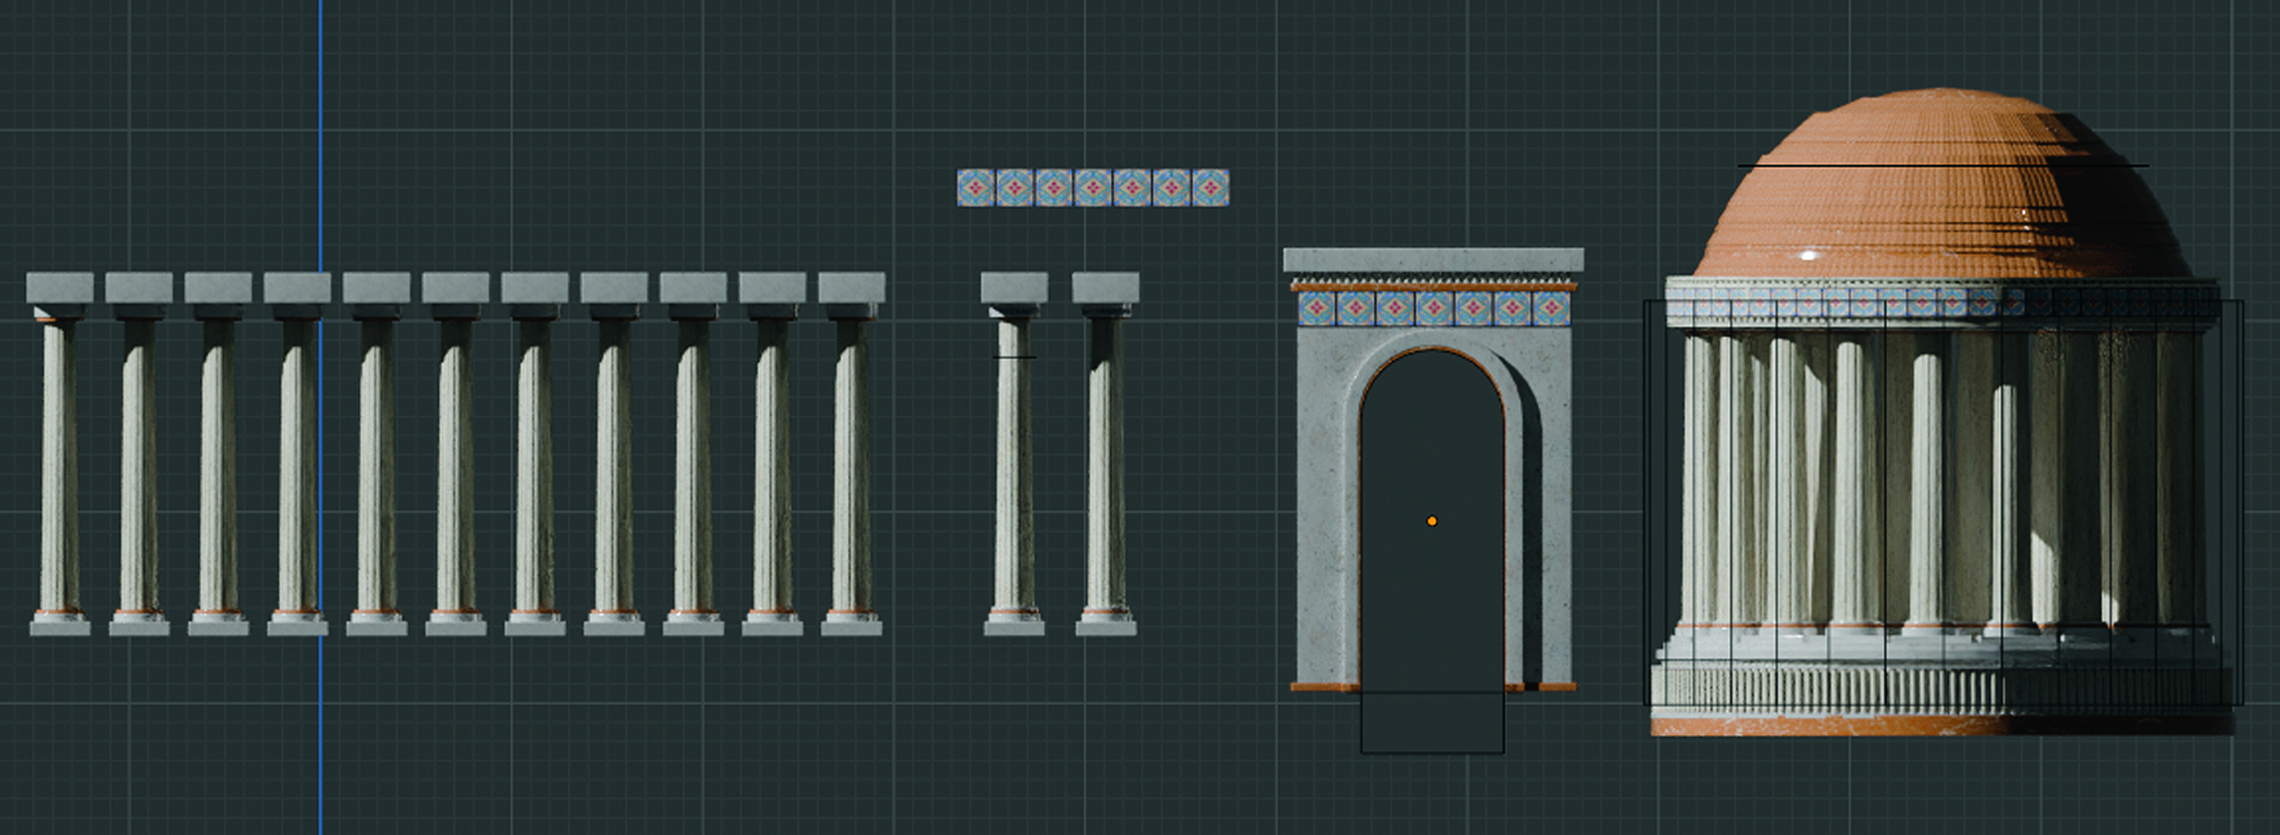
My next step is to start creating my own assets. After studying a collection of reference photos of Roman architecture, I break down what I need to construct my own city in a fantastical environment.
I start with a simple Roman column, dome and archway. These can be reused multiple times to develop different buildings. I need to be efficient in my time for creating these structural elements because the buildings are a secondary detail in the painting.
06. Paint a tile in Photoshop
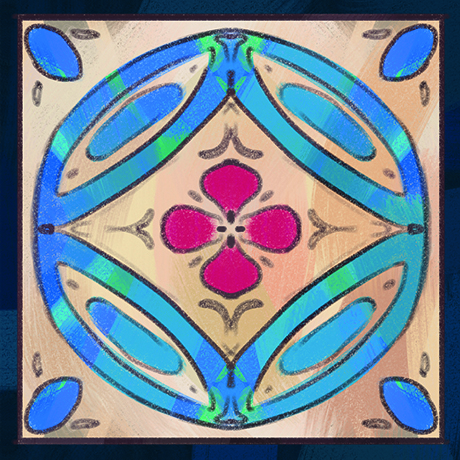
For my own kitbash set I want a reusable tile design so I paint a square tile in Photoshop with the Symmetry setting turned on. I then bring this into Blender as a material and use the array on the plane to duplicate the texture many times.
I add this texture to my buildings as small details.
07. Posing the arms of the gigantic statue
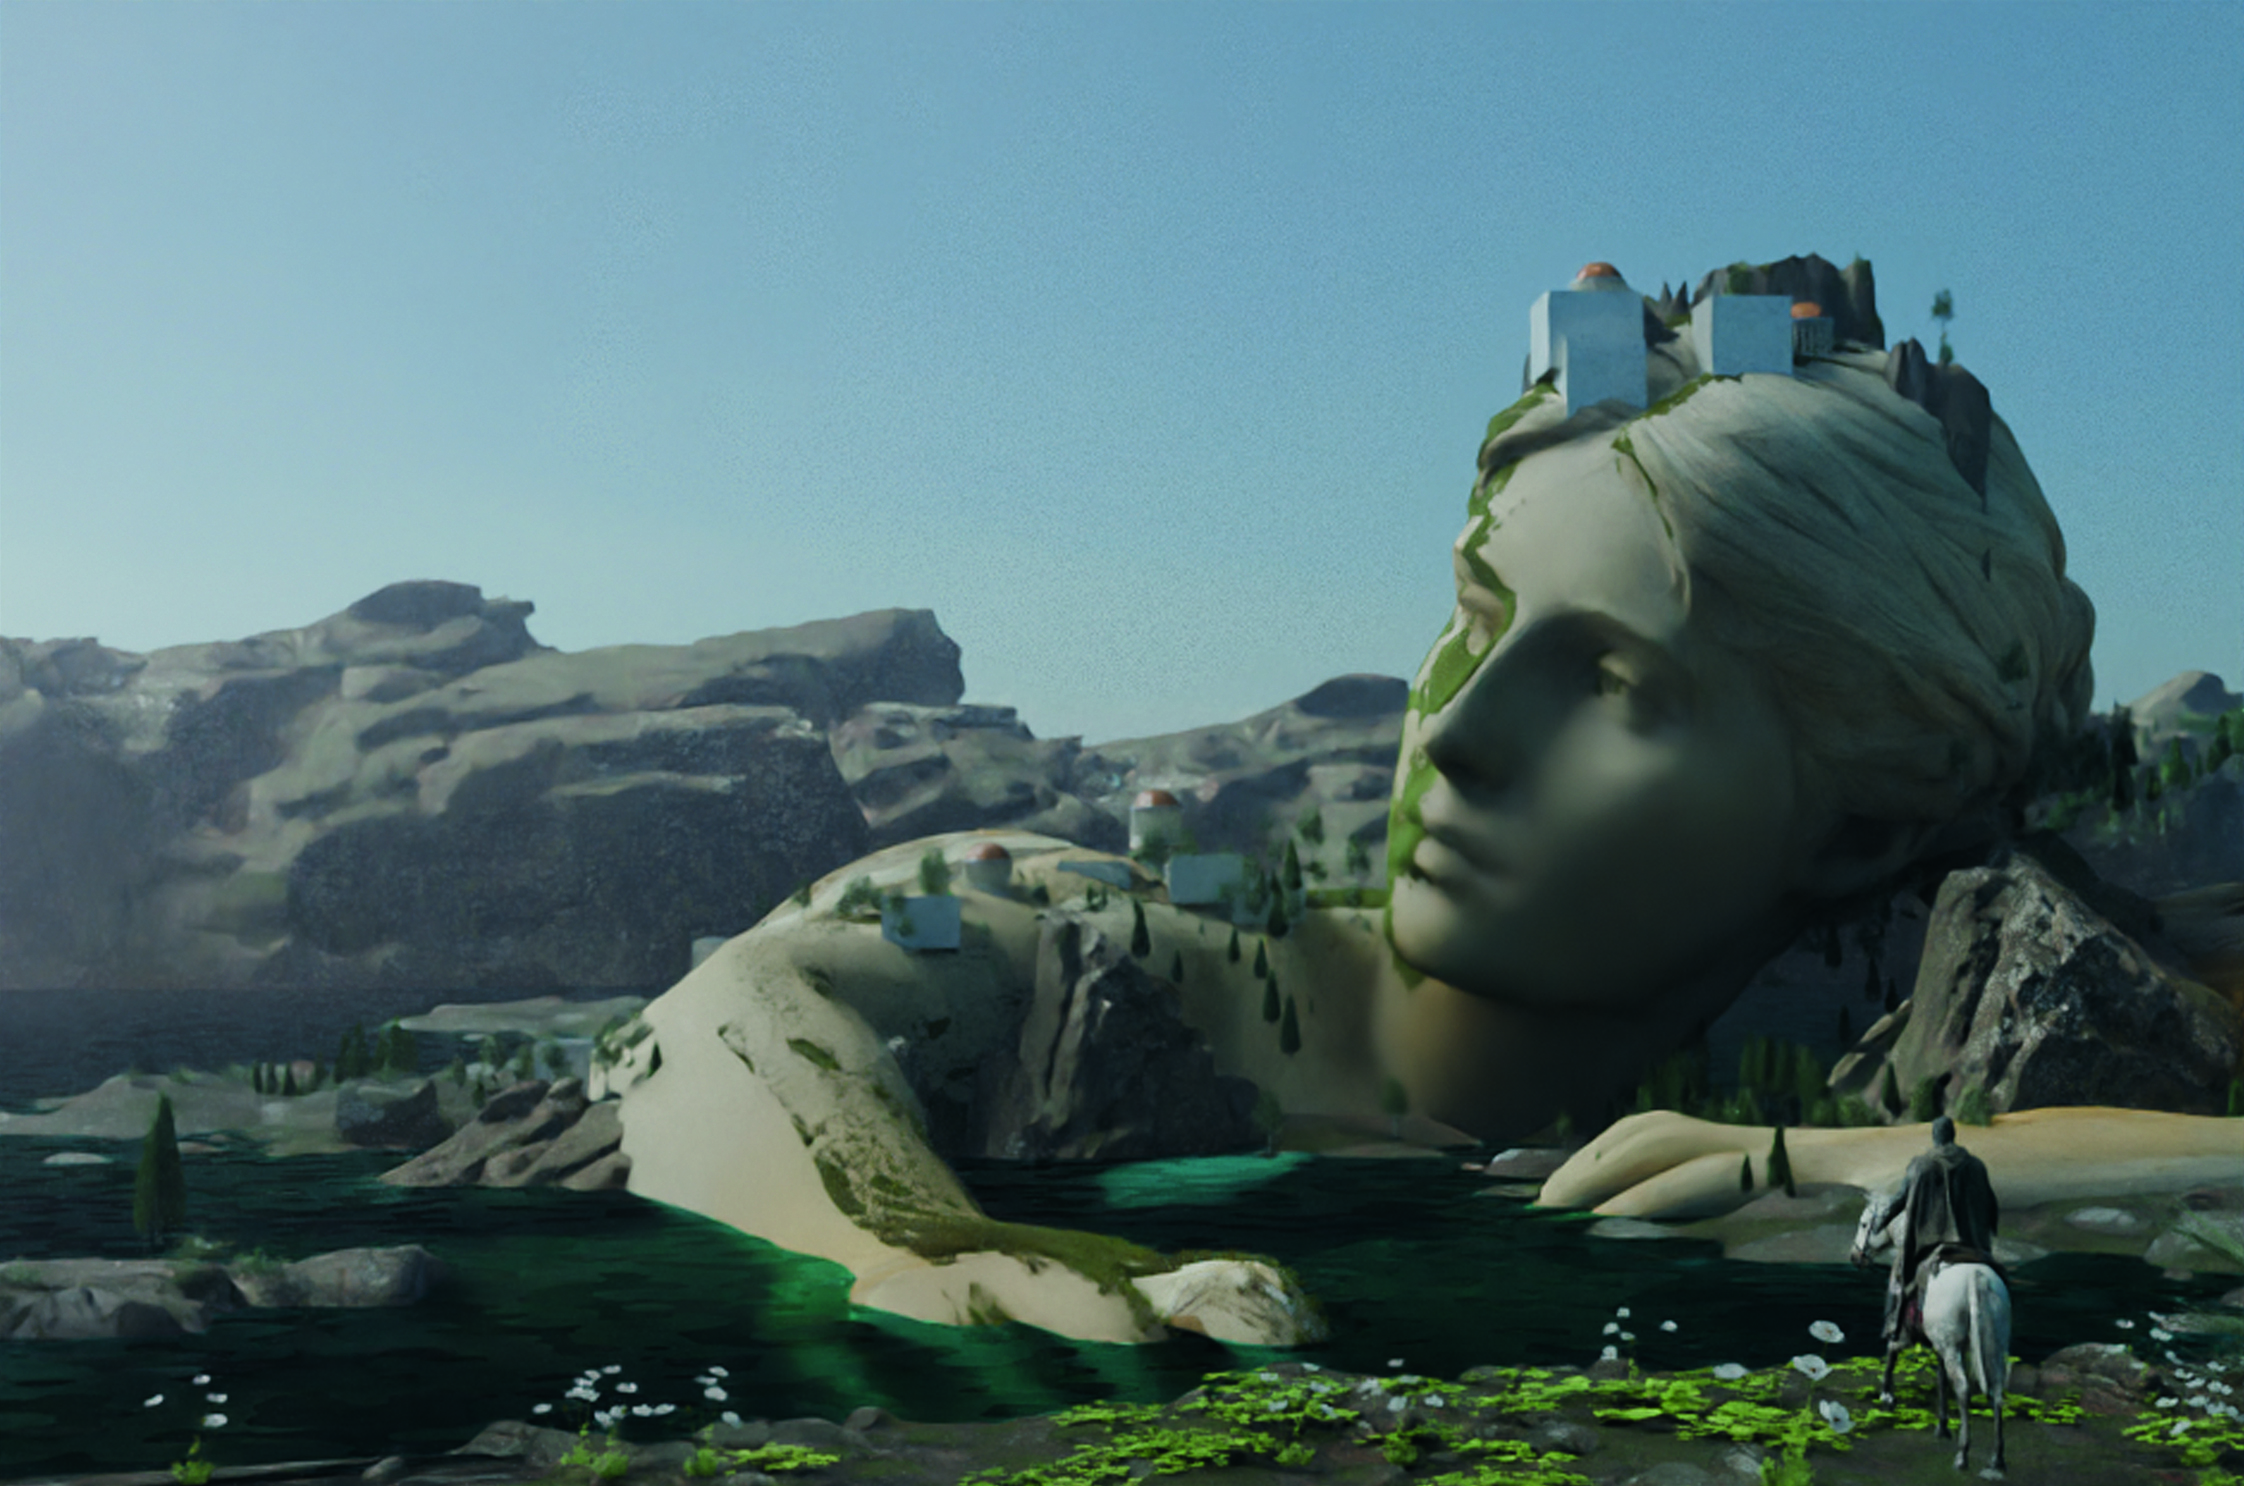
I like to use Mixamo for posing simple characters in my scenes. I find a base character on the website and choose a pose that I like. Next, I download the fbx file to import into my scene.
I change the material to be the same as the head, scale it up and place it in the water. I try adding moss into my scene, but later remove it because it causes lag.
08. First pass in Photoshop
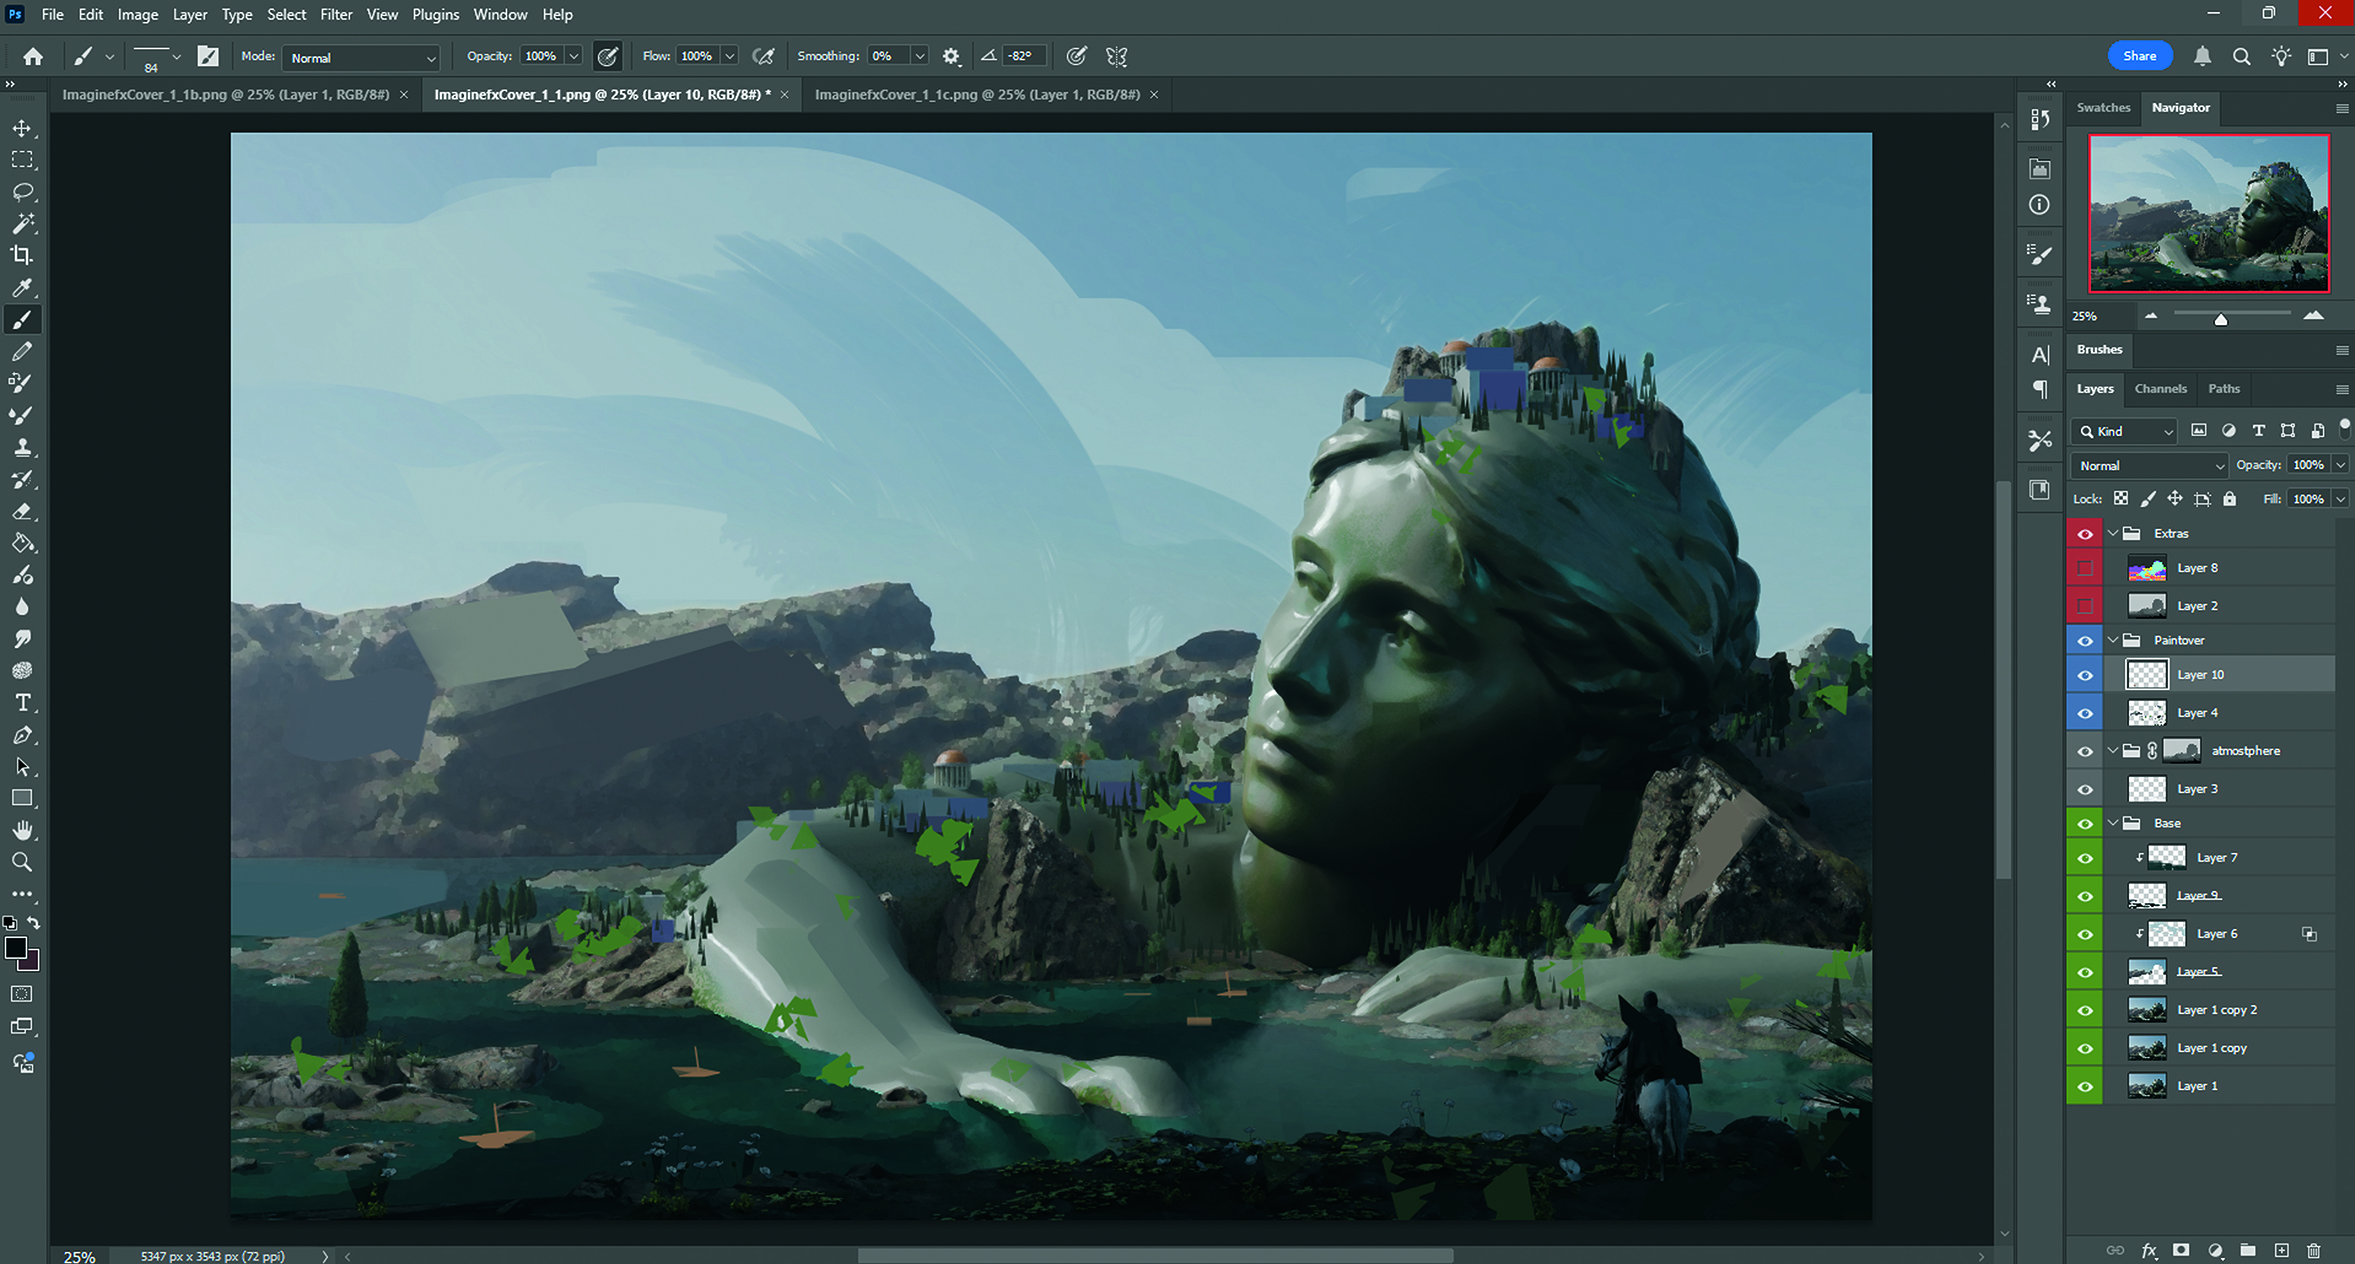
I go from 3D to 2D a couple of times in my process, and I find that this helps me see what I can add to my painting without spending too much time trying to finish everything in 3D.
I’m happy with my initial blockout, so I render it and then do a paintover. At this stage I render my piece with 50 samples or fewer, for a faster render time.
09. Assembling more buildings
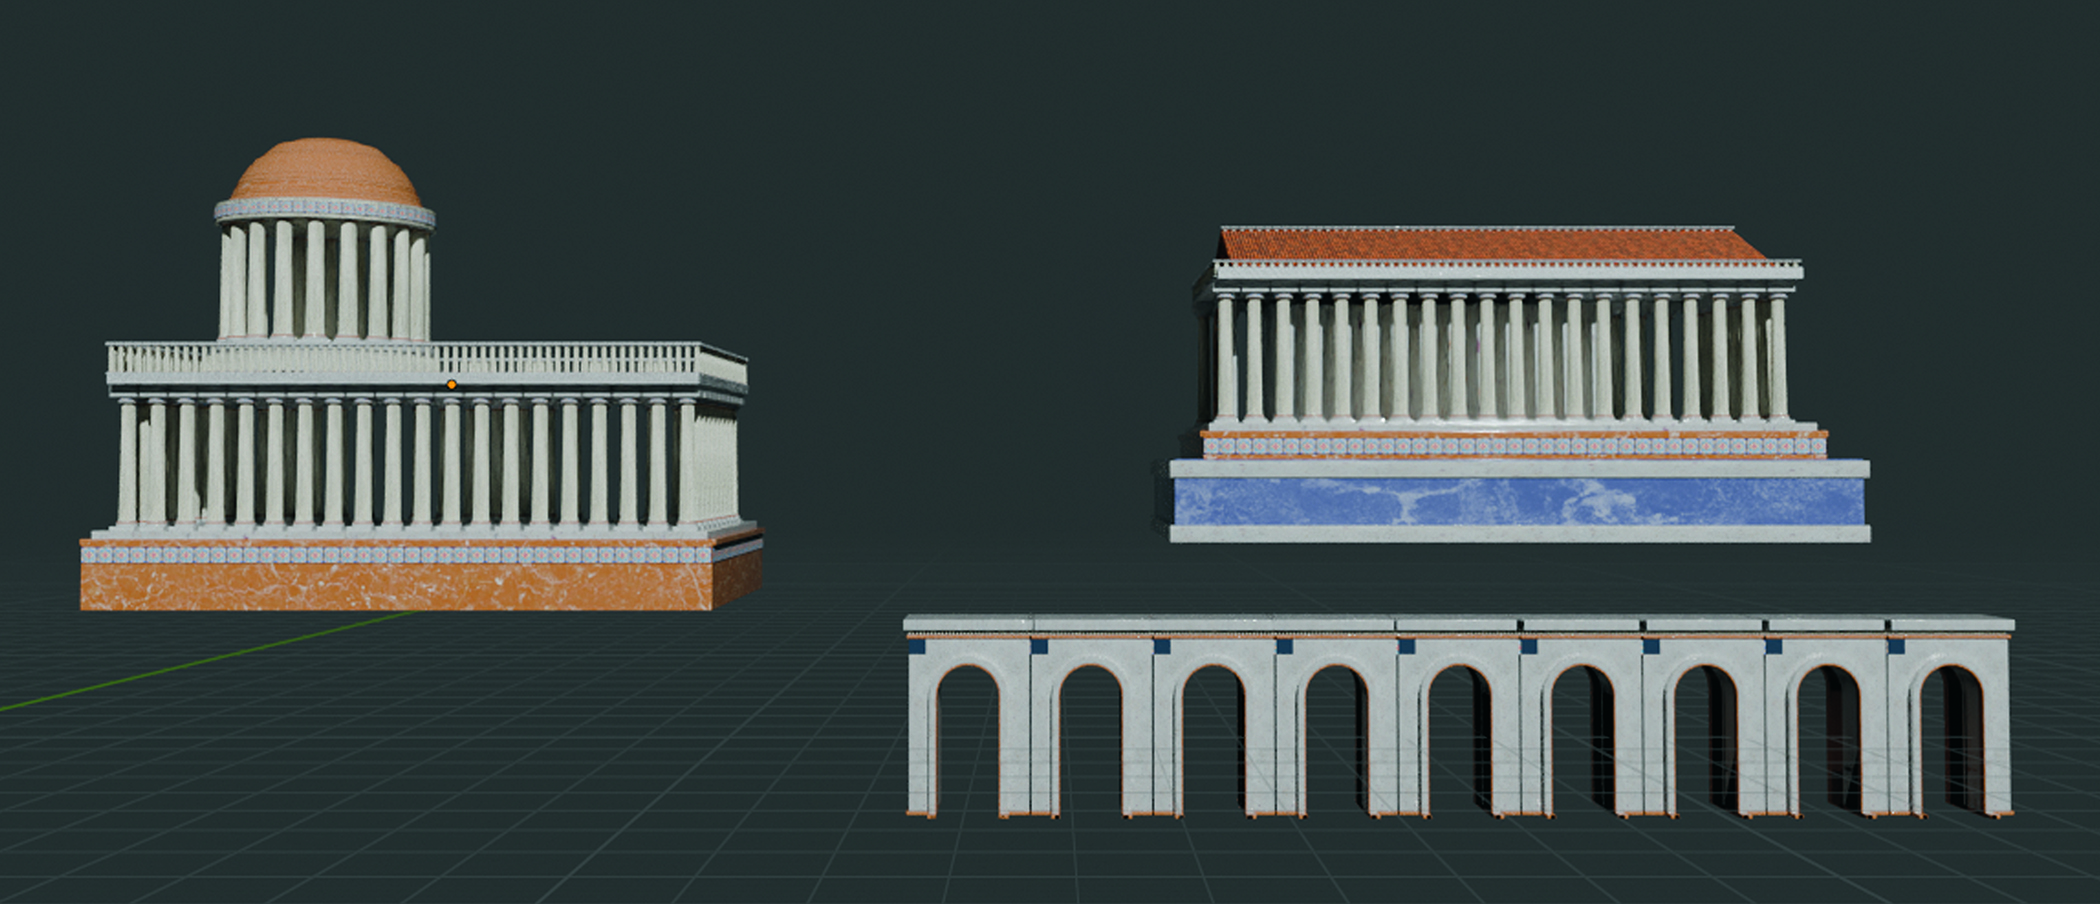
After my paintover, I go back to my kitbash set and create larger buildings to add into my piece. I combine what I made previously and join the mesh together.
After creating these, I bring them back into my main scene and decimate them. I have a Blender add-on called ToOptimize Tools and this helps me see which geometry may be the heaviest.
10. Rendering 3D passes
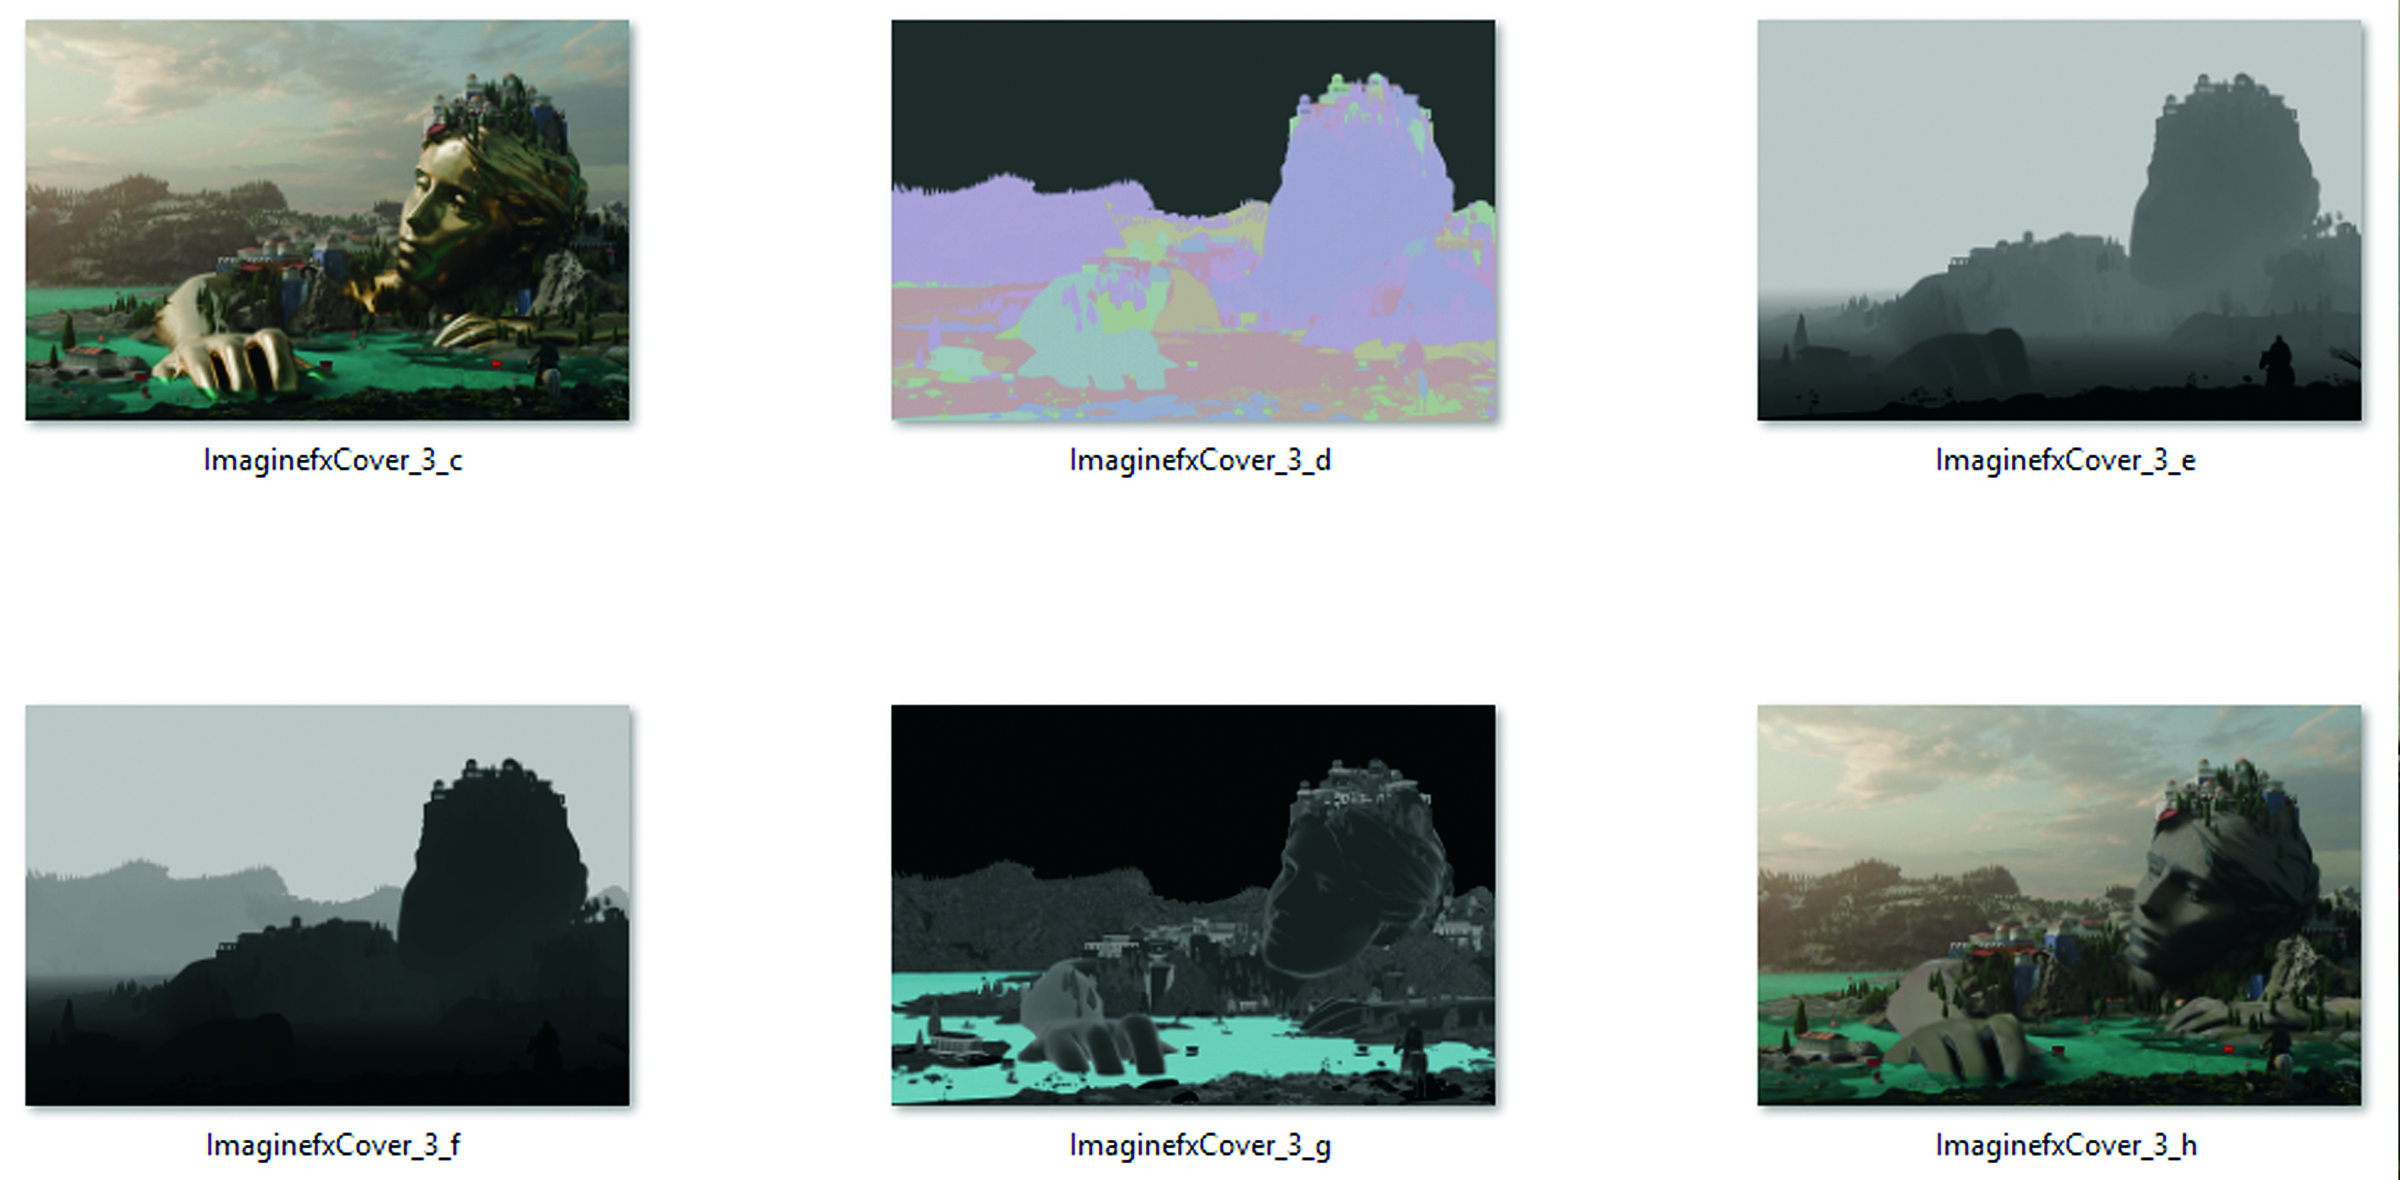
I go back into Blender and push my scene’s details more with the city, props and nature elements. I also test a couple more materials for the main statue, to see if I like the colours.
I want to bring it back into Photoshop so I render my scene again. At this stage I render two mist passes, alternate material passes and a clown pass to make selections in Photoshop easier.
11. Apply Photoshop filters
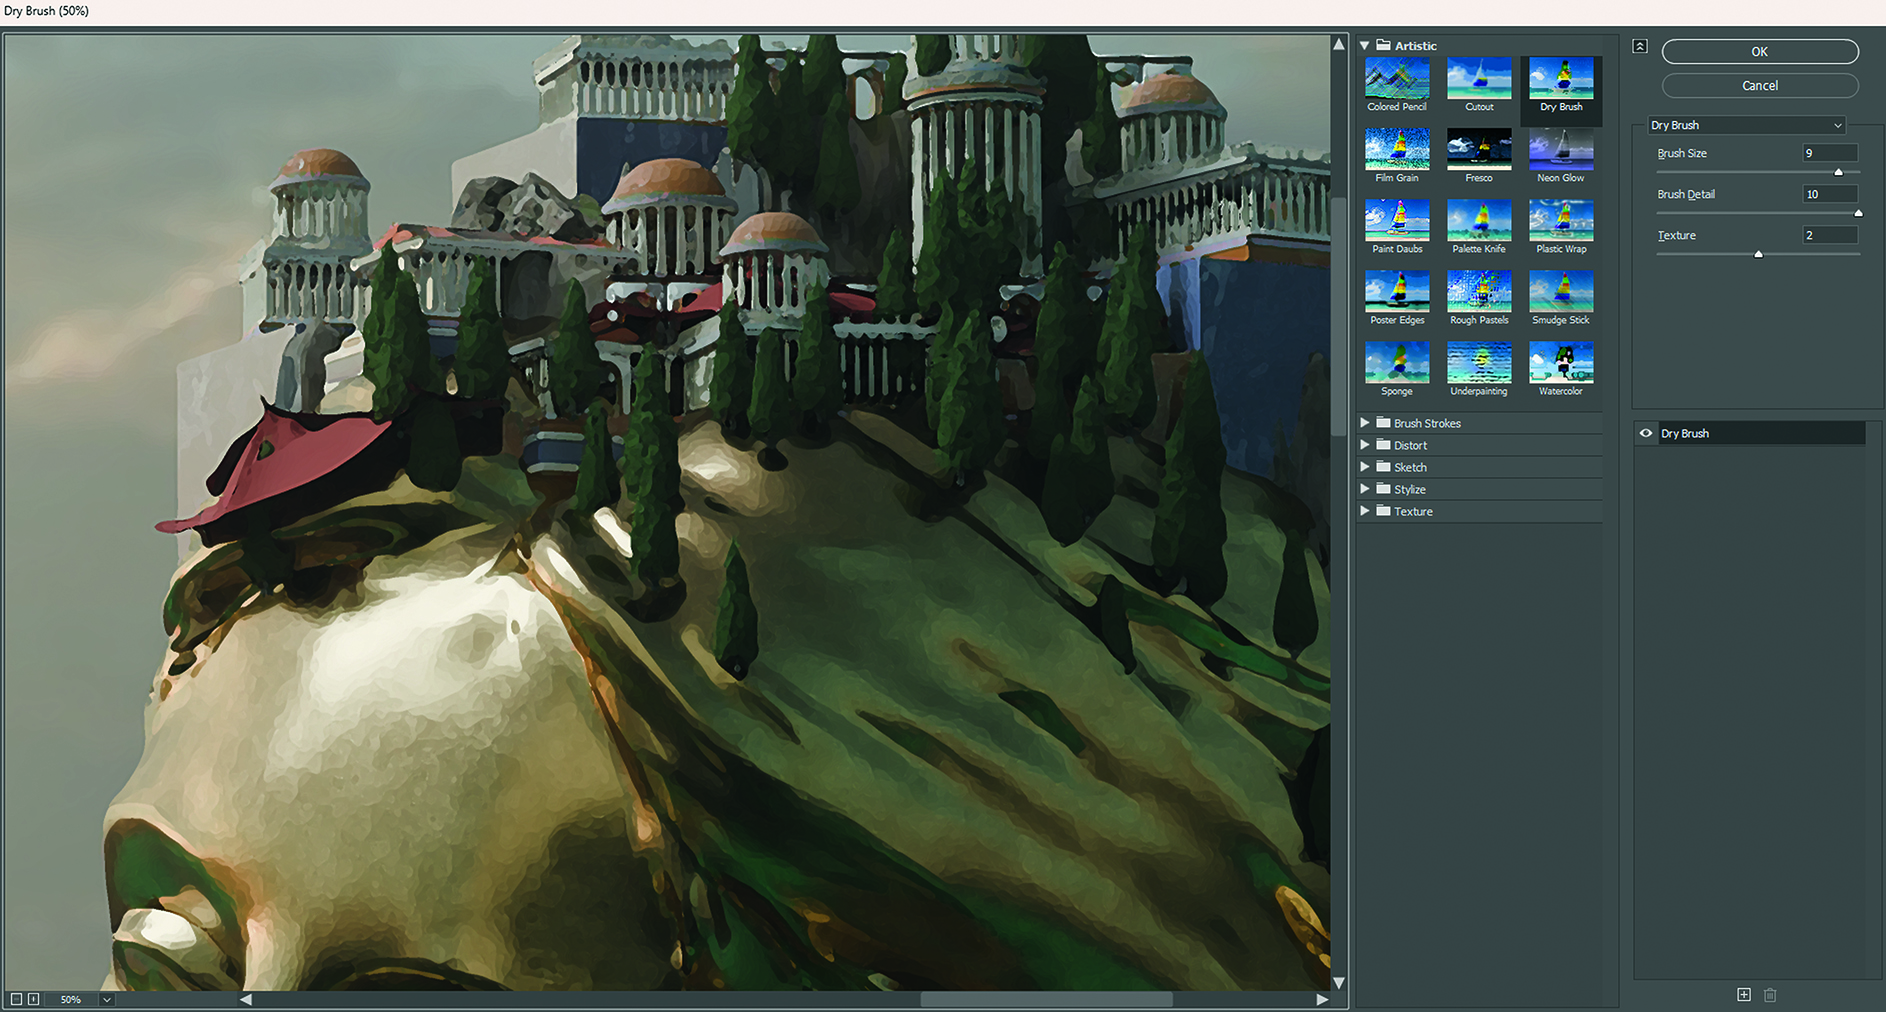
After bringing all my new 3D renders into Photoshop, I like to add a filter on the 3D base from the Filter Gallery. I use Dry Brush the most, but I use the Cutout filter and Watercolor filter occasionally.
They have the effect of softening the 3D look and helps me to begin the paintover process, too.
12. Pushing the painting
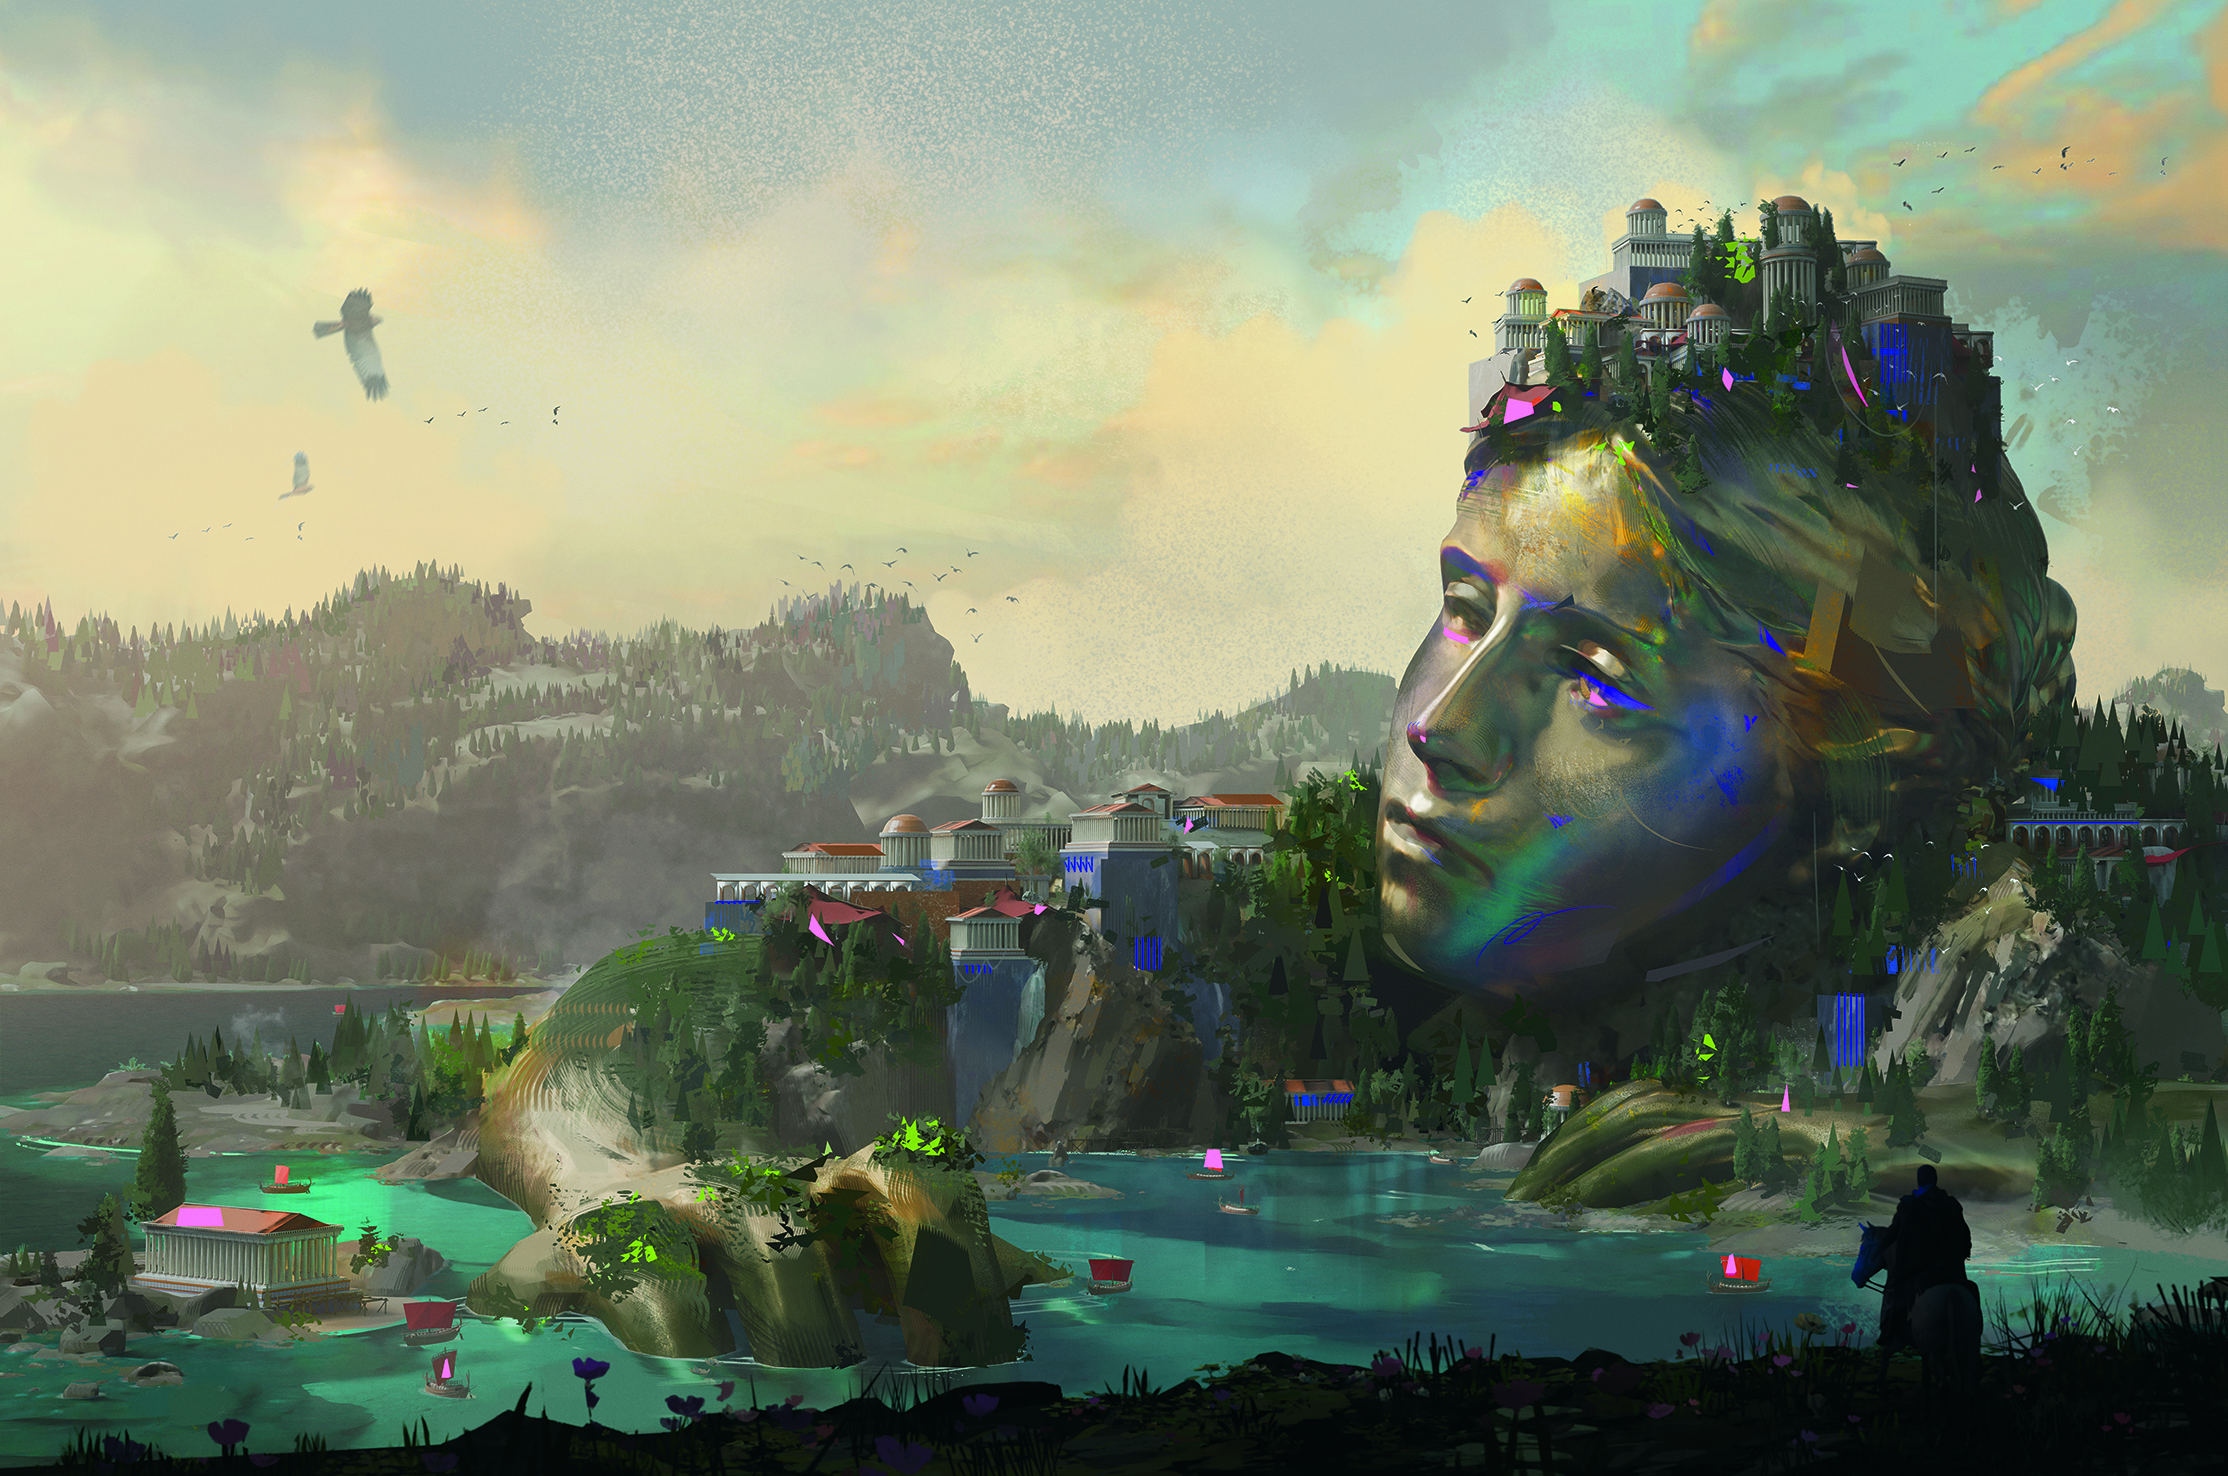
I use the clown pass to select the fore-, mid- and background, separating them into different layers. I then look for ways to add pops of colour and shapes to continue breaking up the 3D look.
I use the Lasso tool and abstract brushes with Color Jitter to add small flecks of saturation in areas around the image.
13. Adding light to the face
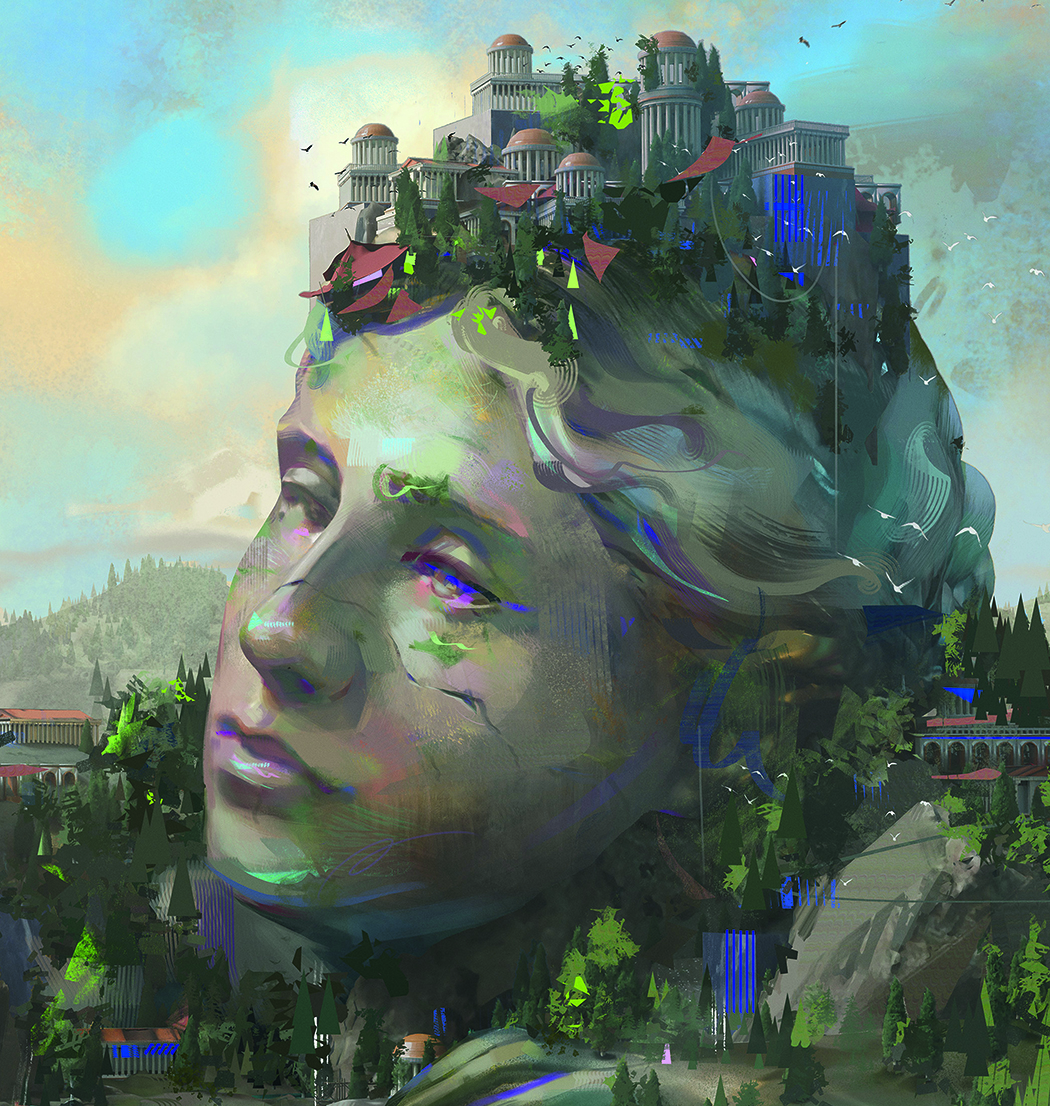
The face is blending in with the scenery so I adjust the material to be brighter and more stone-like.
I start using smaller brushes and slow down around the forms to clarify the planes in the face. I paint in details such as cracks and add moss to indicate the age of the statue.
14. Making final touches
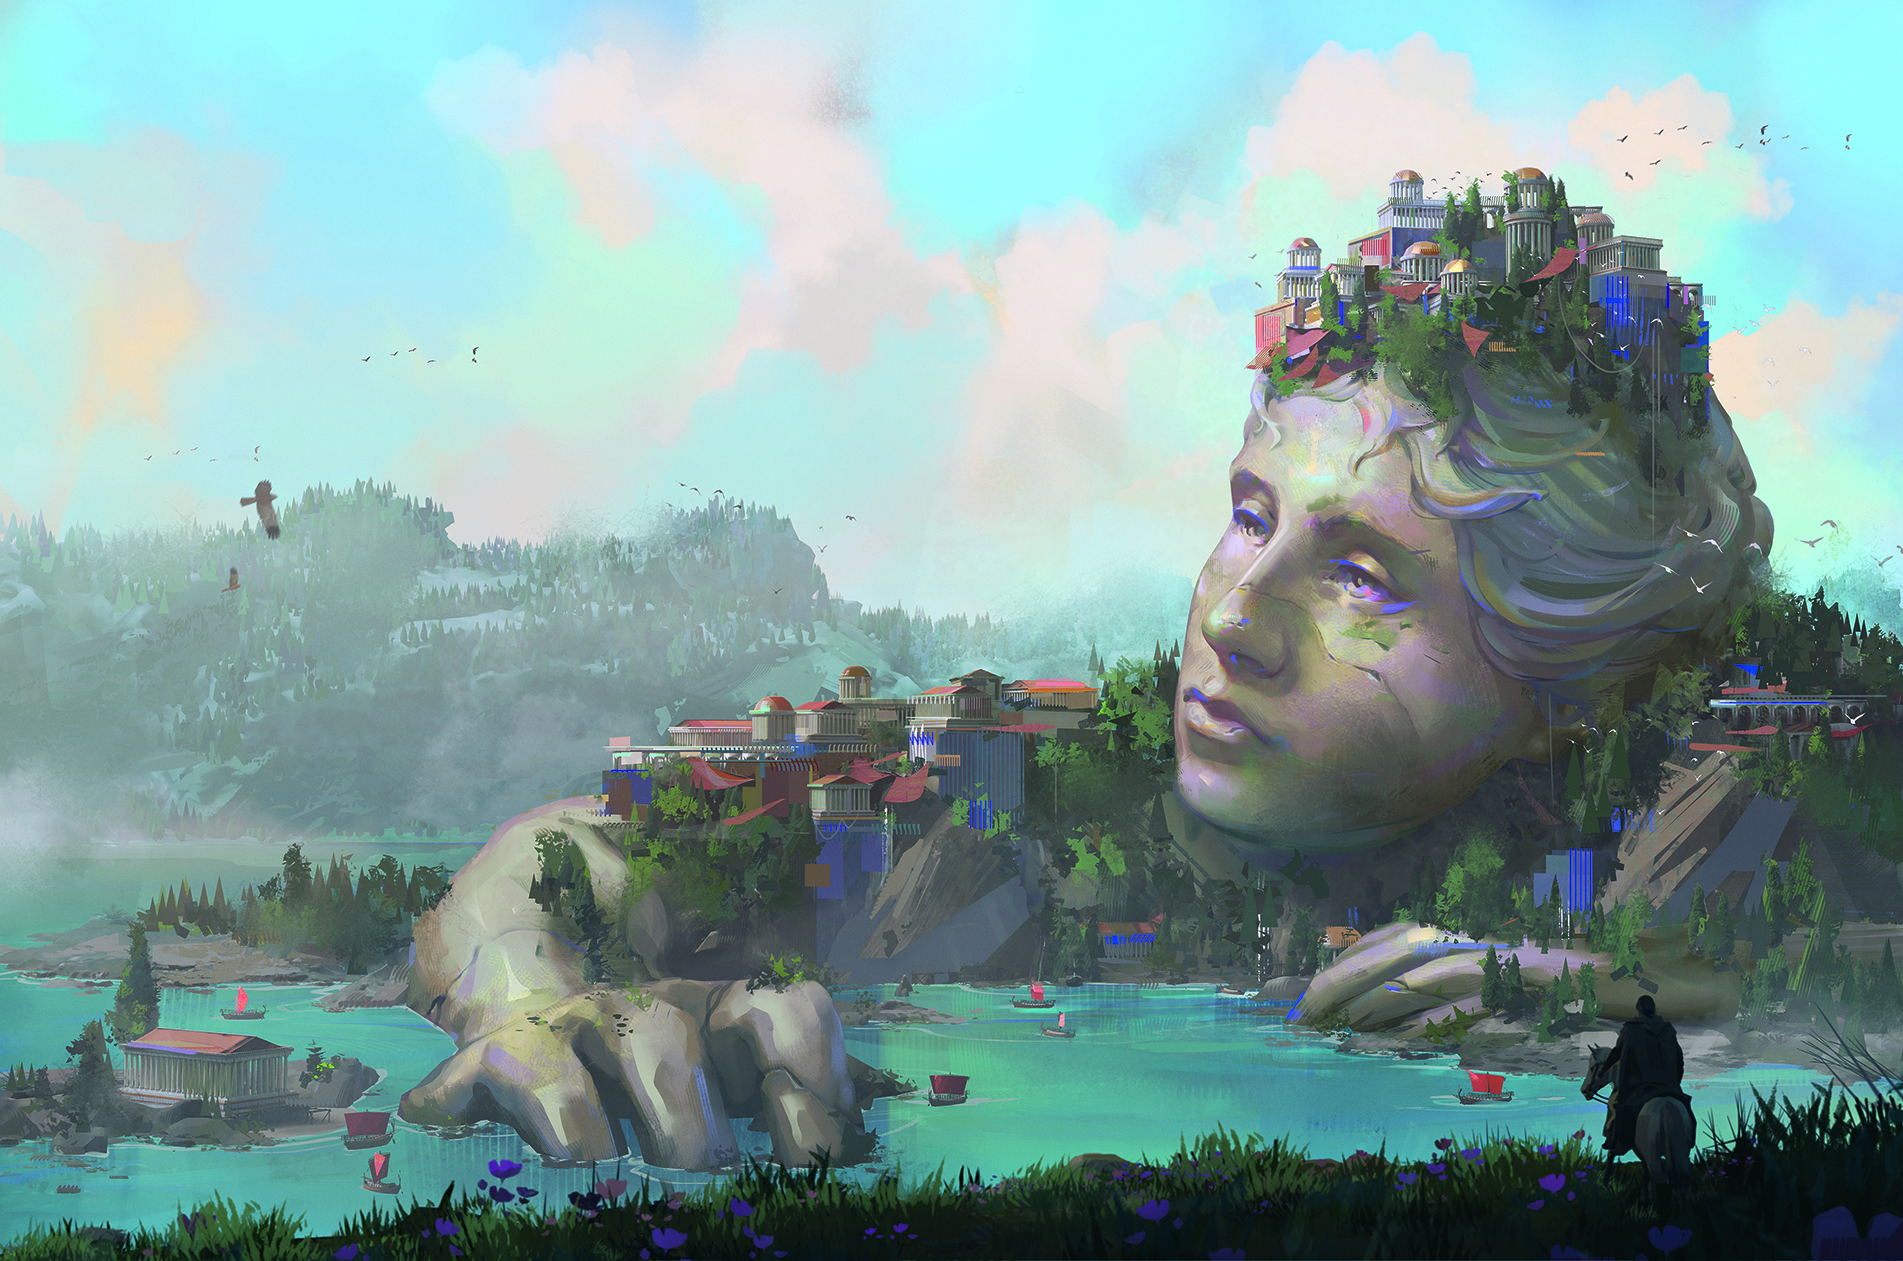
After rendering for a while, I step back from my painting to see what is and isn’t working. The scene is a bit yellowish so I adjust the hues to be more blue, and add grass and flowering bushes to the foreground.
Near the end I merge all my layers and do any final painting and adjustment layers on top.
This article originally appeared in ImagineFX. Subscribe to ImagineFX to never miss an issue. Print and digital subscriptions are available.
Sign up to Creative Bloq's daily newsletter, which brings you the latest news and inspiration from the worlds of art, design and technology.
Misa is a visual development artist at Sony Pictures Animation, with a background in fine art. She loves plein-air painting in her free time.
You must confirm your public display name before commenting
Please logout and then login again, you will then be prompted to enter your display name.
